
Prusa XL - Nozzle silicone wiper A1 (not Mini)
We calculate the final price from your selected file. You review and accept it before payment.
Saved on this device.

If you wish to wipe after print, between color change (toolhead change) this is way to go! Fixed to the frame!
- Rating
- 5 / 5
- Likes
- 18
- Downloads
- 55
- Makes
- 3
- Views
- 512
- Reviews
- 4
Updated at source:
Model information
- Source
- Printables
- Category
- Prusa Parts & Upgrades
- License
- Creative Commons — Attribution — Noncommercial — Share Alike
These can be installed on either the left or right side. Two versions are available below:
- M3
- Left
- Right
- M4
- Left
- Right
You might be wondering which placement is better—left or right. Personally, I find the right-side placement to be more advantageous. With a left-side installation, the nozzle makes contact with the silicone brush even when it isn't strictly necessary. While this doesn't cause any harm, it might not be the preferred setup for everyone. However, the choice is yours!
For an alternative, you can also check out my original remix, which allows you to use brushes instead of the Bambu Lab A1 silicone wipers.
https://www.printables.com/model/1315567-prusa-xl-nozzle-brush-wipers-m3-m4
Print orientation
Ensure the print is oriented correctly: the chamfer in the slot must point upwards (towards the top).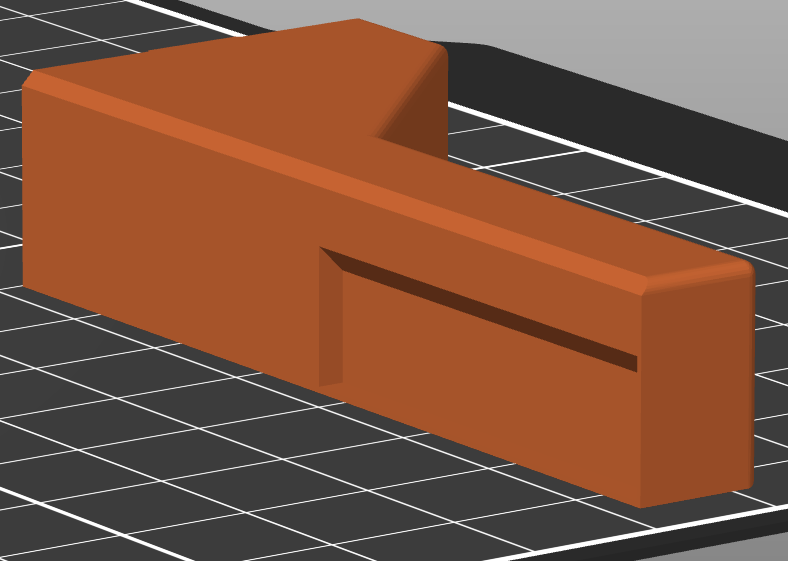
Installation
Place the part approximately 85mm from the very front edge of the printer.
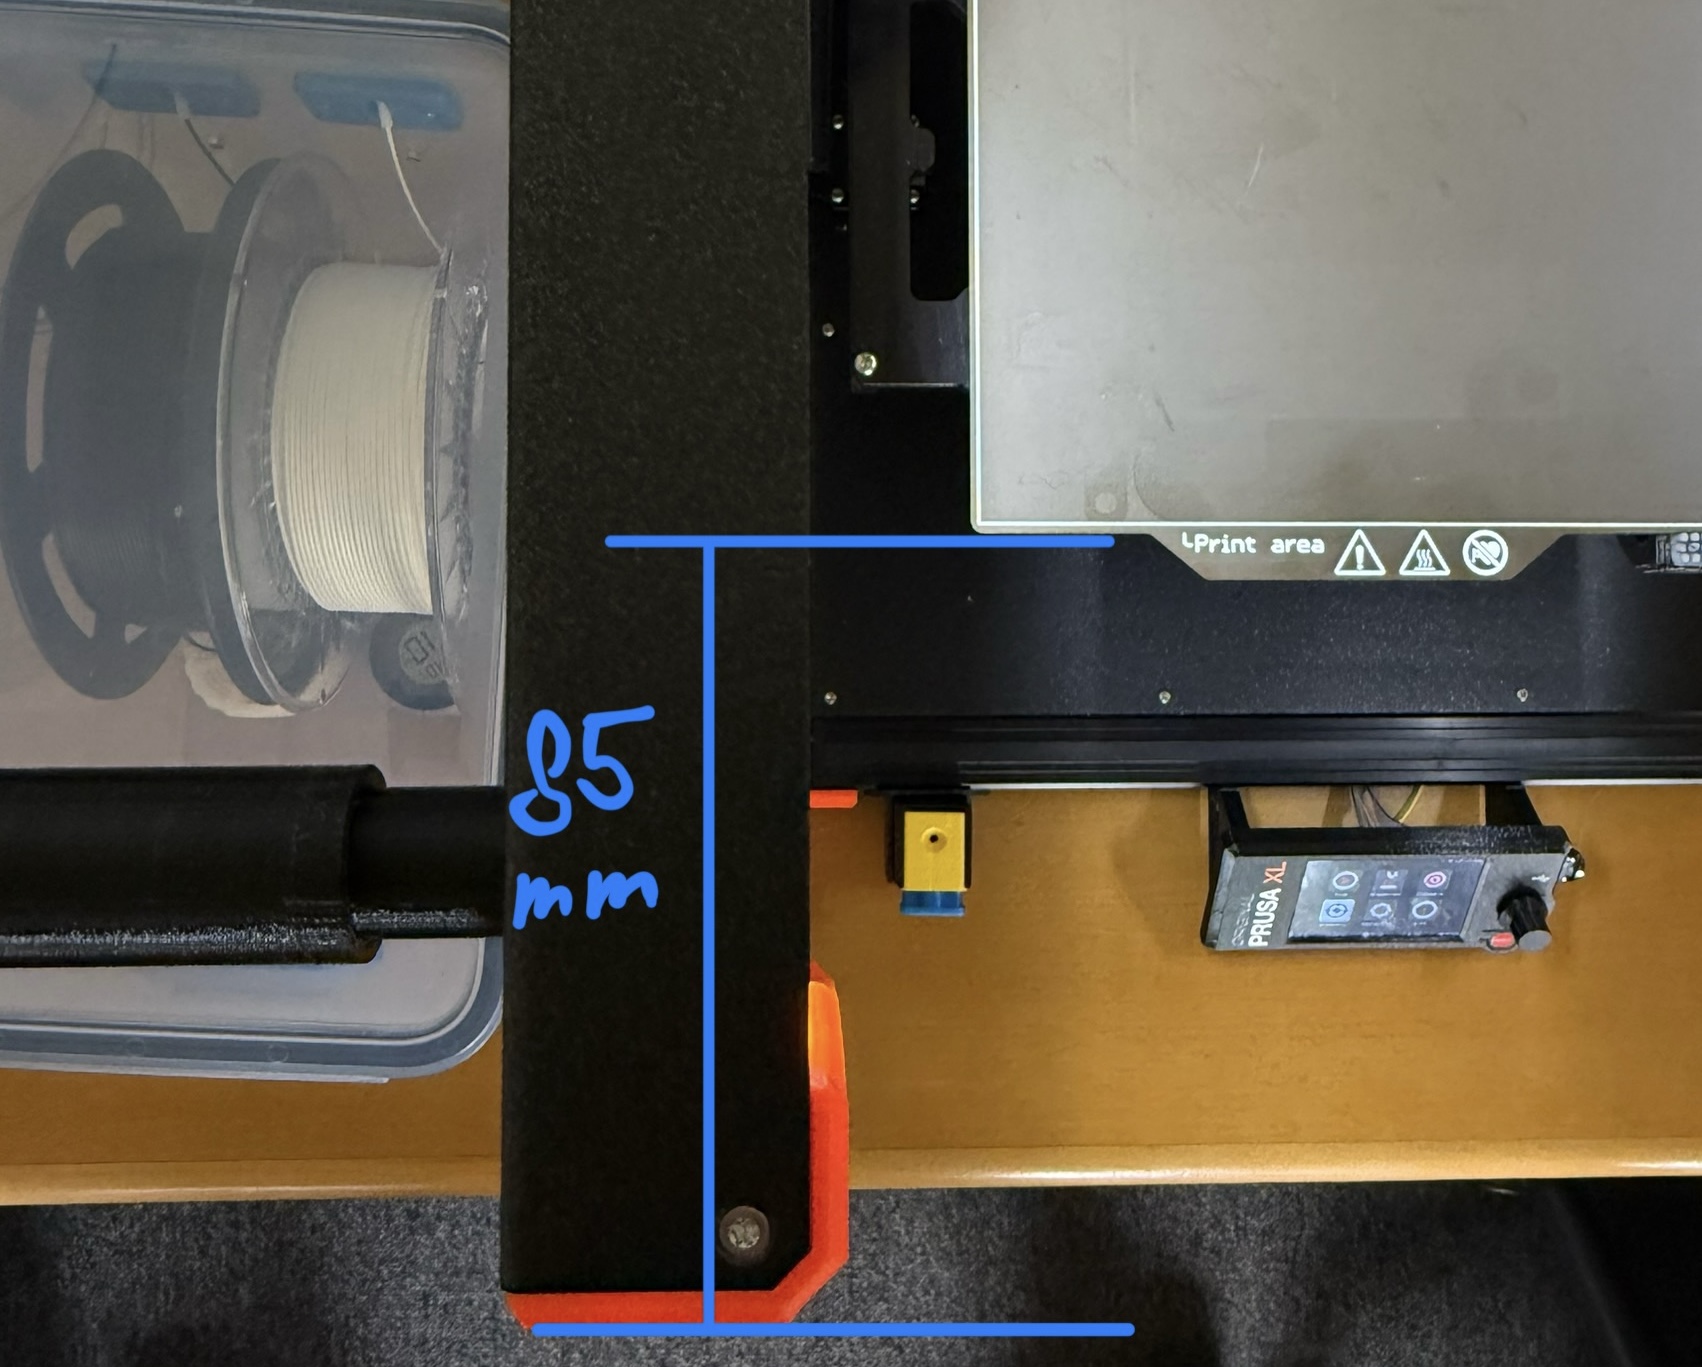
Alternatively, and more importantly, ensure that the installed part will not collide with the print sheet at any point.
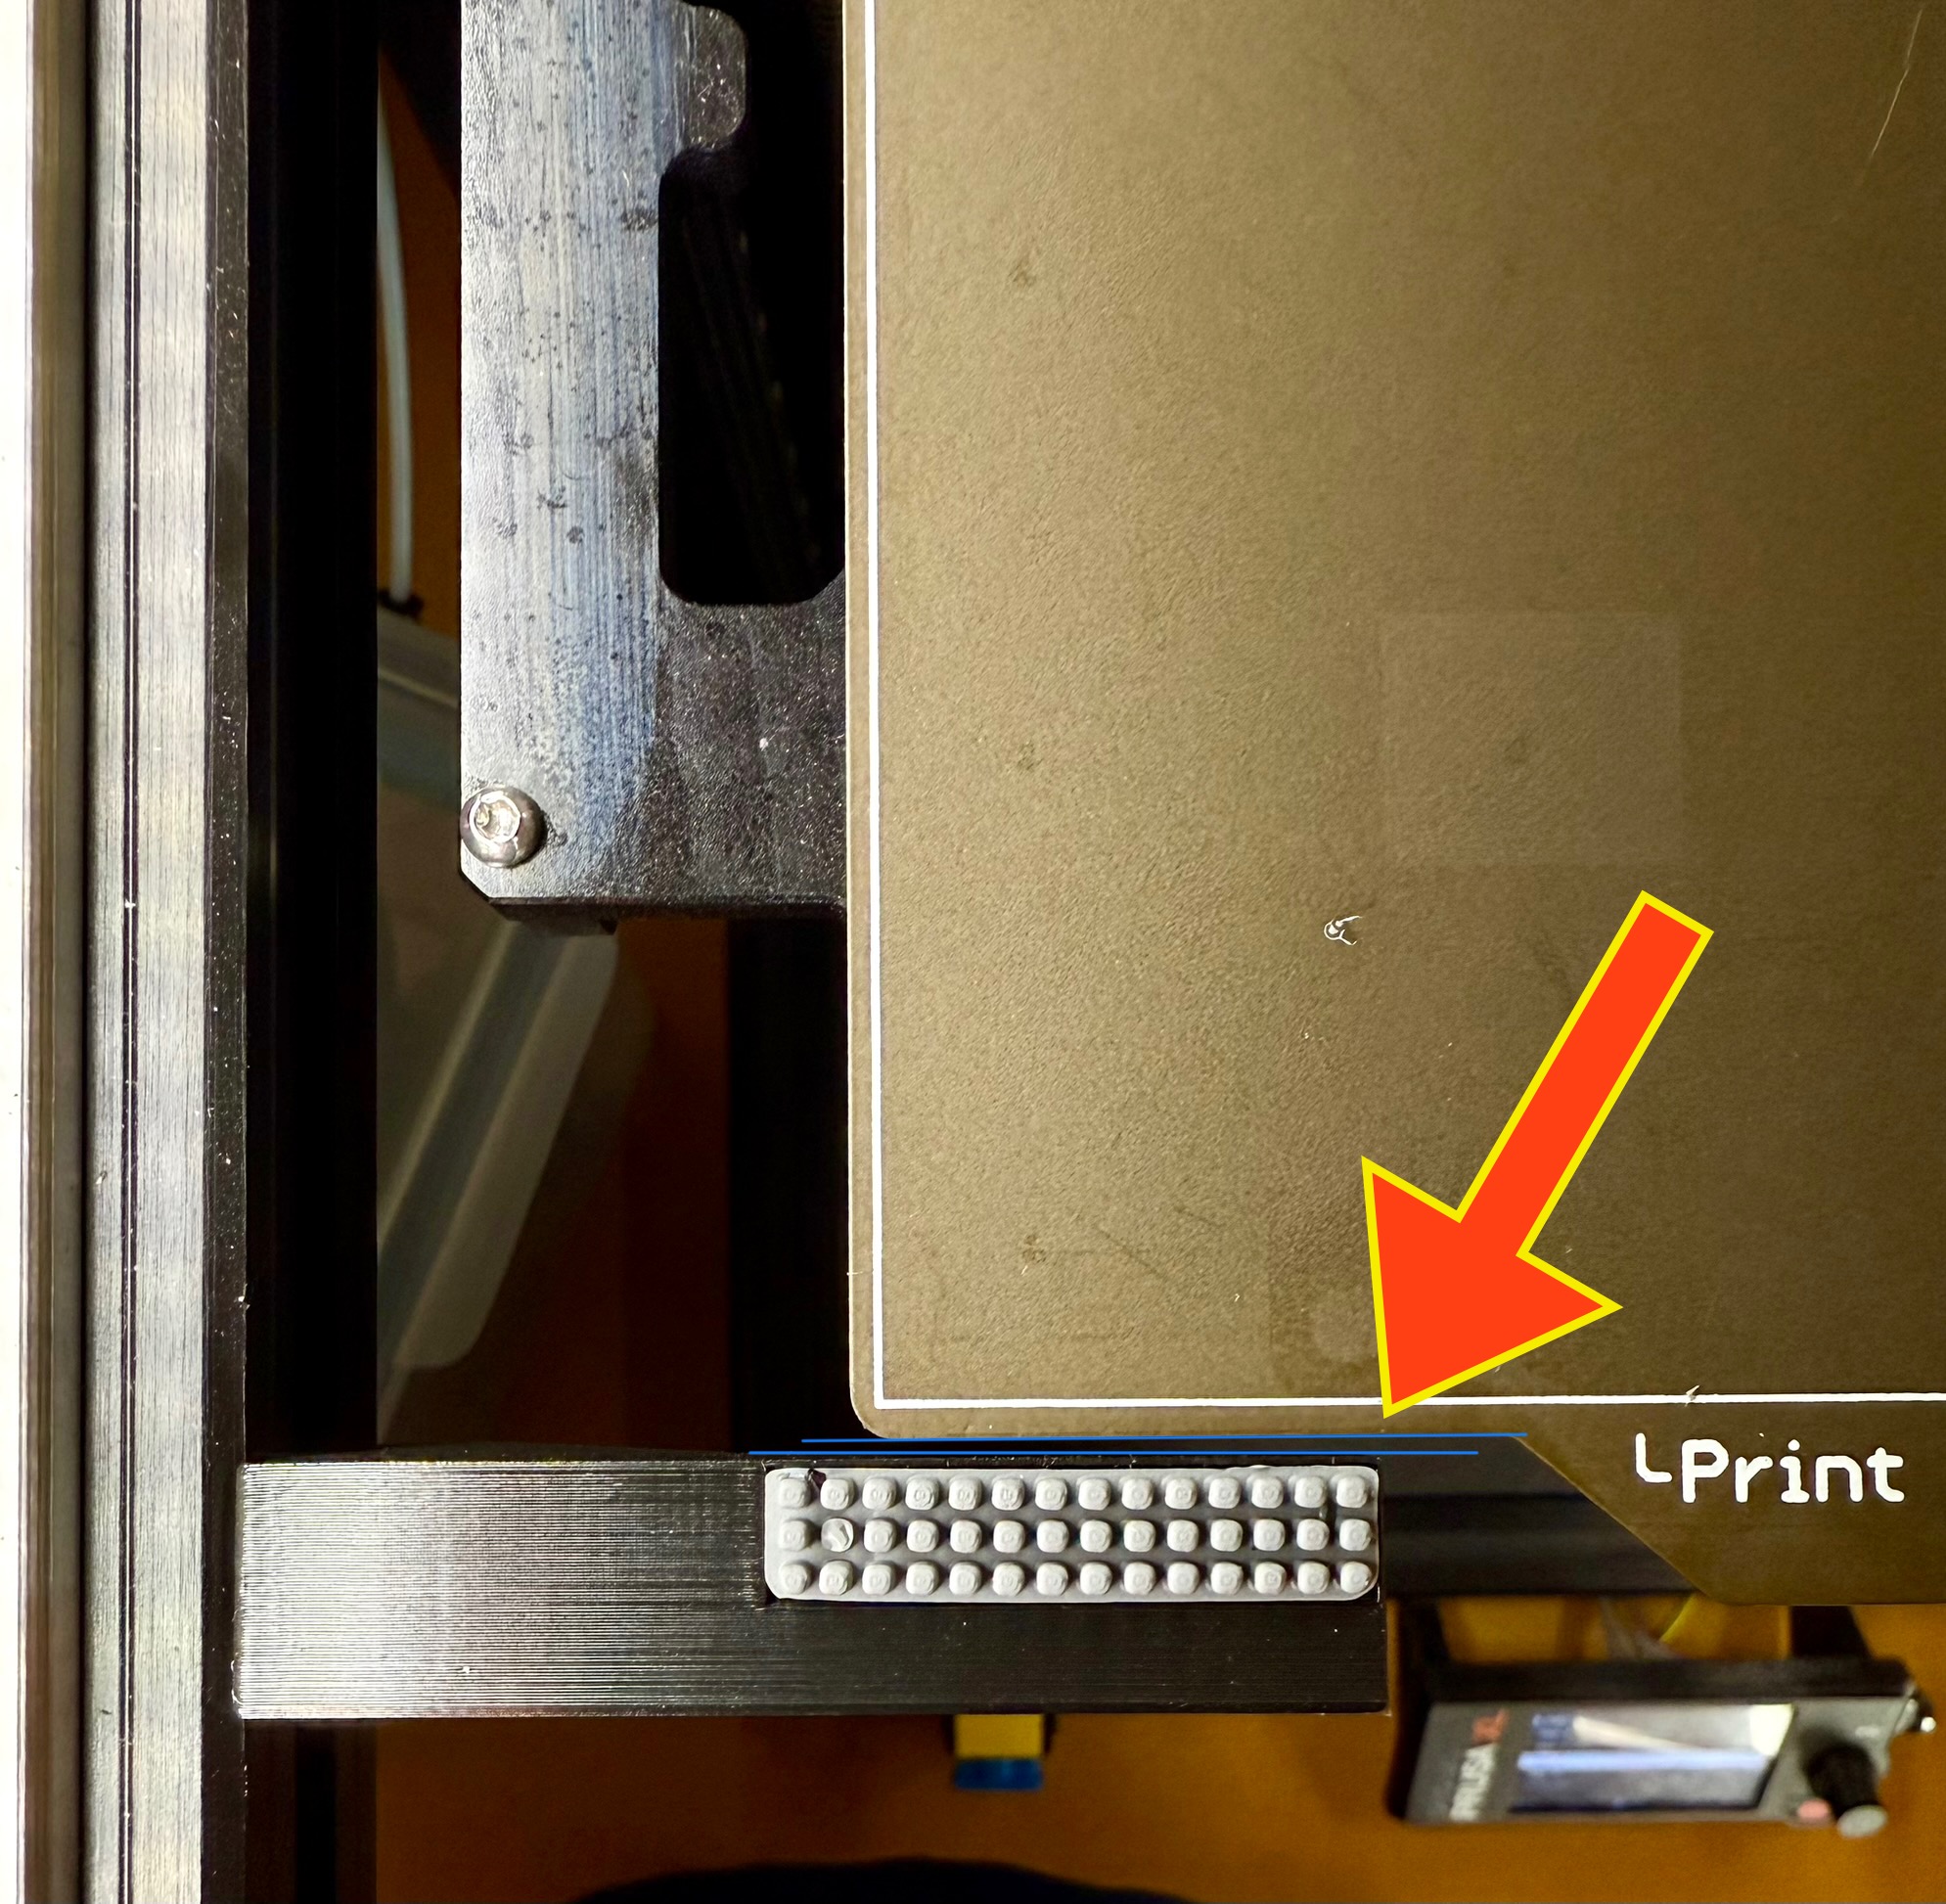
Compared to the original design or my previous remix, this part must be installed flush with the top surface of the 3030 profile.
Tighten the bolt sufficiently to prevent the part from sliding within the 3030 profile.
If the part slides due to vibrations during printing, it could move below the print sheet. Subsequent downward movement of the Z-axis could then cause serious damage!
Tools, screws, nuts
- Bambu Lab A1 Silicone Brush (Important: Use the standard A1 version, NOT the MINI.)
- 1x M3/M4 T-Nut
G-CODEs
I am unsure if these coordinates are universally applicable to all XL printers, as my printer is a single tool head model. Please verify and adjust these coordinates for your specific machine if necessary.
End G-Code
The following G-code snippets can be used in your End G-Code or Tool Change G-Code
- Left
; --- Start Nozzle Wipe ---
; Ensure nozzle is at a safe Z height to travel to the brush areaG1 X-7 Y-8 F24000    ; Move to start of wipe area
G1 X35 Y-8 F24000    ; Wipe pass 1
G1 X-7 Y-7.5 F24000  ; Reposition
G1 X35 Y-7.5 F24000  ; Wipe pass 2
G1 X-7 Y-7 F24000    ; Reposition
G1 X35 Y-7 F24000    ; Wipe pass 3
G1 X-7 Y-6.5 F24000  ; Reposition
G1 X35 Y-6.5 F24000  ; Wipe pass 4
G1 X-7 Y-6 F24000    ; Reposition
G1 X35 Y-6 F24000    ; Wipe pass 5
G1 X-7 Y-6.5 F24000  ; Reposition
G1 X35 Y-6.5 F24000  ; Wipe pass 6
G1 X-7 Y-7 F24000    ; Reposition
G1 X35 Y-7 F24000    ; Wipe pass 7
G1 X-7 Y-7.5 F24000  ; Reposition
G1 X35 Y-7.5 F24000  ; Wipe pass 8
G1 X-7 Y-8 F24000    ; Reposition
G1 X35 Y-8 F24000    ; Wipe pass 9
; --- End Nozzle Wipe ---
- Right
- With this right-side G-code, the tool head may not be able to travel far enough to the right to completely clear the A1 silicone brush.
; --- Start Nozzle Wipe ---
; Ensure nozzle is at a safe Z height to travel to the brush area
G1 X325 Y-8 F24000    ; Move to start of wipe area
G1 X360 Y-8 F24000    ; Wipe pass 1
G1 X325 Y-7.5 F24000  ; Reposition
G1 X360 Y-7.5 F24000  ; Wipe pass 2
G1 X325 Y-7 F24000    ; Reposition
G1 X360 Y-7 F24000    ; Wipe pass 3
G1 X325 Y-6.5 F24000  ; Reposition
G1 X360 Y-6.5 F24000  ; Wipe pass 4
G1 X325 Y-6 F24000    ; Reposition
G1 X360 Y-6 F24000    ; Wipe pass 5
G1 X325 Y-6.5 F24000  ; Reposition
G1 X360 Y-6.5 F24000  ; Wipe pass 6
G1 X325 Y-7 F24000    ; Reposition
G1 X360 Y-7 F24000    ; Wipe pass 7
G1 X325 Y-7.5 F24000  ; Reposition
G1 X360 Y-7.5 F24000  ; Wipe pass 8
G1 X325 Y-8 F24000    ; Reposition
G1 X360 Y-8 F24000    ; Wipe pass 9
; --- End Nozzle Wipe ---
See in photos GIF of how it should work 😊