
Coffin Flop (Corncob TV) from "I Think You Should Leave with Tim Robinson"
We calculate the final price from your selected file. You review and accept it before payment.
Saved on this device.
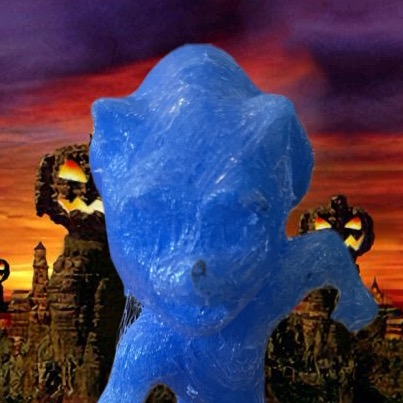
Coffin Flop, only on Corncob TV! Show Spectrum you're not worried about any of this with a print of the show Coffin Flop
- Rating
- 0 / 5
- Likes
- 32
- Downloads
- 86
- Makes
- 0
- Views
- 777
- Reviews
- 0
Updated at source:
Model information
- Source
- Printables
- Category
- Other Toys & Games
- License
- Creative Commons — Attribution — Noncommercial
Inspired by the sketch “Save Corncob TV” from “I Think You Should Leave with Tim Robinson”, this is a working Coffin Flop design. The coffin is made with a trap door on the bottom so at the push of a button the person flops out of the coffin.
The mannequin is a modification of this model by julien3d.cvm. The model states that it is public domain, so I simply changed the pose of the mannequin to be easier to print for this specific print, and fit better with the intended height of the button.
Printing Instructions
This model requires 8 5mmx3mm magnets to get the hinges to work as intended, but if you don't have any you could always just let the trap door swing freely .
I printed everything at 0.06mm layer height with a 0.2mm nozzle, but my test prints worked fine at a 1mm layer height and a 0.4mm nozzle, especially for the stand and backdrop. I used a 5% gyroid infill, but for some of the smaller pieces a little extra infill couldn't hurt.
There are 8 parts to this model. I would recommend printing the doors and coffin model first.
First, Print the door model twice with the magnet holes facing down, and supports enabled. I would recommend adding a support blocker to cover only the magnet holes, and then program in the print to pause at the layer before it covers up that hole so you can put the magnet in and have your printer print over it. This ensures a perfect fit for the magnet and helps the glue stick to the magnet better. The layer above the magnets might be a little too thin, but it should be fine.
Next print the coffin model, once again print with the hinges up and supports enabled, but you might have some trouble with the side that will be on the bed since it needs to fit with the lid, so it might take an attempt or two to get right, or some sanding.
Then print the lid with the curved part up and supports enabled since there is a channel for the coffin to slot with. You might need to sand both parts to make them fit if your supports are less than stellar.
Next print the button, with the spokes facing up.
Then the Corncob TV Logo with the text facing up and supports enabled. Once again, this one might take some extra effort or sanding as there just isn't an easy way to print it without a mess of supports.
Finally, the backdrop and stand can be printed at a slightly higher layer height with less infill and no supports.
All parts might require some light sanding to fit together depending on how well your printer can handle overhangs and support structures.
The mannequin is going to be tough if you do not have a 0.2mm nozzle, as I printed it with a 0.06mm layer height, but if you don't have a 0.2mm nozzle, you probably will just lose some of the mannequins fingers which is alright. Just print it as detailed as you can. I found that orienting the mannequin on its head for printing worked best, but that is not required.
Assembly
I would recommend first installing the magnets in the holes in the doors and the sides of the coffin. The magnets in the doors should be attracted to the magnets in the coffin sides, as this is what is going to hold the doors shut. I used a little bit of super glue in each hole.
The hinges are designed to use a tiny bit of filament to hold the pieces together. I recommend just clipping off 8 or 9 millimeters of filament from your spool for each hinge (So 4 pieces in total) And then making sure the print functions. Then, make sure one side of the filament is flush with the hinge and glue that side of the filament into the hinge with super glue (I recommend a super glue gel) or a tiny bit of hot glue, careful to only glue the filament to the coffin and not the door, otherwise it will not swing correctly.
Once that dries, clip the filament at the side that is not glued so it is flush, and possibly add a tiny bit of glue to that side as well, but that isn't required.
Make sure that your coffin base still fits into the stand as intended, and if not you can either sand or cut a little bit more until it is correctly flush and fits into the stand.
The lid should fit on top of the coffin itself using the slots on both parts, but if your supports were not great it might need some sanding before it fits. YOU SHOULD NOT GLUE THE LID TO THE COFFIN. Doing so makes it more difficult to replace the mannequin, requiring you to open the doors manually every time. Or do glue it down, its your print, do whatever makes you happy.
Push the button part into the slot that fits it in the lid. It only fits one way. DO NOT GLUE THE BUTTON DOWN. Glue on this part means that it can no longer move and therefore the entire print doesn't really work.
The backdrop and corncob TV logo both fit into the obvious slots in the stand.
Finally, painting is optional.
Operating Instructions
Remove the entire lid of the coffin. Place the man in face up for most consistent performance. Then replace the coffin lid. Insert the button into the lid, careful not to press too hard. When you want the mannequin to fall out, simply push the button in all the way.
If one or both doors remain open, you can simply replace the mannequin (Ensuring its face up towards the button) and swing both door parts closed. If the doors swing shut again, you can use your fingernail to try to open them again, or you can just remove the lid and try again.
The .step file has been included if you would like to modify the design.
.3mf File from Orca Slicer is included. Currently is set to a BambuLab P1S Printer, with an AMS System and 0.2mm nozzle. I also recommend not using my settings for brown filament because its terrible.