
Travel Tandem Maze Too (Reengineered)
We calculate the final price from your selected file. You review and accept it before payment.
Saved on this device.
Model information
- Source
- Printables
- Category
- Puzzles & Brain-teasers
- License
- Creative Commons — Attribution — Noncommercial — Share Alike
Tandem Maze Two
🧩 Travel Games
This model is a new entry in my Travel Game Series.
All my travel games have the same size. That makes them easily stackable. They are small enough to put them in your backpack etc. Because of the design you can play these games in a car, train or plane while traveling. (you don't have to charge a battery for it…. ;-)
🧩 Description & Background
I discovered the original puzzle—Tandem Maze Too—on Oskar van Deventer's website:
🔗 Buy the puzzle: here
🔗 Download STL from Oskar's site
Oskar is a well-known and brilliant puzzle designer. I highly recommend visiting his site if you’re looking for creative ideas.
I decided to reengineer his “Tandem Maze Too” to fit within my Travel Box format, making it compact, printable, and more robust for repeated play.
🎯 Object of the Game
Each bar has a thick and thin end, and the maze has associated thick and thin dots. This way, each bar has an orientation. The two bars have different colors. The object of the maze is to swap the two bars, and have the thick ends at the thick dots. The puzzle has, hidden in plain sight, a parking space, a turning space, a roundabout and a passing place. None of these can be used when either bar is at their marked starting position. One bar needs to be moved to the parking space, in order to have the other bar use the turning space of to go to the passing space. It is a lot of fun to get all the logistics right, and swap the two bars properly.
🛠 Design Notes
During prototyping, I noticed a structural weakness in the maze. The vertical maze walls were only attached at one point—see the picture below—which made them prone to deformation when the bars are moved.

You can observe this flexing in Oskar's own YouTube video here.
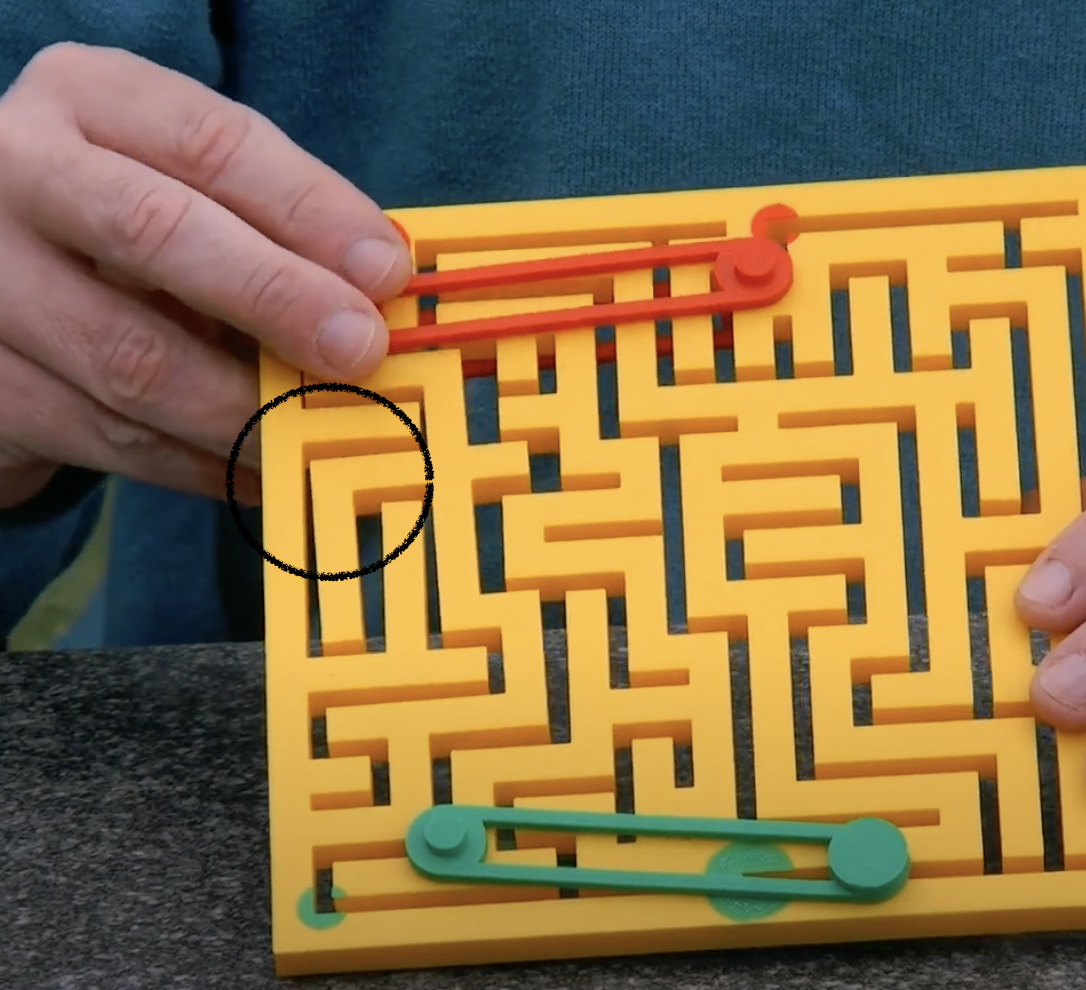
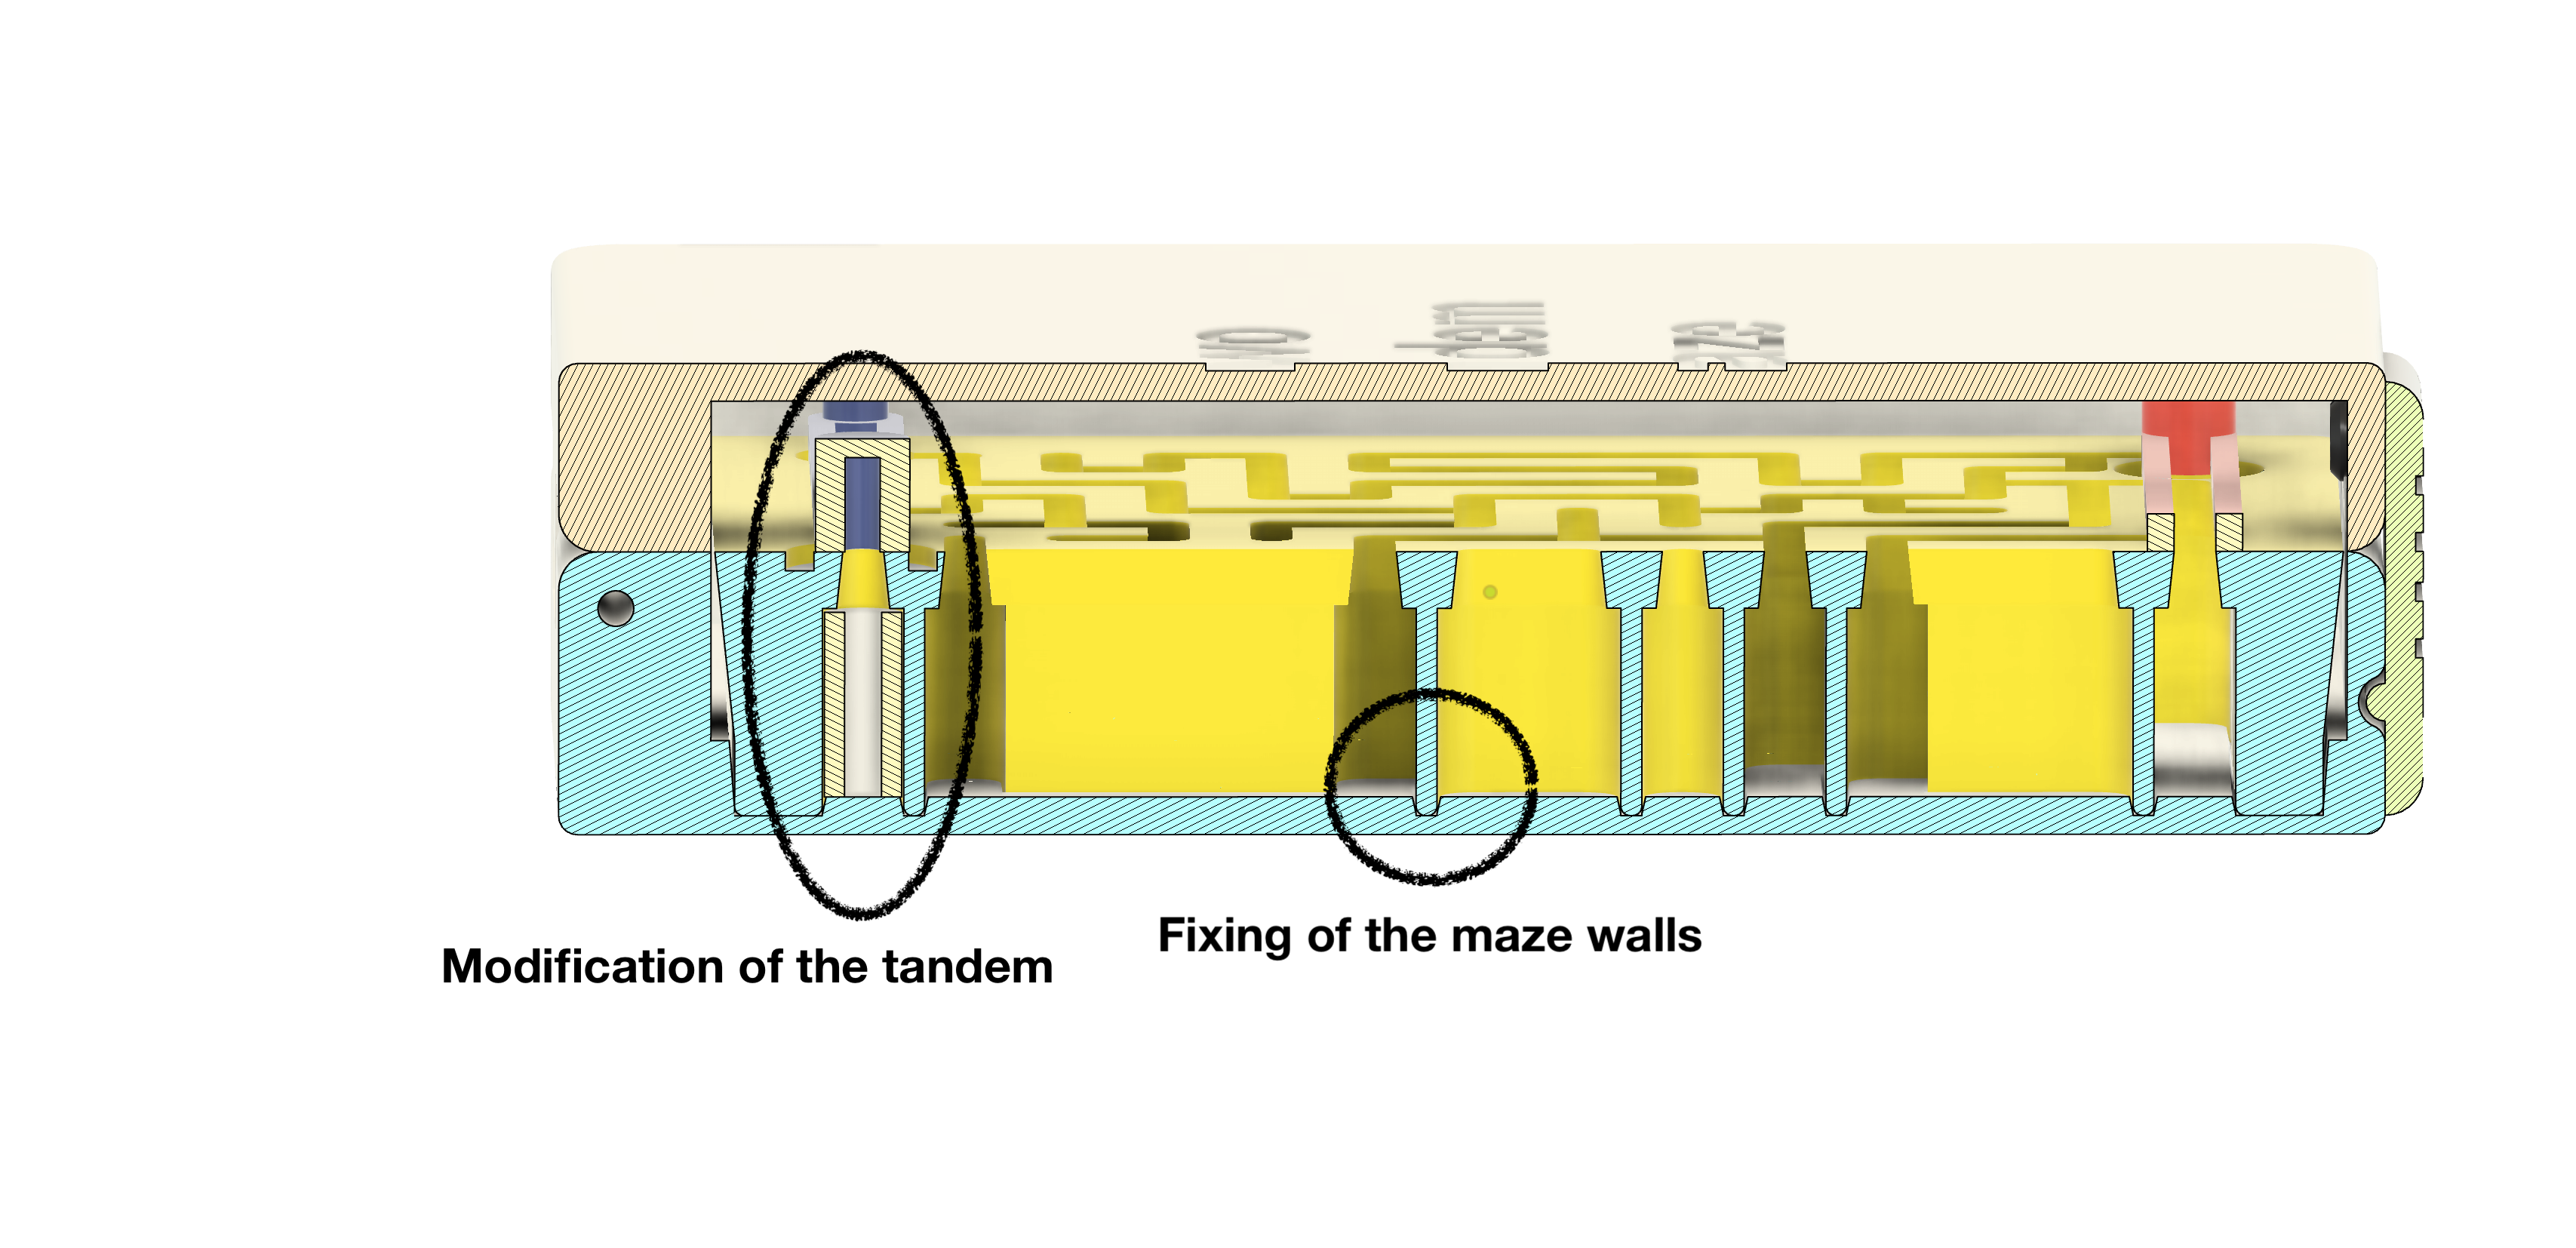
To solve this, I made the following modifications:
- Added vertical supports that fix the maze walls to the bottom of the box.
- Redesigned the maze floor and tandem bars.
- Made everything compatible with my standard travel-game format.
🖨 Printing Instructions
I printed the game in PLA using multiple color changes for clarity.
Symbols and text are more visible this way.
⚙ Printer Notes:
- Use a well-calibrated printer, as tolerances are tight.
- For optimal results, refer to the included .3mf files.
- The cylinder must be printed 4×.
- The tandem bar needs to be printed 2×, ideally in different colors.
🧷 Assembly Guide
After printing, follow these steps:
1. Hole Preparation
Use a 1.8 mm drill to clean out the small holes in:
- The box base (for hinges),
- The four cylinders,
- The tandem bars.
💡 Note: 1.8 mm drills are often not found in local DIY shops—order a quality brand online. They'll last a long time if used only for plastic. The cheap ones are often not durable and have a lower accuracy.
2. Surface Finishing
- Polish the bottom of the box and the cylinder surfaces, using very fine wet sanding paper.
- Ensure the cylinders move smoothly through the maze channels and on the box bottom.
3. Cylinder Setup
- Cut 4 pieces of filament (⌀1.75 mm) to 16.5–18 mm in length.
- Insure that the filament pieces are straight.
- Insert each filament piece into a cylinder, so it sticks out 6.5–8 mm.
- Apply a tiny drop of glue inside the cylinder (not on outer surfaces!).
4. Maze Assembly
- Insert the cylinders with their filament pieces from below into the maze, in their initial and marked positions.
- Position the tandem bars on top (don’t glue them yet).
- Test-fit the whole structure into the box—yes, it’s tight!
- Check if the tandem bars slide smoothly. If not, remove and polish the maze surfaces.
Once everything fits and works well:
- Apply a few small drops of glue at the base to secure the maze walls to the box bottom. Put the maze in the box.
-Glue the bars to the filament, so that they easily can move.
5. Hinge Pins and Lid
- Use filament pieces for the hinges.
- Test the lid's opening and closing. Sand/smooth the hinge parts on the lid slightly if needed.
6. Latch
- Insert the latch and press the studs firmly through the holes with a bit of glue.
✅ Done!
If everything is aligned and smooth, your Tandem Maze Two is ready to play!
💬 Feedback
- ❤ Like this model? Give it a heart!
- 📸 Printed it? Share some photos!
- ❓ Questions or suggestions? Just ask in the comments!