
Dripless Smiley
We calculate the final price from your selected file. You review and accept it before payment.
Saved on this device.

A (mostly) cosmetic remix of the Smiley. Fits on smaller printers!
- Rating
- 5 / 5
- Likes
- 43
- Downloads
- 106
- Makes
- 2
- Views
- 1,190
- Reviews
- 1
Updated at source:
Model information
- Source
- Printables
- Category
- Outdoor Toys
- License
- Creative Commons — Attribution — Noncommercial — Share Alike
I wanted a Smiley that didn't look very futuristic, but wasn't so LARPy that it stopped looking like a Nerf blaster, so I took away the greebles. Sorry.
Bolt Handle-Side
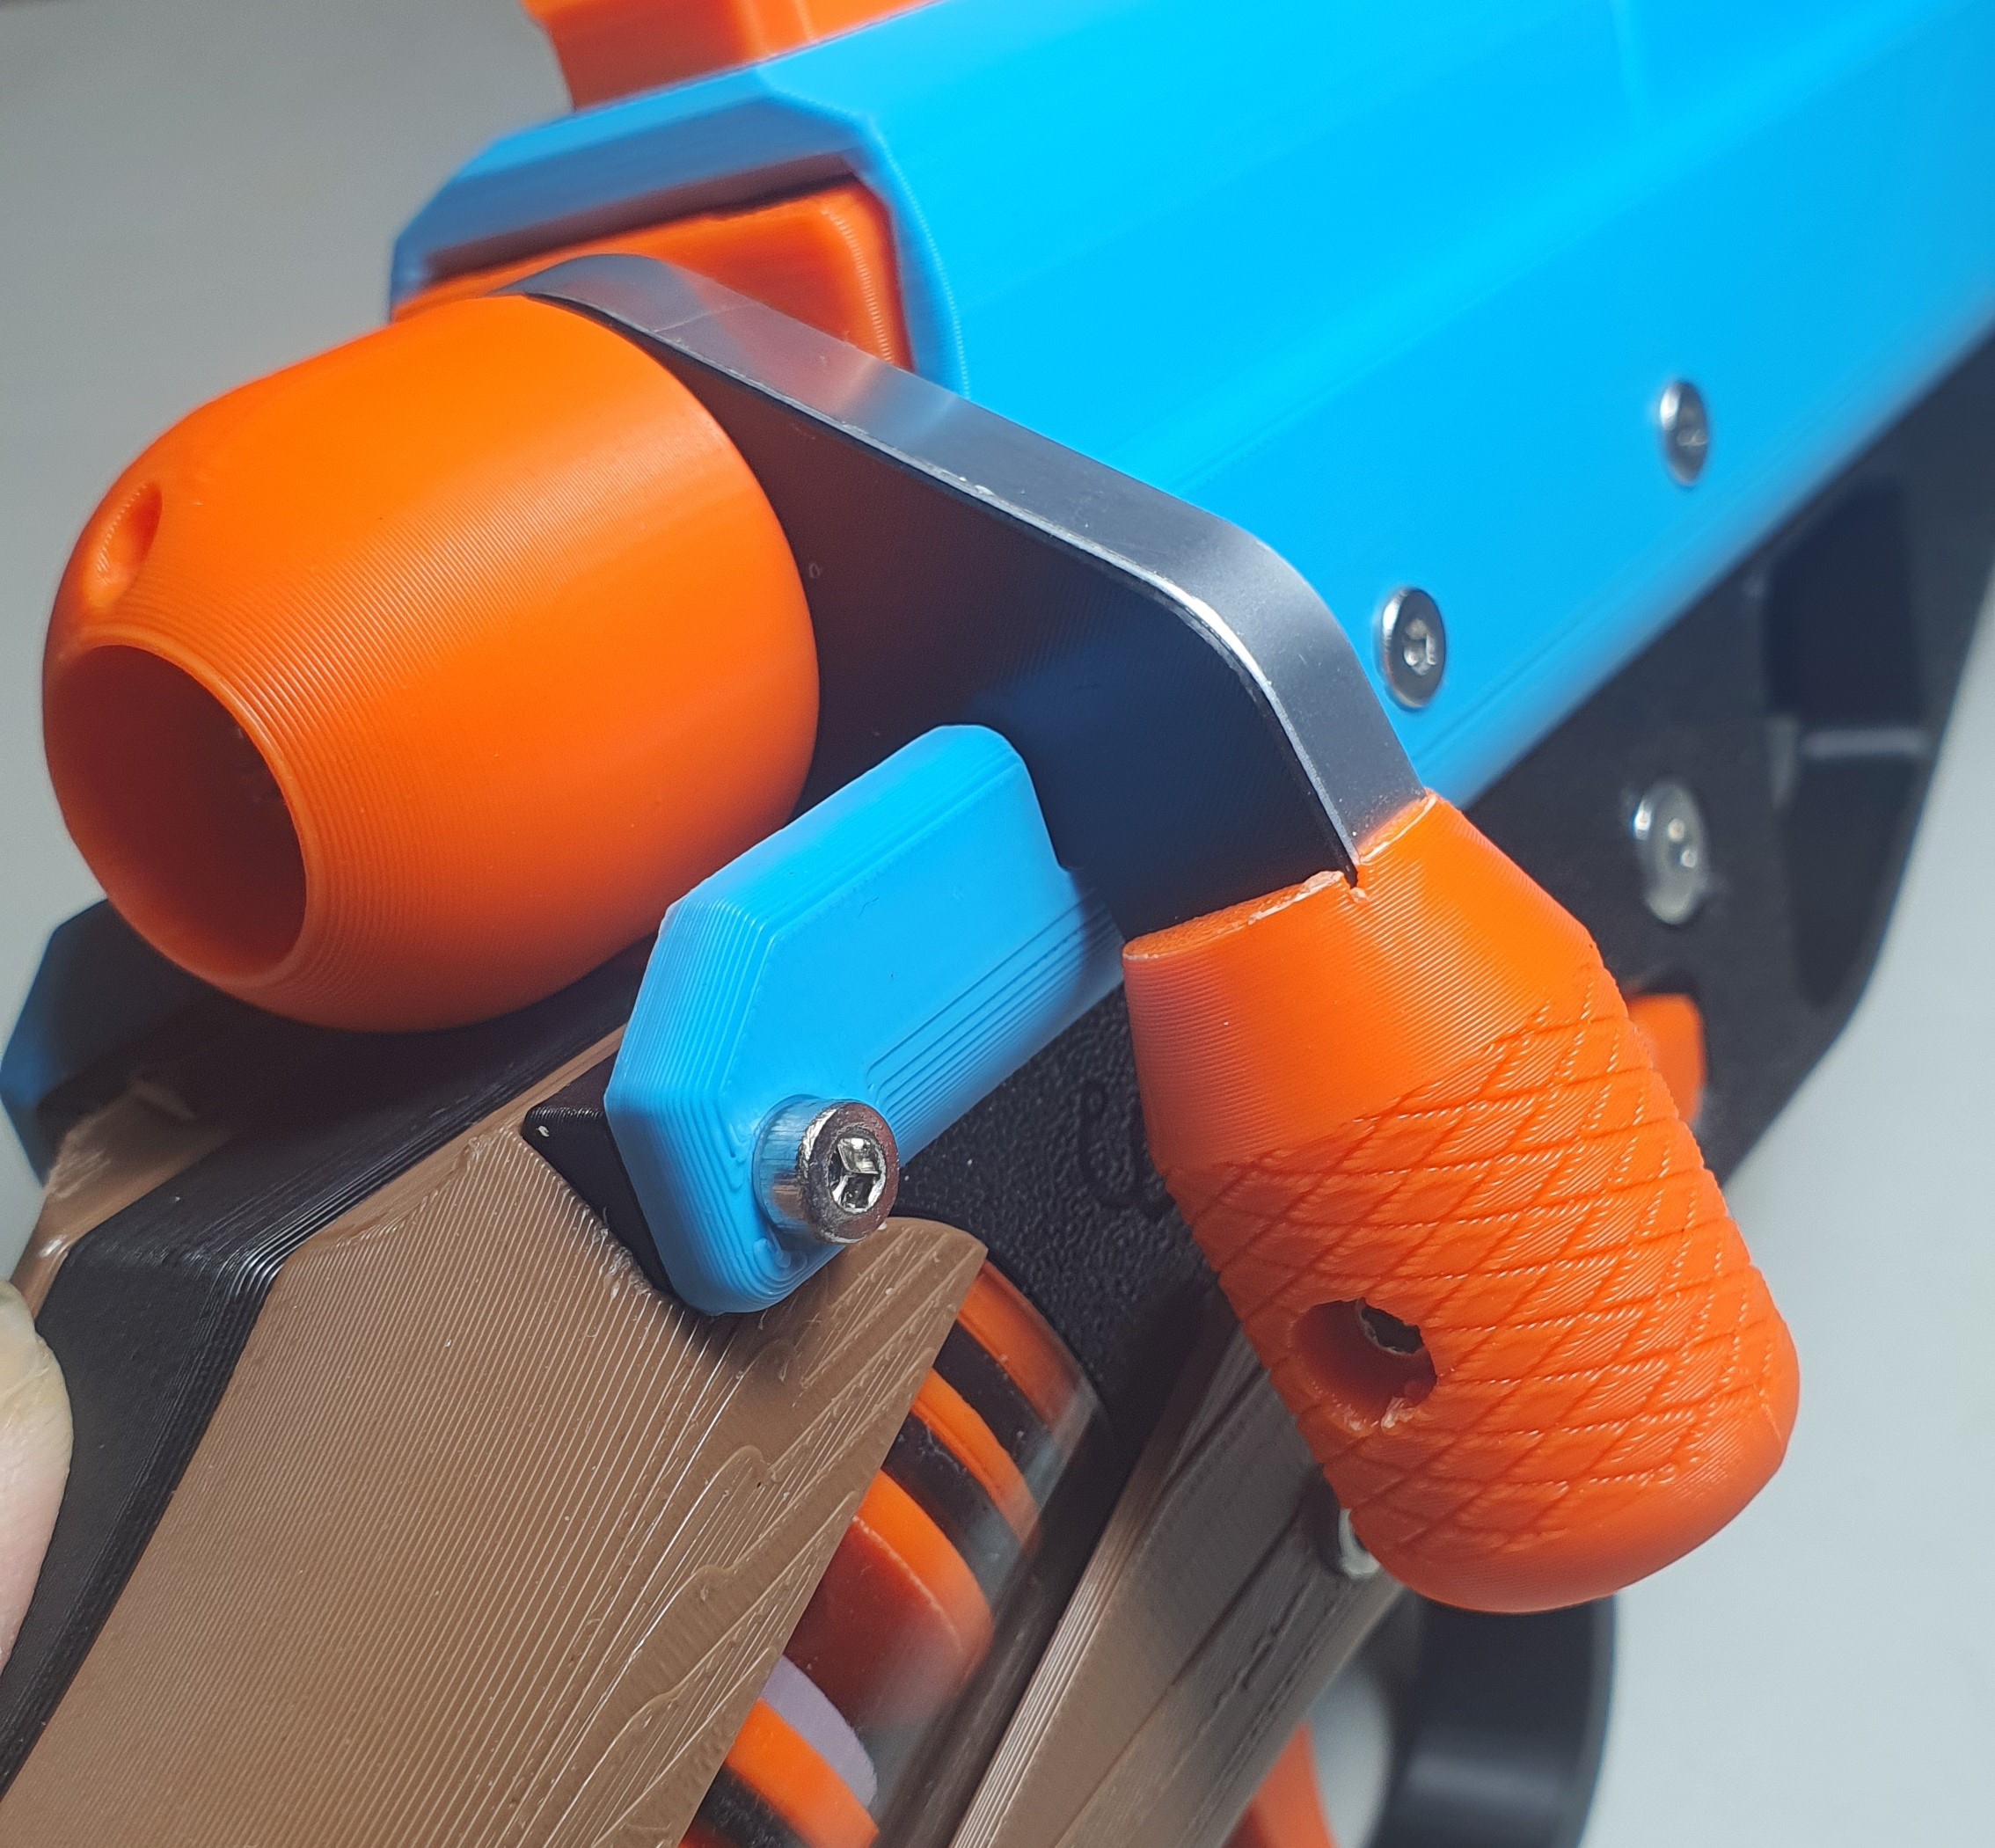
Aside from cosmetic changes, like rounding the cap and simplifying the bell, I've edited the bolt cap to accept a 6x7mm ball detent, and the bolt handle to have grooves lined up with where the ball detent goes. If you already have a machined bolt handle, I've also created a shimmed version which goes in front of the bolt handle and has the same function (seen on the left).
- The ball detent is friction fit in the bolt cap, so expect it to be tight (I had to hammer mine in). I've included a little indent for you to stick a thin screwdriver in there to pry it out in case you don't want it there anymore.
- For the shim, print it with a fairly small layer height (it's 0.7mm thick, so I printed it with 0.1 layer height), and if you want you can turn on top layer ironing. I did all walls since it's just a thin part.
If you don't want the 6x7 ball detent, you don't have to use it, the bolt cap and bell work without it.
Inspired by this Reddit post by RealAstropulse.
Wood-ish Stock Remix
A remix of Heath's wood-ish stock to support the FPS adjustment knob by Beneto, then chopped to fit a 180mm^3 print bed. Has holes for 6 M3x8mm cap head screws, but I got away with 4. You could probably get away with 2.
You should print these a little light. I made the mistake of printing them too heavy and now my blaster is back heavy. Use the same stock butt as the ones found on the original files. Same orientation as the original, print with supports when needed.
Frame
WARNING: These parts are horribly designed! I'll be providing as much support as I can, but I doubt this will be fun to build yourself. Also, I modified these files particularly with the AKBM hardware kit in mind, as that's what I have access to, so the files for the default Smiley are untested. There's a chance none of these files will work for you. You have been warned!
Printing
- Changed parts:
- Bolt, Bolt guide, Breech housing, Both frame plates, Both receiver sides, TrigGuard-L, Handguard mount, RedCowl collet
- Same settings and orientation as the originals.
- New parts:
- Handguard top, Handguard filler, Handguard back, Handguard front, BL/BR/FL/FR grip, Rail
- Settings: Whatever you want. Handguard back and front probably need supports (I turned off build plate only and just left whatever supports I couldn't access in the part).
- Orientation: Choose whatever you think fits best for aesthetics.
Hardware

Above is a diagram of screw holes and sizes I've built into the handguard (all M3 cap screws). To save filament, I added as many screw holes as possible in case the part couldn't carry its own weight, but I didn't end up using them all, so you could definitely use less than the holes that are already there. Here's what I ended up using:
- 2x M3x8mm (one on the 16mm and one on the 13mm slots)
- 4x M3x16mm (the 17mm and 20mm slots)
Assembly
- Assemble the blaster pretty much all the way, except don't attach the top rail yet. Insert the hex nuts, but don't screw in the rail.
- Insert a screw into the singular screw slot in Handguard filler (I used M3x8)
- Attach Handguard filler to Handguard top with 2 screws (I used M3x16)
- Attach Handguard back and Handguard top together. Painstakingly and slowly use an M3 allen wrench to attach the screw from Step 2 into Handguard back. I could only move the screw about a quarter turn before needing to reset the wrench.
- Slide Handguard back into the assembly from the front of the blaster, and attach with screws.
- Two holes from the bottom attach Handguard back to either Receiver (I used M3x16)
- Two more holes attach Handguard back to Handguard mount (I recommend not using these)
- After this point, you can attach the BL and BR grip pieces. They should just friction fit in there. There are little holes on the inside of the Handguard back piece which allow you to poke them out.
- Attach Handguard top to Breech housing with the same screws you would the normal handguard, except from the Breech housing side.
- At this point you can screw in the top rail.
- Push in your barrel, and secure it with the RedCowl collet.
- Attach Handguard front to Handguard back with screws
- One hole in the middle attaches the two through the middle post (I used M3x8)
- Two more holes can be found on the sides of the Handguard front piece, where the grip should go (Use these if the gap between the two is too large)
- At this point you can attach the FL and FR grip pieces. They should just friction fit in there. There are little holes on the inside of the Handguard top piece (right in front of the collet) which allow you to poke them out.
Other words
Full changelist
- Ungreebled most parts (bolt guide, breech housing, frame plates, receiver)
- Logos kept or moved where appropriate. Credit to the original designers!
- Extended frame plates up and added a little wall on the breech housing to cover up more of the bolt
- Top rail doubles as iron sights
- Rounded out bolt cap and simplified bolt bell + added knurling
- Added support for a 6x7mm ball detent into the front
- Wood-ish stock chopped and cut to fit the FPS adjustment knob and smaller printers
- Adjusted receiver, breech housing, bolt guide, and bolt geometry to be less square
Foreword
Looking back, I have a lot of ideas for how to make the frame cleaner and just generally make a more presentable and printable design, but this project is past me now. In spirit of knowing it could be better, however, I've also uploaded the .f3d file (despite how shameful my design workflow is), so in case someone wants to roll back the clock and do a better job, please be my guest!
Thanks to all the original designers, you guys rock and are a big inspiration.