
Kids Artwork => DND Monster Tutorial (DND / TTRPG)
We calculate the final price from your selected file. You review and accept it before payment.
Saved on this device.
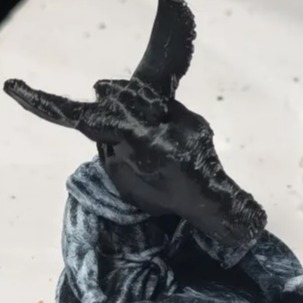
Turning Kids Artwork Into a 3d Model with Rodin and Blender
- Rating
- 0 / 5
- Likes
- 4
- Downloads
- 7
- Makes
- 0
- Views
- 74
- Reviews
- 0
Updated at source:
Model information
- Source
- Printables
- Category
- Other Toys & Games
- License
- Creative Commons — Attribution — Noncommercial
Intro
Yesterday Alfie went to the library for some arts and crafts. They were making bears but in true Alfie fashion he made his own DND monster. I spent some time today converting it to a 3d model via GPT-Image, Rodin and then tweaking it in Blender. This is a fun way to bring kids' art to life and pretty easy to do.
If you'd like to use this process to do the same with your kids' artwork feel free to follow along the steps I have written below, watch the video I made on how I made the above art or reach out to me with the artwork and I'll work on it with / for you.
Shameless Self-Promotion
👍 Don't forget to Like and Collect this, so you can easily find it later! ⭐ If you like my models and what I do then come follow me on Patreon https://www.patreon.com/c/Adamnant for updates on my quests and access to exclusive minis.
Steps To Make Your Kids Art Into a 3d Model
Here is a quick 1-minute desktop overview of the process:
Follow along with the full video tutorial here:
- Get your kids to make some art - use something from school, go to the library's craft day or hide the chargers for the phones until they start making art to fight away their boredom
- Take a picture of the art - you can see the reference pictures I used were just on a white piece of paper, try not too have too much going on in the photo
- Upload that to Chat GPT or Nano Banana (Some services like Rodin have this built right in) and then have that service make a high resolution image - here is the prompt that I use:
- Generate a realistic image of the same main subject in this image as the figure in a t-pose. Show the entire figure from top to bottom, fully visible within the frame, upright, and centered in a portrait composition (4:5 aspect ratio). Include extra space above, below, and on both sides so no part of the figure touches the image edges. The subject should be on a white background, with natural lighting, matching the colors and appearance of the original image. The camera should be pulled back slightly to ensure the entire figure fits comfortably in view.
- Feel free to make more versions or swap the "realistic image" statement with a "Studio Ghibli style image" or disney or whatever you want.
- Alfie is away at school but on other models I usually go through several refinement steps on these creatures, does it have spikey teeth or flat teeth. Does it have angry eyebrows or happy ones etc... etc... you can rework it until it matches the vision that they have for the creature
- Using Rodin or Meshy or Trellis or many other Image to 3d services you can drop in that image and it'll create a figure for you.
- Some of them have a "redo" button to retry if some things don't look quite right.
- You may also find that you can put the model into a T-Pose (arms out) or A-Pose (Arms down / out and to the sides) - this can help if you want to put the model into a custom pose but it's not necessary
- I recommend using Rodin because that's what I use but many of them will work fine.
- Go through the creation steps until it lets you export the files - I exported as an FBX file which included the materials (colors etc...) but an OBJ or STL is fine... and those files might even print out of the box without anymore steps.
- Load the file into blender
- Once the download is complete I open the file in Blender and scale to 32mm in height. This can be tricky to configure so I've added a template.blend file which has my scale settings in it. I've also added some baseplates to this file so if you're doing a DND mini you can put them on it - these also work as nice stands and help as tools to flatten the model.
- You'll want to set blender to use your graphics card instead of CPU or you will have a bad time - here is short video on how to enable this https://www.youtube.com/shorts/DioAvjZ5yN4
- If you want to use your own file here is how to set the scale: https://www.youtube.com/shorts/vz84n6HNqtw
- ???
- Step seven is a mystery - this is where you have to decide what you want to change with the model. Do you want to sculpt it? Go into sculpting mode. Do you want to pose it? Auto Rig Pro is awesome but pricey (but who can put a price on kids art!?), riggify is free I think and you can just use Armatures (think skeletons) that are built right into blender, these work fine. Often you can get away with the Sculpting mode "Pose" tool too for simply moving an arm.
- It's handy when you've added your model to quickly tab into edit mode and hit "P" then split by loose parts. This will help you to get rid of weird artifacts from the AI or to see how parts of the model weren't quite connected together (intentionally like with "Bang to Parts" or unintentionally like with straggley bits)
- For sculpting I recommend using the Crease brush for adding crease / lines in, draw + draw sharp these work opposite of each other and are a thicker crease in or out, inflate, grab and pose (honorable mention for the snake hook)
- If your model has separate parts or your want to join other things in you can use a Boolean modifier to add that in - using the "Exact" mode can be slow and it really doesn't like "intersecting faces" where you're trying to join something so using "Manifold" mode can be a good option - although it sometimes makes your model non-manifold, womp womp - in which case, undo and try again in a slightly different way or check the individual parts to make sure they're manifold to begin with (see print optmizing below)
- Print optimizing
- After posing and sculpting I like to do a remesh - this is a modifier in blender you can apply to your model, as long as you have a similar amount of vertices as the one you're remeshing from then you shouldn't lose too much detail. The key benefit is that it should make your model manifold, fill holes and join things together nicely for you. If remeshing doesn't work it might be because your model is "non-manifold" - if so try fixing that in the next step then going back to remeshing.
- 3d Print Toolbox is amazing - the main thing you should check is if the model is "solid" / "manifold" - install this addon, select your model then click the "Solid" button, if there are non-manifold or broken parts of the mesh it will let you know - you can try using the "Clean up" button "Make Manifold" on any issues. If there are still some afterwards you might have to go into edit mode, select those non-manifold edges, hit "F" to fill those edges, then rinse and repeat the “make manifold”
- If you're making a model for DND then you'll want to set the scale to 20-28mm (small), 32mm (medium), or 50-60mm (large) - the other sizes are a mystery, when in doubt import someone else's model and try to match the same general scale
- Export the model - 3d Print Toolbox has a handy export option which will spit out an STL file - otherwise you can use the built in STL or obj export
- Load the model in your slicer and pray - if you made it manifold it should be fine but small bits can be tricky, there can be trial and error. Small models are a pain on FDM. Supports are a pain for Resin. I recommend something large (~50mm) and relatively blocky like what I've made today.
Blender Addons that I use
- 3d Print Toolbox: https://extensions.blender.org/add-ons/print3d-toolbox/ - use this to optimize your prints
- Auto Rig Pro: https://superhivemarket.com/products/auto-rig-pro - it's so handy and has lots of addons for animation etc...
- DJH Geometry Nodes: https://superhivemarket.com/products/djh-geometry-node-assets - has some awesome tools but I really like the UV modifier to copy them between remeshes
- My own addon for moving models around and saving changes - I don't have this published anywhere but could if y'all want it
Anddddd lots of others that I can go over in another tutorial
Outro and More Self-Promotion
I've completed my quest for 1000 models in 2025 so now I'm trying to decide whats next. You can follow along with me on Thingiverse, Printables, Cults3d or provide suggestions on Patreon here: https://www.patreon.com/c/Adamnant (as well as get codes for exclusive downloads on Cults3d). If you have something that you need or a custom model like this that you want then let me know and let's make it!
Category: Games