
Flashforge AD5M Enclosure Hinge & Handle FOR MINIMAL ENCLOSURE - remixed to be easier to open and use (print-in-place Door Hinge) v3
We calculate the final price from your selected file. You review and accept it before payment.
Saved on this device.
Model information
- Source
- Printables
- Category
- Accessories
- License
- Creative Commons — Attribution
This v3 of the AD5M door hinge for DIY enclosure is expressly for the Minimal enclosure and its remixes. It repositions the plexiglass door downward by 5mm to accommodate getting the touchscreen back on the metal frame, as well as keeping all the added features of v2: being easier to break free after printing, and adding adjustability for left-right placement of the door (because for some users, including myself, the default door placement is too far to the left), and the added features of v1 (easier to break free after printing).
NOTE: you'll also want to print the new, remixed v2 HANDLE that has its latch moved UP 5mm to counterbalance this new hinge, so the handle will still latch properly! The new handle is included in this listing.
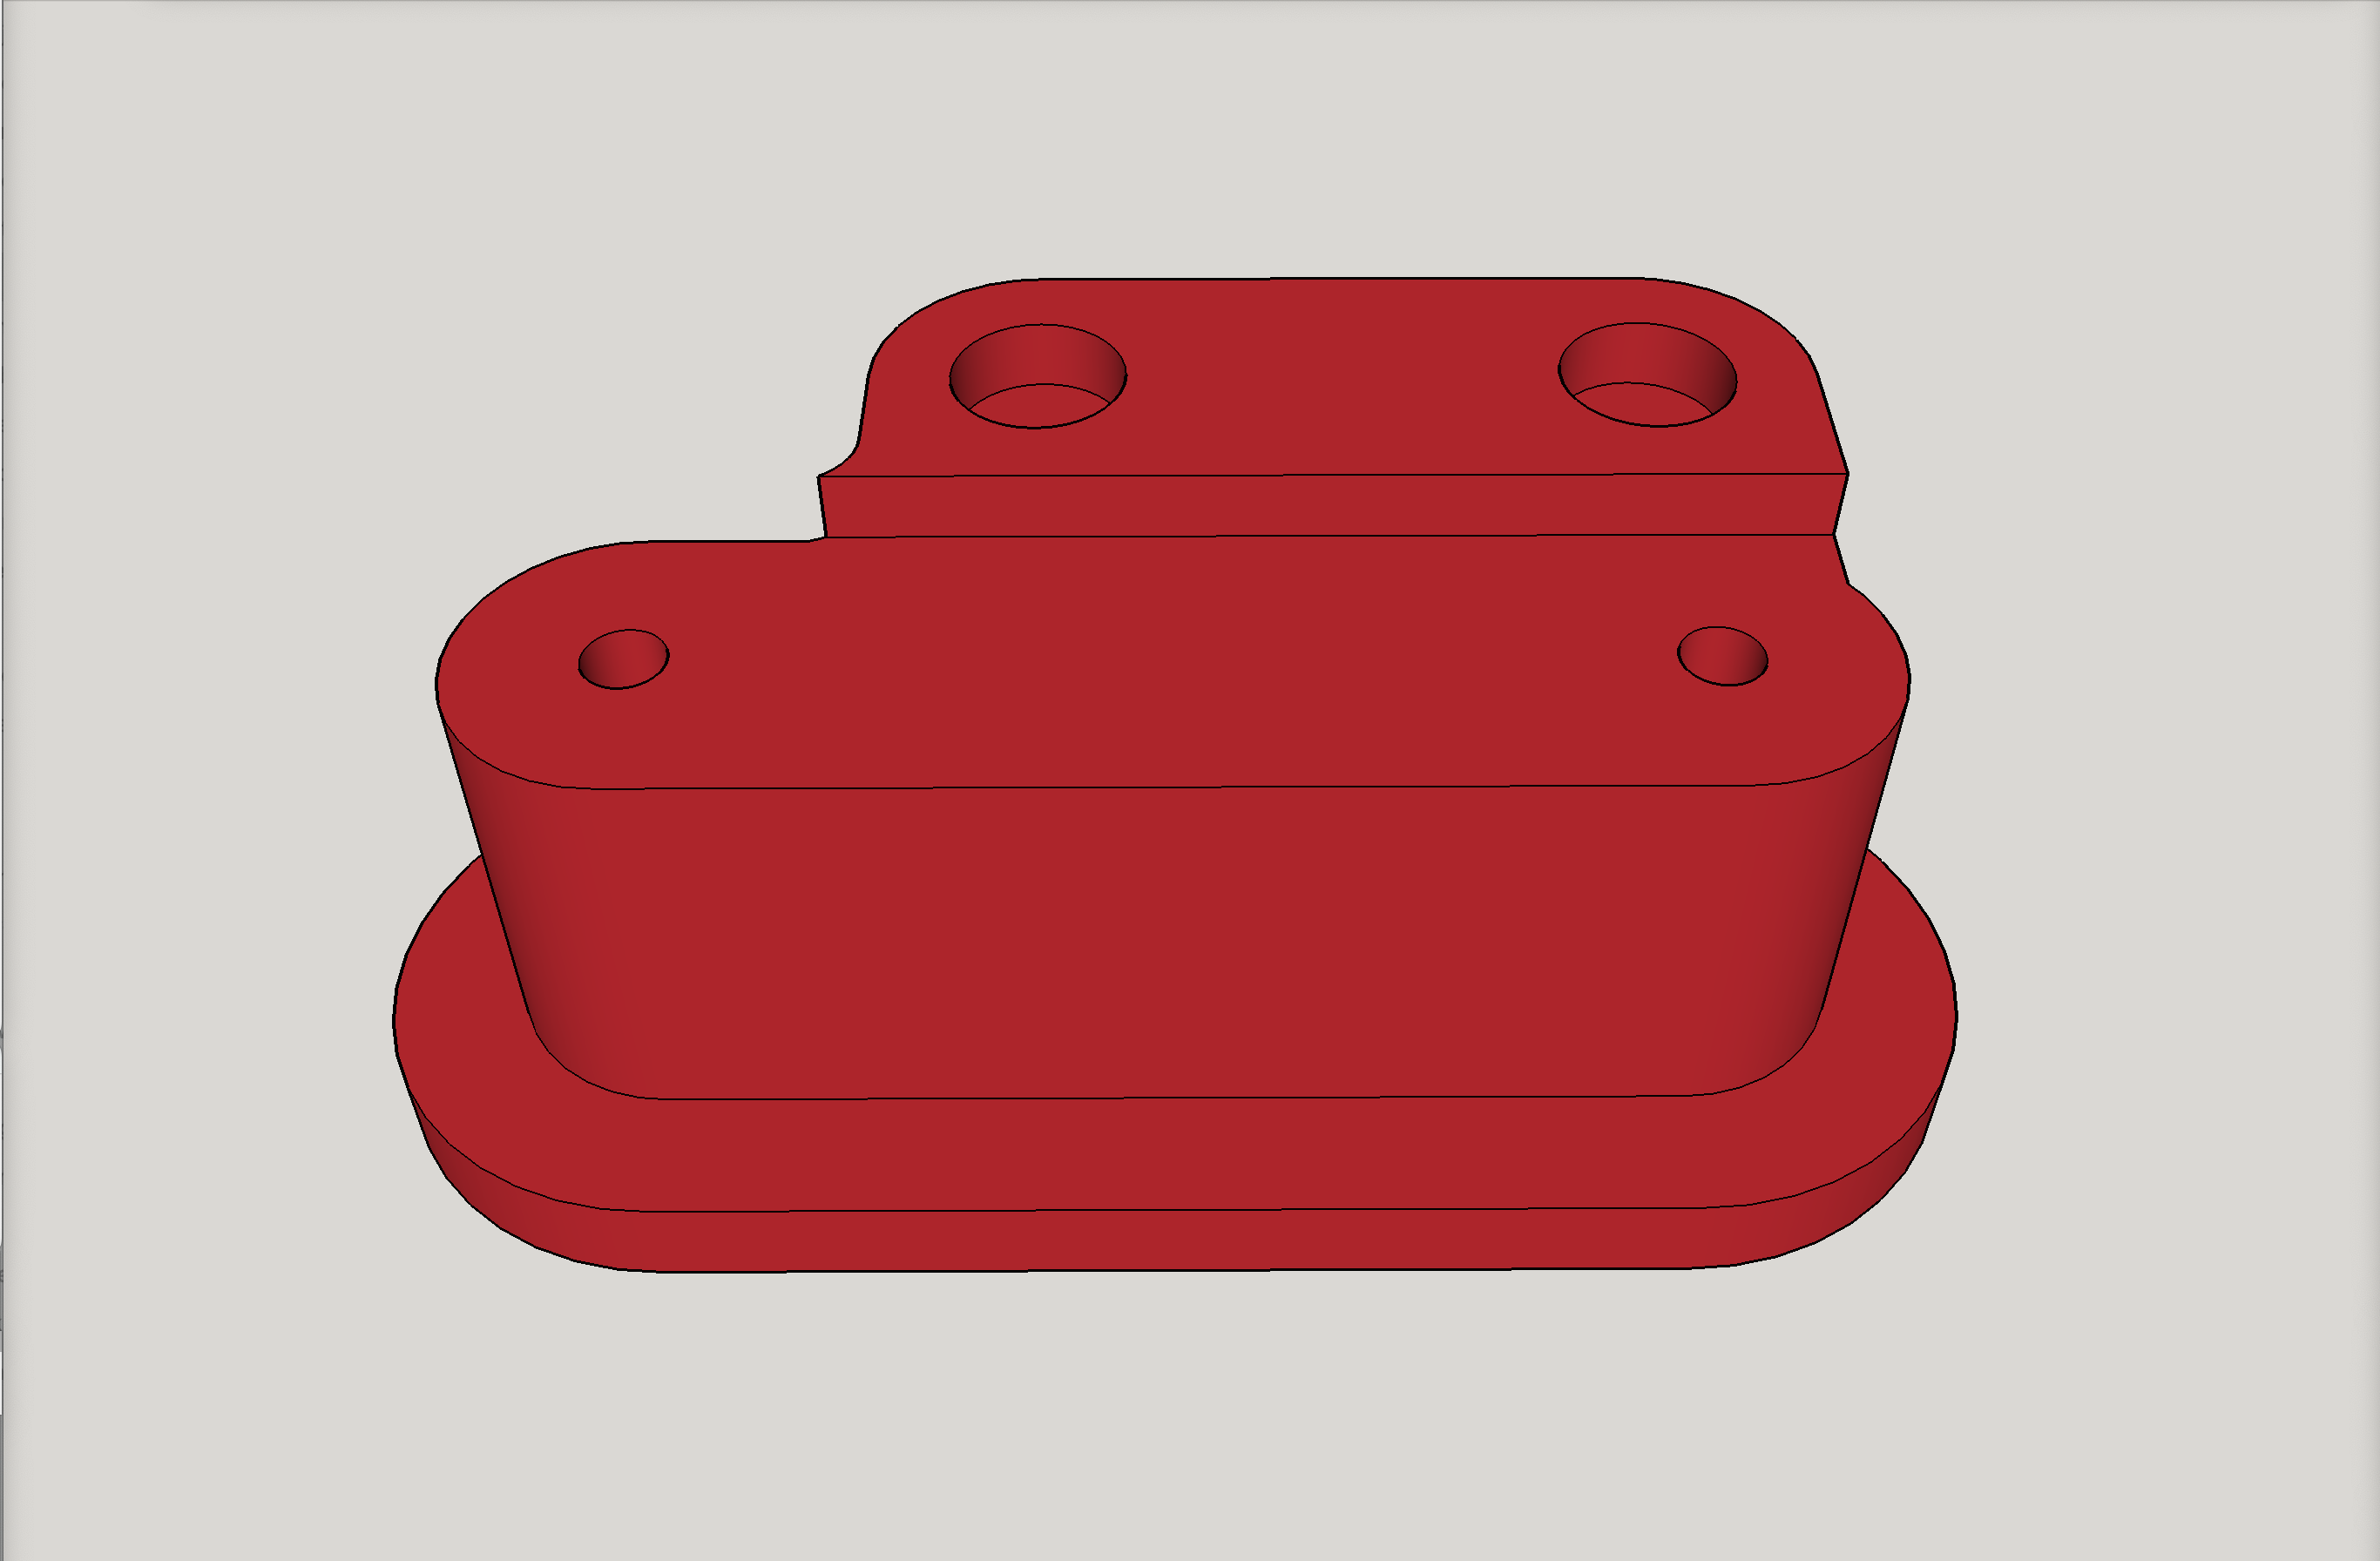
This is expressly for this one, v3:
And for this one - the retrofit for putting the new risers on the OG guard plates, which otherwise has all the goodness of the v3 above:
And is also for this older version of the v3 shown above:
Post Print Note
Regarding the v3 and v2 being easier to break free (for hinge motion) after printing (because a little bit of fusing happens during printing), all I had to do was squeeze it toward "closing" it. Very easy pressure broke it free for awesome hinge motion.
Change log
Tuesday, January 27, 2026 - uploaded tweaked version of the new v3 of the AD5M DIY Enclosure DoorHinge. In the new area added for aesthetics, a hinge "tooth" was missing. If you already downloaded and printed, there is no need to redo it. The missing tooth will not affect functionality. The number of hinge teeth present before this fix was already more hinge teeth than the original. Kudos to fellow Printables maker Алексей Елсуков for catching this during slicing.
Details pasted from earlier version
The details below are copied and pasted from the older v2:
This version is not just easier to open, but also adds better door placement: adjustability slots. For some users the enclosure's front door is too far left. This hinge set allows about 2.5 mm of adjustability on the left-to-right placement.
= = =
The following is copied and pasted from the previous version, v1:
The original print-in-place door hinge had a very tight clearance of only 0.1mm, and for many of us, it fuses (welds together) during printing, and all efforts to pry it open would break the hinge.
This remix has the print-in-place clearance increased from 0.10 to 0.15 mm. It still functions perfectly and I was able to pry it open without breaking it.
Note: before making this remix, I made the DIY enclosure with the old hinge, and was only able to make the hinge work by using one certain PLA+ filament, and by placing the hinge opening against the corner of a marble countertop slab, and gently tapping on the back of the hinge with a rubber mallet. Some would break anyway, but a few would successfully open.
Later efforts to make more enclosures (as I now have 3 of the AD5M's) I was using other PLA filaments (attempted with pure PLA and various PLA+) and all the hinges were failing, and mind you these were printed on AD5Ms - even after carefully calibrating them.
This remixed hinge allowed being opened — on the first try. It's still tight enough to function exactly as intended, with no slop.
If your hinges are coming out great, you don't need this. If your hinges are breaking when you try to pry them open, try this.
This is regarding the DIY enclosure upgrade.
HEADSUP 1:
I just published a new, improved remix of my popular side-mounted spool holder — with four cosmetic variations to choose from. Click here for the printable files.

This popular remix includes a side mounted spool holder. The place where the spool holder attaches, takes into account a vertical guard plate from the DIY enclosure, and is made to work without modifying the existing DIY enclosure parts.
https://www.printables.com/model/1127538-1-of-4-flashforge-adventurer-5m-ad5m-improved-side
HEADSUP 2:
Also, I remixed a new minimal version of the enclosure, that prints in less time, uses less plastic, and in my opinion is better in substantial ways. I now have three of the AD5M printers, and two have the original DIY enclosure, whereas the third has my new remix of the minimal enclosure, and it’s just nice. It makes any maintenance work easier because the top is so much easier to remove (no wiring ribbon cable threaded through a slit to a relocated touchscreen, and no camera cable threaded through a hole to a relocated touchscreen). It’s better because if you have/get the AD5M camera (which is for the Pro version but can be bought and installed on the non-pro version - and its video feed can be displayed remotely in either of the web-based UI choices available if you do the unofficial Klipper mod) it does not need to have a modified mount to get its wire cable to be long enough to reach a higher position of a relocated touchscreen, and better because the touch screen does not have to be moved – it gets to stay in the stock position, which is nicer in all ways. My new remix of the minimal enclosure made several improvements on the great work from the person whose work I based mine on, and it will have the new side mounted spool holder with it. Watch my account on Printables for this soon. https://www.printables.com/@design8studio
Print settings
It's easy to think, "Since these hinges need to be strong, I should increase the perimeter walls and infill." That logic is not intrinsically flawed, however, any print-in-place items with tight tolerances can experience more fusing of the separate sides of the hinge to each other during printing, when compared to printing with normal settings. I think I printed mine with 0.28 layer height, 2 perimeter walls, and 15% infill, and I have them on three AD5M printers, and have never had a hinge fail because of lack of strength. So, while you can feel free to experiment, my own experience is that it was not needful to increase the perimeter walls or infill to crazy high numbers.
I printed mine using PLA.
Other cool options for the AD5M
You may also like my other AD5M related design work:
https://www.printables.com/model/785667-flashforge-adventurer-5m-ad5m-simpler-easier-faste
https://www.printables.com/model/813334-flashforge-adventurer-5m-ad5m-printed-camera-mount
https://www.printables.com/model/814546-flashforge-adventurer-5m-ad5m-nozzle-storage-box-t
https://www.printables.com/model/827706-flashforge-adventurer-5-ad5m-led-mod-accessory-buc
https://www.printables.com/model/828632-flashforge-adventurer-5-ad5m-led-light-bars-mod-ac
https://www.printables.com/model/834011-flashforge-adventurer-5m-ad5m-side-cutter-mount-v1
https://www.printables.com/model/834097-flashforge-adventurer-5m-ad5m-improved-spool-holde
https://www.printables.com/model/886714-flashforge-adventurer-5m-ad5m-filament-cutter-comp
https://www.printables.com/model/1119699-flashforge-ad5m-enclosure-hinge-remixed-to-be-easi
https://www.printables.com/model/1119872-flashforge-ad5m-door-handle-remixed-to-print-witho
Use Klipper stuff on AD5M stock hardware,
…such as Mainsail, Fluidd, and Klipperscreen, etc, with the stock Klipper install on the AD5M's main board.
Get it here: https://github.com/xblax/flashforge_adm5_klipper_mod
Check out other cool AD5M related options here:
My PayPal tip jar: https://paypal.me/design8studio