
Simple lithophane frame
We calculate the final price from your selected file. You review and accept it before payment.
Saved on this device.

A simple frame-shaped lamp design that can be used to showcase flat lithophane plates.
- Rating
- 0 / 5
- Likes
- 11
- Downloads
- 16
- Makes
- 0
- Views
- 152
- Reviews
- 0
Updated at source:
Model information
- Source
- Printables
- Category
- Other Art & Designs
- License
- Creative Commons — Attribution
I wanted a simple frame-like lamp that can be used to display lithophane art.
TL;DR
Requirements for the Lithophane plate:
Must be of size:
140x105mm, with rounded corners of size5mm.Must include a rounded edge/lip of
3mmwidth and2mmthickness. For this purpose, the attachedNegativeMask.stlcan be used as a negative volume within your slicer of choice to adapt lithophane plates created using online generators.
Requirements for the electronics:
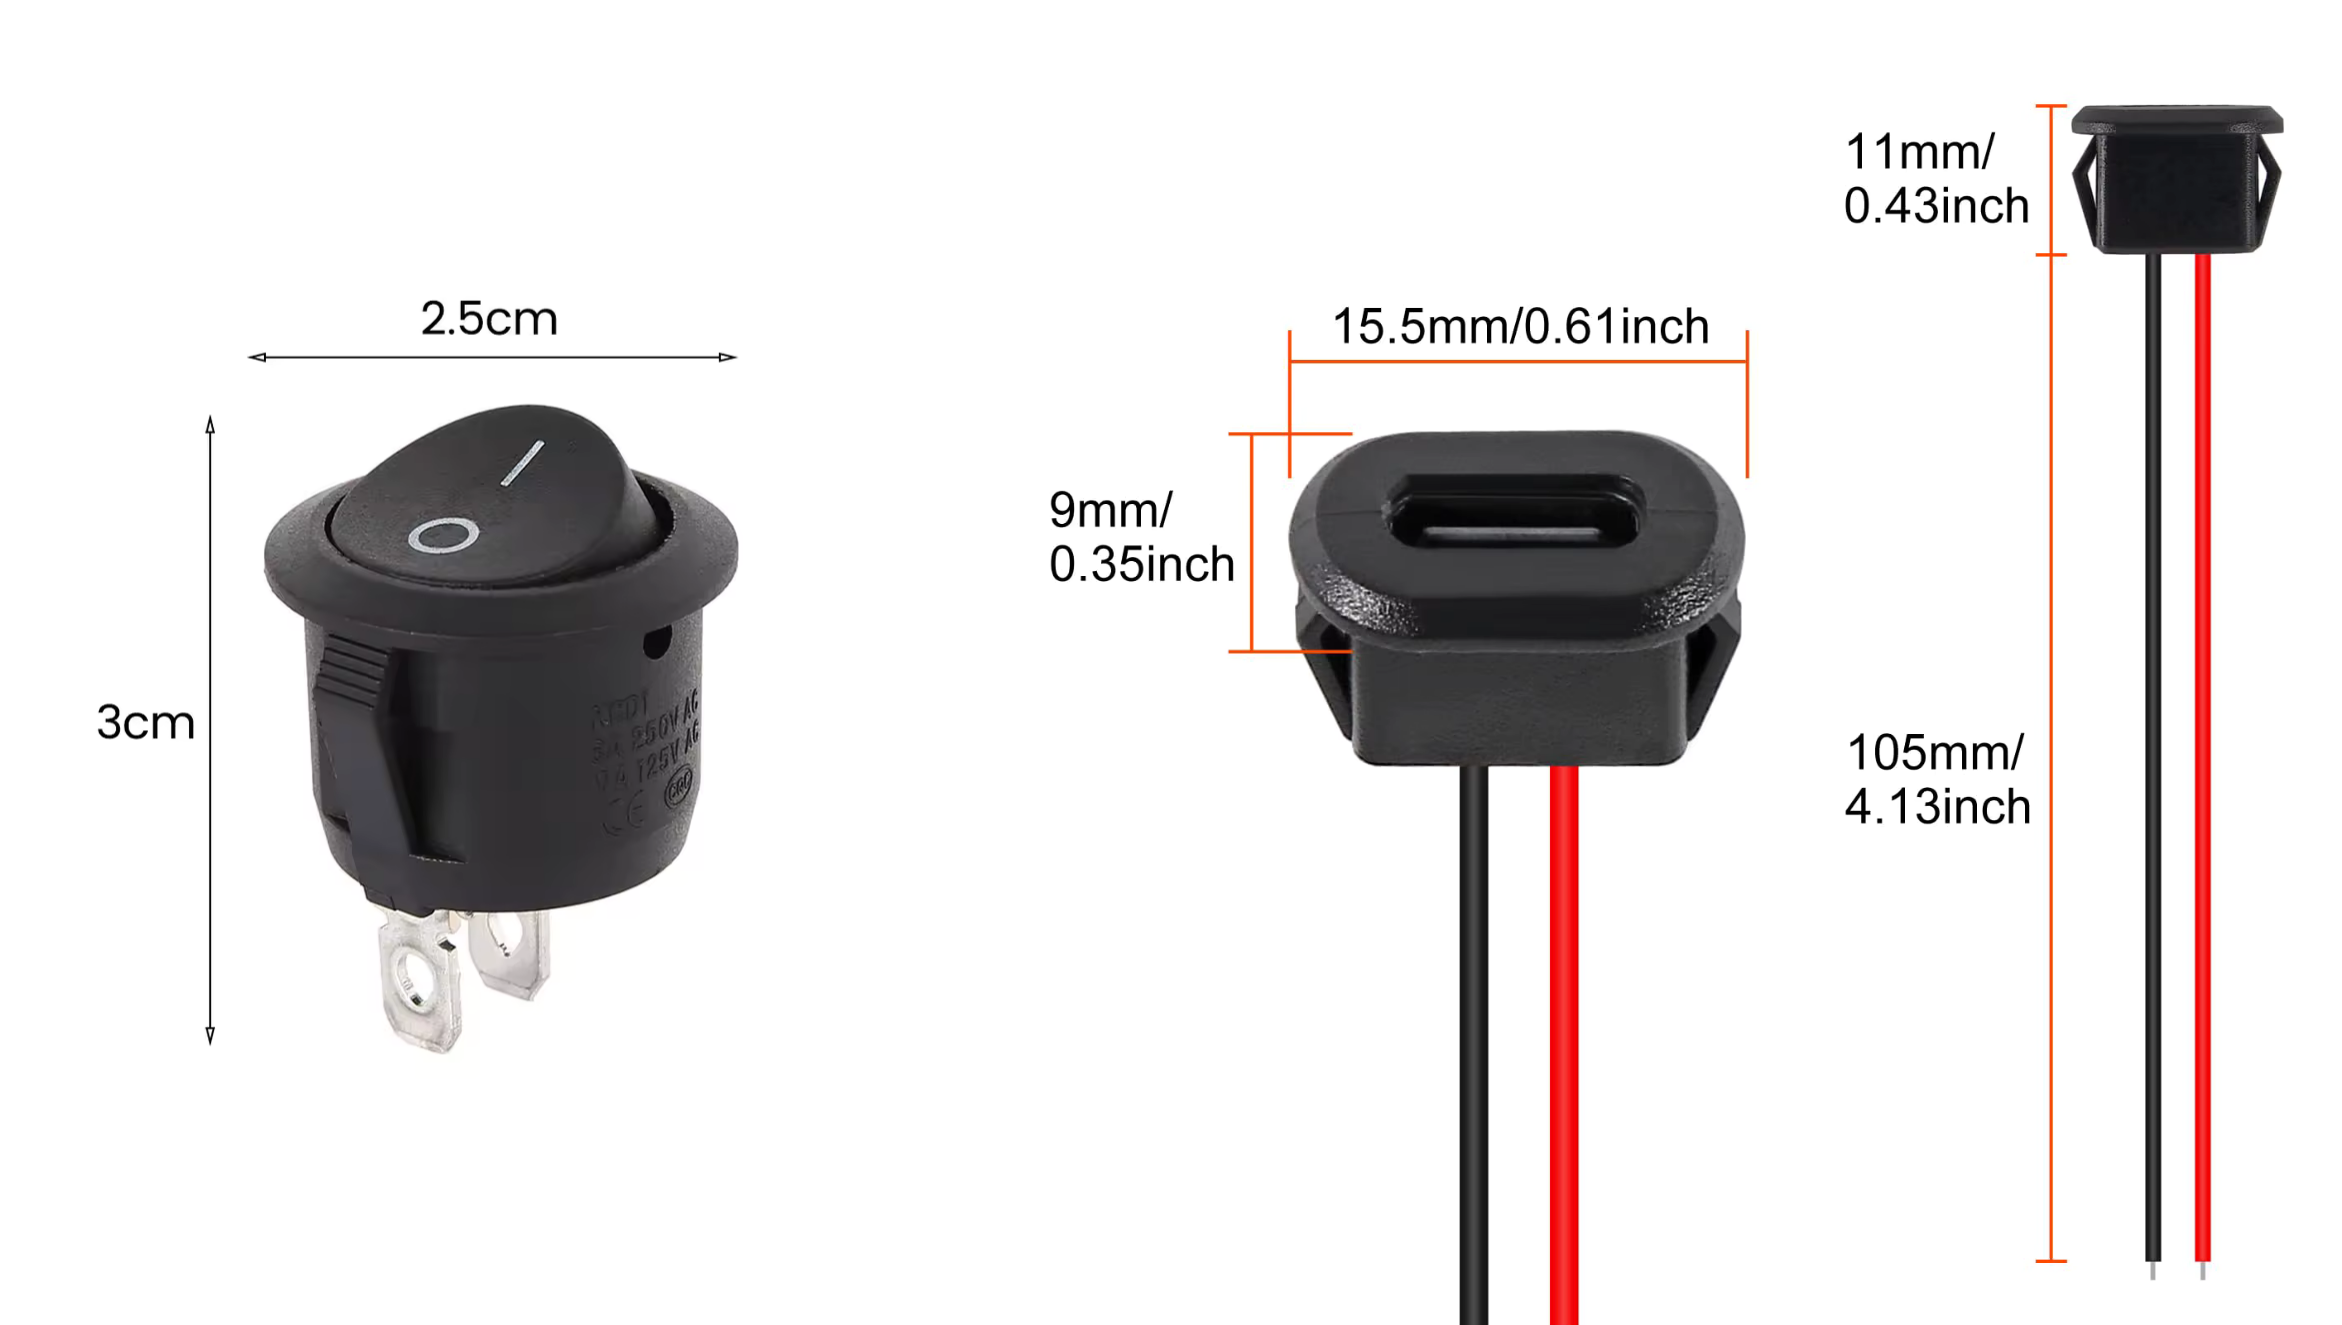
See Figure below for the dimensions of the switch and USB-C port.
LED strips of thickness up to
8mmcan be used, though5mmwide strips are recommended.Required length of the LED strip is
460mm.
Features
The design includes the following features:
Support of both portrait and landscape lithophane plates (the different designs are included in respectively named directories).
USB-C port with power switch.
15° tilt view angle.
No supports required for the print.
No glue/screws or similar required for the assembly.
Assembly
In order to assemble the frame, you will need a USB-C port and a two-pin rounded switch. I do not have exact model numbers but the dimentions of the components I used are shown in the Figure below. I think you will be reasonably safe ordering any components that "vaguely" look similar and have the same dimensions as shown in the Figure below:
The middle frame has an inner thickness of 8.8mm meaning strips up to 8mm in width could be used, I have however only used 5mm wide strips in my assemblies. the total length of LED strip required is: 460mm.
The electrical assembly is quite forward and is shown below:
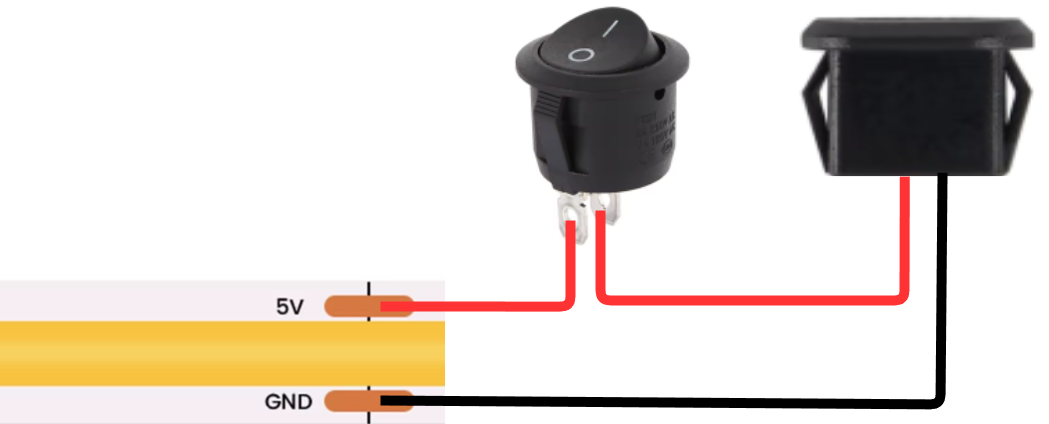
When assembling the electrical components, I recommend doing it in the following order:
Deposite some solder on the switch's poles.
Cut the USB's red cable to leave about
30mmof wire attached to the port. Keep the free piece of wire aside, as it will be used to connect the switch to the LED strip.Insert the switch and port into the
USBSwitchSupportpiece.Solder the red wire from the USB port into the switch.
Solder one of the ends of the free piece of wire from Step 2 to the switch.
Insert the
USBSwitchSupportpiece into theBackPlate. You will need to apply some pressure as the two pieces are simply press-mounted into each other.You will need
460mmof LED strip to cover the inner circumference of theBackPlate.Solder the free end of the red wire coming from the switch into the LED strip's
5Vand the black wire coming from the USB-C port into the the strip'sGND.Stick the LED strip to the inside of the back plate. I recommend gradually removing the protective film from the strip rather than doing it at once.
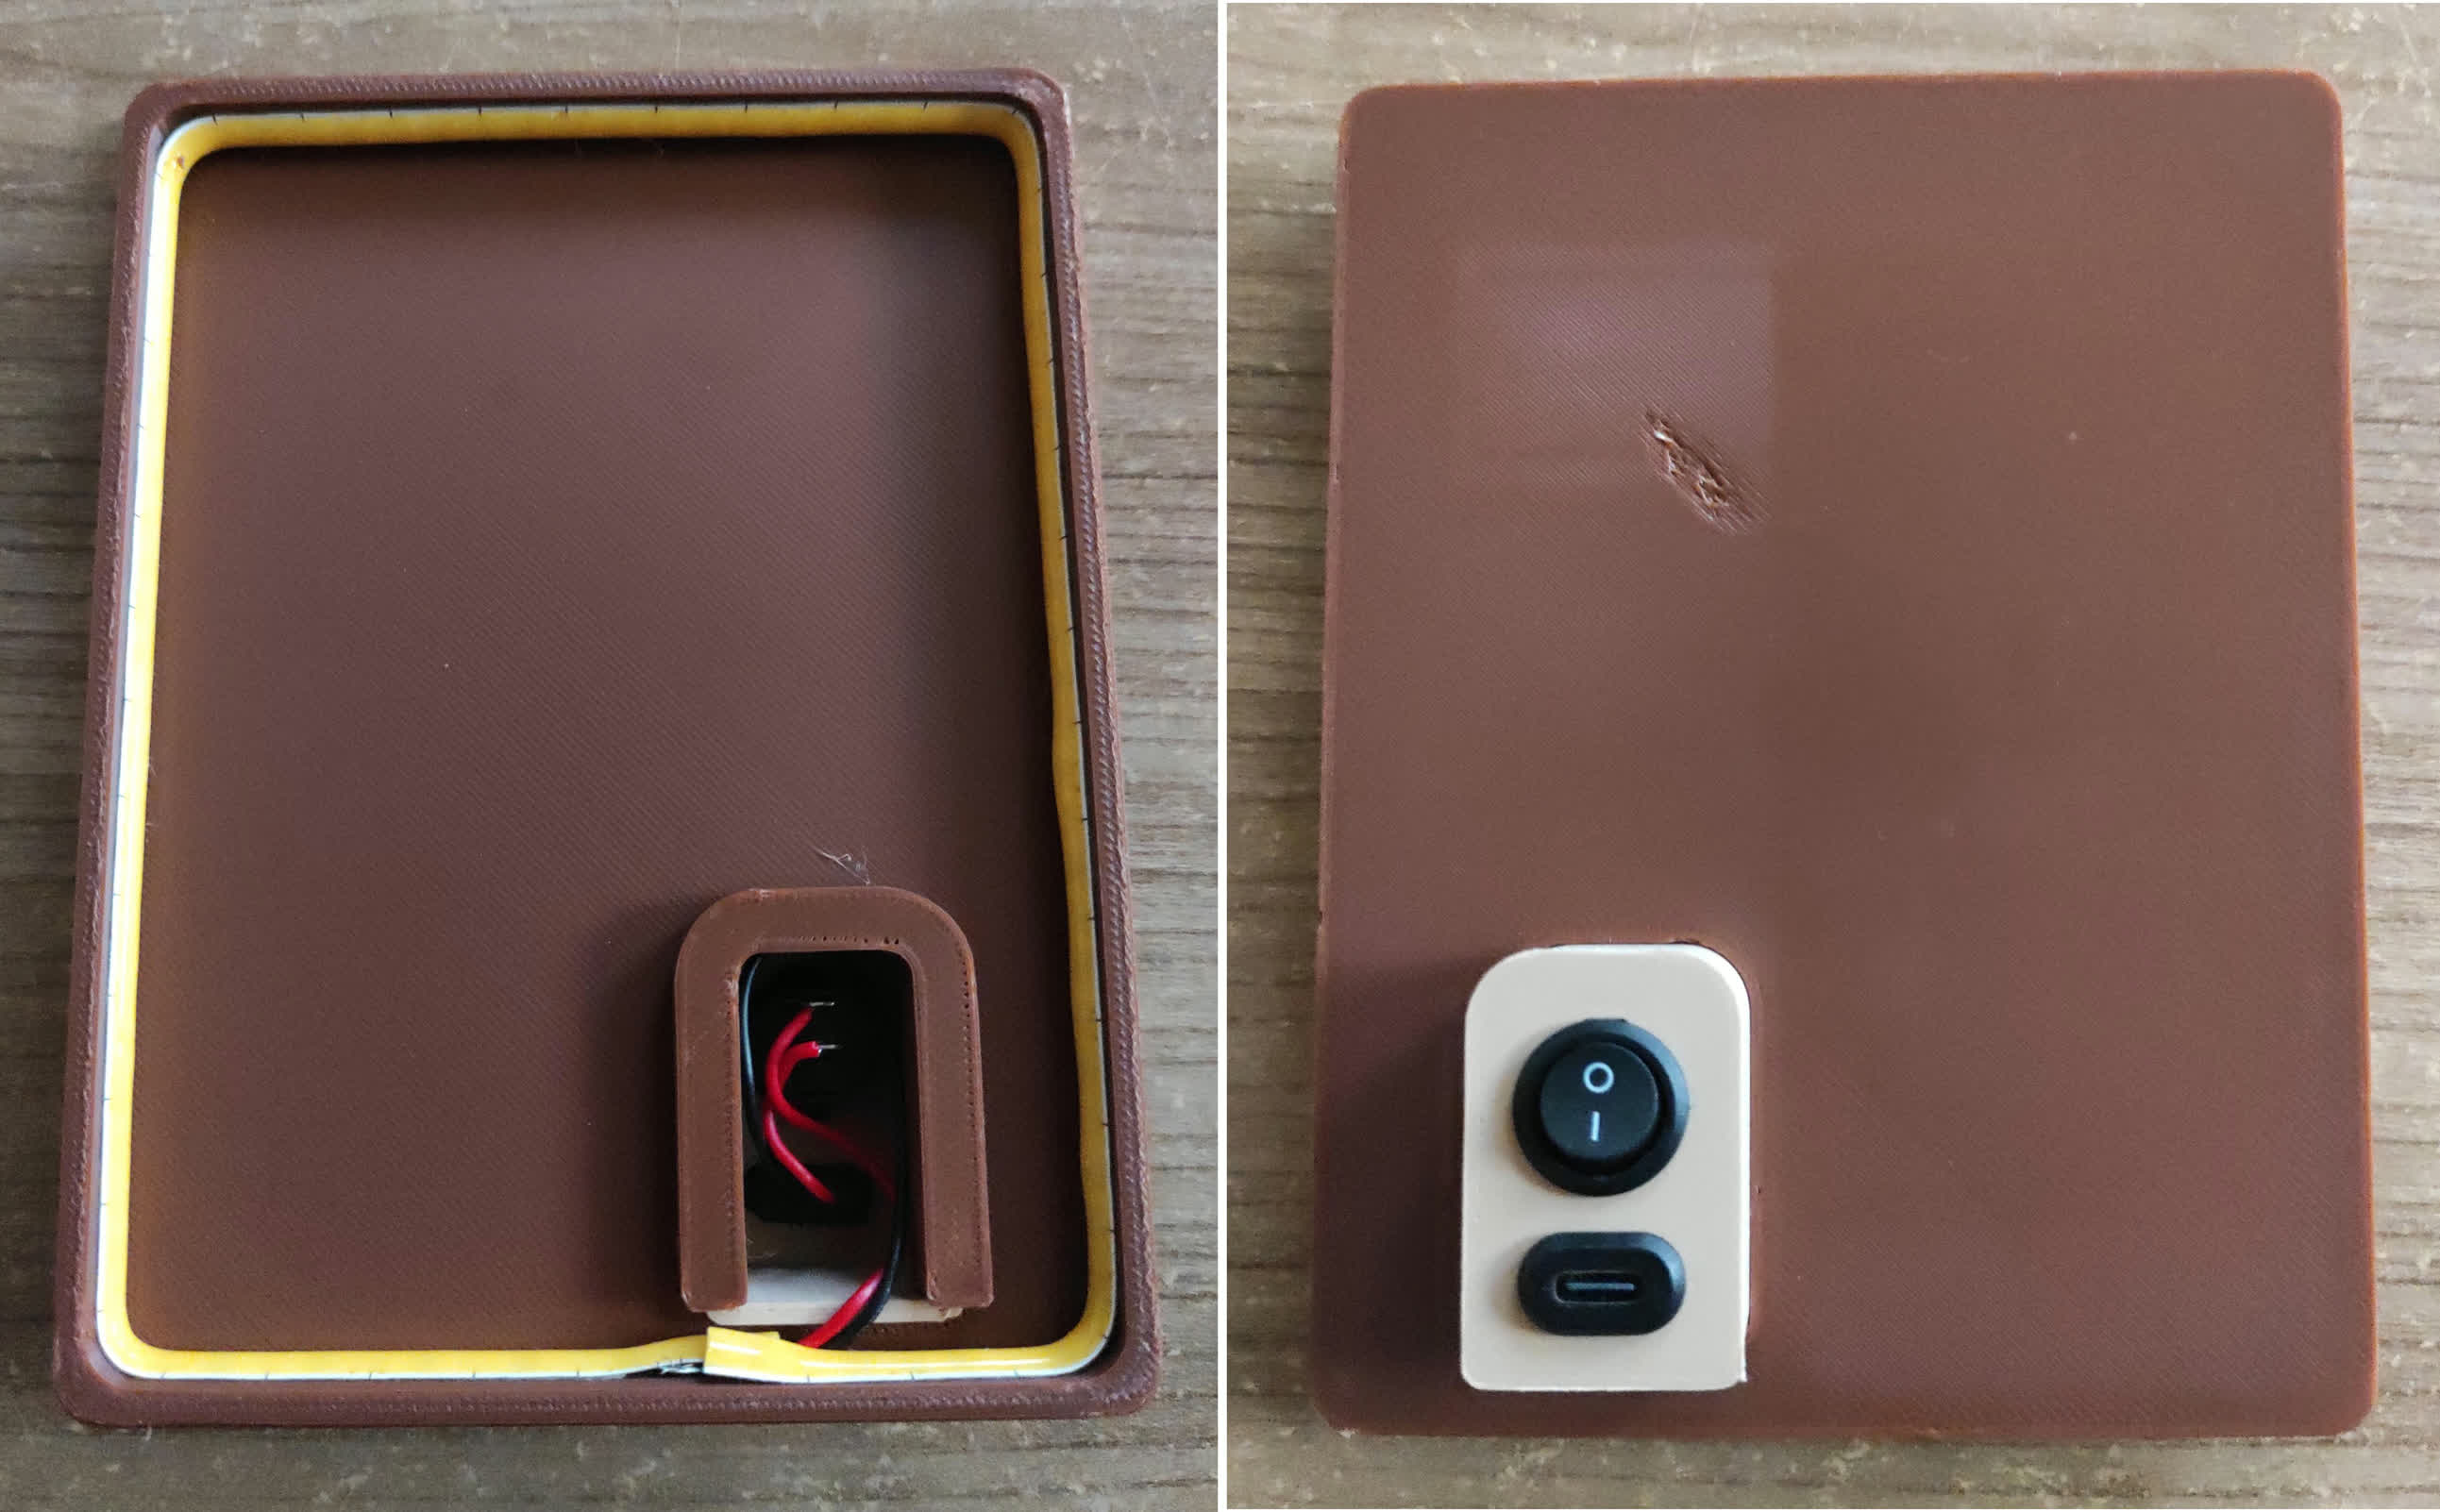
With the electronics mounted into the BackPlate, all that remains is to push the lithophane plate into the MiddleFrame, push the BackPlate into the MiddleFrame and secure the assembly using RightFoot and LeftFoot.
Adapting Lithophane plates to work with the design
The dimensions to use when using online generators (such as https://itslitho.com/) to create your lithophane plate are:
Height and Width of
140x105mm, with rounded corners of size5mm.Border of width
3mmand thickness:2mm.
Most generators I found online do not allow to create rounded rectangles, or rounded borders. For this reason you can use the attached NegativeMask.stl as a negative volume, and add it to the generated lithophane plate within your slicer. The GIF below shows what that looks like within the prusa slicer.
