Windup Airplane
We calculate the final price from your selected file. You review and accept it before payment.
Saved on this device.
Model information
- Source
- Printables
- Category
- Other Toys & Games
- License
- Open Community License v1
Model Assembly
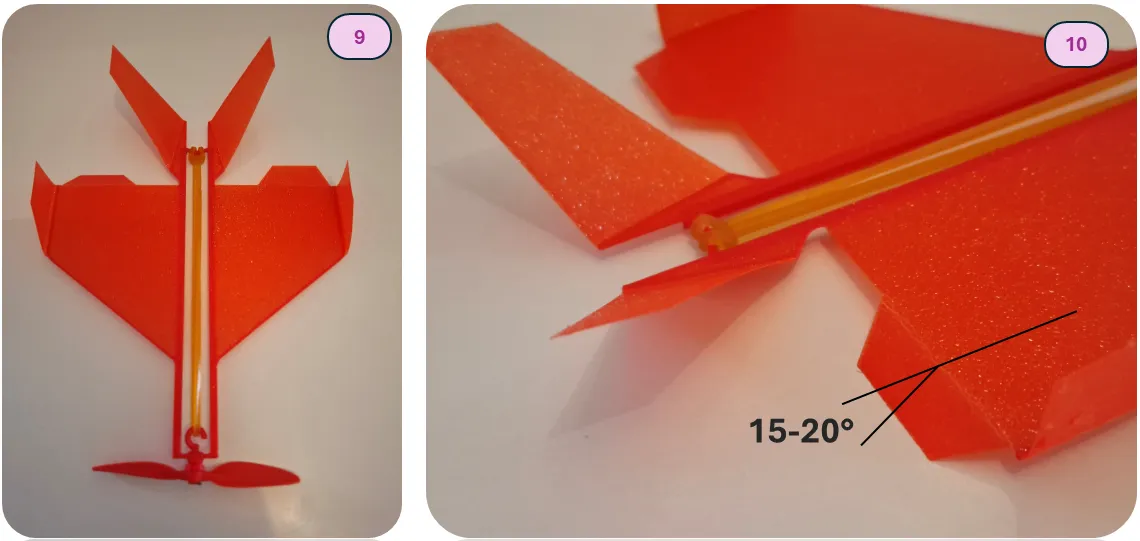
The model consists of 4 parts, as shown in Figure 1.
1 – Plane, 2 – Propeller, 3 – Washer, 4 – Pin.
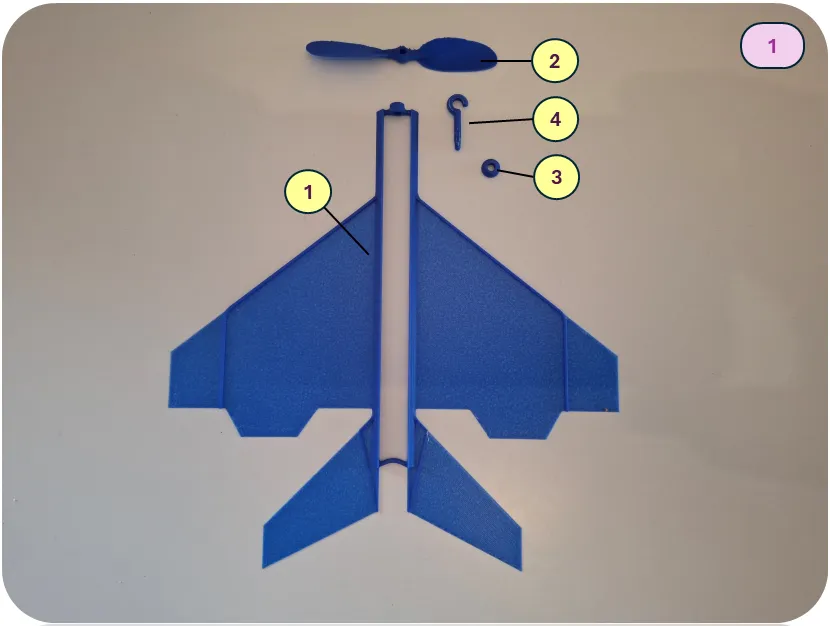
Bend the tail surfaces at a 45-degree angle, as shown in Figure 2.
Make sure the structural frame elements are positioned on the underside of the model, as illustrated in Figures 3 and 4. The wingtip should be bent at a 90-degree angle, as shown in Figure 4.
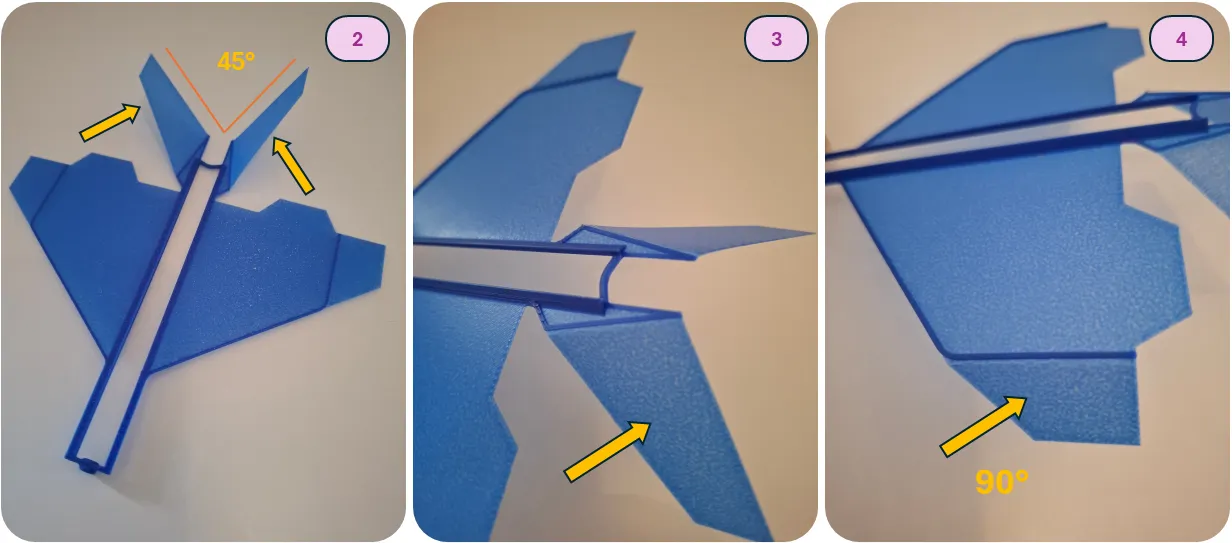
Pre-install the pin (part 4) and washer (part 3) into the plane hub (part 1). Using a twisting motion, attach the propeller to the pin, as shown in Figure 5. Be sure to check the correct propeller orientation, as shown in Figure 6. The curved side of the blades should face forward, in the direction of flight.
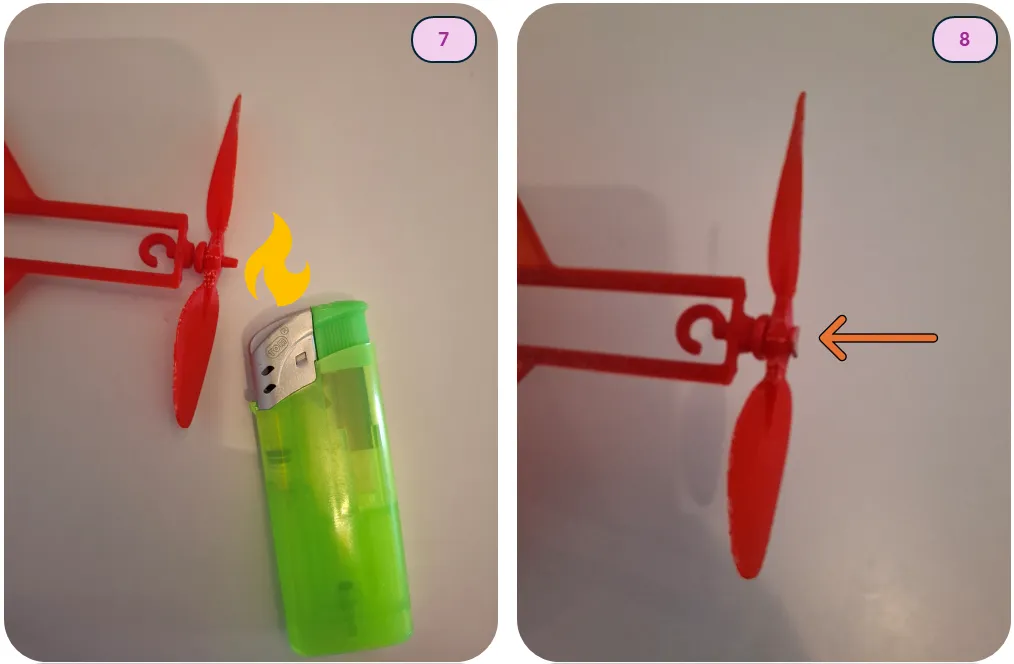
After checking the propeller installation, it needs to be secured.
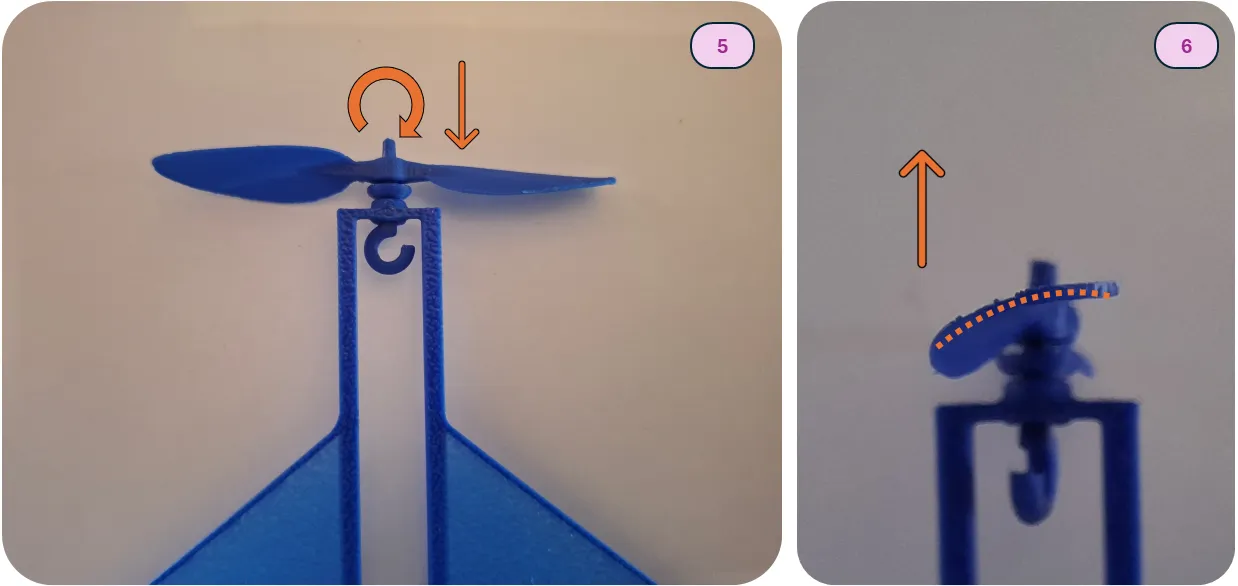
The tip of the pin can be heated with a flame for 2–3 seconds and then pressed to fix the propeller in place (as shown on Figure 7, 8)
Alternatively, the propeller can be glued using cyanoacrylate adhesive.
After securing, make sure the propeller rotates freely. A small amount of friction may occur at first but will disappear after 5–7 launches.