
OpenCube – Modular marble run system
We calculate the final price from your selected file. You review and accept it before payment.
Saved on this device.

Create unique marble runs by combining modular cubes with different paths and levels.
- Rating
- 0 / 5
- Likes
- 63
- Downloads
- 108
- Makes
- 0
- Views
- 979
- Reviews
- 0
Updated at source:
Model information
- Source
- Printables
- Category
- Puzzles & Brain-teasers
- License
- Creative Commons — Attribution — Noncommercial — Share Alike
OpenCube – Modular Marble Run System

Build endless marble run layouts by combining modular 44 mm cubes.
OpenCube is a modular marble run construction system designed from scratch for 3D printing. Combine different cube types to create surface tracks, hidden tunnels, level transitions and multi-level layouts.
✨ Features
Modular 44 mm cube-based construction system
Same-level routes and multi-level transitions
Surface tracks and hidden tunnels
Integrated magnetic alignment system
Optimized for support-free 3D printing
Open and expandable design
📦 Suggested Sets
Starter Set
2 × Base Cubes
6 × Track Cubes (T1, T2, T2, T3, T4, T5)
7 × Drop Cubes (D1, D2, D3, D4, D4, D5, D6)
1 × Start Cube
1 × Finish Cube
1 x 16mm marbles
Total: 17 cubes
📂 Cube Categories
Base
Cubes without paths.
Used as foundations and supports for taller constructions.
Track
Cubes that keep the marble on the same level.
A cube belongs to the Track category when the marble enters and exits at the same elevation.
Drop
Cubes that change the marble's elevation.
Drop cubes use sloped channels and tunnels to move the marble between levels.
Start & Finish
Cubes used to begin and end a marble run.
These elements define the starting point and destination of the track.
🧲 Magnetic Alignment System
OpenCube cubes include integrated pockets for 6 × 2 mm neodymium magnets.
For reliable operation and maximum stability, I strongly recommend installing magnets in all cubes.
Magnets improve:
Vertical stability
Cube alignment
To install magnets:
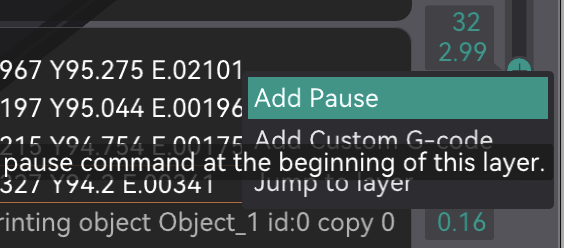
Add a pause at the appropriate layer in your slicer.
Insert the magnets.
Resume printing.
⚠ Ensure magnet polarity remains consistent throughout the entire system.
🖨 Recommended Print Settings
Material: PLA
Infill: 5%
Supports: Not required
OrcaSlicer Recommendations
The models shown in the photos were printed using the following settings:
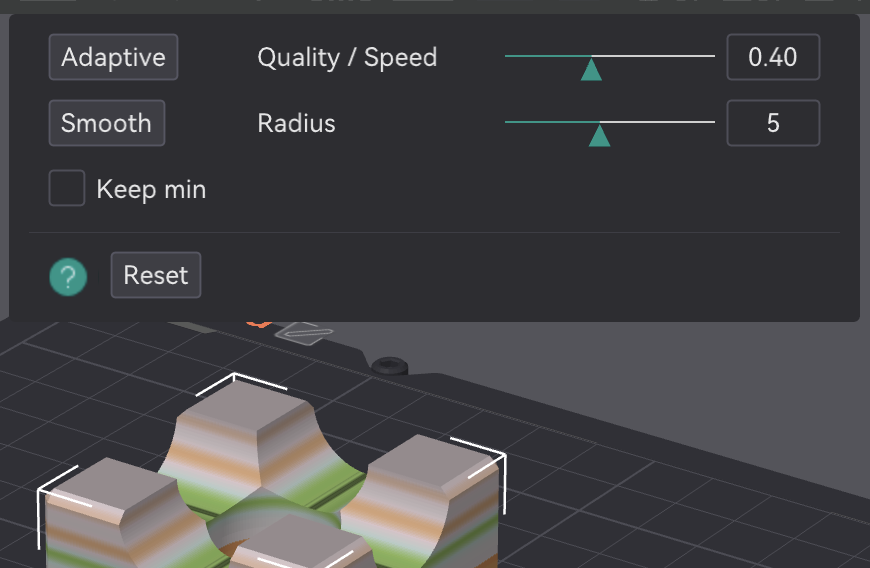
Adaptive Layers: 40
Smoothing: 5
Mouse Ear Brim: Enabled
Adaptive Layers and Smoothing improve curved tunnels, level transitions and reduce stair-stepping on sloped surfaces.
Mouse Ear Brim helps preserve bottom-face geometry, prevents corner lifting and ensures accurate cube alignment.
📐 Model Orientation
All models are already provided in the correct printing orientation.
✔ Rotation around the vertical axis is acceptable.
❌ Do not place another face on the build plate.
Changing the orientation may affect cube functionality and prevent magnet installation.