
Dangletag, customizeable tiny name tag
We calculate the final price from your selected file. You review and accept it before payment.
Preliminary estimate for PETG
€0.07 – €0.09 net (excluding VAT)
For file: dangletag_plate_colorprint_0.25n_0.15mm_PETG_MK3S_5m.gcode
This is an estimate for one file. You’ll confirm the exact price before ordering.
File and estimate settings
File used for this estimate
Average indicative estimate: €0.08 excluding VAT (range midpoint).
- Weight reported by the author
- 1 g
- Print time reported by the author
- 4.8 min
- Source material
- PET
- Estimate material
- PETG
- Estimate printer
- Bambu Lab P1S - 0.4 nozzle
- Estimate process
- 0.20mm Standard
Indicative estimate for the selected file only, based on the author’s weight and print time. File variants are not added together. The final price is calculated after file analysis.
Saved on this device.

Customizeable with STEP file or paper tag; printed ring or cord attachment
- Rating
- 5 / 5
- Likes
- 140
- Downloads
- 291
- Makes
- 2
- Views
- 1,713
- Reviews
- 1
Updated at source:
Model information
- Source
- Printables
- Category
- Other Fashion Accessories
- License
- Creative Commons — Attribution — Noncommercial — NoDerivatives
A small nametag based on my paracord endcap. Customize the STEP file with your name/designation/icon/, and start labelling away. Or use a piece of printed or handwritten paper. And then post some makes and applications!
Changelog
| Dangletag | ||
|---|---|---|
| 2022-06-12 | v0.6 | option for paper frame added |
| 2022-06-12 | v0.5 | minor improvements to carrier, housing and ring |
| 2022-06-10 | v0.4 | initial public release |
Customize - your choices
| ring attachment | cord attachment | |
| paper tag |
|
|
| 3d-printed tag |
|
|
with the provided STEP file for colorprint:
- open dangletag_plate_colorprint.STEP with a CAD of your choice
- add texts/icons to the top side with a height of 0.30mm
- export an STL file to the directory where the downloaded 3MF file is stored
- name it dangletag_plate_colorprint.STL
- open dangletag_plate_colorprint.3MF
- select the (empty) dangletag_plate_colorprint.STL in the model tree or 3d area with the right mouse button, and select #Reload from disk
- your custom model is loaded, proceed as usual
with attachment alternatives
- print the loop provided for download
- use a ø2mm cord that you cut to length, and then attach both ends to form a closed loop
- cap the end of a single 4mm cord
BOM

- nameplate or paper frame
- carrier
- housing
- ring (optional)
Production
- this only works with 0.25mm nozzle and 0.15mm layer height
- Tested with PETG and ABS; PETG is recommended for the carrier (2.), as it is less prone to break
- the housing has quite a small footprint; while it attaches ok to a PEI sheet, you might want to add a brim on other surfaces
- advice: mitigate the blob on the colorprint by printing always one part more than you need
Assembly
Depends on your choice of attachment. 3d-printed loop and nameplate are shown here exemplary.
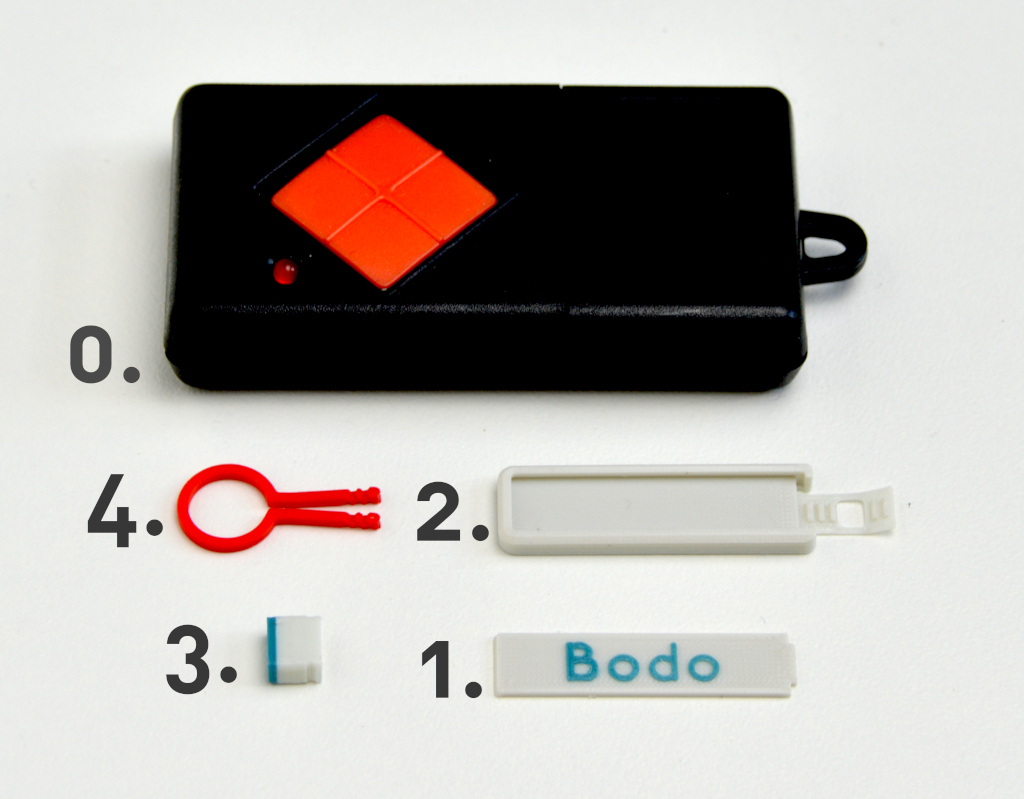
All components. 0.) is a remote control that the Dangletag will be attached to.
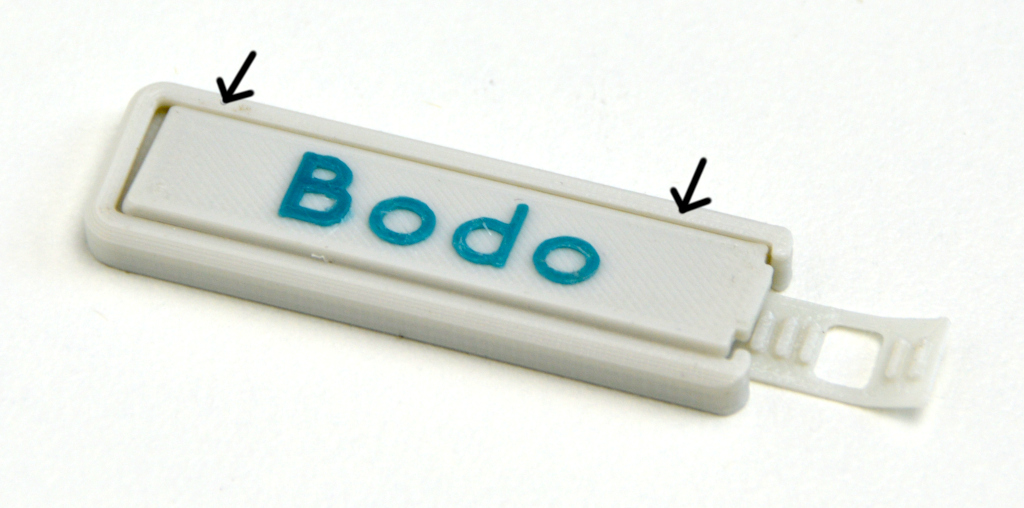
Slip the nameplate into the carrier by aligning it into the top of the cavity.
In case of the paper frame, you'd place the paper first, and the mount the frame in the same way. To ease orientation of the frame, it has a bigger radius in the bottom right corner:


Push it down and slide it to the left.
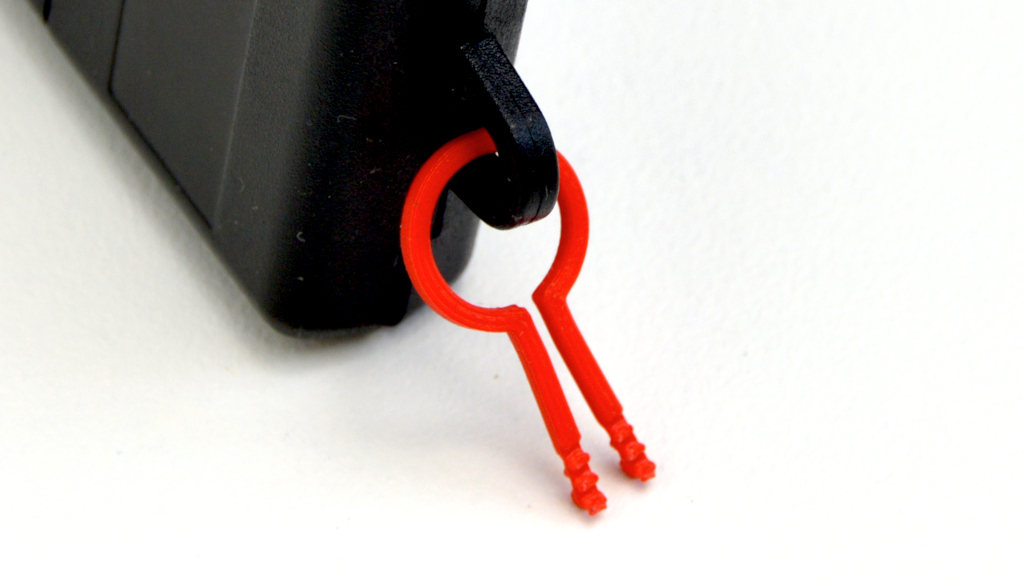
Attach the ring (or the cord) to the item you want to tag.
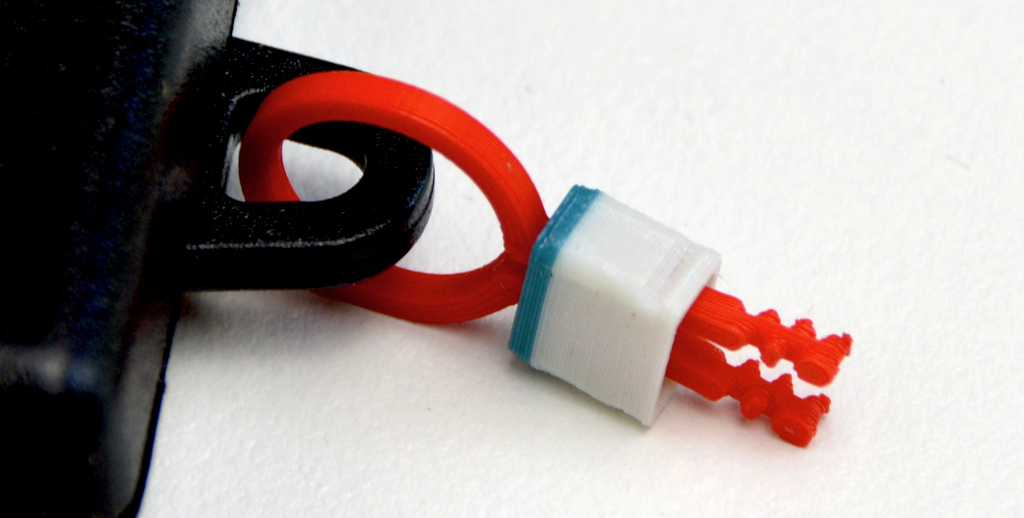
Slide the housing onto the ring. Take note that the end with the grooves point to the direction of the plate.
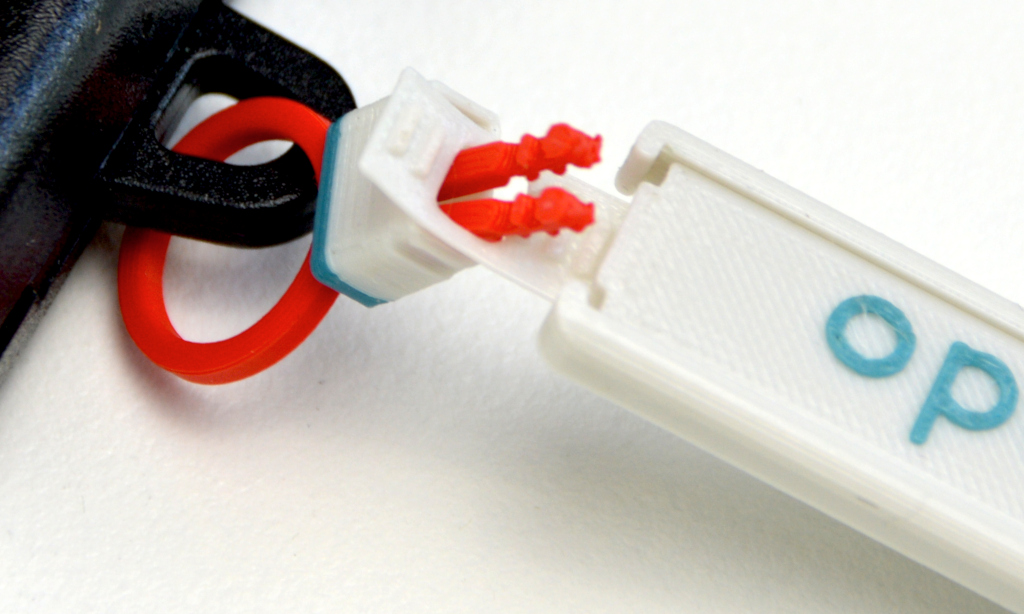
Then slide the ring through the hole of the carrier. There's two and three ribs on the carrier. Align the ring accordingly.
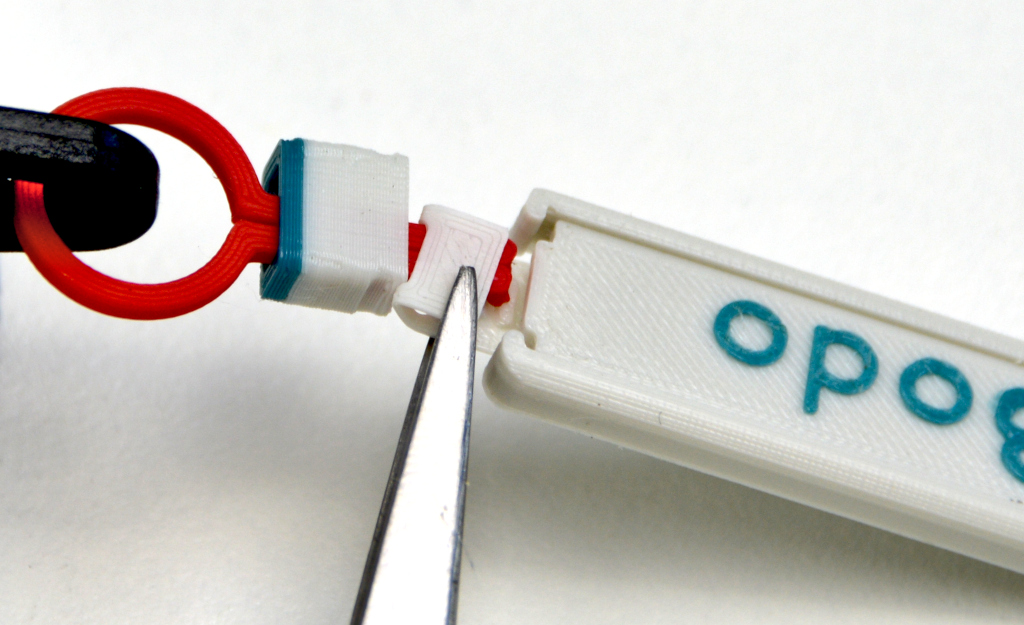
Gently bend the latch over.

Make sure all ribs engage.
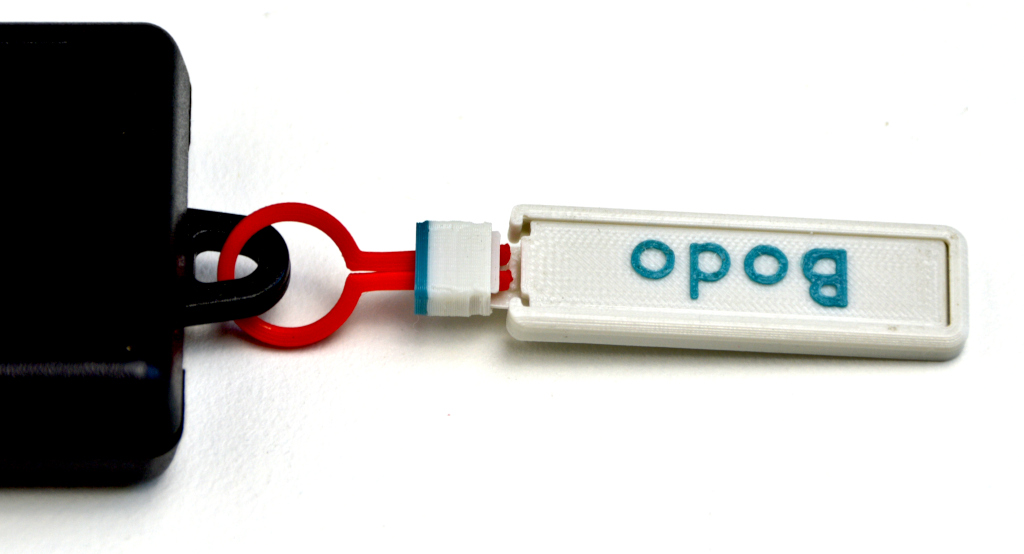
Now slide the housing over the bent latch.
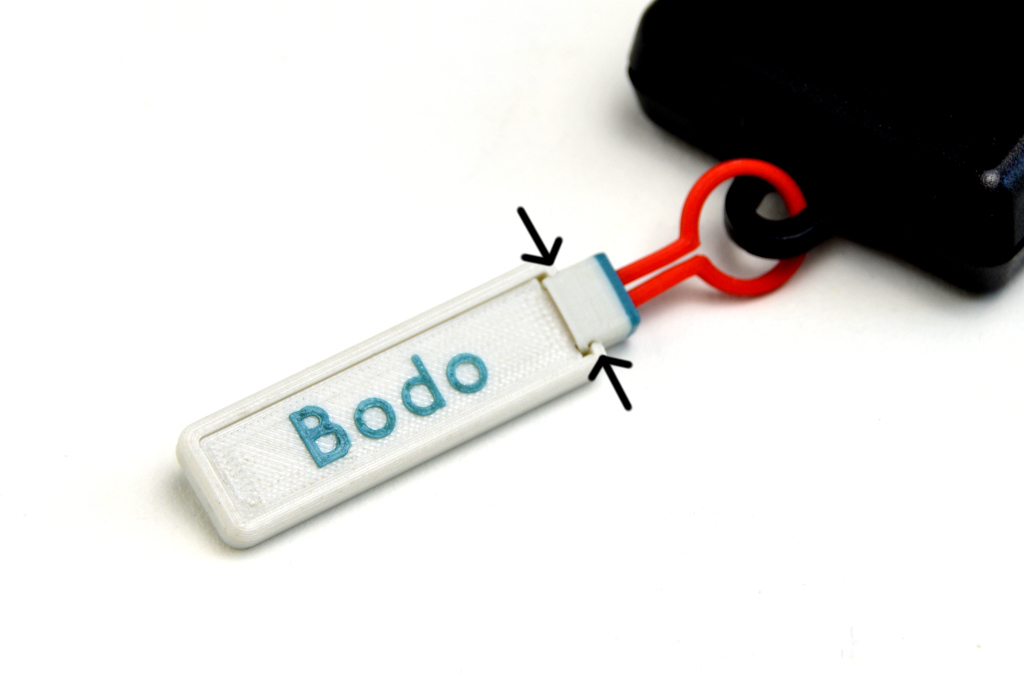
Force it further until the hooks engage fully.
More
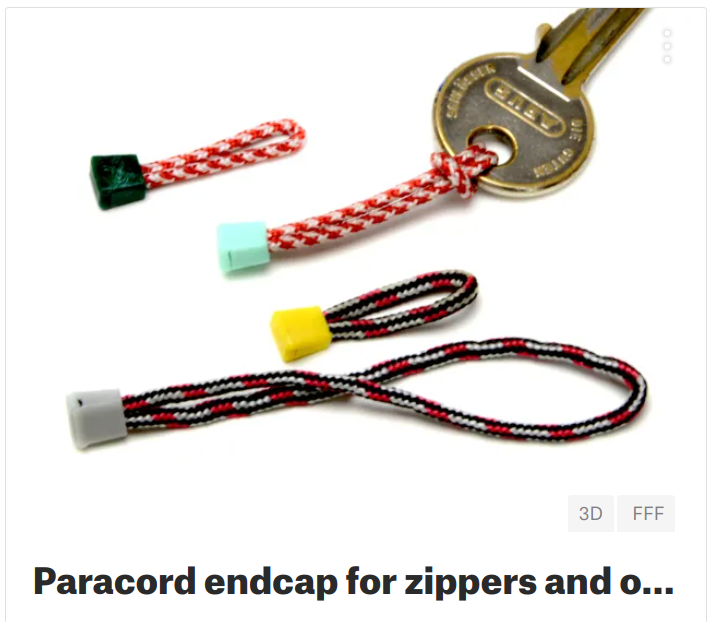
Paracord endcap for zippers and other uses - 2× ø2mm or 1× ø4mm