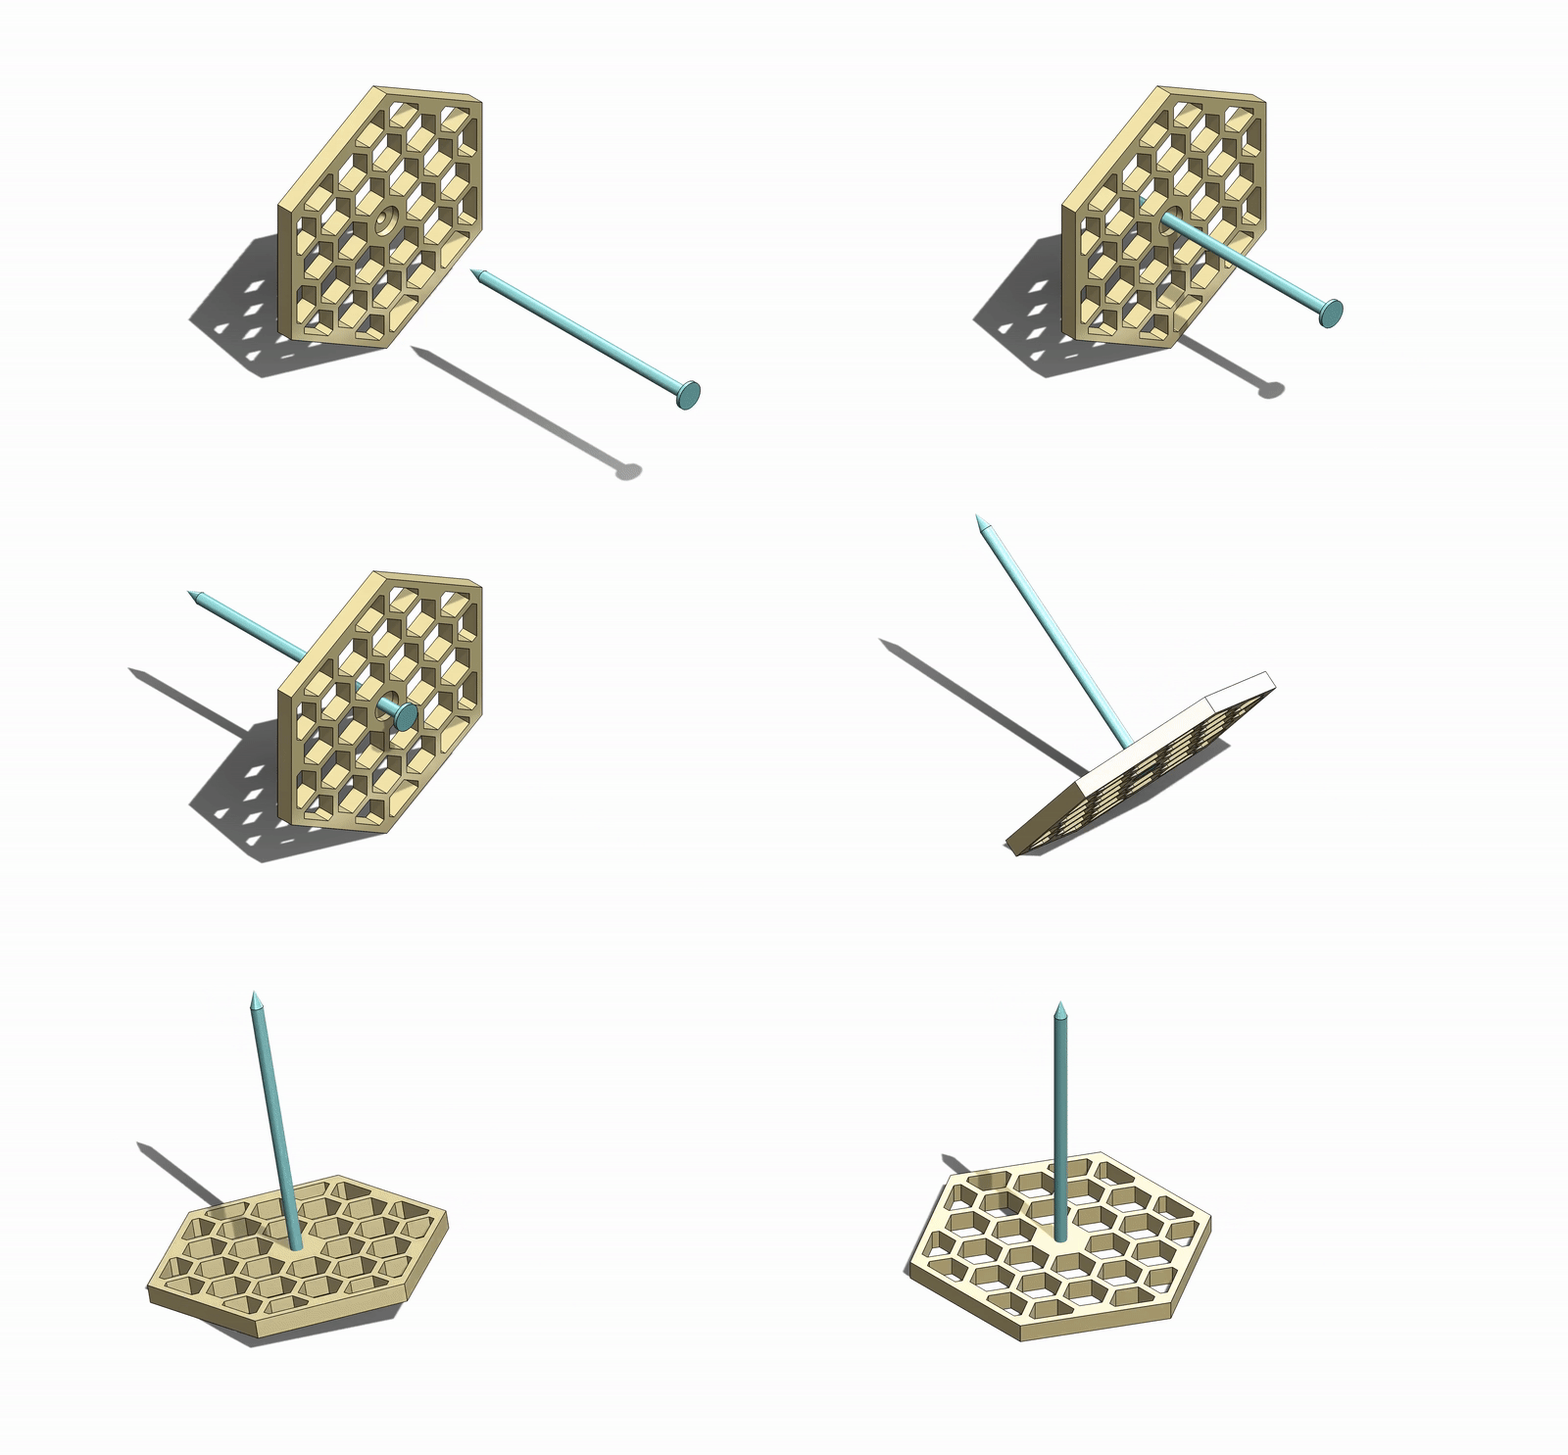
Receipt Punch Base With Hexagonal Pattern
We calculate the final price from your selected file. You review and accept it before payment.
Preliminary estimate for PETG
€1.36 – €1.67 net (excluding VAT)
For file: CE3PRO_base pinchador.gcode
This is an estimate for one file. You’ll confirm the exact price before ordering.
File and estimate settings
File used for this estimate
Average indicative estimate: €1.51 excluding VAT (range midpoint).
- Weight reported by the author
- 11 g
- Print time reported by the author
- 1.93 hr
- Source material
- PET
- Estimate material
- PETG
- Estimate printer
- Bambu Lab P1S - 0.4 nozzle
- Estimate process
- 0.20mm Standard
Indicative estimate for the selected file only, based on the author’s weight and print time. File variants are not added together. The final price is calculated after file analysis.
Saved on this device.

A receipt punch for storing all your Post-it notes, tickets and receipts.
- Rating
- 5 / 5
- Likes
- 7
- Downloads
- 76
- Makes
- 0
- Views
- 477
- Reviews
- 1
Updated at source:
Model information
- Source
- Printables
- Category
- Office
- License
- Creative Commons — Attribution — Noncommercial — Share Alike
As previously stated, this is a model for a receipt punch base.
For the whole assembly, you will need to print the base and pick a nail.
The one that I used had a diameter of 3.4 mm through the "body" (this is the diameter of the small central hole) and a "head" with a diameter of 7.7 mm and the heigth of 2.5 mm.
In the following image I have detailed the most important dimensions:
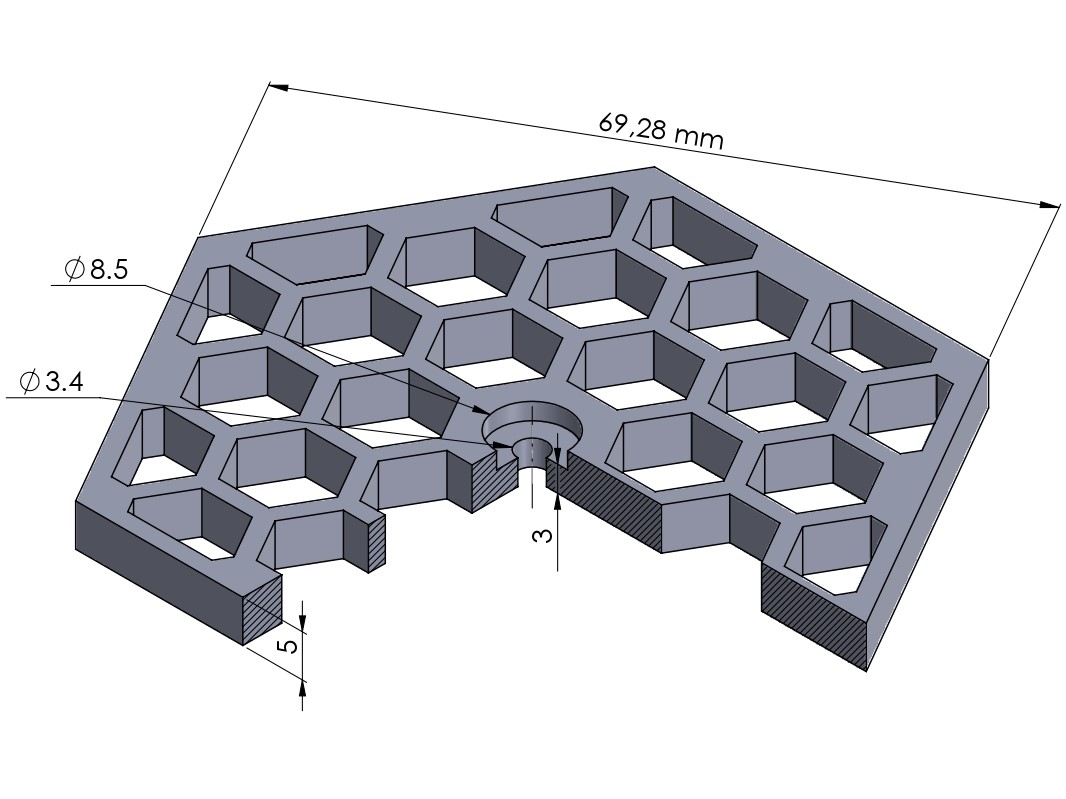
Since you may want to modify the model (most certainly the central holes), apart from the .STL I also included the .SLDPRT SOLIDWORKS 2020 file for the base.
In the case that you may want to download the hexagonal pattern on its own in “blank”, you can get it in one of my previous post here: Coaster With Hexagonal Pattern & Dispenser
Print Settings
Printed in PETG, without supports or rafts, at 0.2 mm resolution and 100% infill.
It can be printed as it is, there is no need for supports or rafts.
Assembly
The assembly is pretty straight forward, you just inssert the nail in to the hole of the base. Then, you can glue them together or just let them stuck by friction.
It may be the case that you have to sand the hole, making it bigger, to fit the nail.