Adjustable Tablet Stand 200x150mm
We calculate the final price from your selected file. You review and accept it before payment.
Preliminary estimate for PETG
€2.23 – €2.73 net (excluding VAT)
For file: TabletStand_02_0.2mm_PETG_MK3S_2h43m.gcode
This is an estimate for one file. You’ll confirm the exact price before ordering.
File and estimate settings
File used for this estimate
Average indicative estimate: €2.48 excluding VAT (range midpoint).
- Weight reported by the author
- 28 g
- Print time reported by the author
- 2.72 hr
- Source material
- PET
- Estimate material
- PETG
- Estimate printer
- Bambu Lab P1S - 0.4 nozzle
- Estimate process
- 0.20mm Standard
Indicative estimate for the selected file only, based on the author’s weight and print time. File variants are not added together. The final price is calculated after file analysis.
Saved on this device.

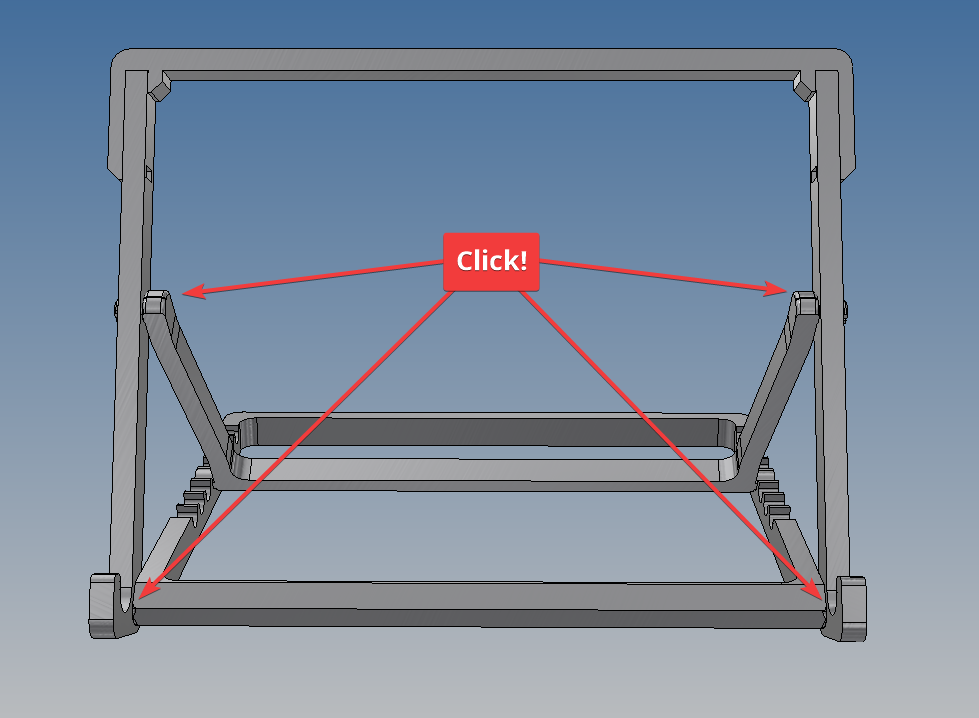
Snap-together adjustable tablet stand printed without supports.
- Rating
- 5 / 5
- Likes
- 57
- Downloads
- 370
- Makes
- 5
- Views
- 1,761
- Reviews
- 5
Updated at source:
Model information
- Source
- Printables
- Category
- Portable Devices
- License
- Creative Commons — Attribution — Noncommercial — Share Alike
This is more or less influenced by many tablet stands out there, the design is not that complex or unique. It is quite big, I designed it for a 13" drawing tablet that my wife uses. The outer dimensions are 200 mm wide and 150 mm high. The angle is adjustable in 8 steps between roughly 82° highest and 46° lowest setting.
It is designed to print without supports and has a snap-together assembly.
I recommend printing in PETG and 3 perimiters with at least 15% infill.
Due to the parts being very long and thin they're prone to warp, so I've added small pads to help holding the most pointy corners down. The pads can be easily removed with a wire cutter or similar for a clean cut.
I've included two .3mf-files: “TabletStand_01.3mf” and “TabletStand_02.3mf” for easy setup. The separate STL:s are also included.
Assembly instruction:
The main parts holding the tablet need to be assembled.
- Take the arm part and slip it into the notch in the crossmember.
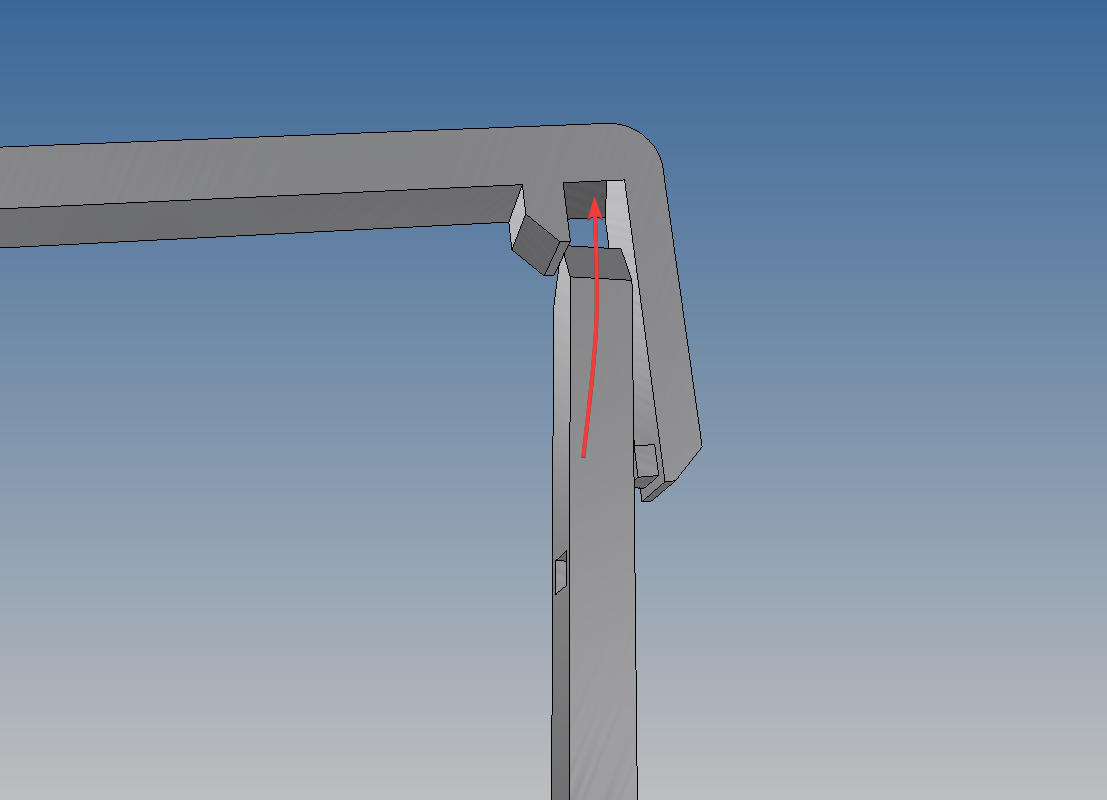
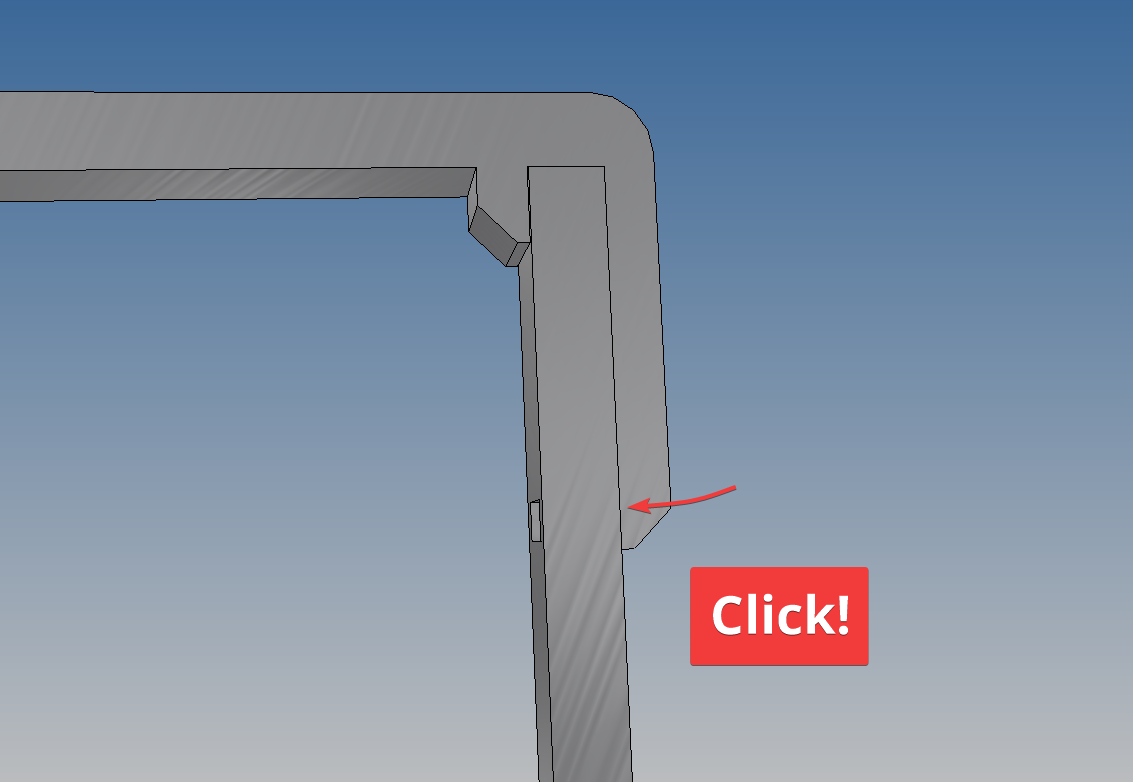
- When the arm part is all the way in, the outer bracket with the small ledge should click into place or it can be pressed in.
- The rest is just to snap together.