
🤖 Peg Board Generator 🤖
We calculate the final price from your selected file. You review and accept it before payment.
Saved on this device.

Generate your own peg board! With mount holes and spliting functionality.
- Rating
- 5 / 5
- Likes
- 379
- Downloads
- 1,562
- Makes
- 2
- Views
- 7,923
- Reviews
- 3
Updated at source:
Model information
- Source
- Printables
- Category
- Organizers
- License
- Creative Commons — Attribution
Generate your own peg board! With mount holes and splitting functionality. It uses the standard dimensions (1inch spacing, 1/4inch holes, and 3/16inch thickness) so have fun combing it with all of the great things people will come up with for this Peg Board Contest.
Ready to use!
I have pre-generated two common options for the MK3 and the MINI. See the image below for file name reference. Those are the only parts you need to make a board of any size as you can re-use the “5” piece for all of the center sections and sides 2,4,6,8 for their respective edges.
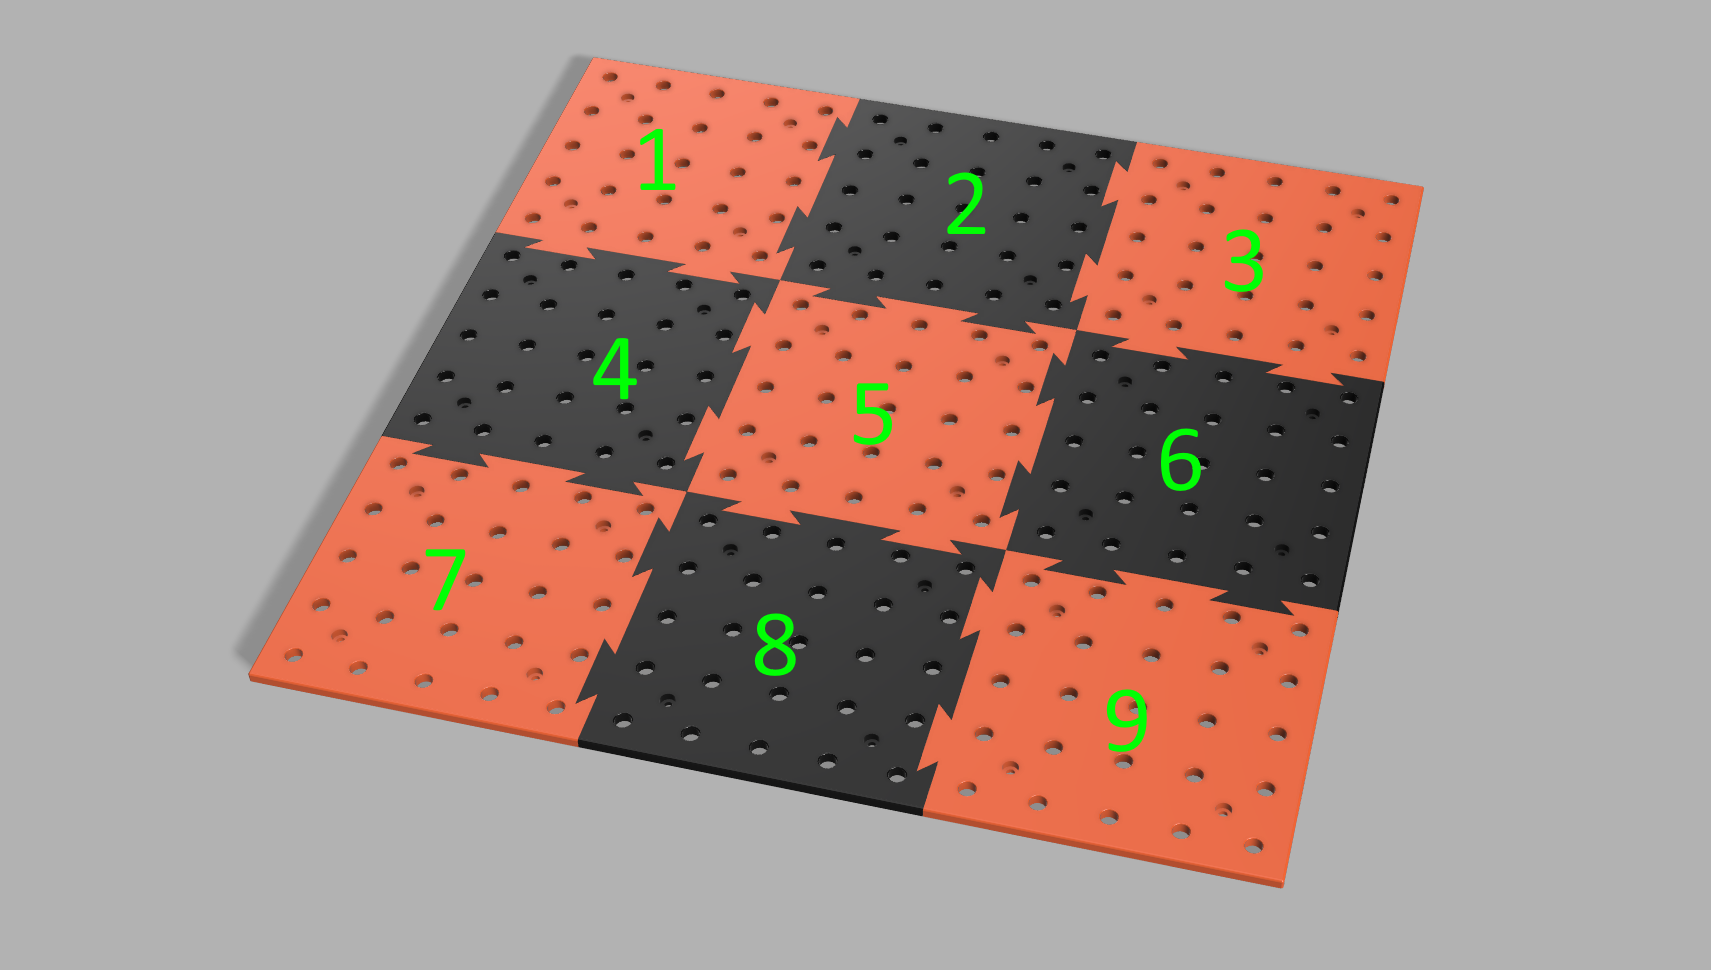
Each section has 4 M3 counter sunk mounting holes. (this does mean pieces like 1 and 9 are NOT interchangable)
The default gap between panels is 0.1mm which I found works well for Prusa printers(and most other quality printers).
Generator
I tried my best to make this as simple as possible all you need to do is change some values in the fusion 360 values section.

Here you will find these parameters:

- height and width determine the number of pegs in each direction.
- pegsPerSection determines the section cut size ideally you would want this to be a divisor of width and height meaining you will get nice equal cuts.
- gap determins the tolerance between the pieces 0.1mm should work on a decent printer to provide a tight fit but you can increase it if you find it too little.
- Wcuts and Hcuts are calculated for you so you do not need to change them.
NOTE: Most of the time you would want to create a set of 9 like I did for my examples in which case height and width should just be 3x the pegsPerSection.
TIP: To prevent Fusion 360 from caclulating the changes for each variable change you can move the view to the start of the timeline, then adjust all of the variables and finally shift it back to get your objects.