
Robust BUCKLES
We calculate the final price from your selected file. You review and accept it before payment.
Saved on this device.

Buckles designed in an unique way for 3d printing and durability. 8 different sizes.
- Rating
- 4.888 / 5
- Likes
- 17,161
- Downloads
- 30,986
- Makes
- 455
- Views
- 128,289
- Reviews
- 375
Updated at source:
Model information
- Source
- Printables
- Category
- Other Gadgets
- License
- Creative Commons — Attribution — Noncommercial — Share Alike
The goal was to create a buckle design that is durable and of course adapted to 3d printing.
It often happens that the buckle (e.g. on a backpack) breaks when you step on it. I believe that these 3d printed buckles will last, since they are basically two plates that fit together. For latches I'm using a compliant levers integrated and better protected in the printed part.
This model is outdated, be sure to check out the improved model here: https://www.printables.com/model/1759303-robust-buckles
Update (19/10/2022): Tuned clearance of mating surfaces for better sliding of parts. All parts except the pins are new.
Update (15/11/2022): Added 2 new widths, 41mm and 46mm. Added .stp files for F21 and M21 (FREE end parts).
Update (11/05/2023): Added 17mm width.
Update (01/2024): Added .stp files for 21mm LOOP end parts.
Here is a short video introduction:

Variants:
The BUCKLEs comes in 8 widths of the slot for strap (17mm, 21mm, 26mm, 31mm, 38mm, 41mm, 46mm and 51mm).
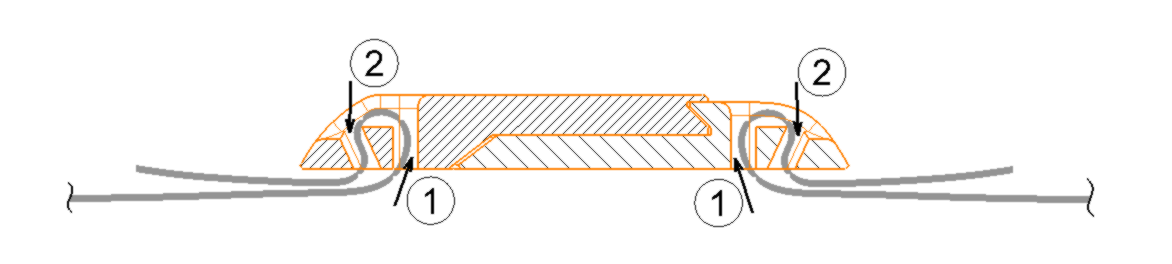
Every width comes in 2 variants. There are parts for FREE end straps (see strap threading steps below),
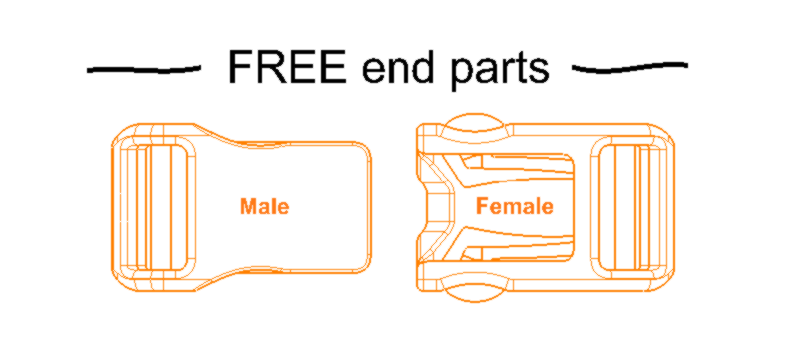
and parts for LOOP end straps with pins.

You can combine LOOP end Male with FREE end Female and vice versa.
Explanation of the name of the STLs:

Printing:
I recommend printing with PETG because of its flexibility, 0.2mm layerheight and 3 perimeters.
“Female” parts need to be supported only under the buttons that protrude from the body. For convenient post processing turn off the “Detect bridging perimeters” parameter (Print settings/ Layers and perimeters in PRUSA Slicer).


“Male” parts for FREE end could have support under the pins, but may be not if you trust your printer's bridging capabilities (for example I printed the M21 without supports).

All “Male” parts are printed upside down (see picture above).
Post processing:
1/ Remove supports.
2/ Push on the buttons of the “Female” parts to break it from the body.
3/ Use.
Also check out: