
Extrusion Multiplier Calibration Print
We calculate the final price from your selected file. You review and accept it before payment.
Saved on this device.

A quick and easy print to tune your extrusion multiplier!
- Rating
- 5 / 5
- Likes
- 37
- Downloads
- 397
- Makes
- 4
- Views
- 3,555
- Reviews
- 4
Updated at source:
Model information
- Source
- Printables
- Category
- Test Models
- License
- Creative Commons — Attribution — Share Alike
These are calibration model designed to be use with the Print Tuning Guide by Andrew Ellis.
Specifically, for the part of tuning extrusion multiplier.
This is designed for PrusaSlicer since at this time PrusaSlicer doesn't support setting flow rate / extrusion multiplier per object.
But, it should work with any slicer that supports inserting custom G-code at specific layer (or you can do it manually).
Calibrate your extrusion steps and pressure advanced first!
The print takes about 20 minutes.
Print Settings
- Layer height: 0.2mm (or the most common setting you use)
- Infill: 20% rectilinear
- Top layer: 5 layers, line width 100% (same as the nozzle diameter)
- Bottom layer: 2 or 3 layer, just to save time
Slicing
After slicing, scroll to layer two and right click on the “+” sign to add custom G-code.

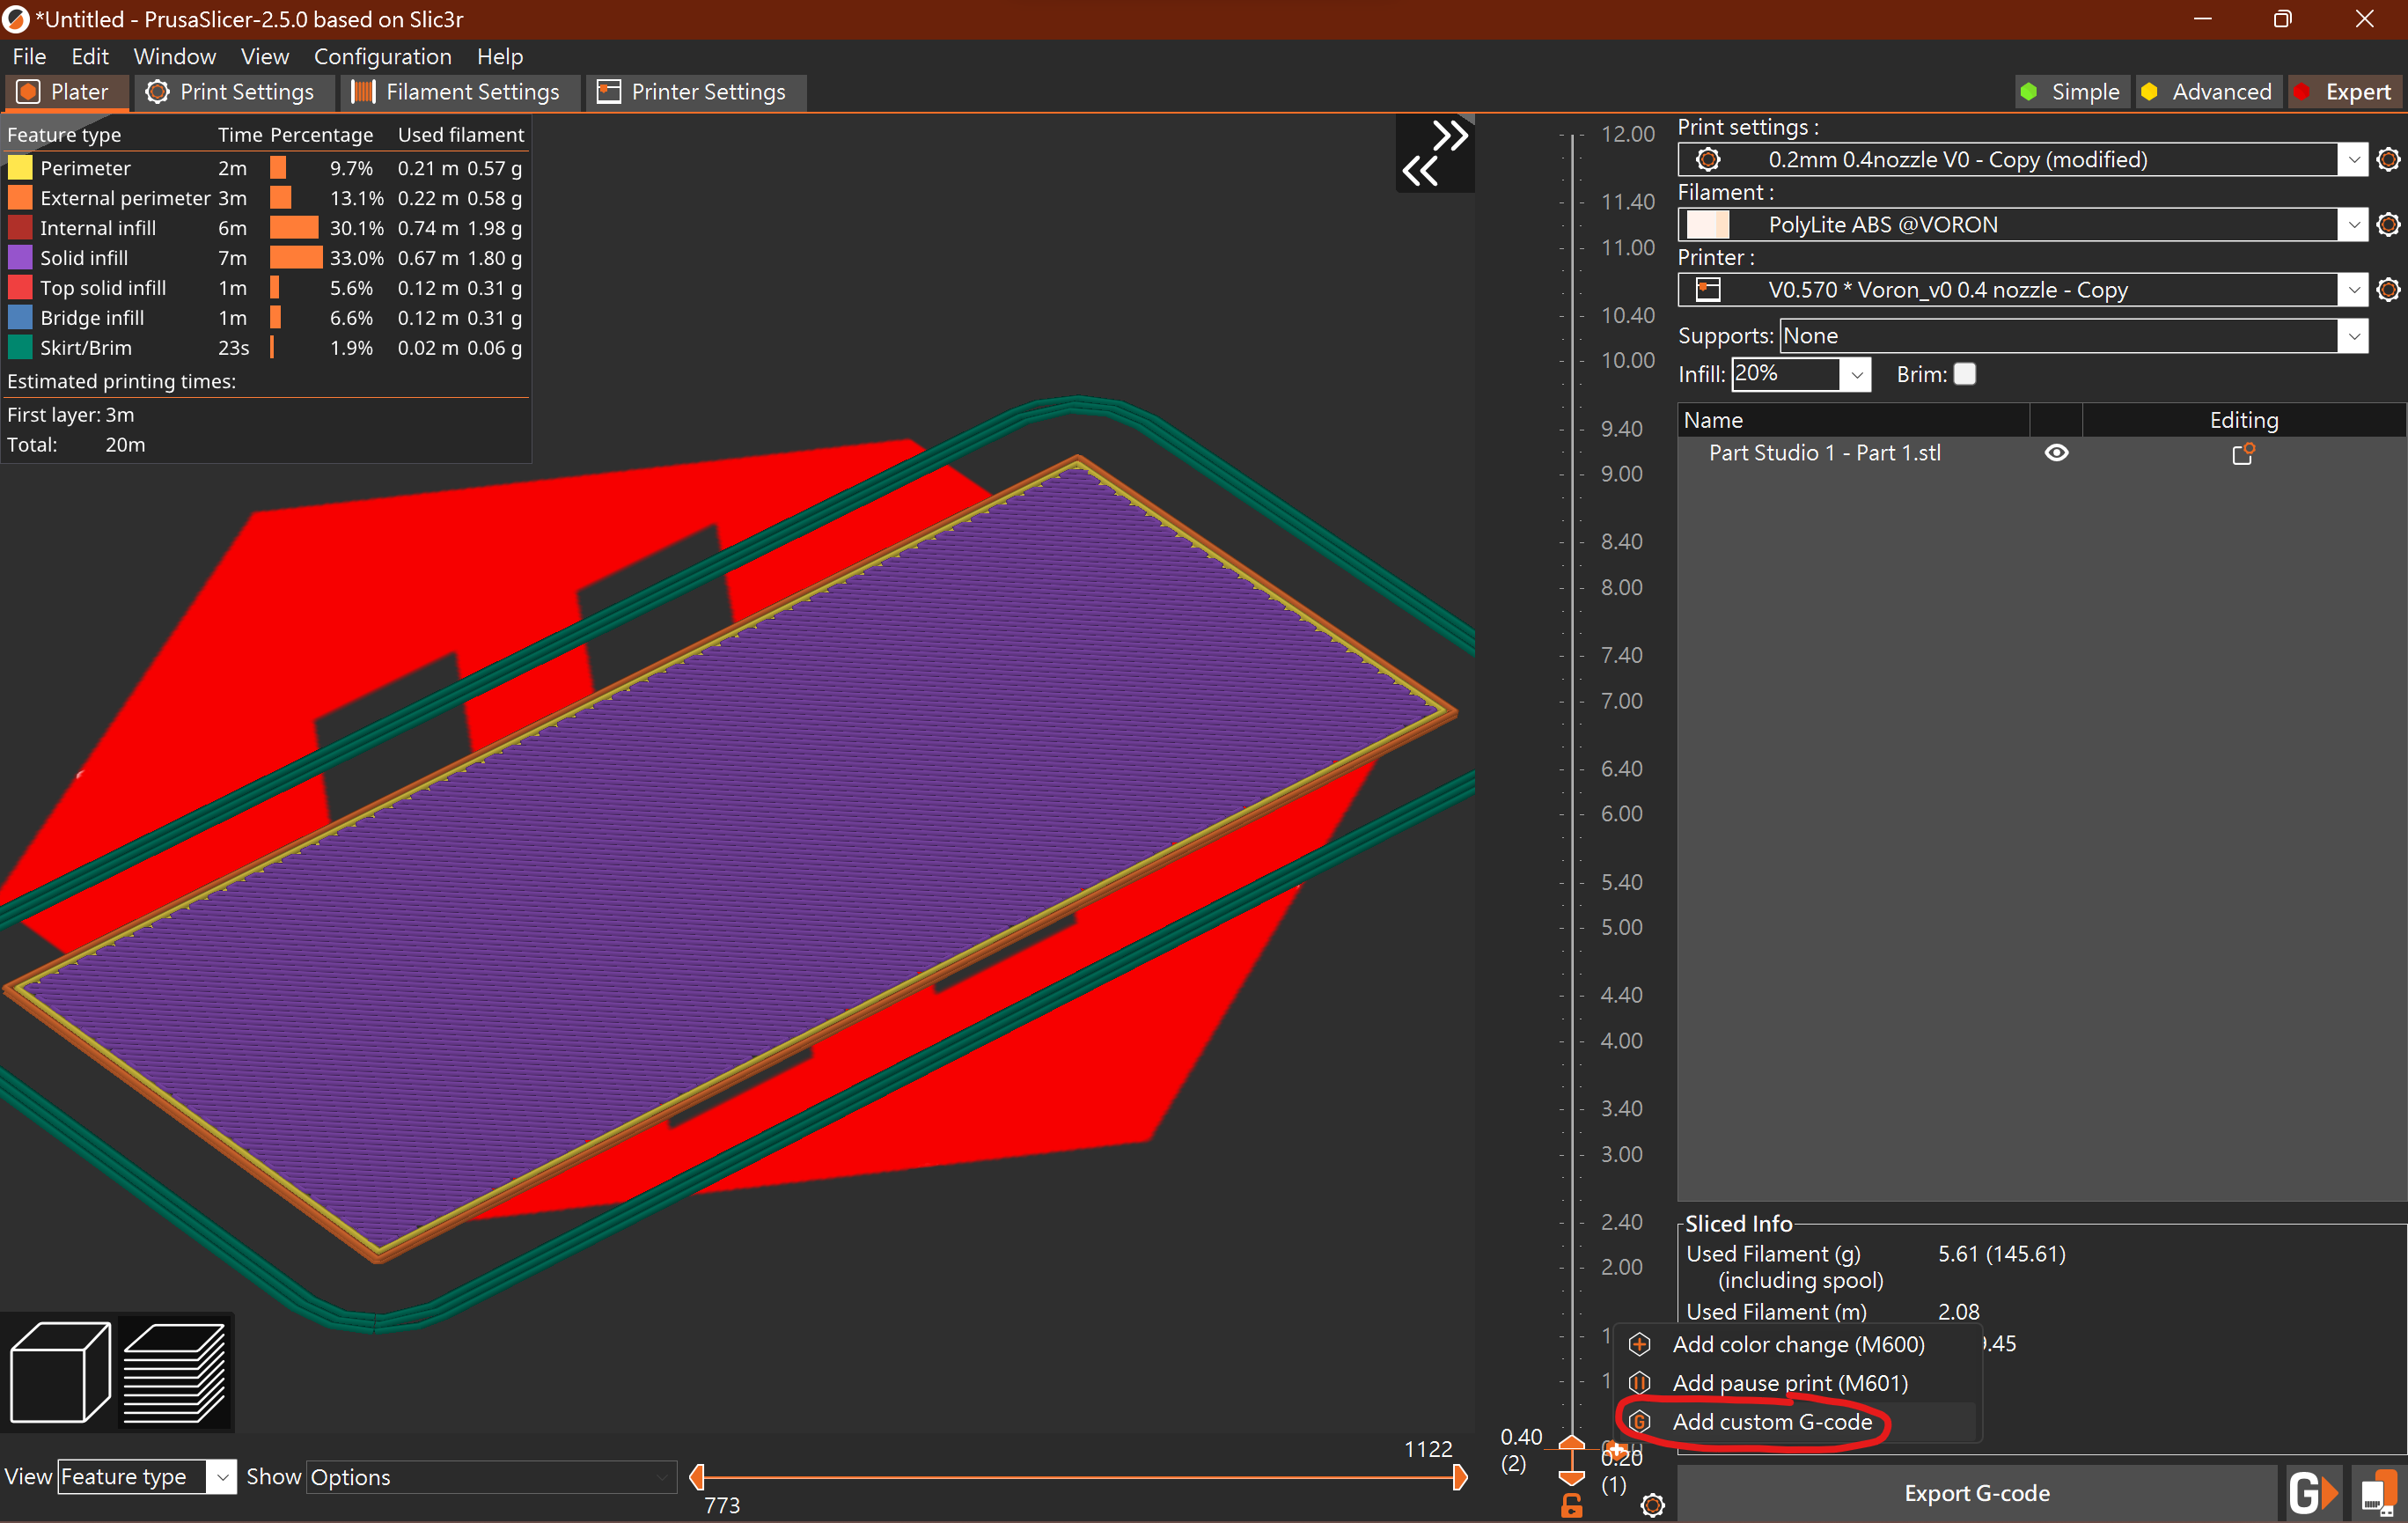
Input the G-code M221 S90 (Replace the value 90 with 100 - 2 * step_value).

Repeat the above step and insert M221 S95(or 100 - step_value) at height 4.2mm (4mm + layer height) and M221 S100 at 8.2mm (8mm + layer height).
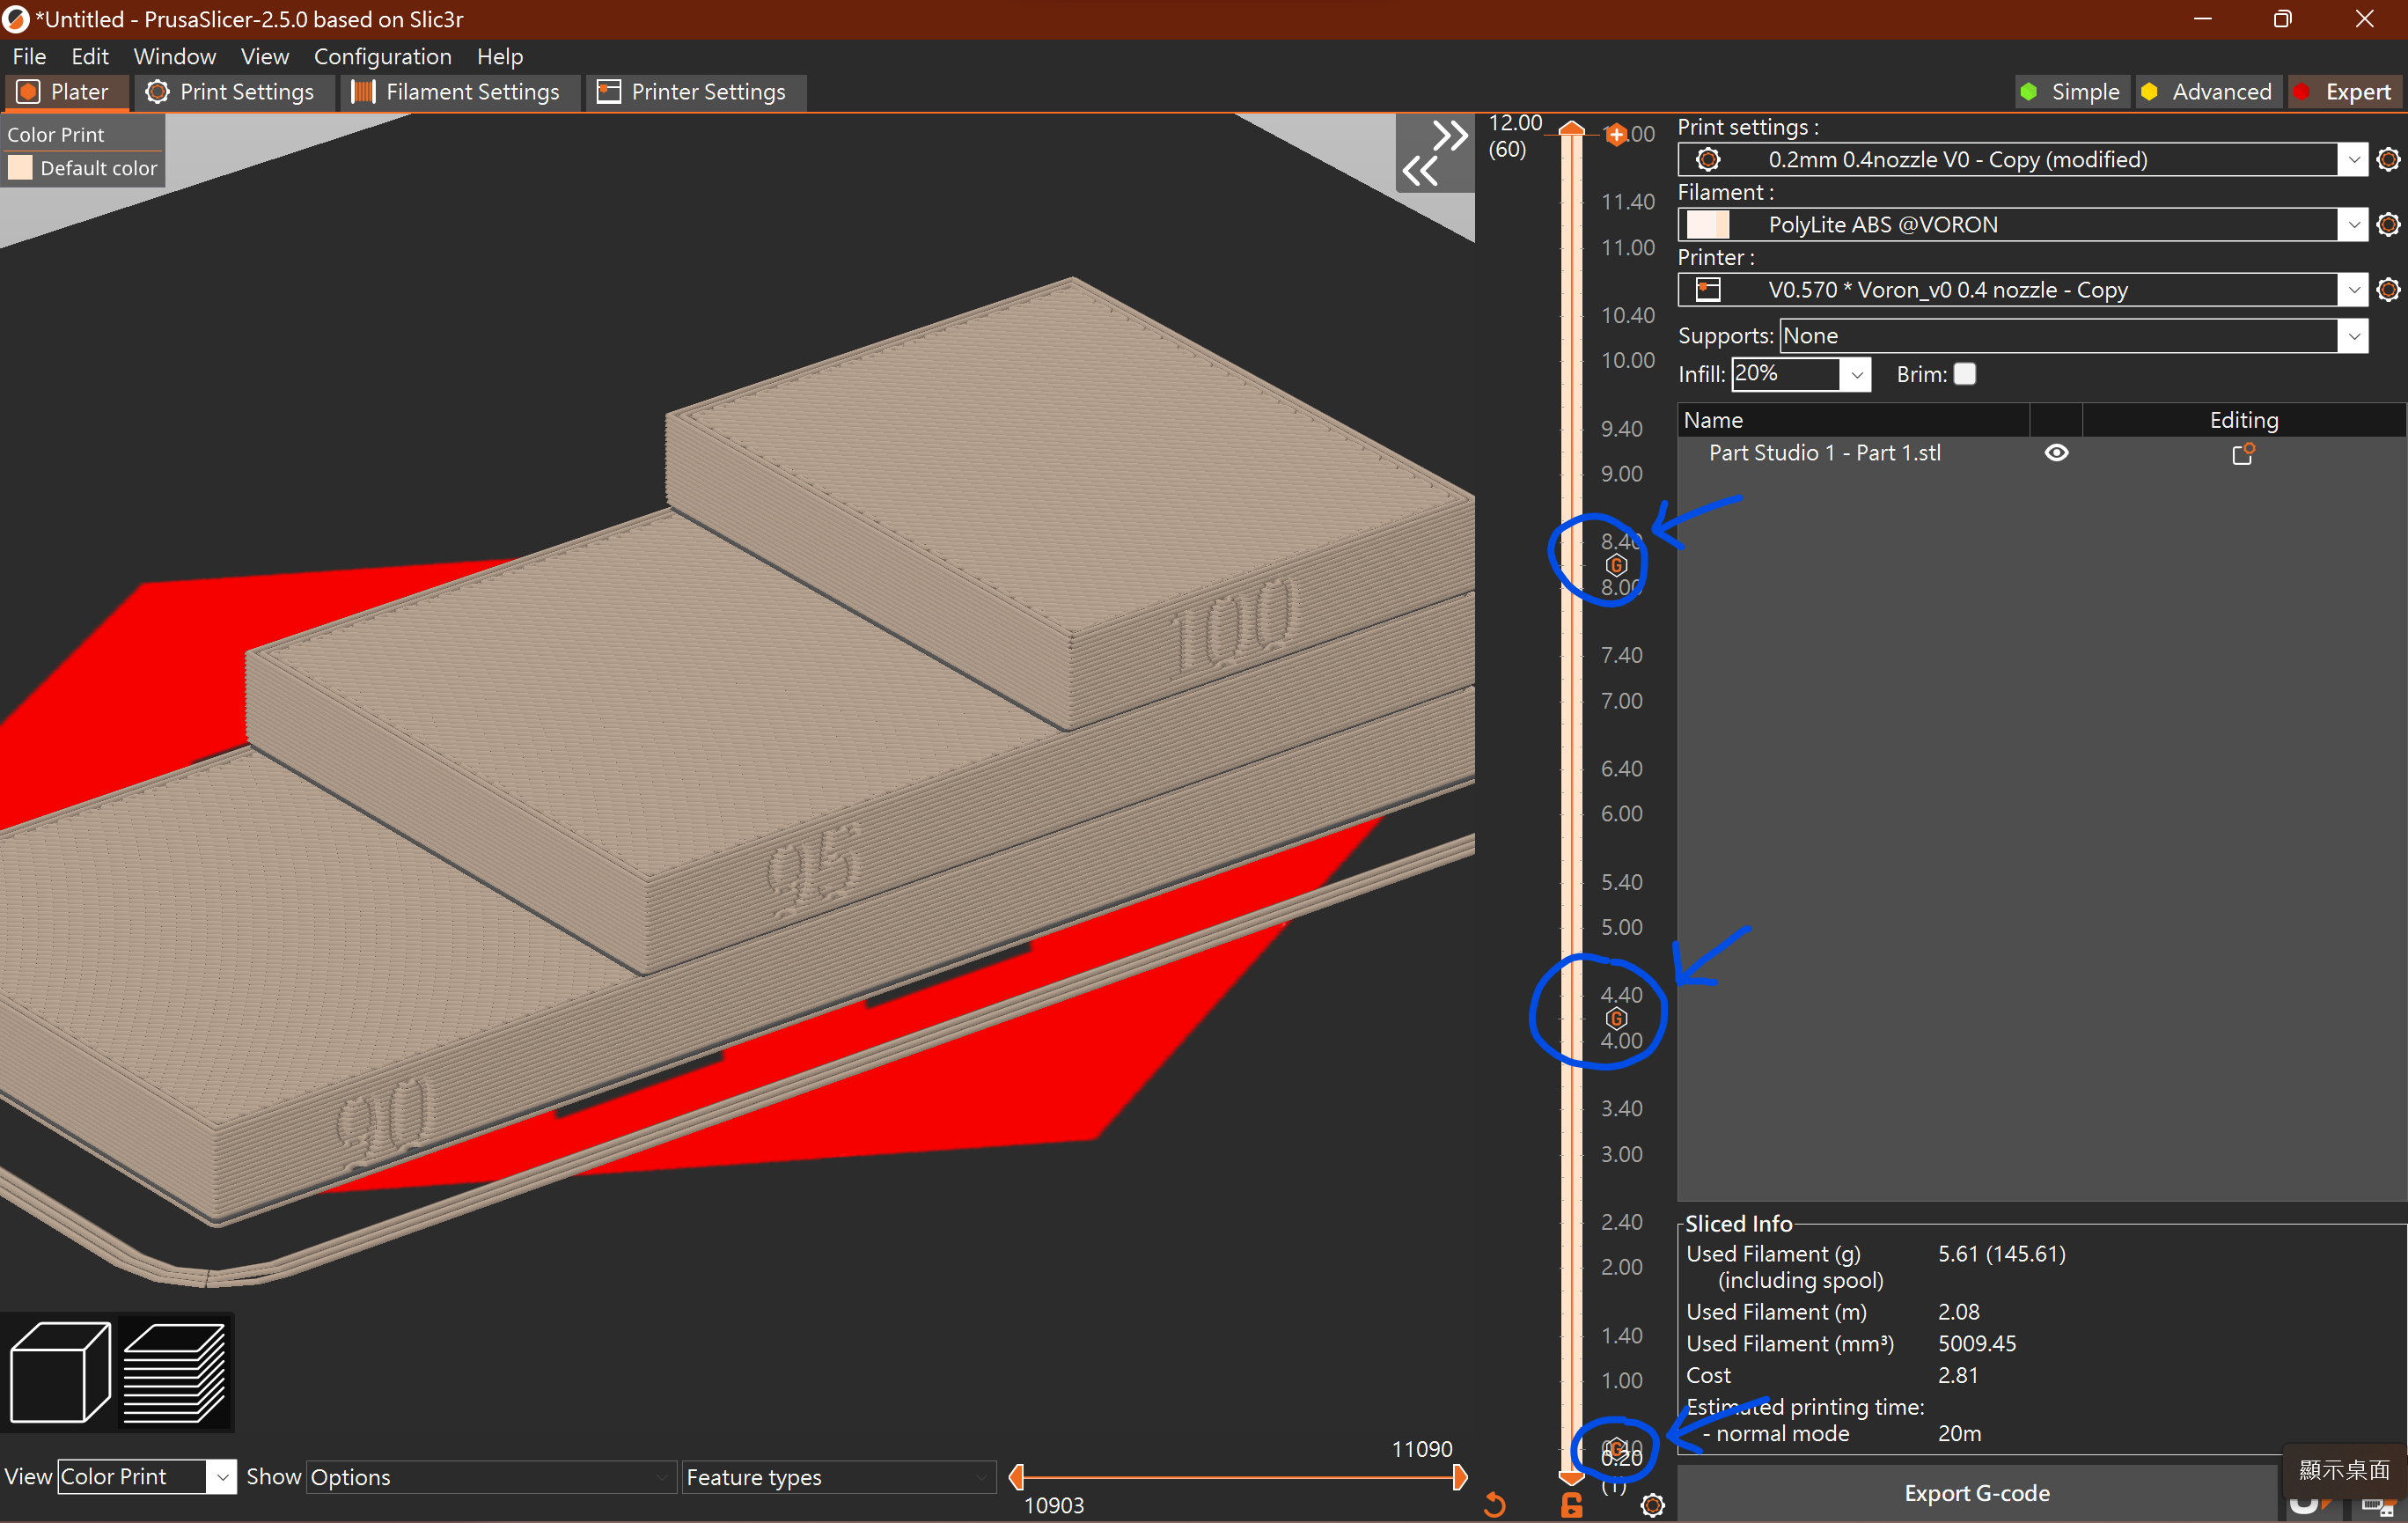
Steps
Basically it's the same as Ellis' guide.
Set EM(extrusion multiplier) to 1, start with larger intervals (e.g. 5%) and go toward smaller intervals.
Repeat the print → inspect → choose new EM value cycle until you are satisfied with the result. I find it's easier to to check with feeling the roughness at the center of the top surface.
Both over-extrude and under-extrude will have a rough touch. Pick the smoothest one.
Check Ellis' guide for more example photo on what to look for at the top surface.
Example
First I start with EM value 1.0, and printed the 5% interval test.
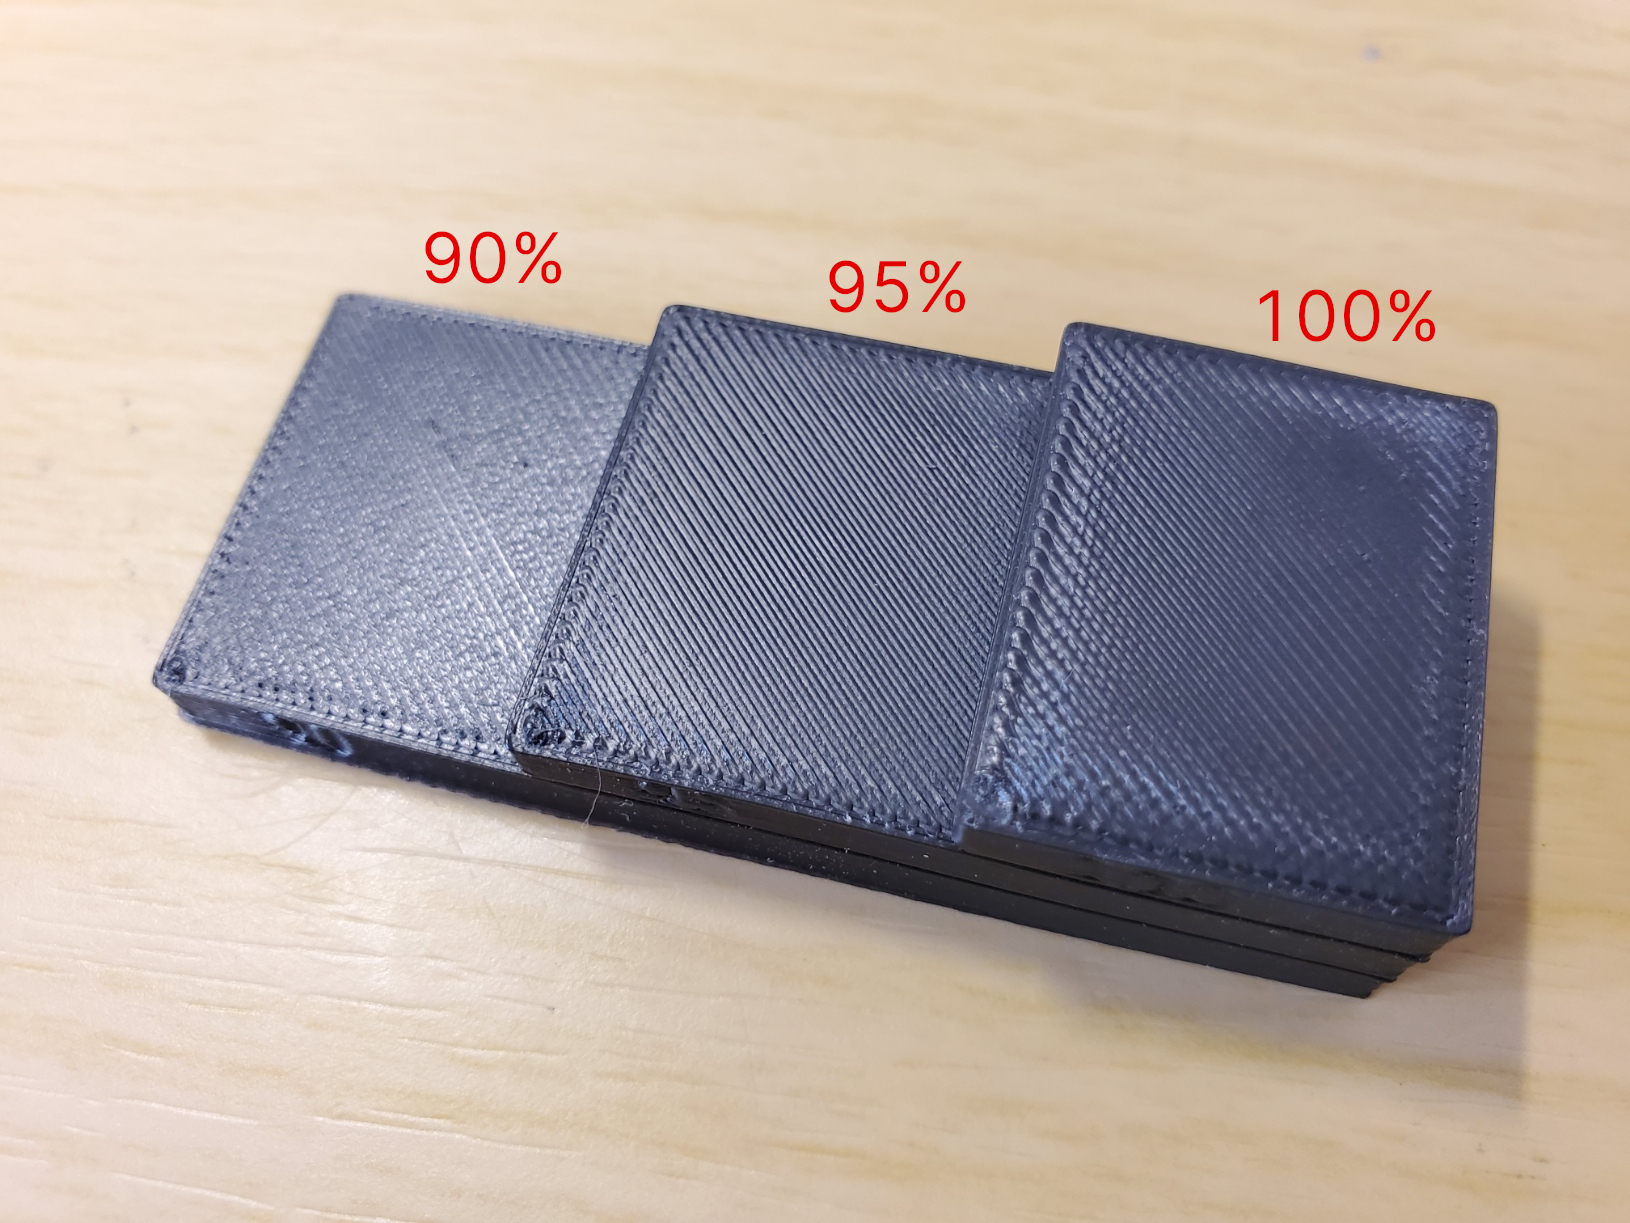
The 95% one looks pretty close but still a little over-extruded. The 90% surface starts to show some slight grooves between the lines.
Then I set the extrusion multiplier to 0.96 and printed another test with 2% interval.

Feels like the good value is between 96% and 98% so I go with 97%.
So I ended up with EM set to 0.96 * 0.97 ≈ 0.93.
Other Things to Look for
You can also check the corners for your pressure advanced value.
Here are some examples for what to look for.