
MMU Filament open adjustment and Filament display box - Filament manipulation
We calculate the final price from your selected file. You review and accept it before payment.
Saved on this device.

The box shoul be in filament pathway to Prusas MMU (2/3) to manipulate filaments and make Filament manipulation possible
- Rating
- 0 / 5
- Likes
- 32
- Downloads
- 58
- Makes
- 1
- Views
- 1,176
- Reviews
- 0
Updated at source:
Model information
- Source
- Printables
- Category
- Accessories
- License
- Creative Commons — Attribution — Noncommercial
This magnetically closing box is meant to be in the filament pathway of Prusas MMU/MMU2/MMU3 unit to give access to the filaments for manipulation or manual filament adjustment. Furthermore it displays which Filament color is in the corresponding path. I designed this box to solve a problem with looping filaments in the filament path to Prusas MMU2.
Problem (without my box):
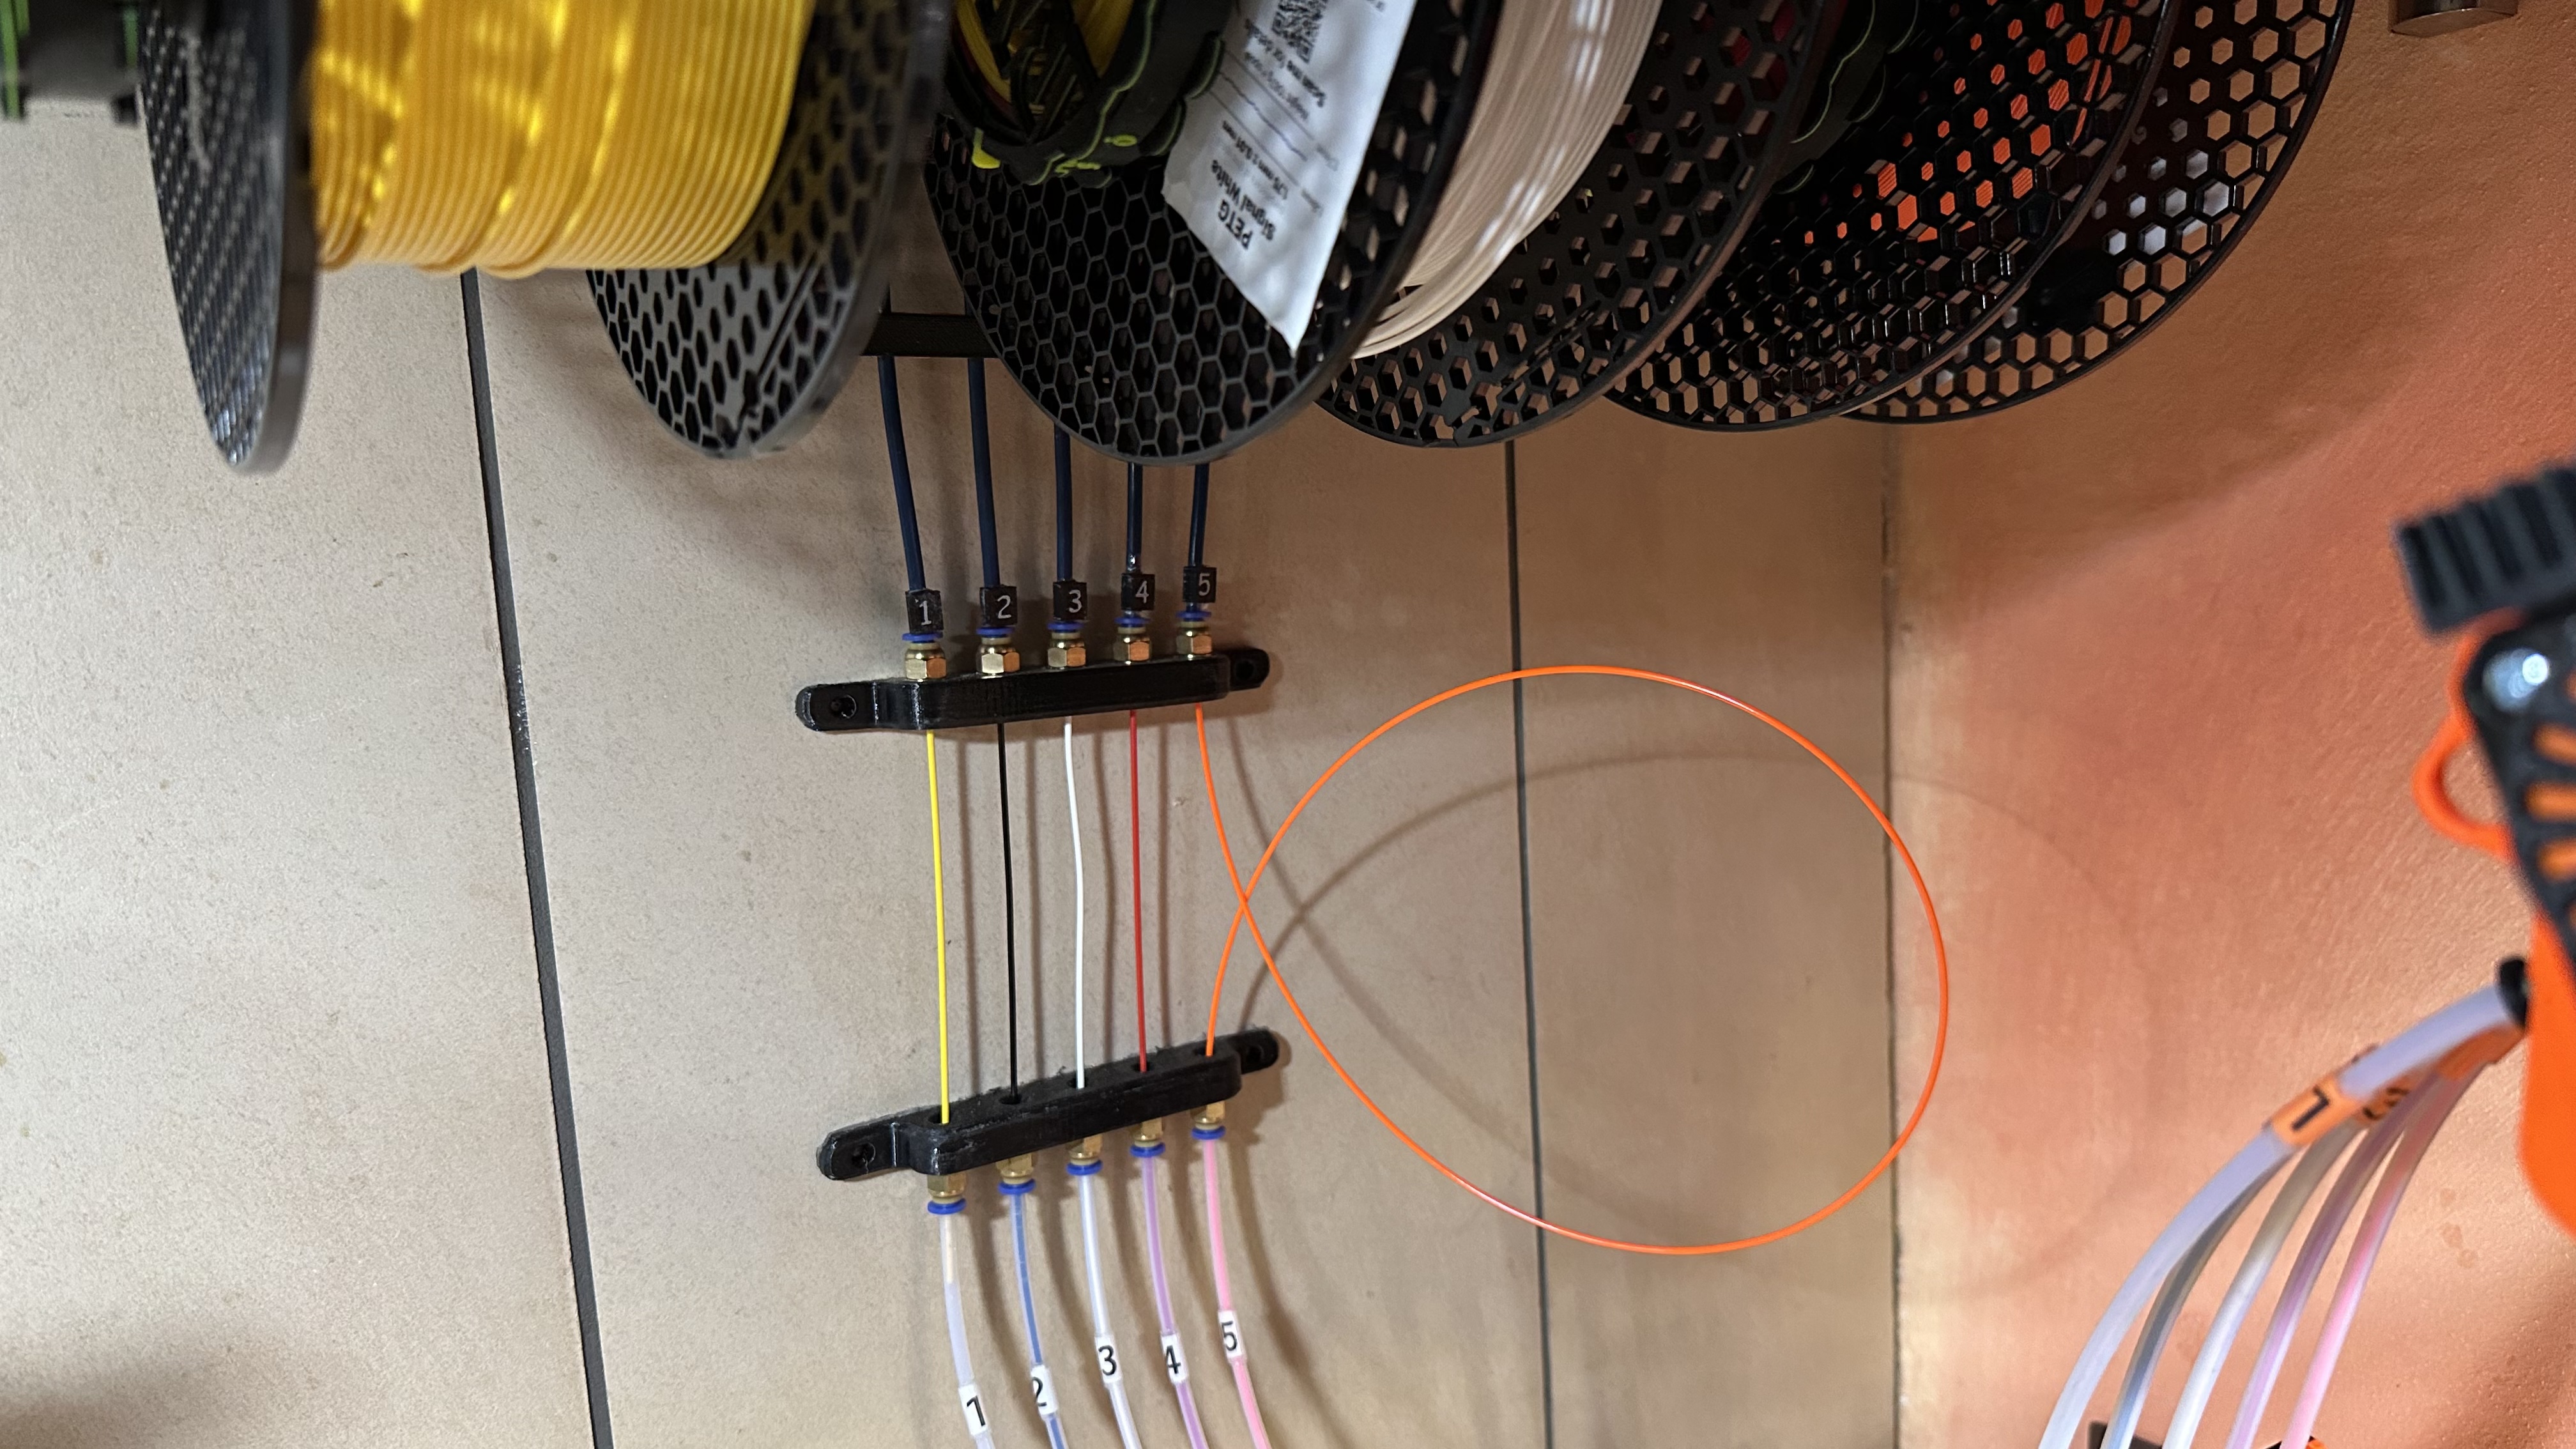
To see and adjust filaments in the pathway to MMU2 I used to let the filaments run freely through the air for a short distance of about 10cm. I did this with a set of 2x5 PC4 fittings in a small frame and some free space between them. This worked for me and made filaments accessible thus helping to insert or rectract the filaments. Only downside was that sometimes when MMU changed filaments in a multimaterialprint the retracted filament looped in the air, though I use the really fantqastic Universal auto-rewind-spoolholder by Vincent Groenhuis.
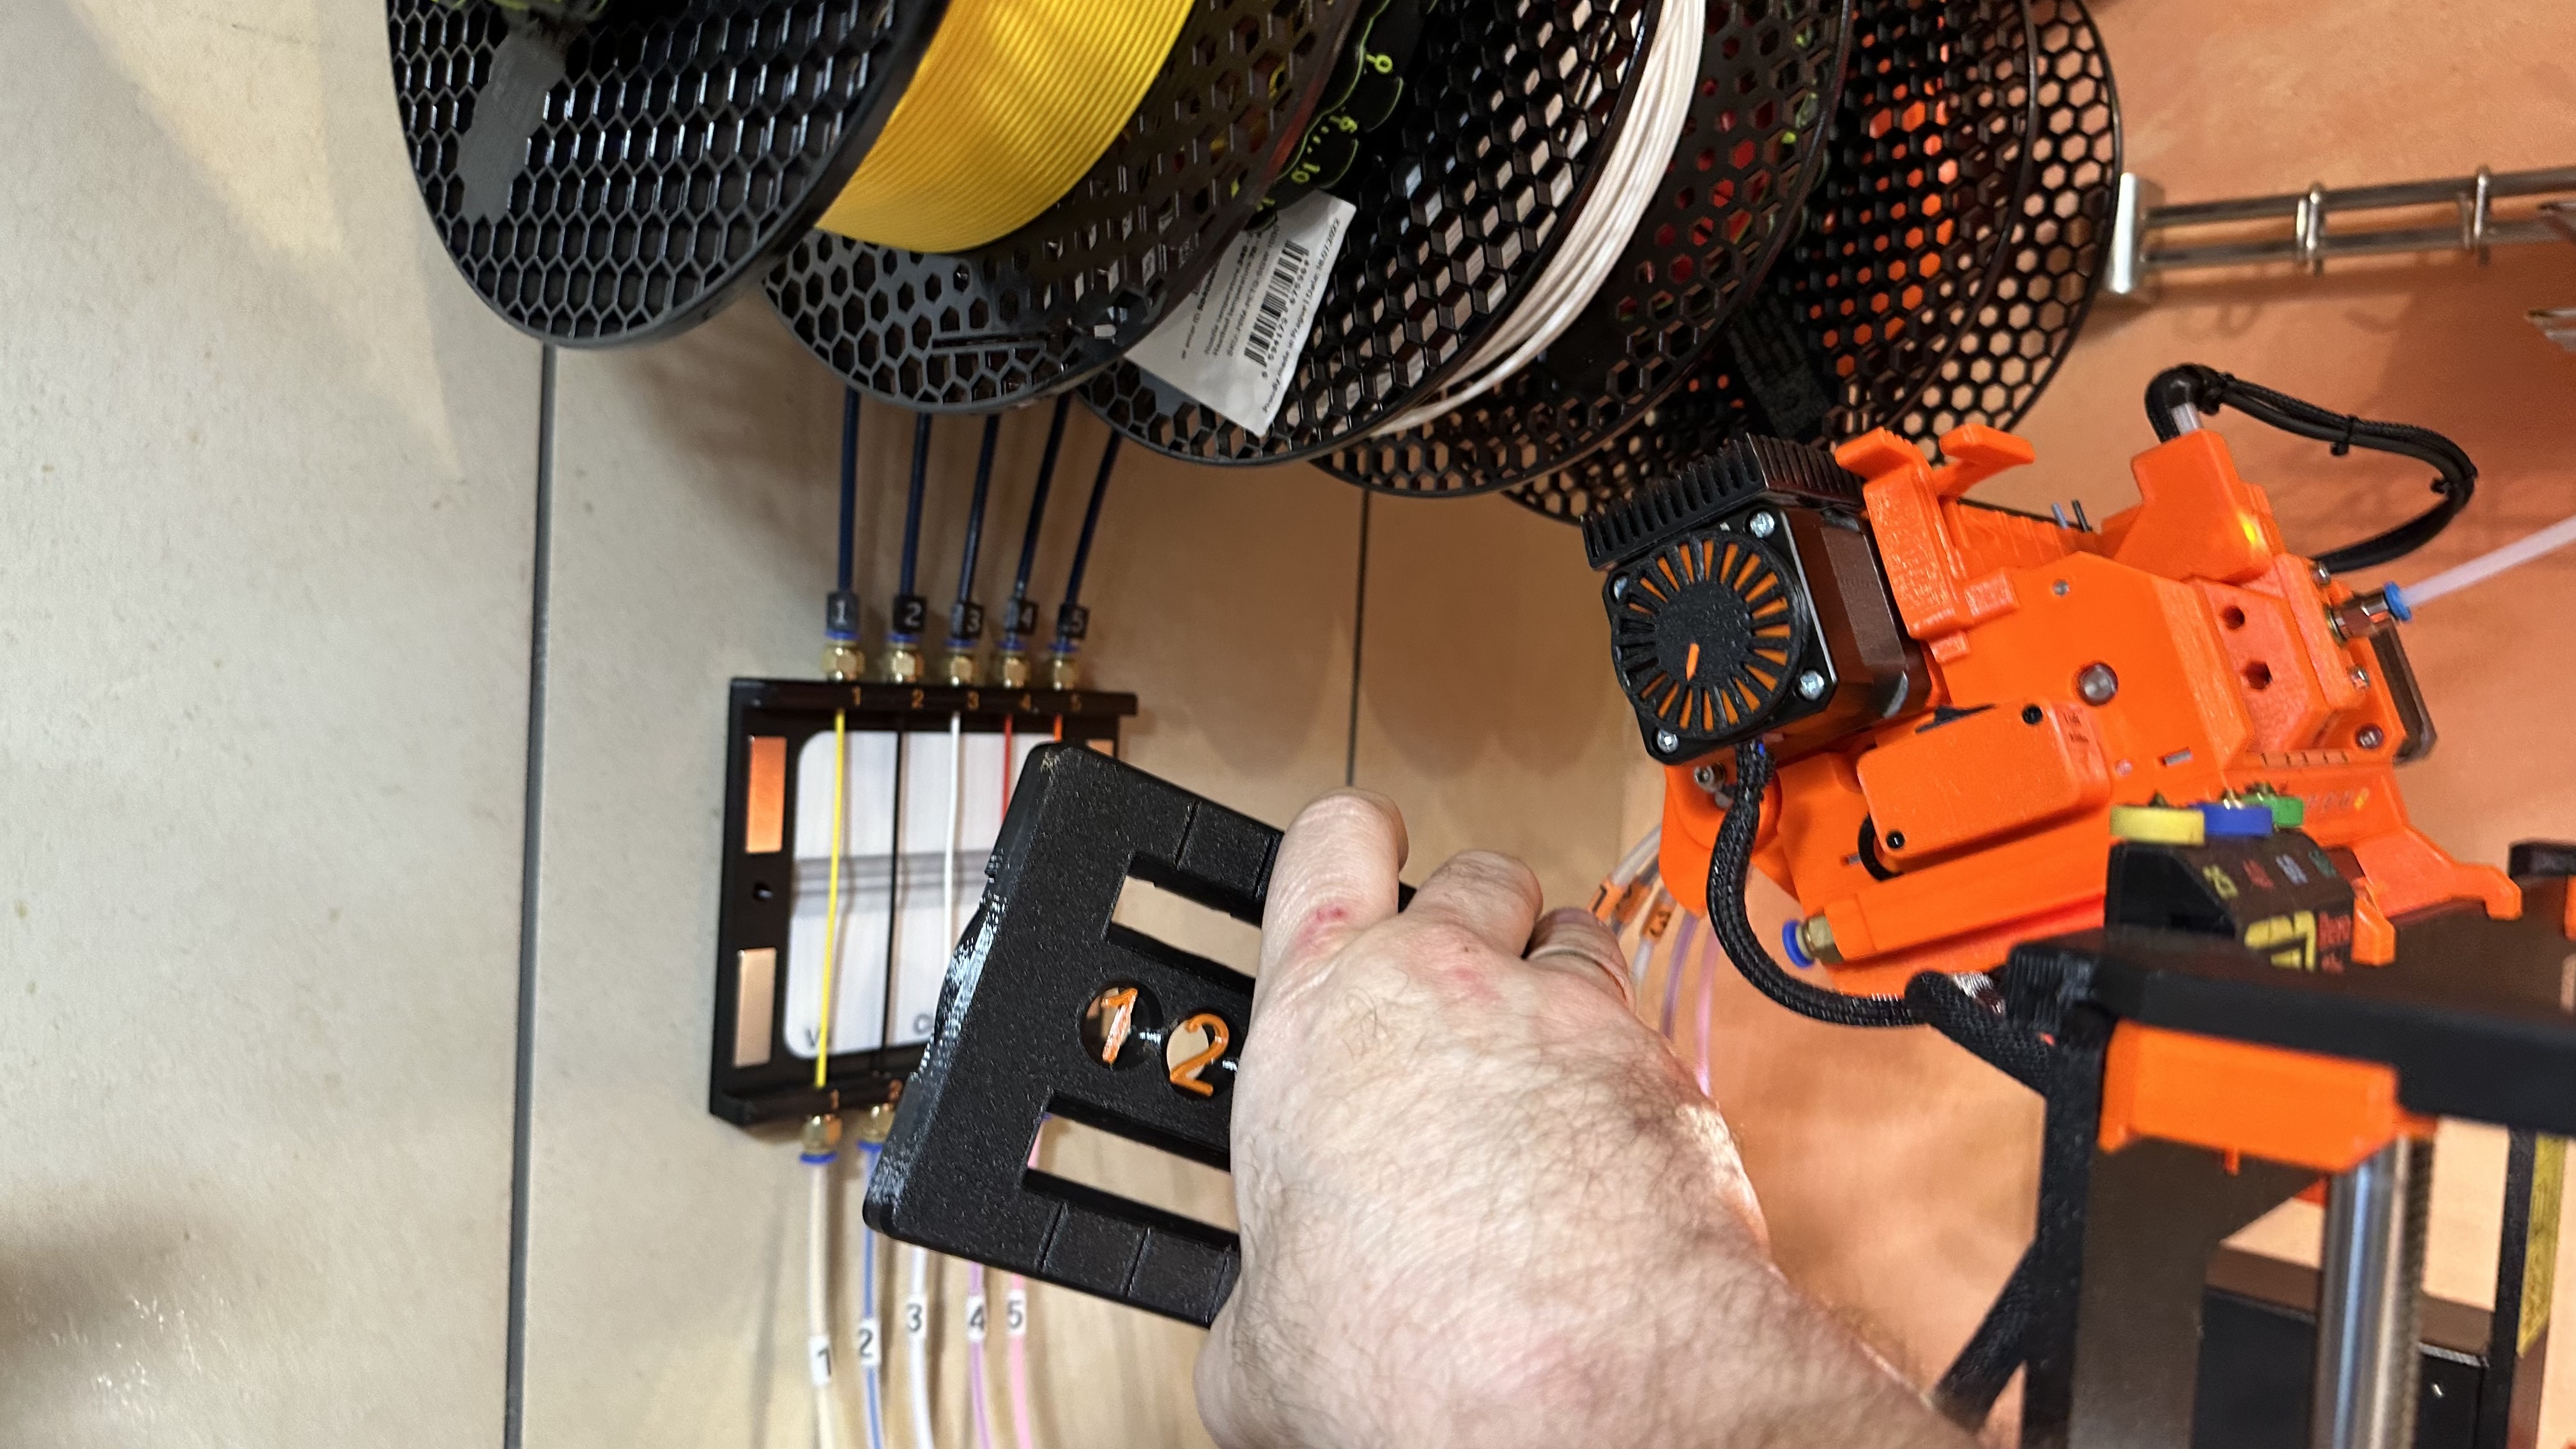
Solution: with Shapr3D I designed a box that guides the filaments and makes them visible (which color is filament 3 at the moment?). The top attaches magnetically to the base. The lid has openings that make the filaments visible even in closed state. When opened filaments can be pulled or pushed into the PTFE tubes, if necessary. It helps to insert or remove filaments a lot for me.
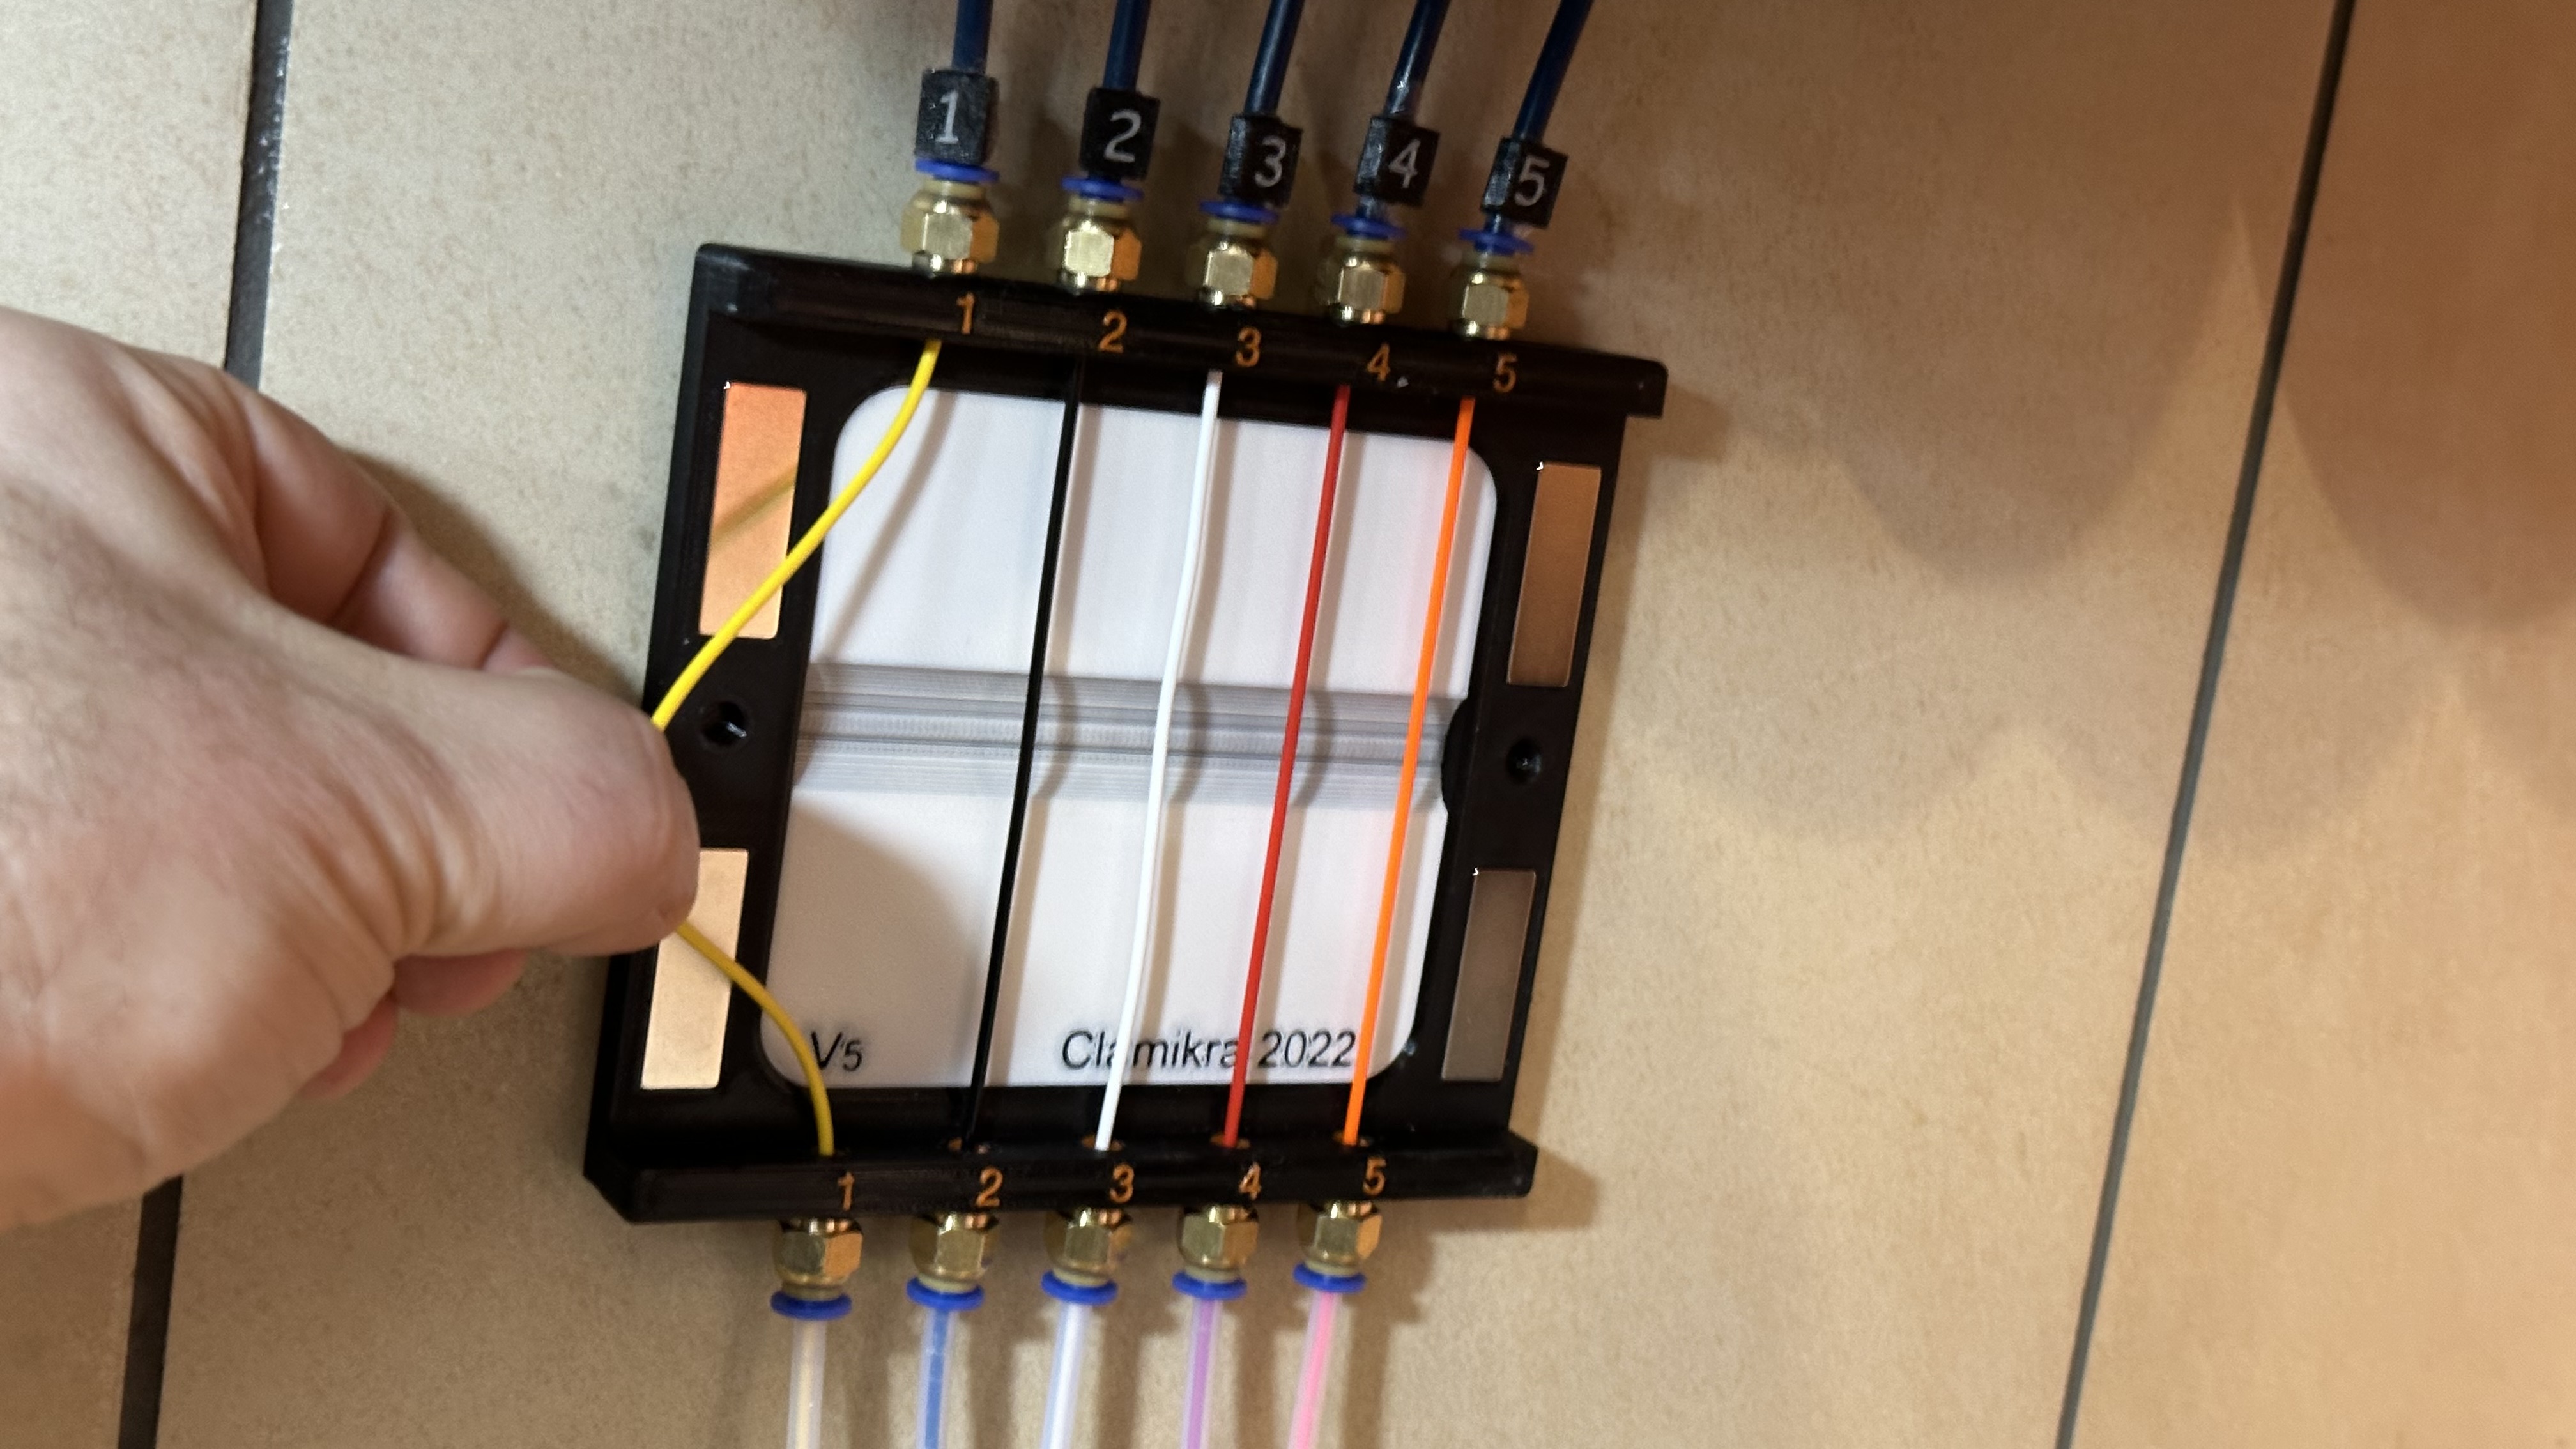

I attached the box to the wall with adhesive strips. This works well for me. There is Version V5c of the base with holes for those who like to use screws instead.
Materials needed:
- 10 PC4-M5 fittings Example at Amazon
- 8 magnets (4 pairs) 10x30x1mm Example at Amazon, be careful to use pairs that attache to each other.
- double side adhesive tape for wall attachment Example at Amazon
Tips for making:
Designed with Shapr3D, sliced with Prusa Slicer 2.5.0
I printed the box in PETG, but everything else will do, I guess.
Print resolution 0,20mm layer height with 0,40mm nozzle
No supports needed
I printed in colour (big numbers in orange, white background in base) with MMU2, but of course monochrome is possible, too.
The small numberstrips on top and bottom of the base of the box are a separate part and are optional. I glued them on top with a drop of superglue. To achieve the desired resolution of the small numbers I printed them with 0,25 Nozzle and 0,10 layer height in Duo-color. So only this small part had to be printed in HiRes. Otherwise the whole box would have taken way too long for printing everything with 0,25 nozzle.
Updated Version V5b (20.01.2023):
- shorter fit pins do the job better and don’t tend to break off
- smoother filament outlets in the top part
- flat surface filament numbers on base
Updated Version V5c (only base, 22.01.2023) :
- base plate now with holes for screw mounting
- top Part V5b fits this base as well
Please show me your results and send me fotos of your makes. I like to see how you use this model. If you have ideas for improvement don’t hesitate to send them to me in the comments. I will try to incorporate your suggestions and will modify the model for special needs if you ask me to do so.
And of course a like ♥ or a rating ⭐ of the design are always welcome.
happy printing, clamikra