
Tessellating Koch Snowflakes
We calculate the final price from your selected file. You review and accept it before payment.
Saved on this device.

This adaptation of a Koch Snowflake can fully tile a plane (tessellation)
- Rating
- 0 / 5
- Likes
- 20
- Downloads
- 56
- Makes
- 0
- Views
- 472
- Reviews
- 0
Updated at source:
Model information
- Source
- Printables
- Category
- Math
- License
- Creative Commons — Attribution — Noncommercial
A Koch snowflake is a geometric shape that is created by starting with a triangle and then adding smaller triangles to the sides in a repeating pattern. The resulting shape is a complex, self-similar curve that has an infinite perimeter but a finite area.
The Koch snowflake is named after the mathematician Helge von Koch, who first described it in a 1904 paper. It is an example of a fractal, a type of shape that exhibits self-similarity and has a complex, irregular structure.
How I made this design
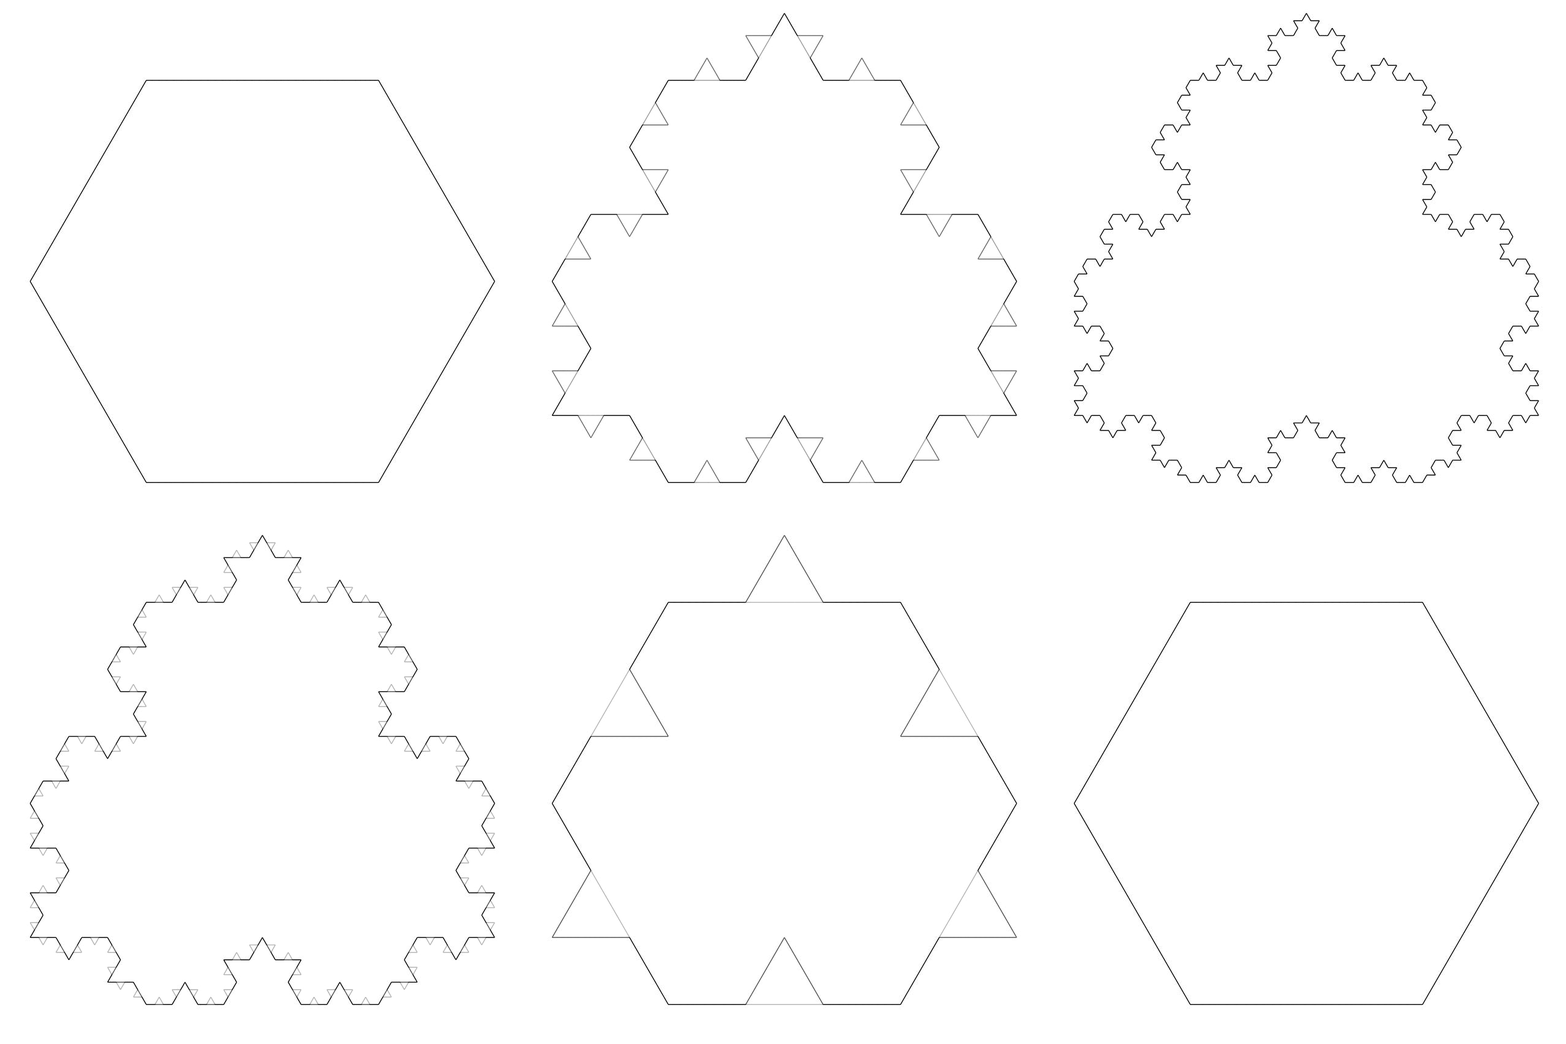
The ‘normal’ Koch snowflake starts from an equilateral triangle and build up with more equilateral triangles on all sides. However, for tessellating, I had to adapt the usual snowflake:
- Instead of starting with a triangle, I started with a hexagon.
- Instead of only building up on the sides, like the normal Koch snowflake, I actually cut the triangles away from the base shape on three of the six sides. A combination of a snowflake and an antisnowflake.
- This .gif shows the steps from the base shape (iteration 0) to the third iteration and back (click the image if the gif is not showing).
To fit the pieces together, a little bit of material is removed from the edges. The amount of material cut away is denoted by the ‘tolerance’. The recommended prints are at the top of the print files. If you can't make these parts fit, I added some test prints for the other tolerances available.
Print settings
Printing takes about 30 minutes per piece. You can decrease the thickness to reduce print time.
- Layer height between 0.15 and 0.25mm
- Line width at most 0.5mm, but for the 3 iteration version a narrower line will make the details print better. I used a 0.4mm nozzle with an equal line width
- Infill: any will do really, just needs some to support the top layers
- Material: PLA will do just fine
Images of my printed parts will be added soon