
Soviet Fotosnaiper/Photosniper (FS-122-2) Shutter Release Cable Trigger Kit
We calculate the final price from your selected file. You review and accept it before payment.
Saved on this device.

A trigger mod for the KMZ Photosniper kit that make it compatible with camera with normal mechanical shutter release.
- Rating
- 0 / 5
- Likes
- 4
- Downloads
- 35
- Makes
- 0
- Views
- 951
- Reviews
- 0
Updated at source:
Model information
- Source
- Printables
- Category
- Photo & Video
- License
- GNU General Public License v3.0
What is this thing?
This mod replace the Soviet Photosniper kit's trigger mechanism to a normal mechanical shutter release cable.
What's being replaced?
Top plate of the stock and the trigger pack. You will have to drill a hole on the original top plate if you wish not to use a 3D printed one.
Things you need:
- Access to a 3D printer.
- The Photosniper kit (obviously.) Mine is the later version (FS-122-2) & this mod is made to fit them, I don't know if it can fit other ones.
- 8 to 10 4.5mm(.177) bearing balls or BBs.
- A shutter release cable, preferably a short one, the plunger travel distance of a long one might be to much for this mod.
- 2 M3x5 set screws, for setting the cable in place.
- (Optional) 2 M3x6 screws, ones where the heads are thin, used in the 3D printed top plate.
- Ability to adjust the model's fittings and the patient to assemble, disassemble and reprint dozens of times, YOU HAVE BEEN WARNED.
Printing:
See photos for printing orientation.
100% infill, 4 perimeters for top plate.
Use your normal settings for the other 2 parts.
Before assembly:
Take the original top assembly off.
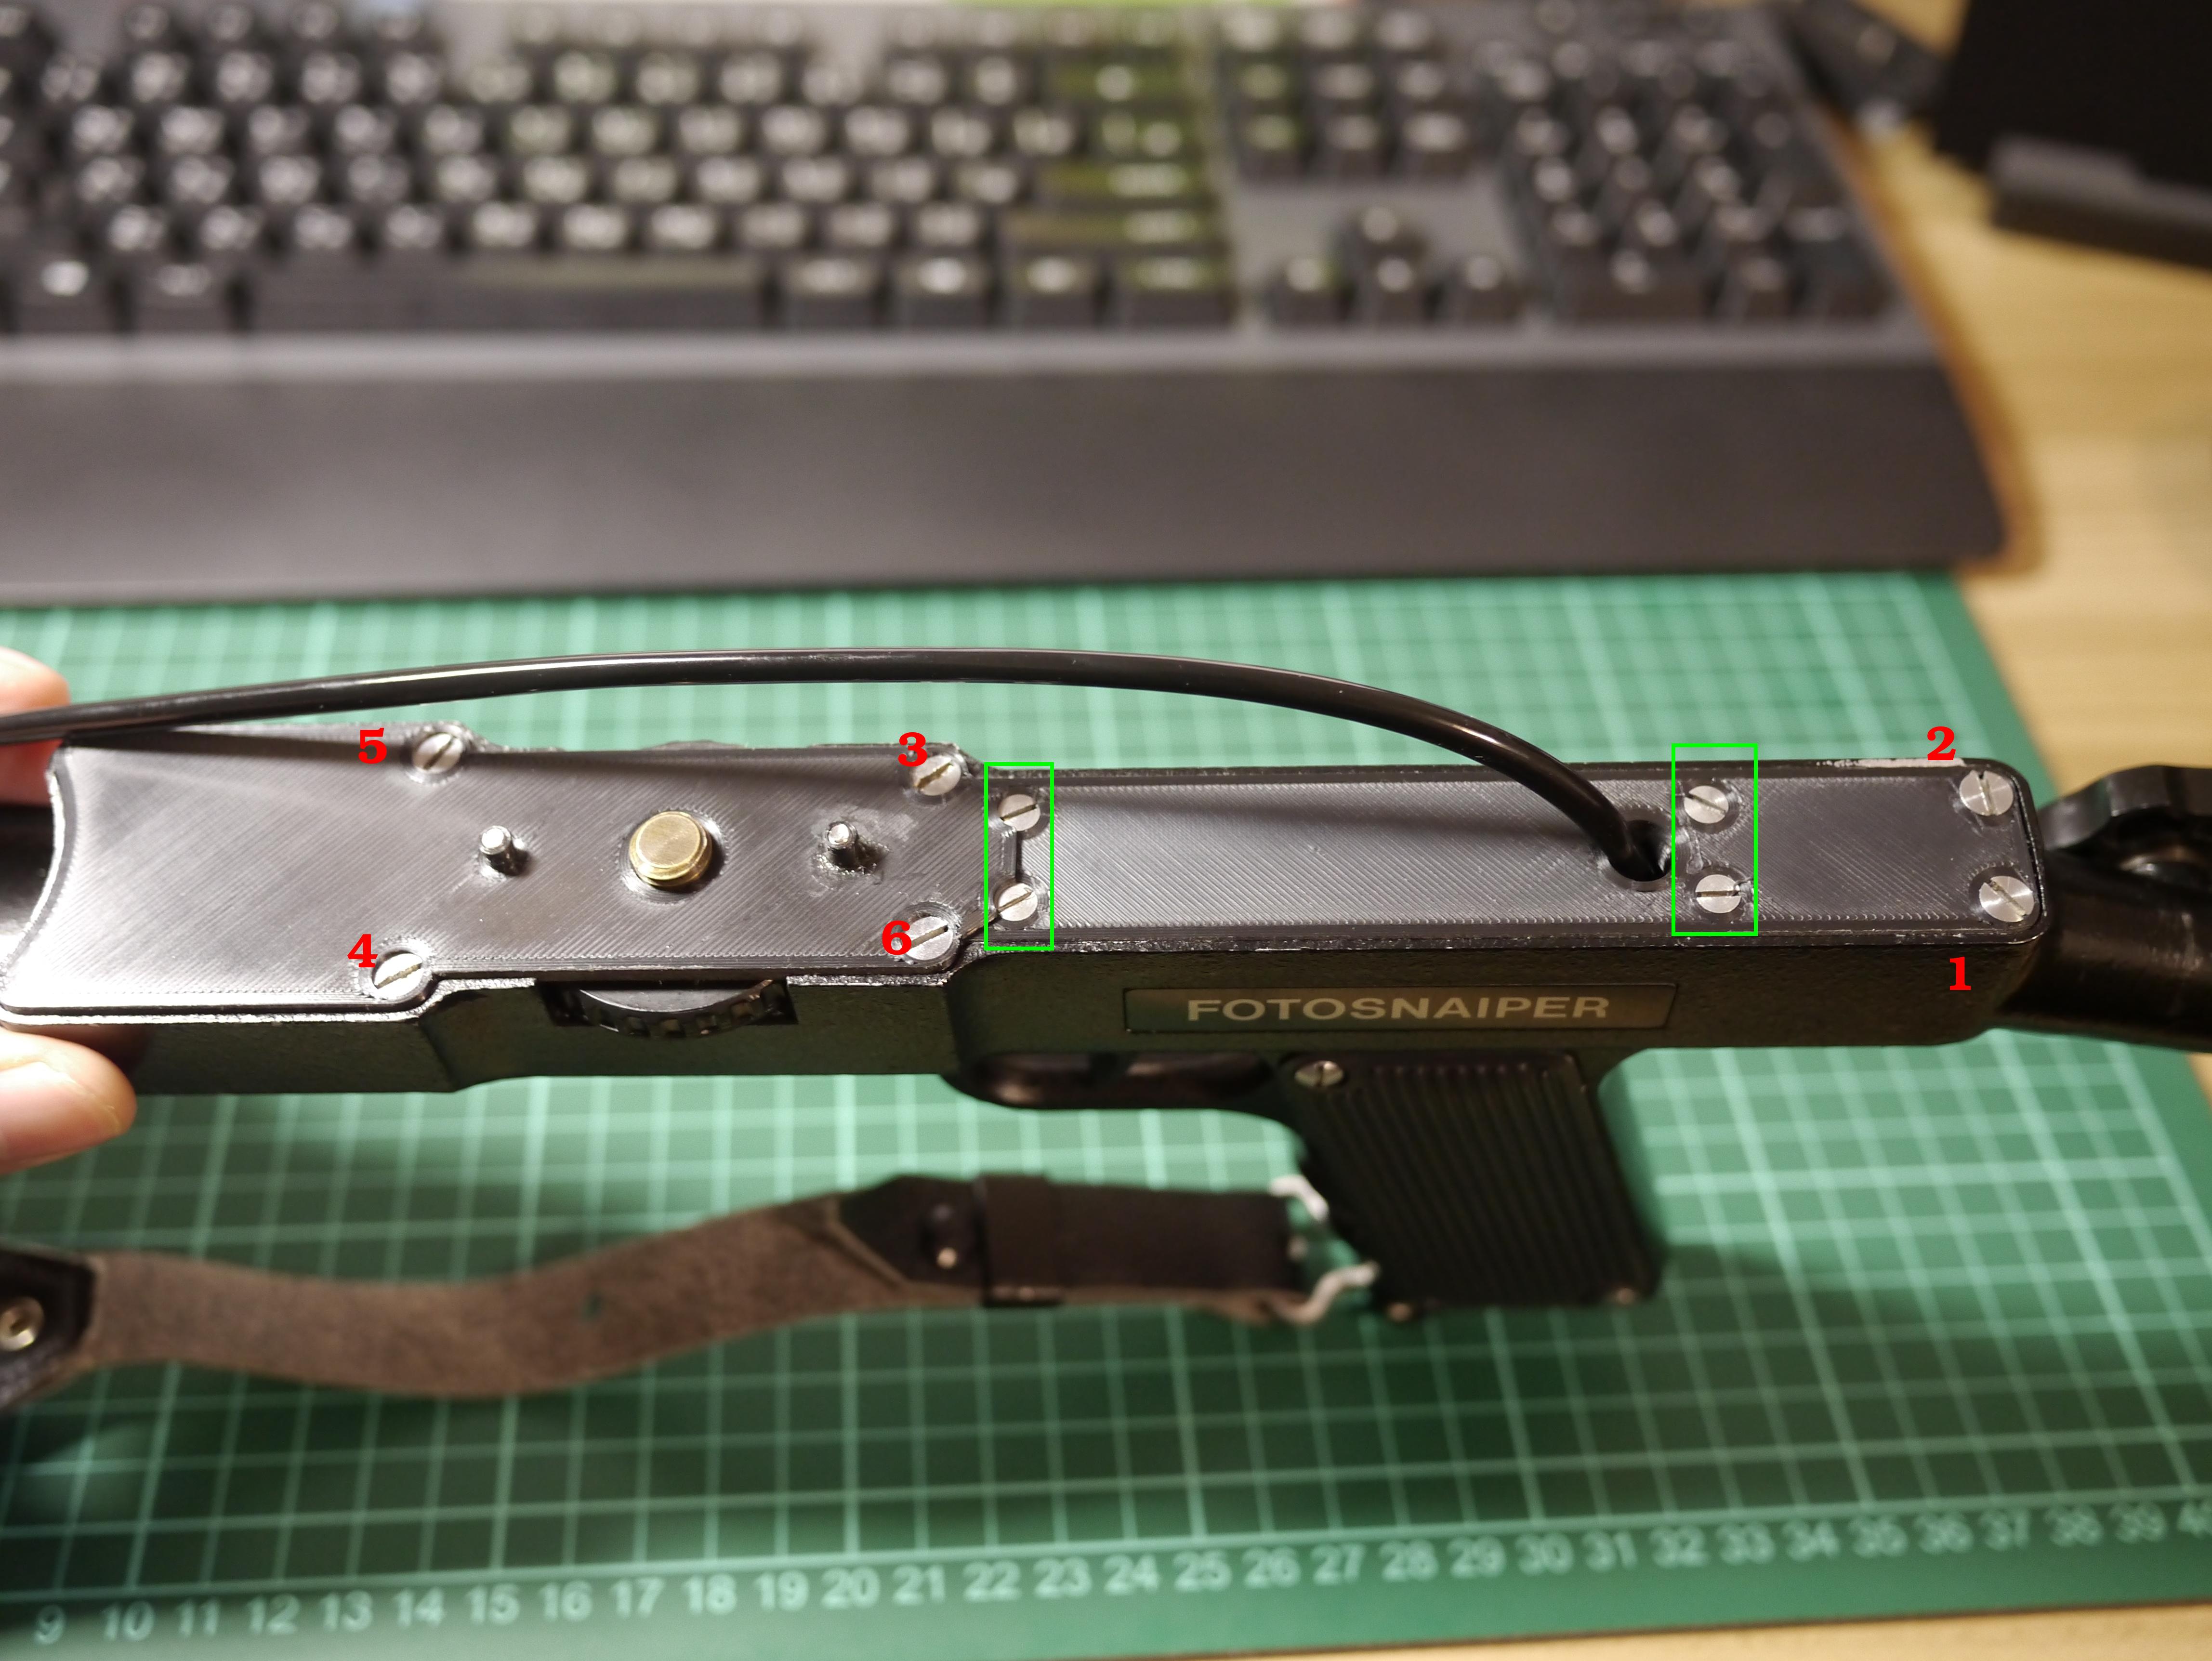
Take out screw 1 & 2 first, take out screw 3 to 6 next but be careful, the screw for the lens is spring loaded, after that you can take out the whole top assembly.
Take out the remaining screws (green box) to take the original trigger off.
Collect all 10 screws, we'll need them assemble the new assembly back.
Assembly:
Trigger group:
- Strip down the shutter release cable to like in the picture, and set the cable so it won't hold the plunger when pushed in.

- Inset the cable in the base like this.

- Screw in M3x5 set screws on both side to hold the cable in place. Don't screw them too tight.

- Take the trigger & 2 bearing balls and hold them like in the picture and slide them into the groove of the base, and repeat 3 to 4 more times.

- Voila, the trigger group is now done!

Top assembly:
- Screw in 2 M3x6 screws like in the picture.

- Be aware of these tiny studs, they might break when screwing in. You can glue them back on if they break.

- Take the trigger group and screw them on the top plate with the original screws.

- Insert the cable through the hole and pull it in.


Final assembly:
- Hold the trigger down a bit when you put the top assembly back.

- Once it's in, the trigger should hook on the frame like this.

- Screw the reaming screws back and you are done!
Final advises:
- The top plate might need some sanding on the side for it to fit properly.
- Test with the whole kit assembled(lens on the camera attach on the lower,) you might need adjust the cable position on the base.
- For adjusting the cable:
- Try a shorter cable.
- If the shutter can't be triggered, move the cable towards the front.
- If is the opposite, you might need to cut the plunger short to adjust it.
- Dimension of the top plate & the Blender files are in the files.
Leave a comment if you have any question, I'll reply as soon as I can.
Happy shooting!!