
Mini D3vil Burner V0.2
We calculate the final price from your selected file. You review and accept it before payment.
Saved on this device.

Mini stealth burner with TBG-S extruder from TriangleLab.net The design was made to make the burner better and stronger.
- Rating
- 5 / 5
- Likes
- 28
- Downloads
- 47
- Makes
- 1
- Views
- 2,064
- Reviews
- 1
Updated at source:
Model information
- Source
- Printables
- Category
- Other Printer Parts & Upgrades
- License
- GNU General Public License v3.0
Update Feb 19th 2023:
Voron meets Zurg
here is the link
https://youtube.com/shorts/bwTMPT5cxHM?feature=share
This was made as I heard many say that the tool head looks like Zurg from toy story.
here is the link to the latest update to this model:
https://www.printables.com/model/403389-d3vil-zurg-bambu-x1
The Original Post
Here is a short Video of the making (( https://www.youtube.com/shorts/25mA3bKBRGc )) (( https://www.instagram.com/reel/Cn1T3YcpL2e/?utm_source=ig_web_copy_link ))
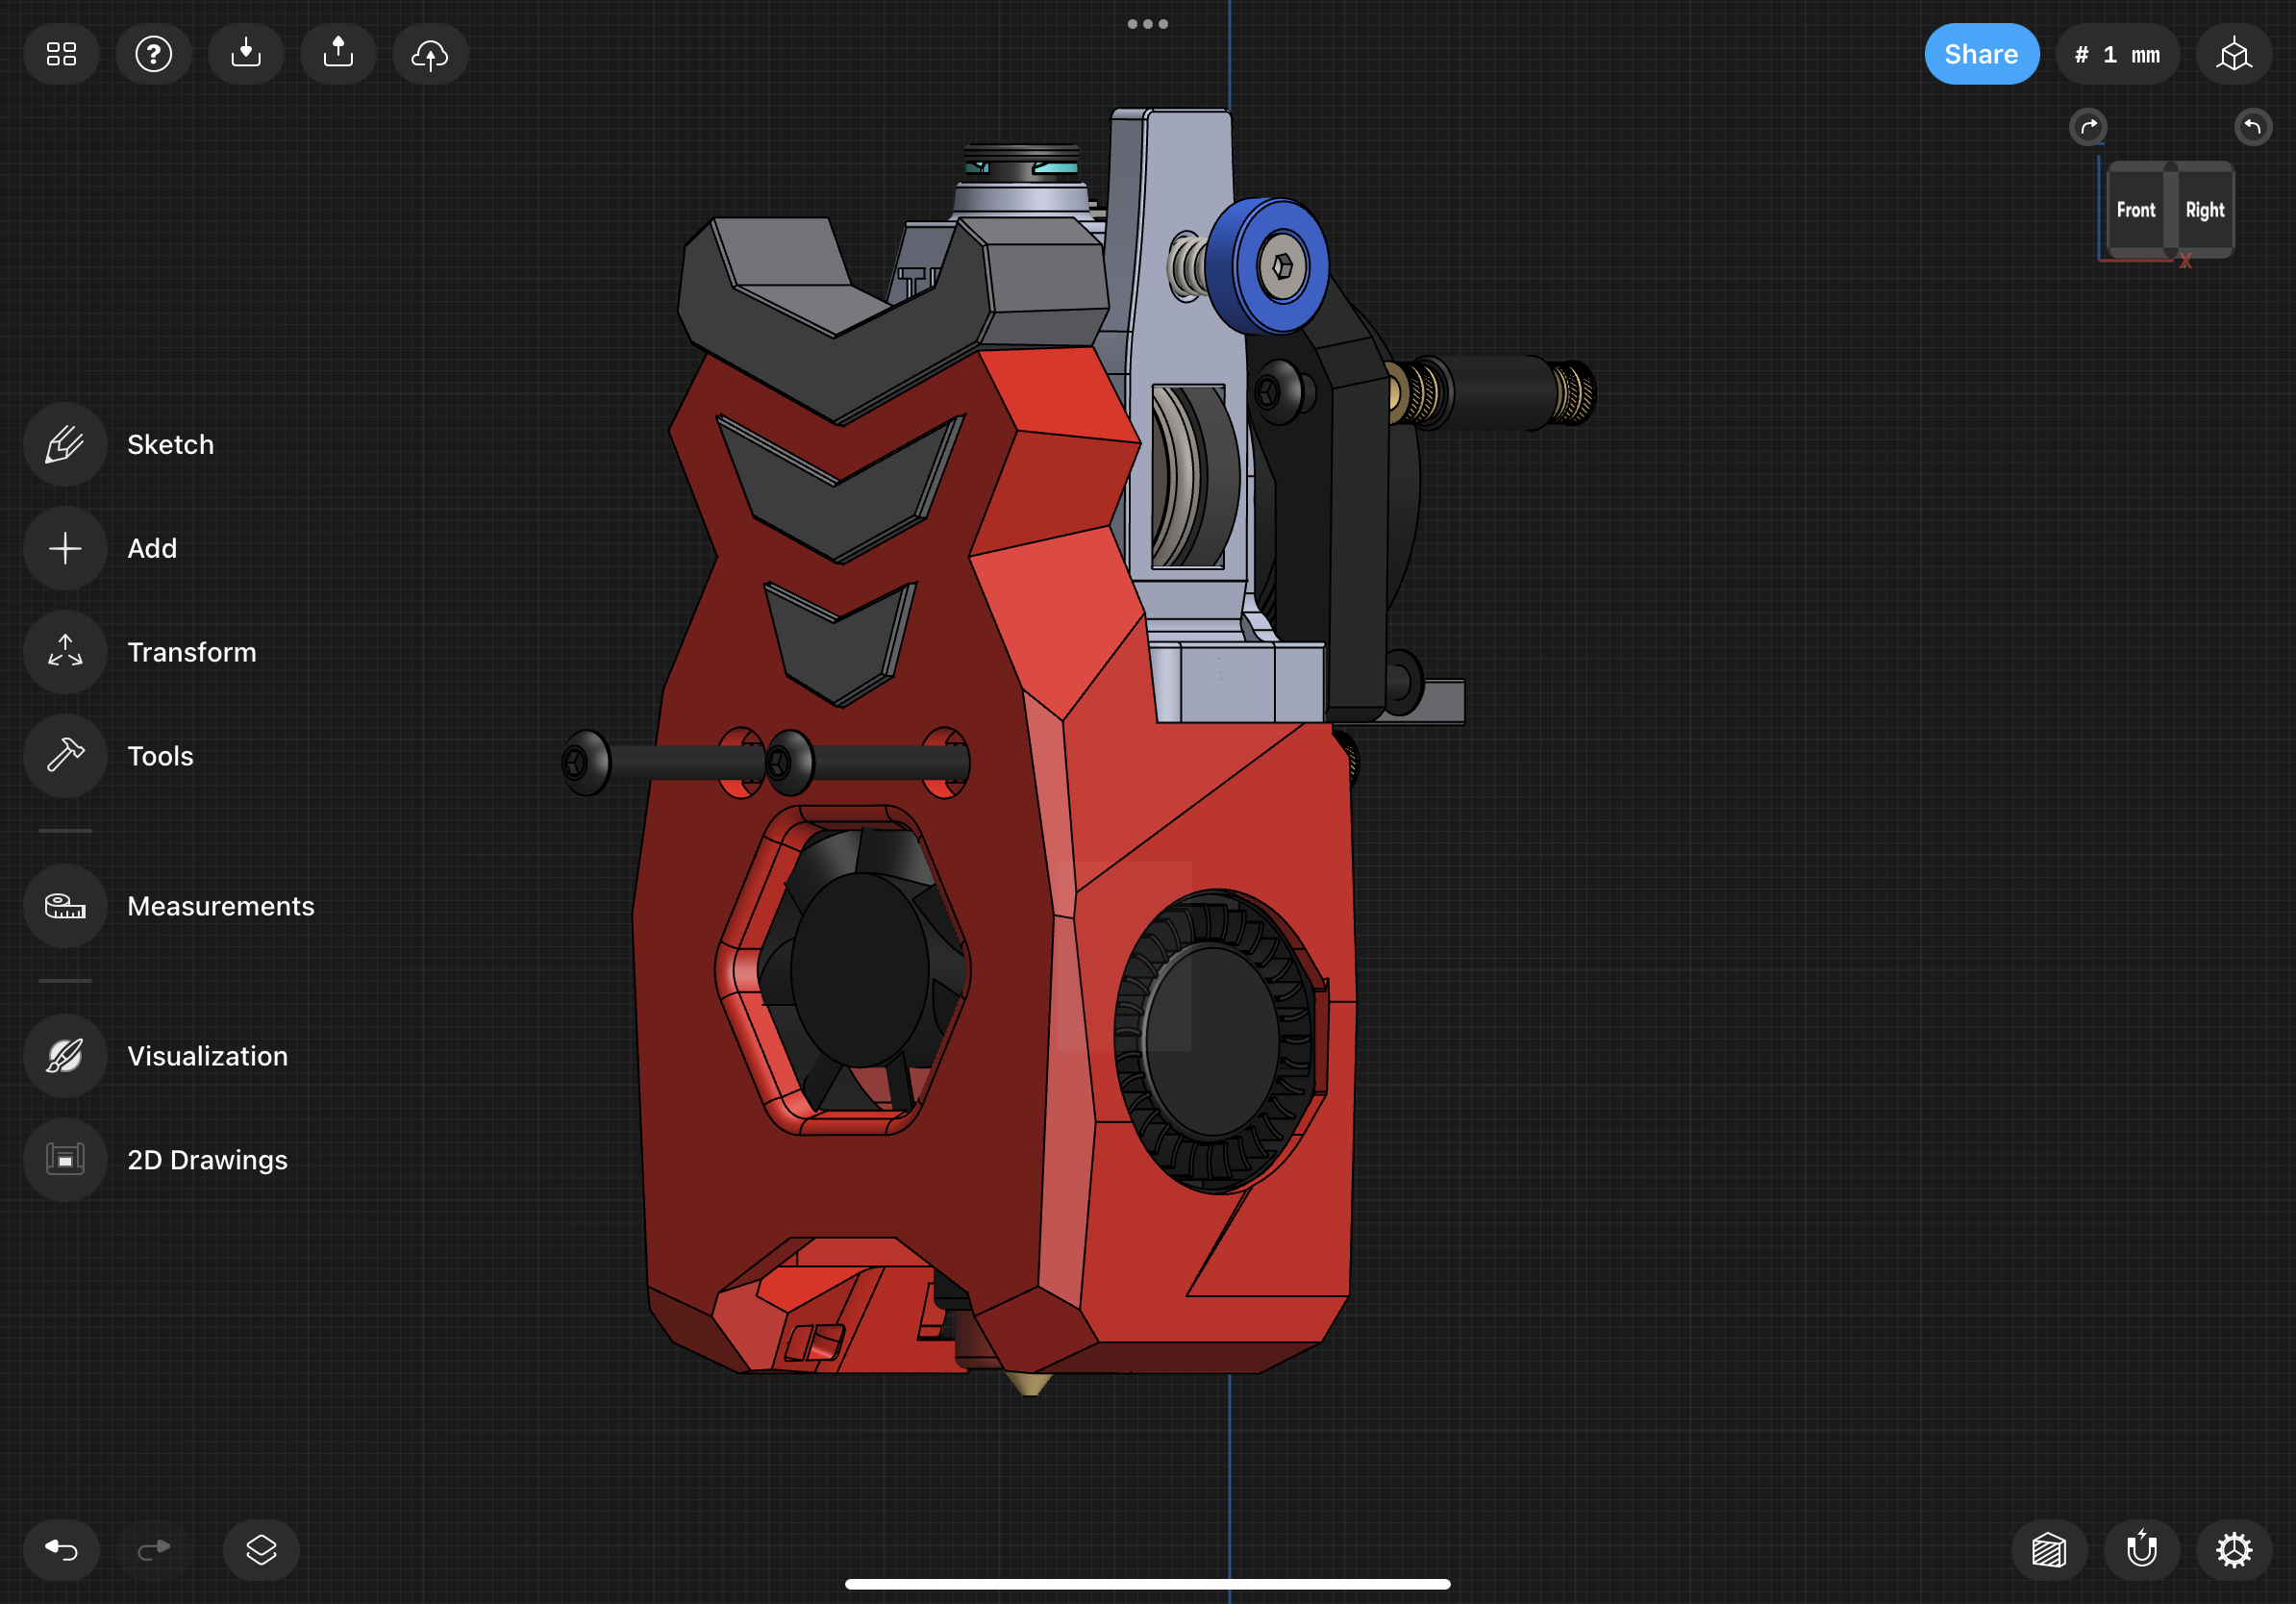
This is the Mini D3vil Burner … a remix from the V0.2 stealthburner from:
- VoronDesign ( https://github.com/VoronDesign/Voron-0/tree/Voron0.2/STLs/Toolheads/Mini_Stealthburner
made to accommodate the tiny TBG-S extruder from:
- Trinaglelab.net ( https://www.trianglelab.net/products/tbgs-extruder?VariantsId=11007 ) .


The objectives of this design:
- make it look cool 😎
- fit the TBG-S extruder
- remove the drop-in nuts
- make it stronger ( the previous design have very thin walls )
- make it stable with wider x-carriage
- make it possible to add a logo LED
- allow it to fit any size NEO LED or even strip ( for the logo )
- with all the above trying to maintain/reduce the overall weight.
The design has been going on for some time and this is after many iterations … but nothing is perfect so please share your makes and findings, so we can fix them.
NOTE: the whole design is held to the x carriage via 2 screws so I decided to make a heat-insert rather than drop-in nuts and longer screws ( 40mm make sure they don't touch the Rail block ) you can use 35mm screws if you push the heat insets further in … check the x-carriage section.
NOTE: there are 2 options in this design
- 1st is the" BLACK" TBG-S bridge, which requires no modification to the extruder itself but will add some extra weight
- 2nd is the “ORANGE” TBG-S motor back plate, which will require you to change the backplate of the extruder “I would not suggest it at the moment ”( i am working with Trianglelab to offer this as a printed option with the kit they send you … if more people are interested please msg me directly here ) check the image below …
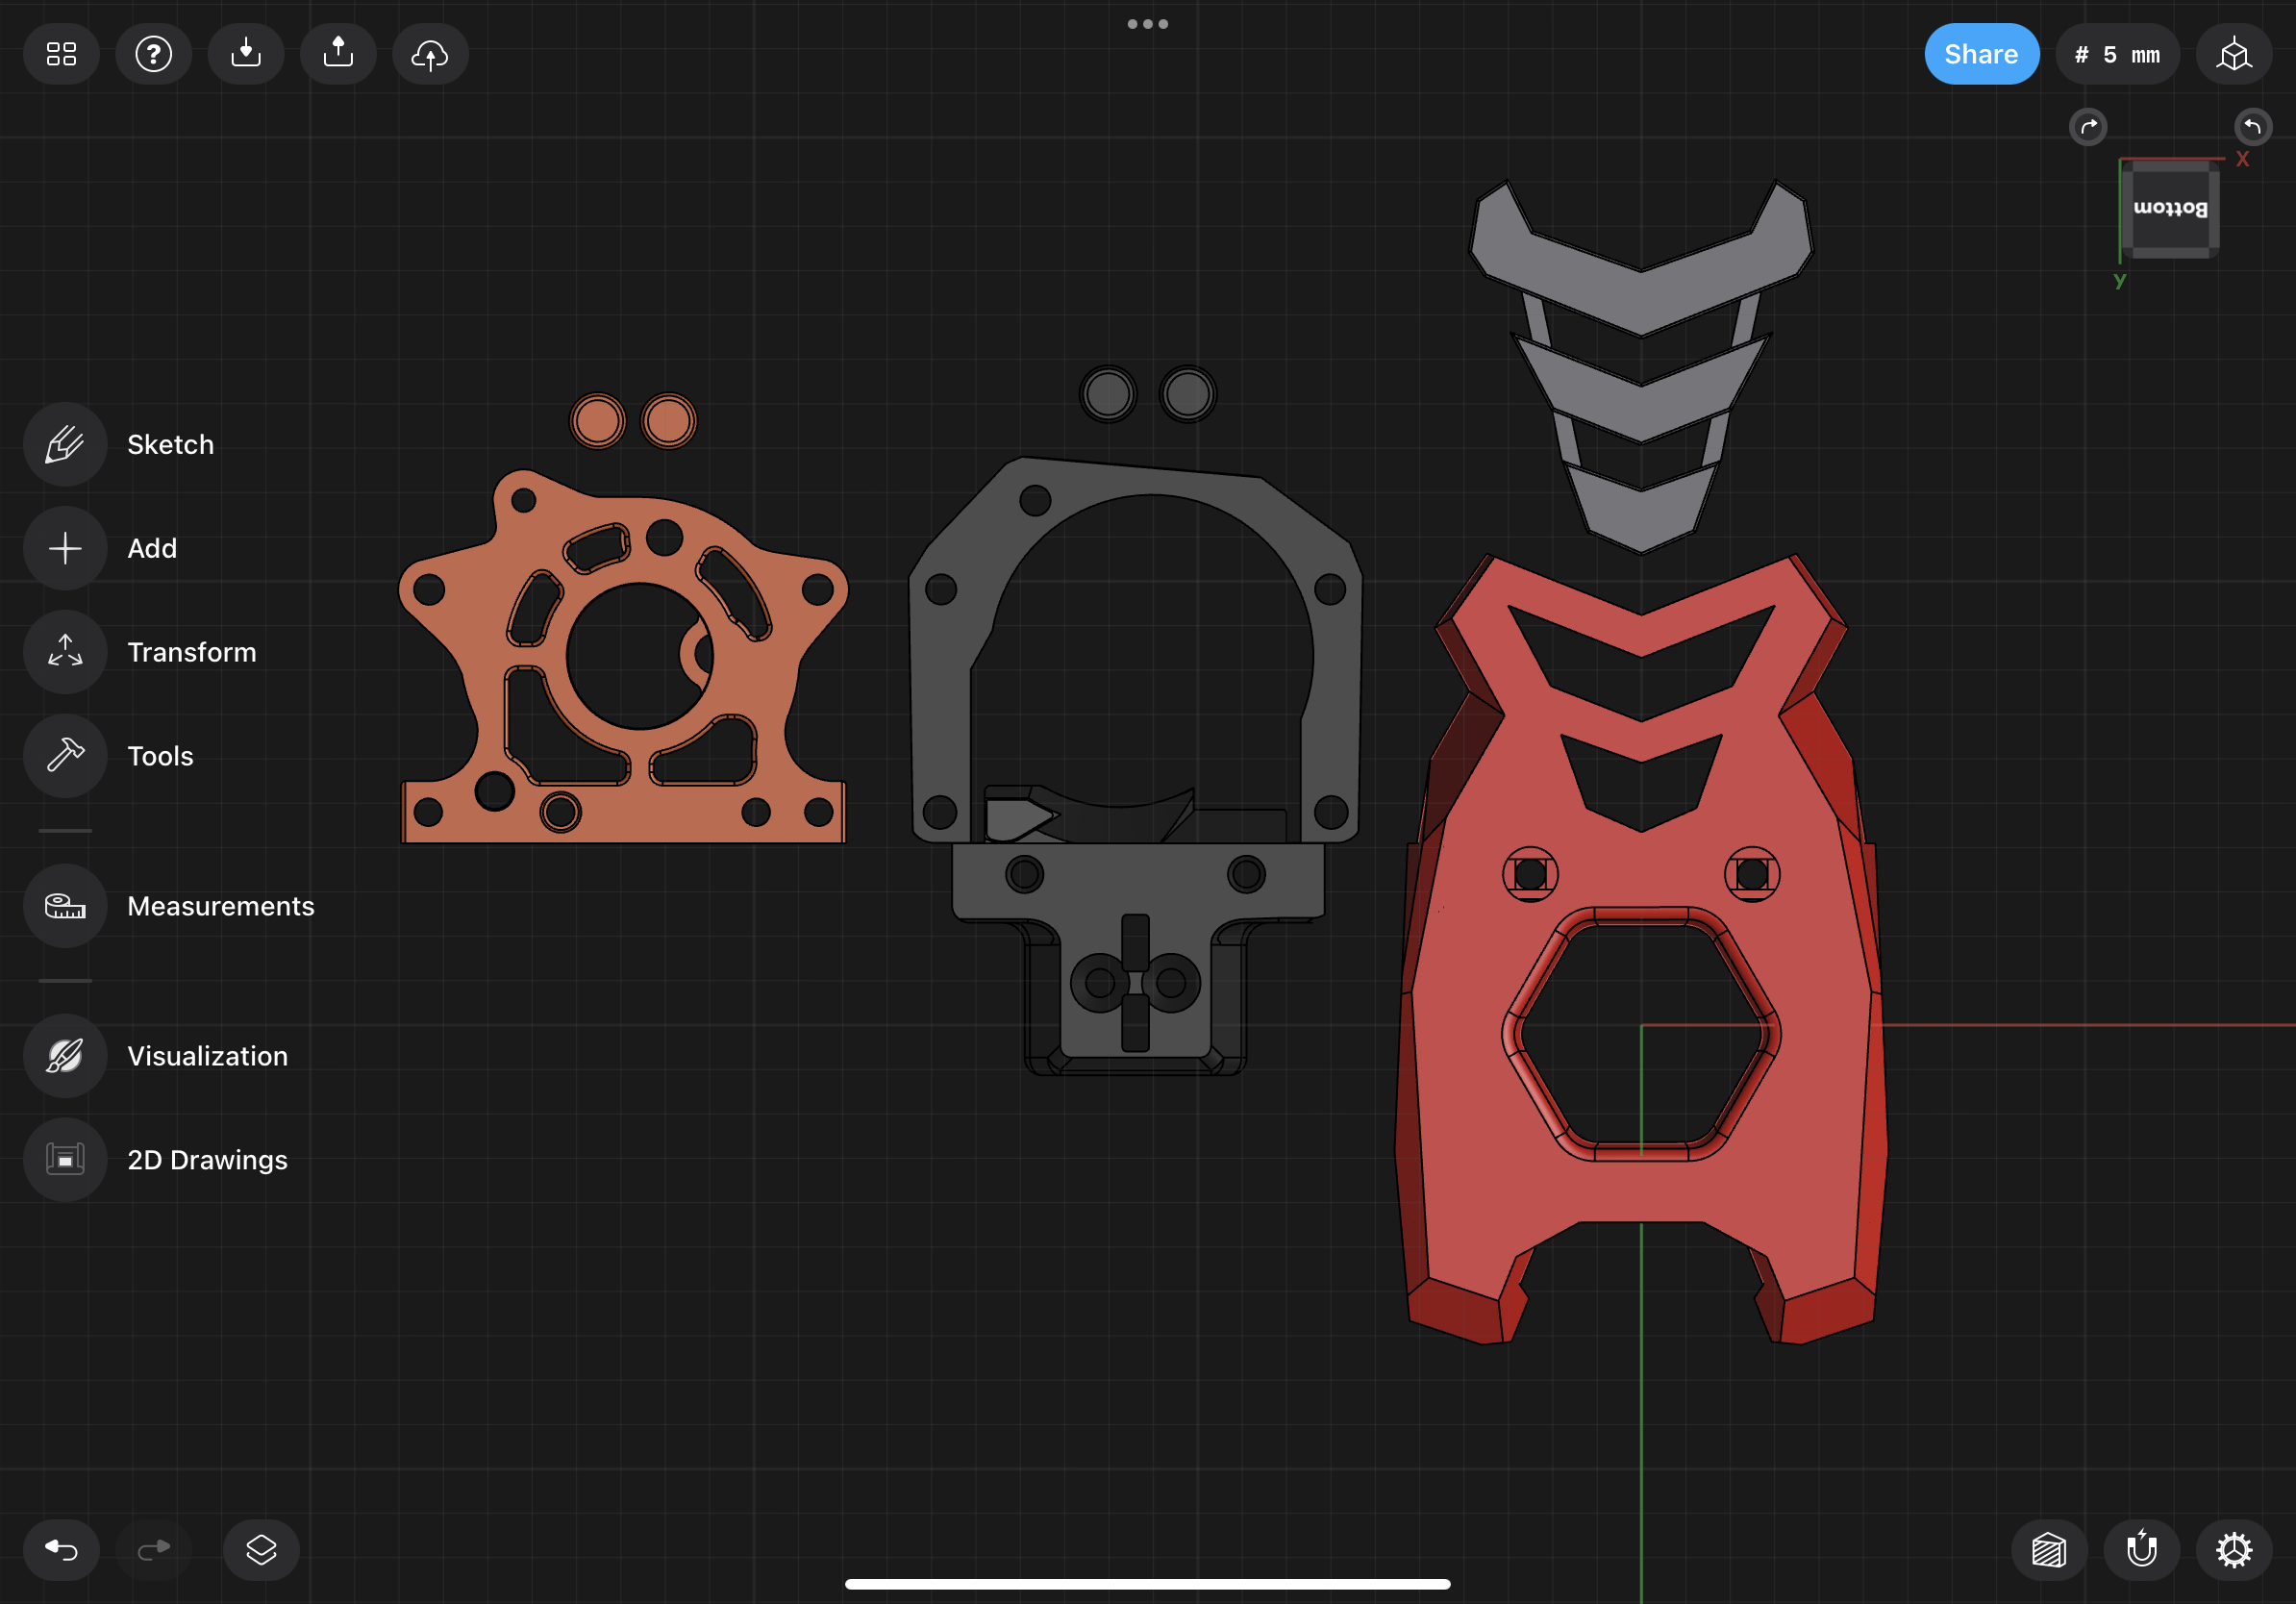
OK .. LETS START…
1st thing 1st …. Heat inserts
- 4 for the Strain spacers
- 2 for the X carrige
- 2 in the Main Body

1- The printing setup :
remember to choose between the print you will make … TBGS BRIDGE or TBGS backplate.
A- All the Parts :
- ABS+ or whatever you are comfortable with ( mind the shrinking )
- 4 walls/perimeters
- 5 bottom / 5 top
- 40 infill
B- The logo :
- PETG clear
- 3 walls
- 30 infill ( you can change it as you like )
- no bottom layers to show the infill ( Triangles ) “this is a personal choice” feel free to play around
- 2 top layers or more as you wish.
2- The LEDs:
the design is made for 2 Nozzle LEDs and 3, 4 or 5 LED for the Logo ( as per your liking)
Make sure that the Last LED in the chain will need to go through a small hole
make the wires long enough ( there is enough room to hide them inside the logo compartment ) i suggest measuring after printing the body part before you start soldering.
I have left the Logo compartment without mounts for the LED this will allow you to have the freedom to fit them wherever you wish.
Note: i suggest using a strip here … Easier to solder and bend to a U shape with 4 LEDs that will be facing upward and side to side.
after pulling the LED wiring around the toolhead Place the Logo LED cover it will be held in place in step 4 ( when placing the extruder) … Dont fit the Nozzel LED just yet wait until all Fans are fitted then make this as the last step.
3- The fans:
should be straightforward as suggested by Voron Design.
4- The hotend
after fitting the Hotend make sure to change the PTEF tube to match the distance with the Extruder ( sorry I didn't measure it … will update the right size later … but its fairly easy to get it manually 😅)
5- the extruder
Place the extruder in place in a way that it will push the logo-led cover to be fitted in place … should be easy. and screw it in place.
6- X carriage
There is built-in support with this model
there is a space in the right side to fit the X-endstop ( if you need to, you just need to drill in 2 holes )
If you can add one FHCS Flat head screw to make sure its not touching the motor. didnt have issues with my setup.
check the images i hope they can explain a lil more.
all the best and please please please, let me know if there is anything that needs changing.
Support
The link below for those who wish to donate or become one of my Patrons , please don't feel pressured.
If you like my designs and find them useful, a simple comment would be a great support 🙂
Thank you 🙏
