
Filament Hinge Tutorial
We calculate the final price from your selected file. You review and accept it before payment.
Estimated printing price per file
€0.17 – €0.21 net (excluding VAT)
For file: lid-v3_0.2mm_20%_2p_PLA_MK3S_13m.gcode
This is an estimate for one file. You’ll confirm the exact price before ordering.
File and estimate settings
File used for this estimate
Average indicative estimate: €0.19 excluding VAT (range midpoint).
- Weight reported by the author
- 2 g
- Print time reported by the author
- 12.6 min
- Source material
- PLA
- Estimate material
- PLA
- Estimate printer
- Bambu Lab P1S - 0.4 nozzle
- Estimate process
- 0.20mm Standard
Indicative estimate for the selected file only, based on the author’s weight and print time. File variants are not added together. The final price is calculated after file analysis.
Saved on this device.

A short tutorial on filament hinge creation.
- Rating
- 5 / 5
- Likes
- 49
- Downloads
- 369
- Makes
- 0
- Views
- 5,621
- Reviews
- 1
Updated at source:
Model information
- Source
- Printables
- Category
- Other Ideas
- License
- Creative Commons — Attribution — Noncommercial — Share Alike
Filament Hinge Tutorial
Overview
Hinge pins can be of many materials: metal rod, wooden rod, bolt & nut, or a piece of filament.
The filament hinge is sturdy, costs nothing, and is fairly easy to construct. I have used this method with PLA, PLA+, Tough PLA, ABS, and ASA. I suppose any solid filament is possible, but probably not the softer flexible materials.
NOTE: Obviously, you may simply use a piece of filament without treating the ends. Just cut it the same length as the hinge, or even slightly shorter if you want. However, this tutorial is focused on treating the ends.
The idea is to use a piece of the same filament as the hinged device, cut slightly longer than the hinge, and lightly heated on each end to form a blob (like a mushroom or rivet head) that is just bigger than the hinge hole to prevent sliding out.
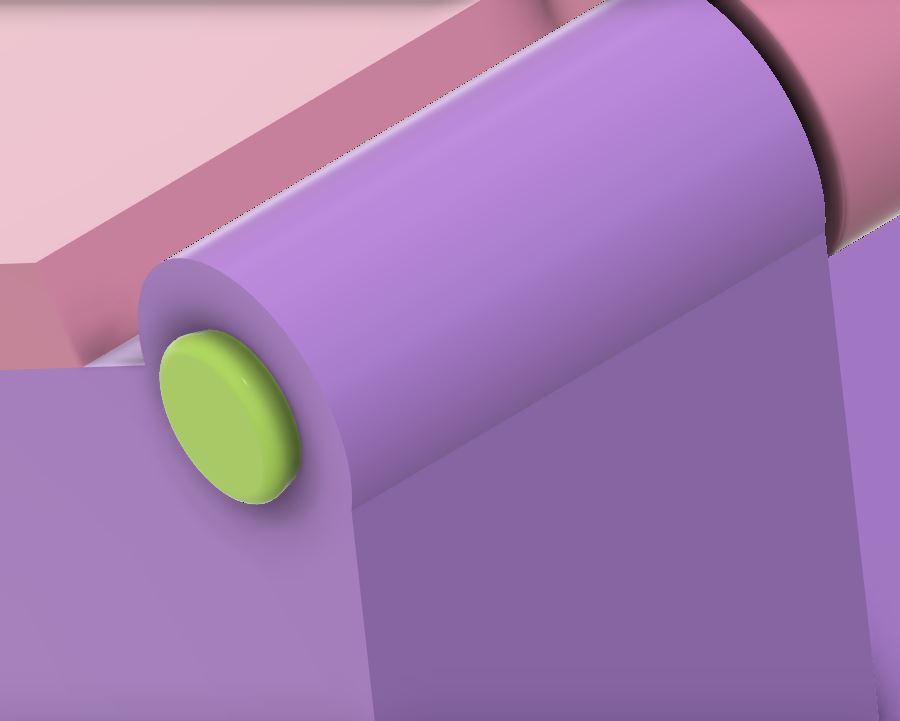
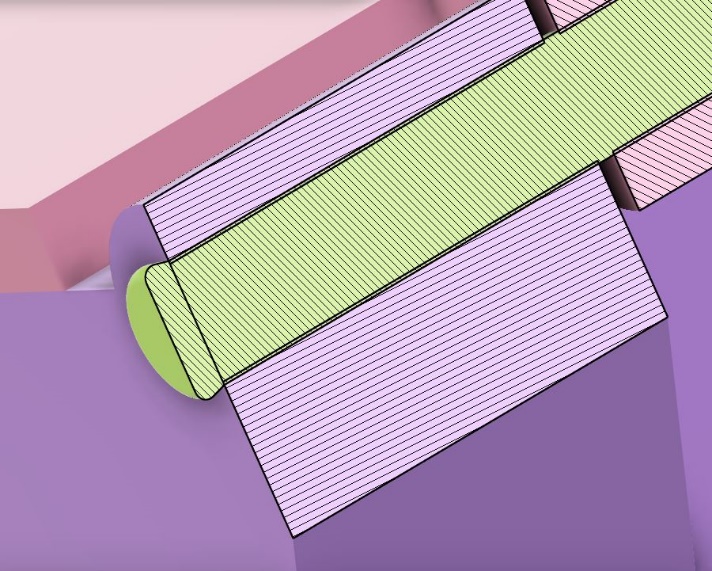
Theoretically, any method to heat the end of the filament will work.
When I first discovered filament hinges, the recommended method was using a soldering iron. I used that method for a while; however, it has some disadvantages. The iron is often hotter than needed, melting the filament too much. The heat is over a larger area, risking damage to an adjacent area. And it sometimes leaves the end burnt and discolored.
The method I will describe here does much better in those areas. I didn’t invent this method and can’t remember where I discovered it. It is just applying a controlled amount of heat to a small metal area. I use a butane torch and a putty knife. I suppose one could also use a butane lighter and an old butter knife or something similar.
Although I have not tried this, I would think it might be possible to use acetone with ABS.
Steps
- Hinge hole preparation
- Begin by cleaning out the hinge hole. The filament must be able to slide in and out of the hole without binding.
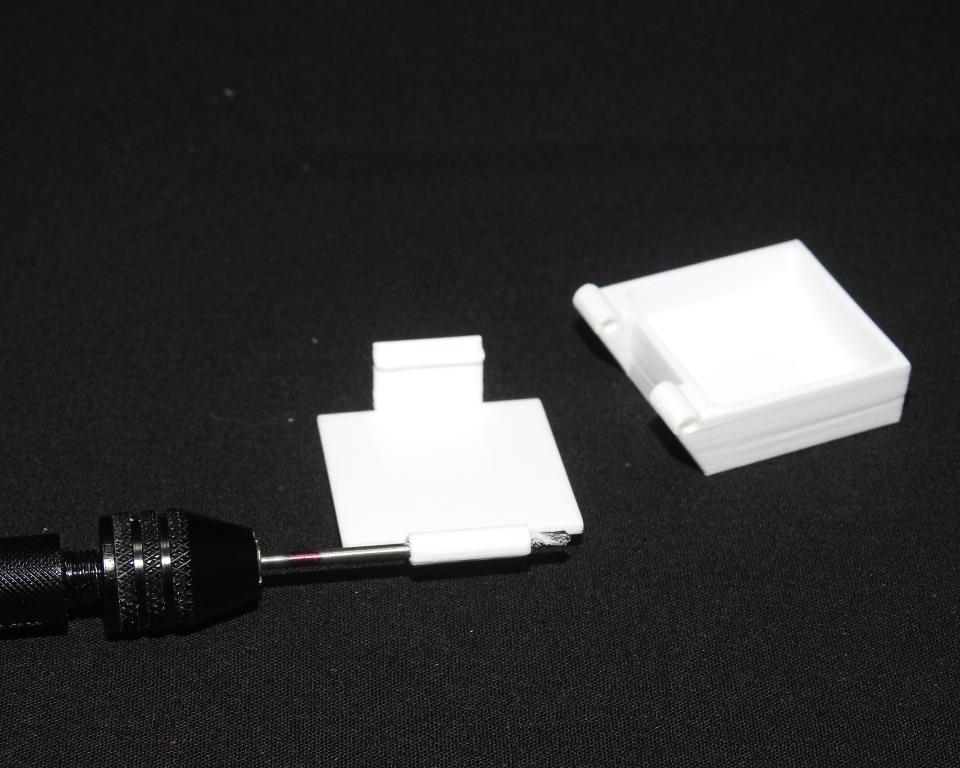
- For short hinges (not more than about 35mm) I use a hand drill and bit. I recommend starting with a 1.8mm bit. If necessary, repeat with a 1.9 or a 2.0 bit.
- For longer hinges I use my reamer. It is constructed of a metal wire (coat hanger) about 1.9mm diameter. I printed a handle and used a grinder to make the end sharp enough to remove the filament.
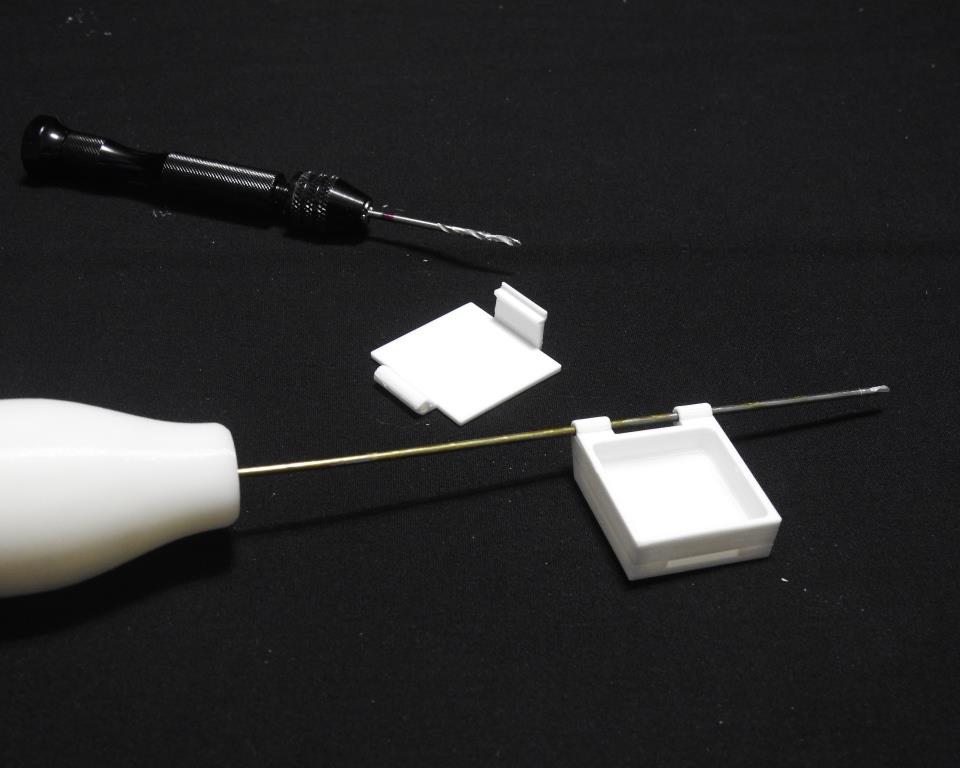
- Slowly twist back and forth with gentle forward motion until completely through the hinge.
- Test fit your filament to make sure it slides in and out freely. This will ensure the hinge will rotate without binding.
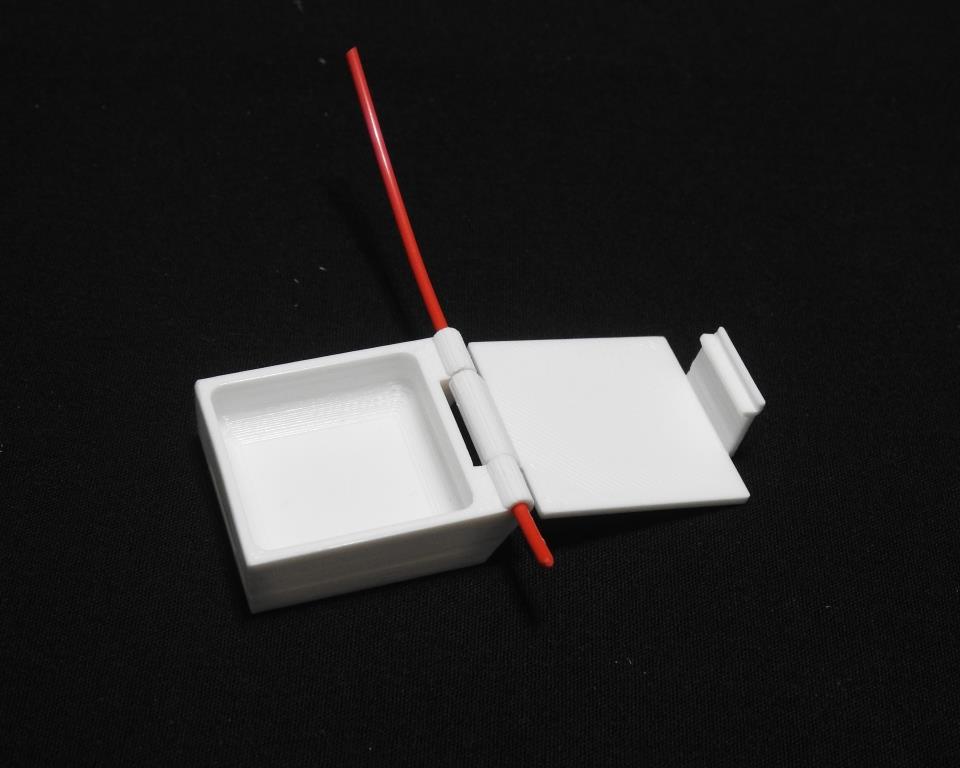
- Next, cut a piece of filament about 2-5mm longer than the hinge.
- Setup the heating station. Ensure it is stable and located so you don’t burn yourself or any nearby objects.
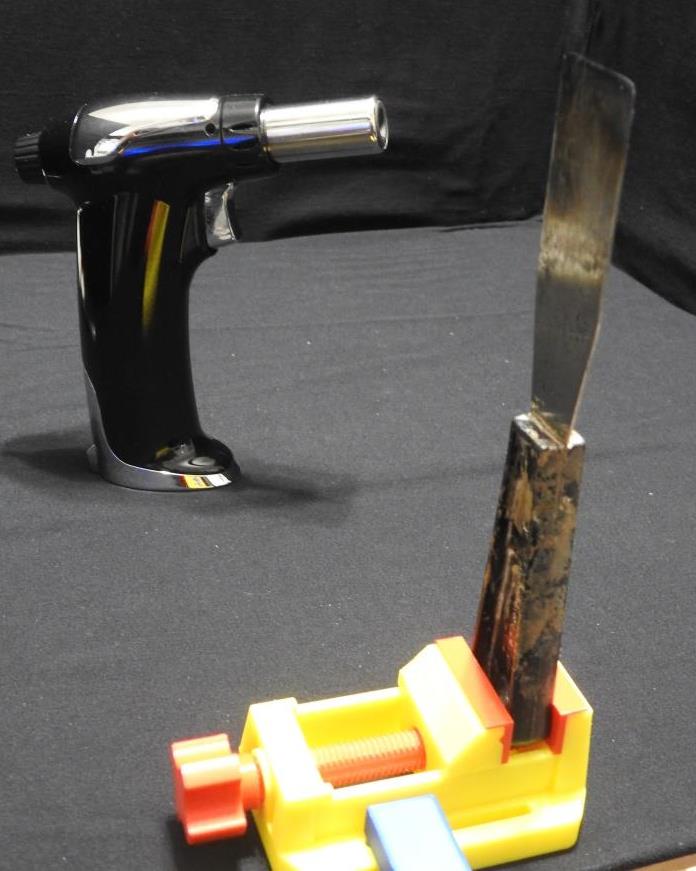
- I like to clamp a small vise to the edge of the work surface. I use the vise to hold the putty knife while heating.
- Melt the first end of the piece of filament.
- Apply the torch to the putty knife for about 3-4 seconds.
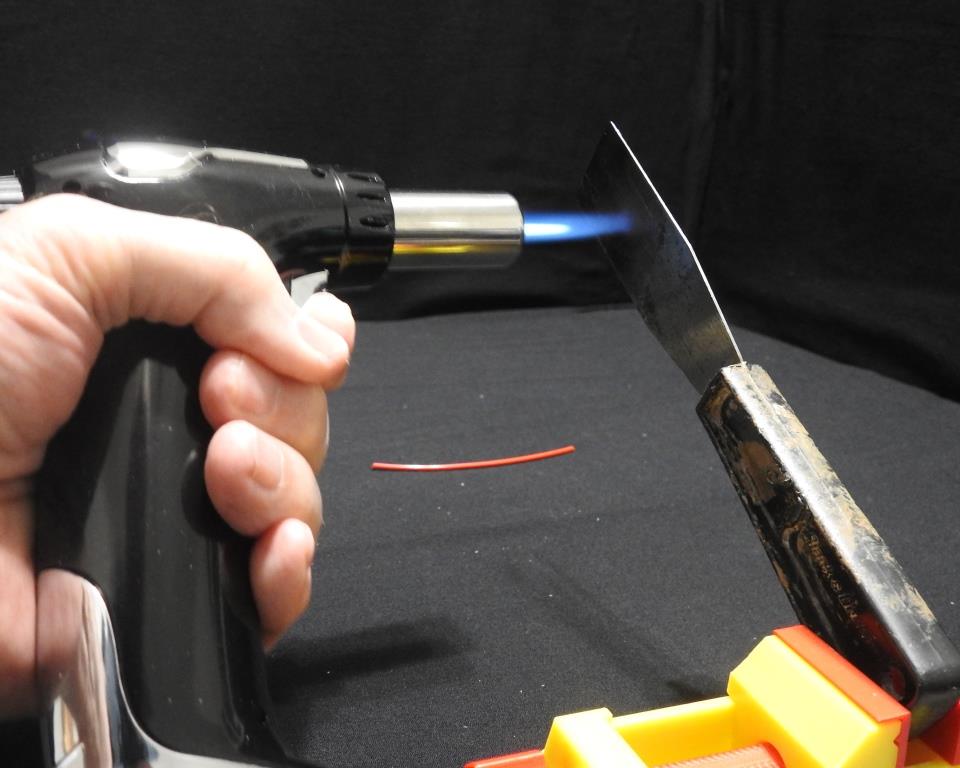
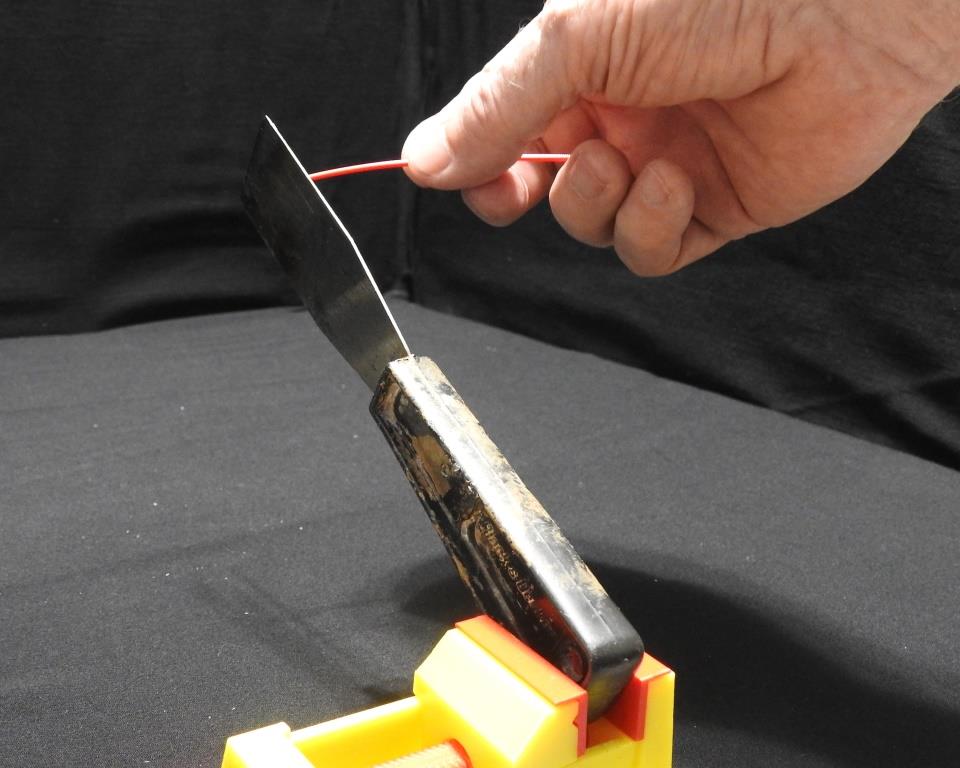
- Lightly push the end of the filament into the putty knife to form a slight mushroom. This may take some practice to get the desired shape. It doesn’t have to be perfect, just slightly bigger than the hinge hole so it won’t slide through.
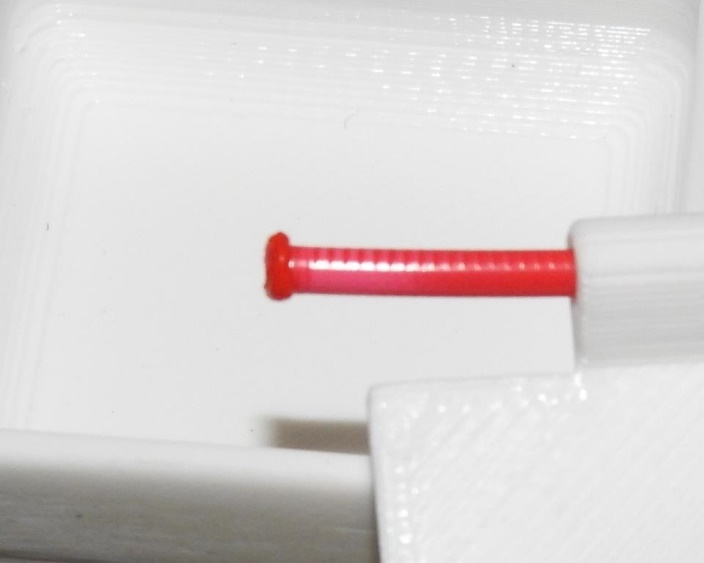
- Insert the prepped filament into the hinge and verify it fits as you desire and doesn’t slide through.
- Then, while holding the mushroomed end firmly against the end of the hinge, cut off any excess filament sticking out the other end of the hinge, leaving about 1mm sticking out.
- Now, back to heating station and heat the putty knife again. This time you may want to apply the heat for a little longer – maybe 5 seconds – to allow for the extra maneuvering.
- Set the torch down and remove the putty knife from the vise.
- Carefully apply the putty knife to the remaining filament end.
- You will want to hold the hinged device in one hand while ensuring the filament remains inserted.
- Apply the putty knife very carefully to just the filament – without touching any other part of the device that doesn’t want to be melted.
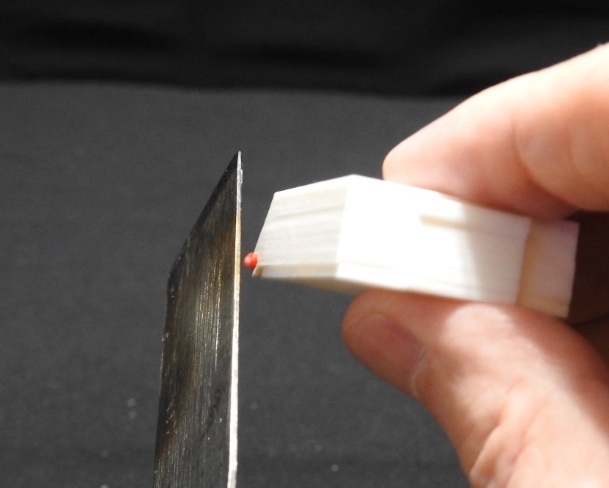
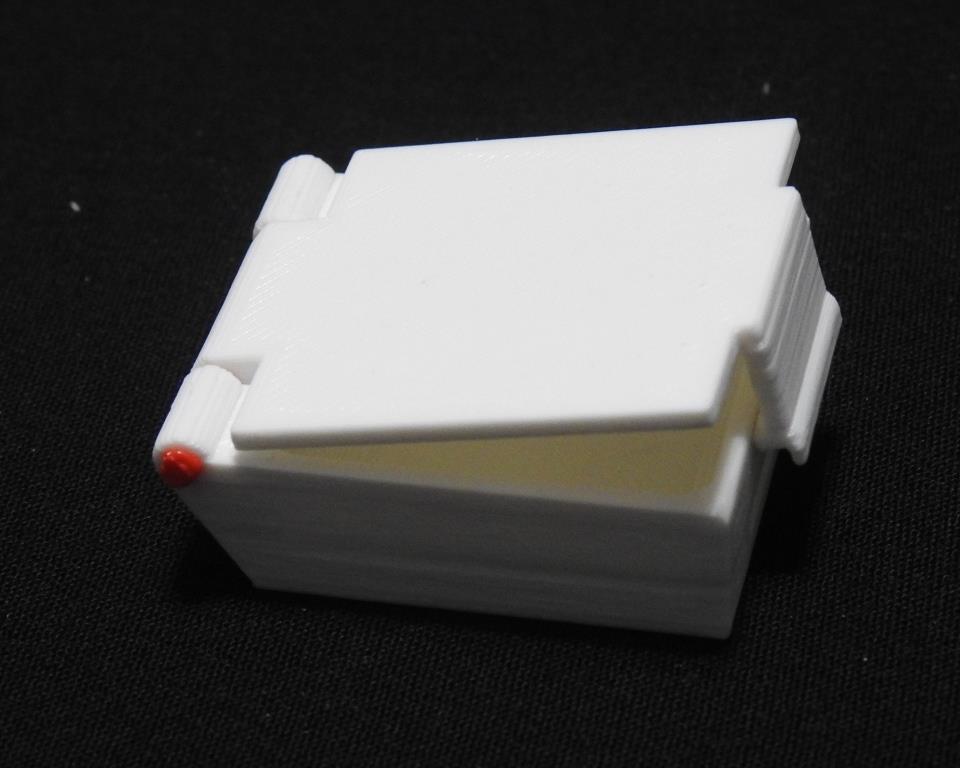
- The end result will be a device with a sturdy hinge that is nearly invisible. {I used a contrasting color filament in this demonstration for visibility.}
Tools
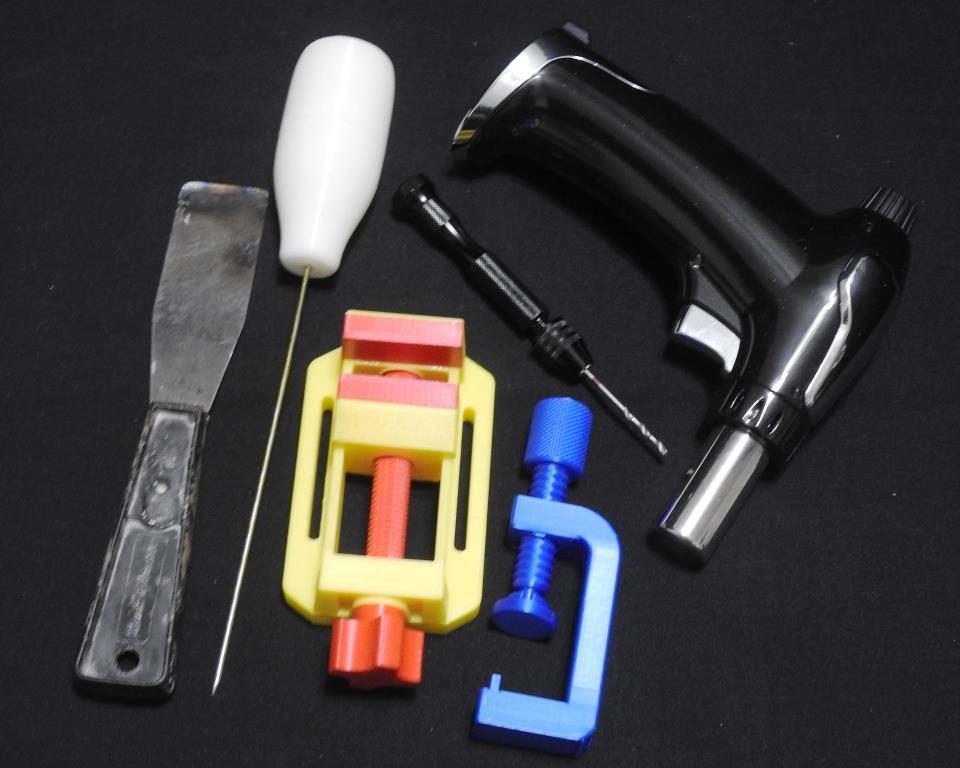
- Vise and clamp
- Putty knife
- Any thing with a flat metal surface and a handle to protect your hand
- Butane torch
- Hand Drill and 1.8-2.0mm bit
- Reamer
Update 5/30/2024
Added a note about optionally not treating the filament ends. And uploaded the small box STL files by request.