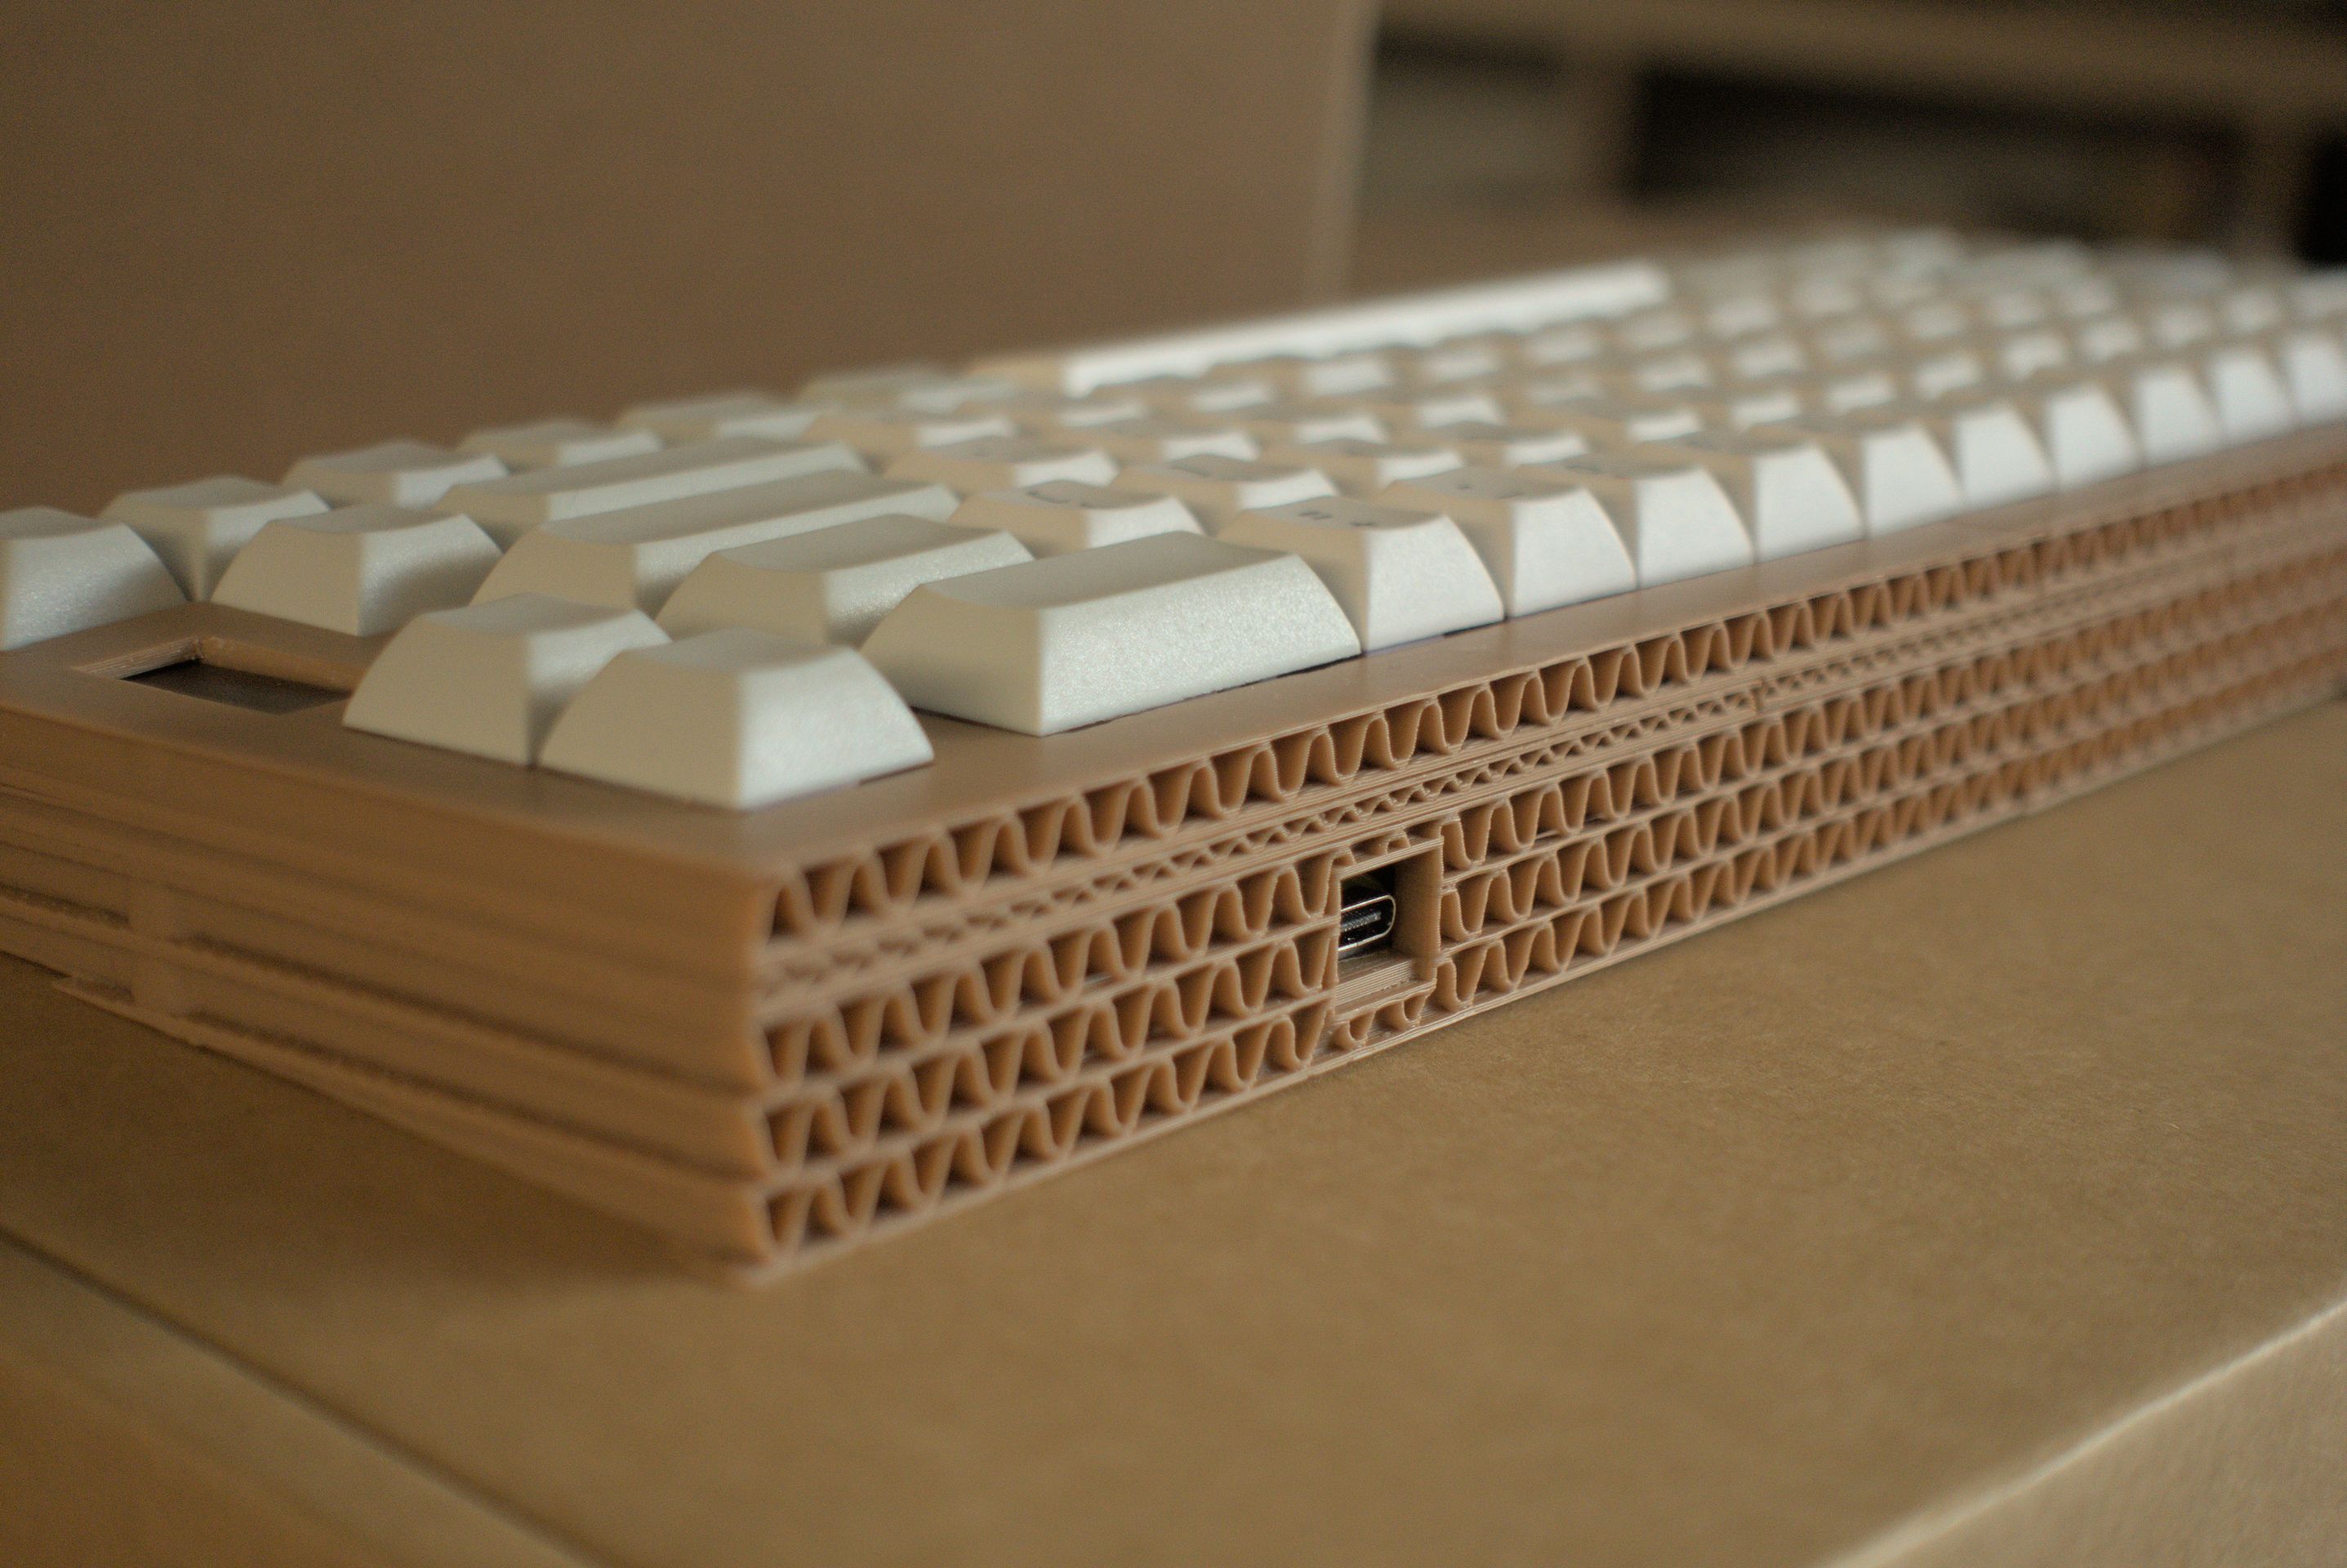
3dp fc660 v3 OLED hand wired mechanical keyboard
We calculate the final price from your selected file. You review and accept it before payment.
Saved on this device.
Now with bongo cat
- Rating
- 0 / 5
- Likes
- 46
- Downloads
- 149
- Makes
- 0
- Views
- 1,996
- Reviews
- 0
Updated at source:
Model information
- Source
- Printables
- Category
- Computers
- License
- Creative Commons — Attribution — Noncommercial — Share Alike
This is a hand wired keyboard. Please be familiar with the process of hand wiring before undertaking this project. Inspiration for this project comes from this hero.
Features
- 5° typing angle
- Low profile front height
- Supported layouts:
- Split backspace
- ISO enter
- Split left shift
- Split right shift
- Stepped caps lock
- JIS bottom row
- If I haven't included your preferred combination, please feel free to edit the source file and share
- Vial compatible
- Bongo cat
Parts
Aside from the printed pieces and tools, you will also need:
| QTY | Part | Comment |
|---|---|---|
| 1 | ATmega32U4 MCU | e.g. Arduino Pro Micro or Teensy 2.0. |
| 14 | M3 threaded insert (5 mm OD, 3 mm length) | |
| 14 | M3 bolt (8-10 mm length) | |
| 1 | 0.91 inch OLED module 128×32 | |
| ≈66 | MX keyswitch | Exact number depends on layout. |
| ≈66 | Diode | e.g. 1N4148. |
| 2-6 | Plate mount stabilisers | Exact number depends on layout. |
| ≈3 | Cable ties (3 mm width) | For securing the MCU to the case. |
| Wire | Solid wire recommended over stranded. |
Wiring guide
Do not wire the rows all the way across. The Arduino Pro Micro only has 20 pins therefore we must use a 10×8 matrix (10 rows, 8 cols) with the last two pins running the OLED display. See diagram below for wiring. The row and col are labled on the top left legend.

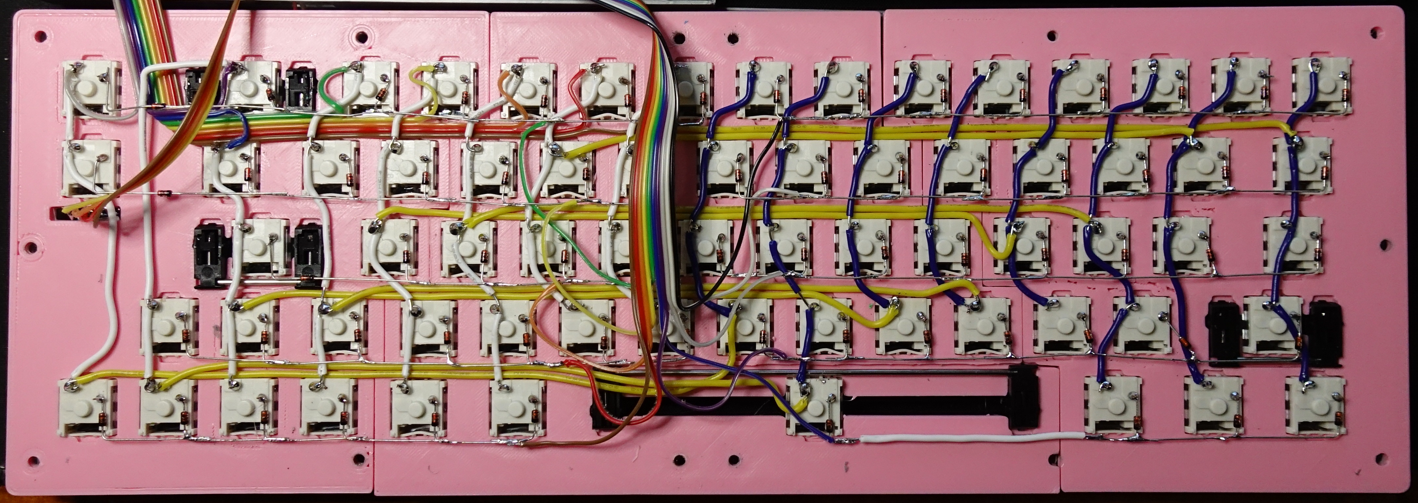
| Matrix | Pin | MCU | Pin | Matrix |
|---|---|---|---|---|
| Row 9 | D3 | 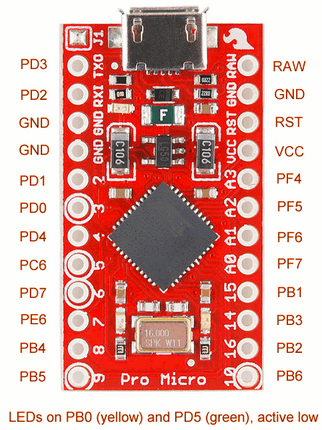 | RAW | |
| Row 8 | D2 | GND | ||
| GND | RST | |||
| OLED GND | GND | VCC | OLED VCC | |
| OLED SDA | D1 | F4 | Col 0 | |
| OLED SCK | D0 | F5 | Col 1 | |
| Row 7 | D4 | F6 | Col 2 | |
| Row 6 | C6 | F7 | Col 3 | |
| Row 5 | D7 | B1 | Col 4 | |
| Row 4 | E6 | B3 | Col 5 | |
| Row 3 | B4 | B2 | Col 6 | |
| Row 2 | B5 | B6 | Col 7 | |
| Row 1 | B0 | D5 | Row 0 |
Firmware
Default firmware with Vial support is included in the ‘Other files’ section. Flashing is easy with QMK Toolbox.
Source code:
- QMK https://github.com/qmk/qmk_firmware/tree/master/keyboards/handwired/3dp660_oled
- Vial keymap https://github.com/xia0/vial-qmk/tree/3dp660_oled/keyboards/handwired/3dp660_oled/
Cardboard design
See my faux cardboard version of this keyboard.