
1 / 5
XMAS neon LED star
Order a print of this model
We calculate the final price from your selected file. You review and accept it before payment.
Saved on this device.

Model information
- Source
- Printables
- Category
- Winter & Christmas & New Year's
- License
- Creative Commons — Attribution — Noncommercial
XMAS neon LED star. Very easy build and print.
Parts used:
- 12V/2A power supply
- 70cm of an 12V WS2811 neon LED strip 5m (6mm width, 10mm height)
- 1x Wemos D1 Mini ESP8266
- 1x On/Off switch Ø13x19mm
- 1x Barrel jack for power input Ø12mm
- Some 0,25mm² wires in different colours
- 1x Step-Down module (12V > 5V)
- Some 3 wire LED cable
- Some suction cup hooks
- 2x M3 screws to close the box
Software:
- If you want to use white color only, you don’t need the ESP8266 or code.
- The code can be found in my GitHub repository.
Wiring:
- If you want to use white color only, you can use the barrel jack adapter delivered with the power supply to connect the “-“ output to the “white“ cable of the neon LED adapter and the “+” output to the “red” wire of the neon LED adapter.
- After you press the neon LED strip onto the printed star you simply need to cut the strip on one of its markers shown on the side of the neon LED strip. The star is sized to hold the strip 1 way around with not much overhangs of the LEDs as shown.
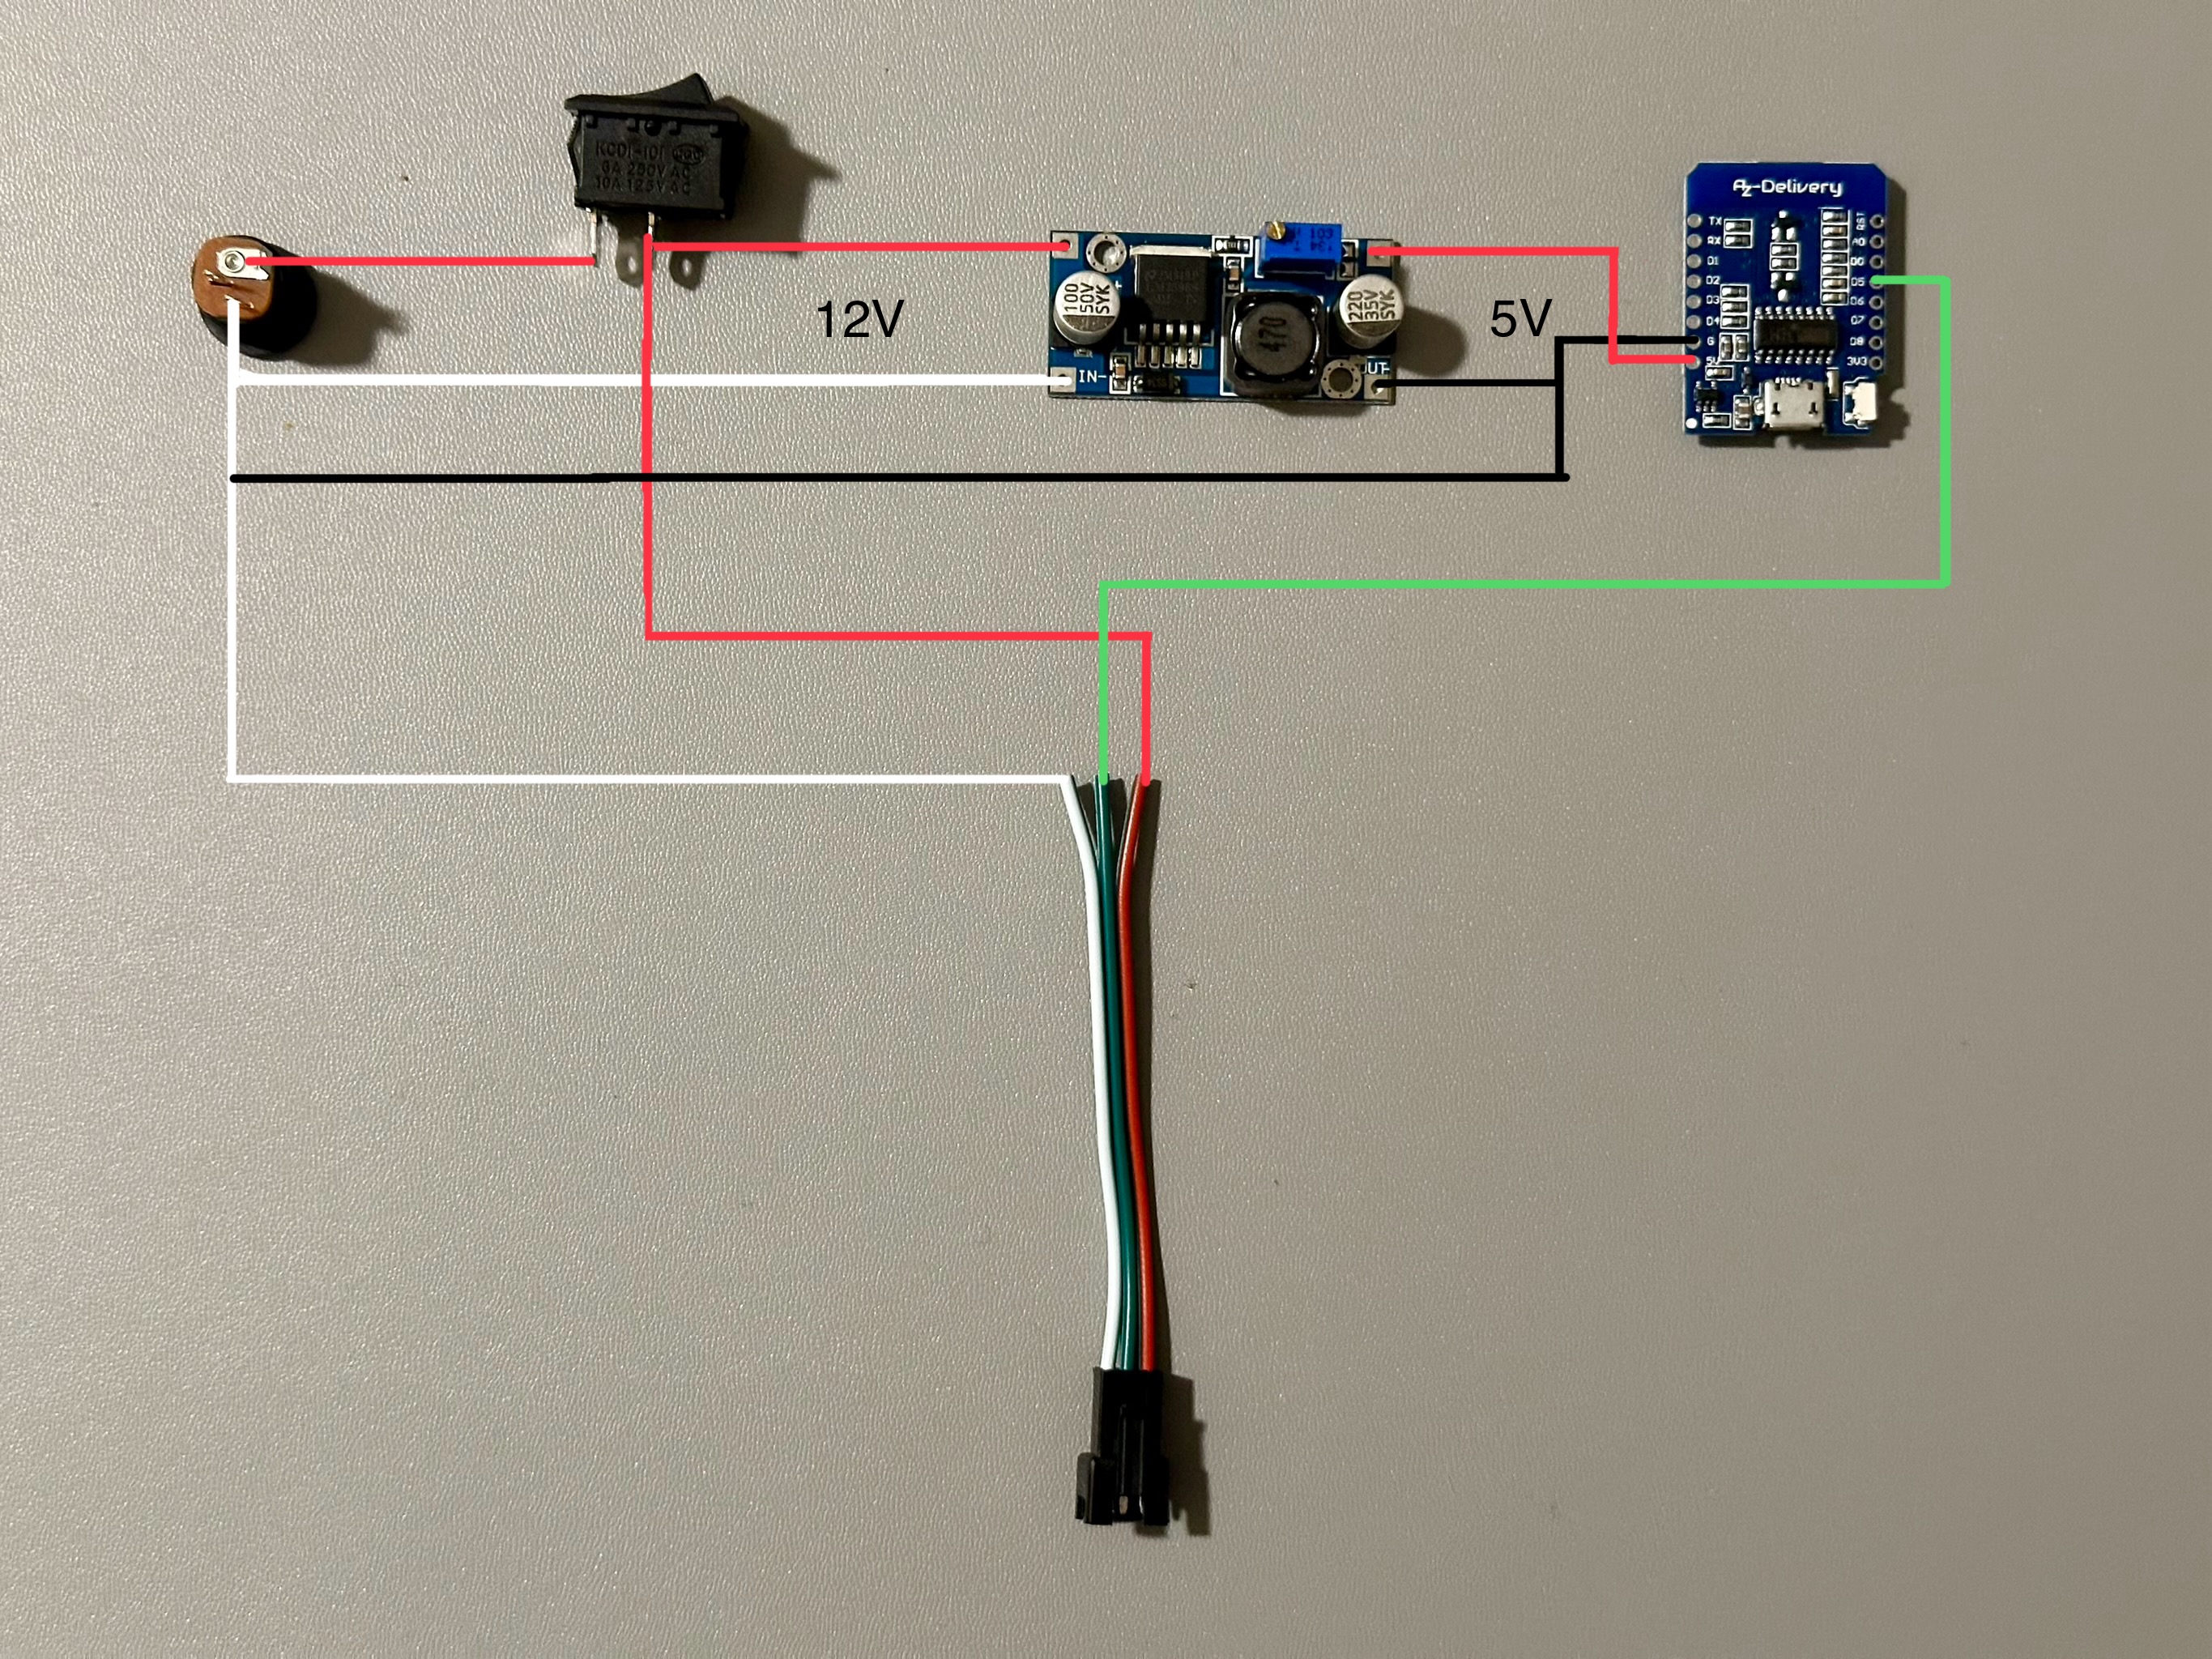
- You will need to add the above listed Step-Down module to power the ESP8266 with 5V instead of the 12V delivered by the power supply. The 12V is needed for the neon LED strip itself. You will need to measure the output voltage of the module with a volt meter and set it to 5V to avoid damage to the ESP8266.
| Barrel jack: | Switch: | Step-Down: | ESP8266: | LED strip: | Wire color: |
| +12V | Pin1 | ||||
| Pin2 | IN+ | 12V | Red | ||
| GND | IN- | GND | White | ||
| OUT+ | 5V | ||||
| OUT- | GND | ||||
| D5 | DIN | Green |
Printing instructions:
- 0.3 draft profile
- No supports needed
- No brim needed
- Textured sheet used
Happy printing =)