
Cat (Pet) proof toilet paper roll holder
We calculate the final price from your selected file. You review and accept it before payment.
Saved on this device.

Prevent your cat / dog / lizard from un-spolling and / or attacking your toilet paper roll with this print!
- Rating
- 5 / 5
- Likes
- 47
- Downloads
- 205
- Makes
- 4
- Views
- 1,588
- Reviews
- 2
Updated at source:
Model information
- Source
- Printables
- Category
- Bathroom
- License
- Creative Commons — Attribution — Noncommercial
Overview
One of our cats loves to grab the end of the toilet paper and then run through the house with it, sometimes taking the majority of the role with him. To prevent this I designed this cat-proof holder that uses a three piece revolving mechanism to allow easy access to toilet paper by humans but at the same time frustrate cats.
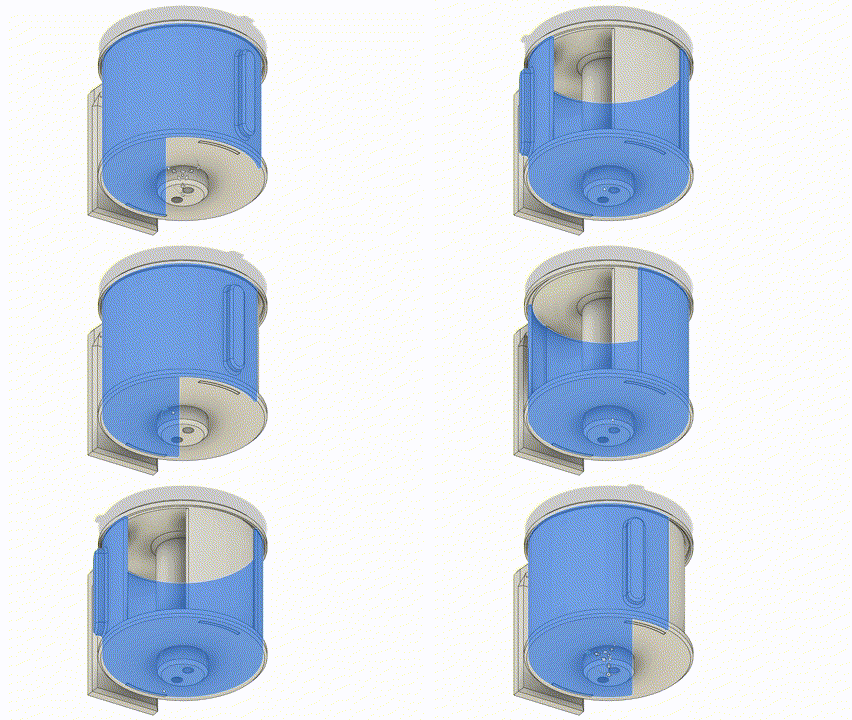
(The model used in the gif above is a previous version yours will look slightly different but the mechanism is the same)
The roll is placed inside and rests on the stator.stl. The rotor.stl fits into the outer groves of the stator.stl and allows access to the toilet paper when the gap in both parts is rotated into alignment.
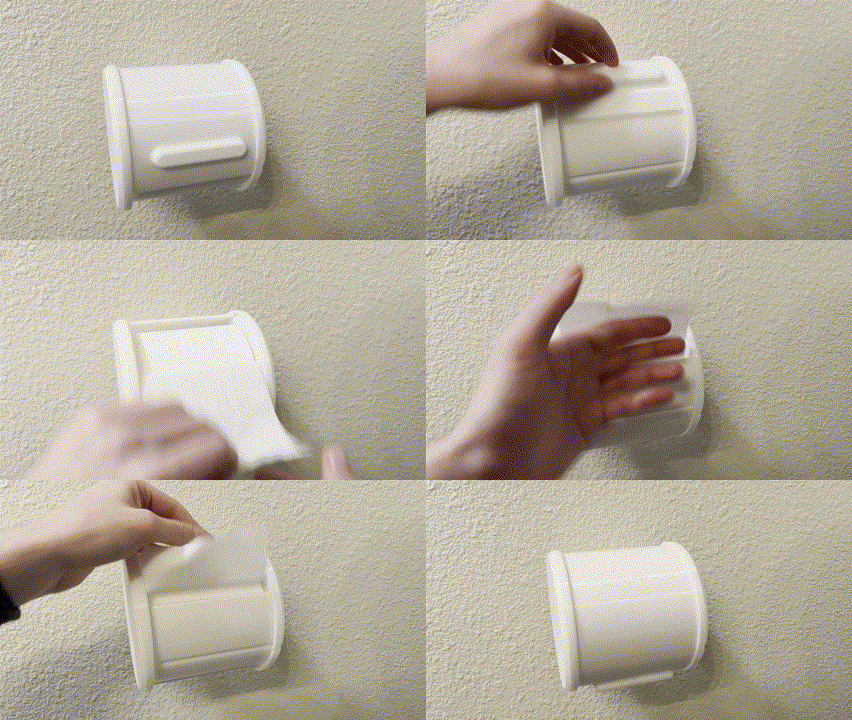
This video shows me accessing the TP after the assembly as been mounted to the wall
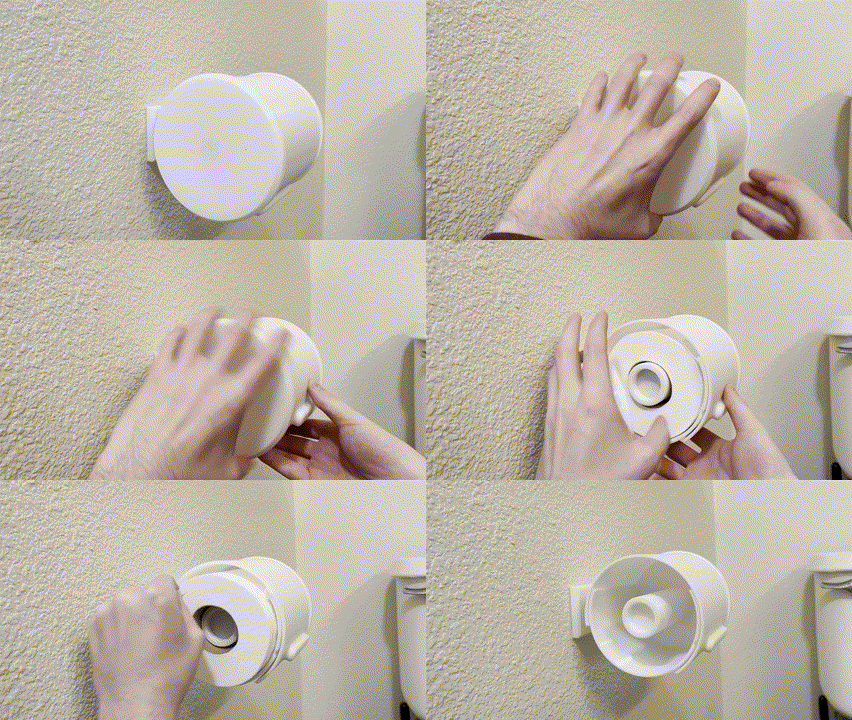
This video shows me unscrewing the stator lid to access and remove the toilet paper roll like you would do to change the roll.
TP dimension requirements
This TP holder was designed for use with Trader Joe's Ultra soft rolls. It should work for other standard size rolls but no promises there. The height of the roll should be ~100 mm and the diameter should not exceed ~60 mm.
Printing
All parts can be printed without support although the rotor handle can benefit from a small support if you want a cleaner finish. I have provided a .3mf file exported from OrcaSlicer that has all the parts oriented and ready to print.
I found that 15% gyroid infill with 3 walls is more than sturdy enough to resist even the most motivated feline.
Parts are designed with a 0.2 mm tolerance so make sure your machine is printing accurately to ensure the smooth operation of all parts.
Installation instructions
- Attach the
lidPull.stlto thestatorCap.stlusing two #6 self tapping screws (you could probably get away with a wide assortment of screw types that is just what I had on hand and designed with). - Using the
wallMount.stlpart locate on the wall where you would like to hang the holder. Use pencil to mark the location of the screw holes. Drill and install dry wall anchors of your choice (I like these printed ones from Eric Cardinal) then screw thewallMount.stlto the wall and into the drywall anchors. - Attach the
stator.stlto thewallMount.stlusing 4 #6 self tapping screws or comparable fasteners. - Place a roll of TP onto the
stator.stland slide therotor.stlover it making sure the bottom edge fits into the groove. - Screw on the
statorCap.stlto close everything up. Using a small amount of thin silicon lubricant really helps with the smoothness of the thread if it is binding up.
Other notes
- There is a small cutout in the stator, this can be used for a 5.5 mm ball detent to retain the rotor but I found it not necessary. I kept it in the model because it does not effect the function.