MagSpring PCB Holder
We calculate the final price from your selected file. You review and accept it before payment.
Saved on this device.

This spring loaded magnet PCB holder is ideal for securing your circuit board during soldering, inspection, and testing.
- Rating
- 5 / 5
- Likes
- 142
- Downloads
- 336
- Makes
- 5
- Views
- 2,777
- Reviews
- 3
Updated at source:
Model information
- Source
- Printables
- Category
- Electronics
- License
- Creative Commons — Attribution
I'm a big fan of the Sensepeek PCB holder, known as PCBite, but unfortunately, they are relatively expensive for my needs. Therefore, this is my take on an affordable, high-quality PCB holder.
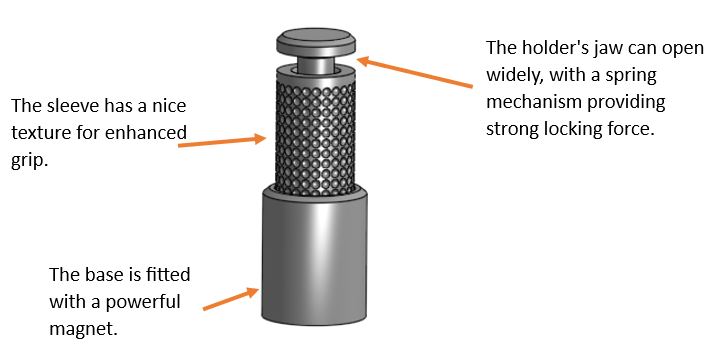
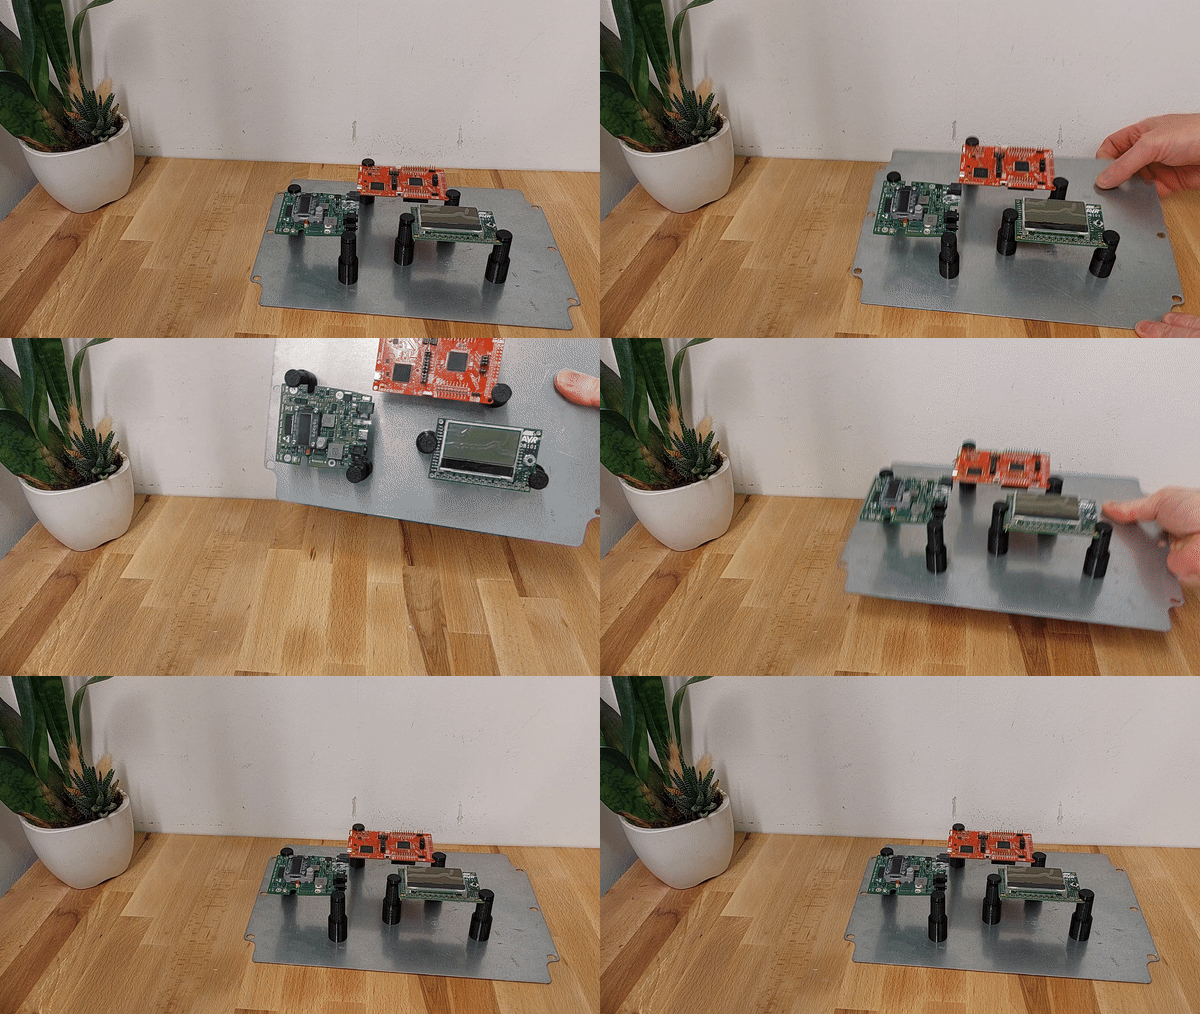
This holder is ideal for securing your circuit board during soldering, inspection, and testing. Each holder is equipped with a strong magnet at the base, which facilitates easy sliding of the PCB holder. The 'jaw' of the holder can open wide, and a spring mechanism ensures a robust locking force. Its design enables effortless repositioning, allowing it to adapt to circuit boards of diverse shapes and sizes.
Print instructions
For optimal results, please adhere to the following recommended print settings:
Filament Type: The filament type is not critical. I used PETG, but other materials should also work well.
Print Layer Height: 0.10mm This setting is important, as using a different layer height may affect tolerances and prevent the components from clicking together correctly.
Perimeters: Use 2 perimeters for the base and sleeve, and 4 perimeters for the center pin to provide additional strength.
Infill: Set to 20% Gyroid is recommended, although the exact infill setting is not critical.
Supports: No supports are required. All parts have been specifically designed to print without support material.
Pause the printing process when it reaches 7.6mm in height, which corresponds to layer 75 at a 0.1 mm layer height, and then insert the magnets.
Required parts
For assembling each PCB holder, you will need three magnets, each 10mm in diameter and 2mm thick. Additionally, you'll need three small springs, similar to those found in a pen, with an outer diameter of 4–5 mm and a length of approximately 15–25 mm. The springs I used were about 4.5 mm in outer diameter and 20 mm long. Both the magnets and suitable springs are readily available to order online, including from Amazon.
Neodymium Mini Magnets 10 x 2 mm https://amzn.eu/d/8K3zZE4
Compression Springs for Small Ballpoint Pens https://www.amazon.de/dp/B0GD1MDC79
Assembly Instructions
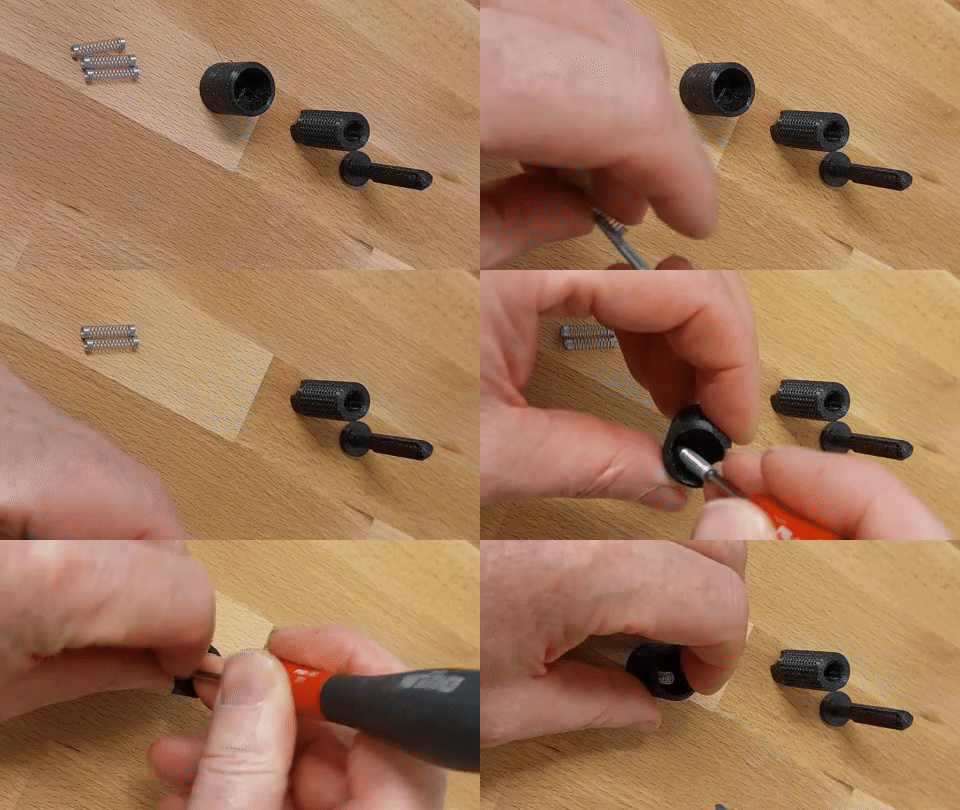
Insert the three springs into the three round holes in the base; this task can be a bit tricky. I recommend using a small screwdriver to guide each spring into its respective hole. Once correctly positioned, the springs will be held in place by the magnet.
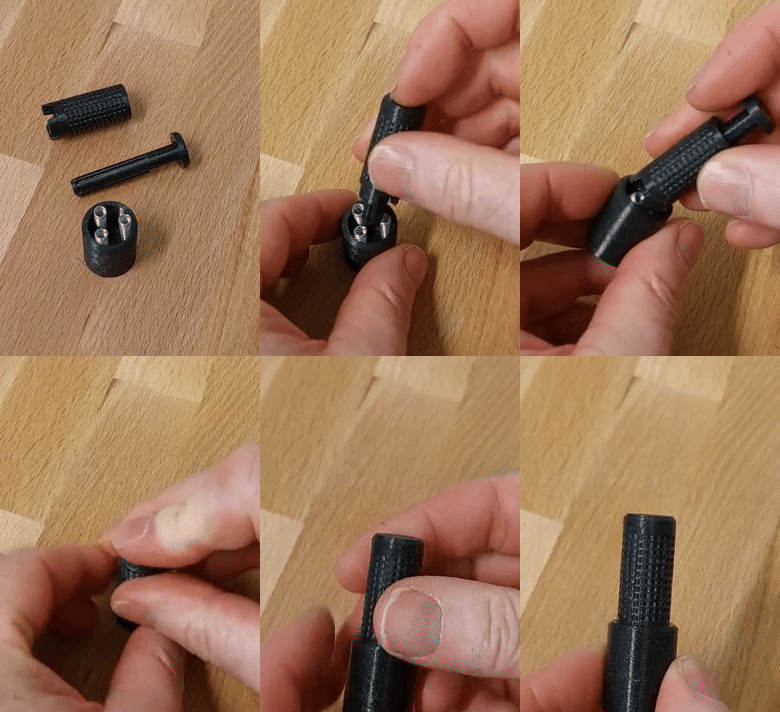
The next step involves inserting the center pin into the sleeve, and then fitting this assembly over the springs. Carefully press them into the base until you hear them click into place.