
Filament Unroller System (Construction Kit)
We calculate the final price from your selected file. You review and accept it before payment.
Saved on this device.

For filament unrolling there are thousands of solutions. My presented solution is a construction kit, high versatile.
- Rating
- 0 / 5
- Likes
- 23
- Downloads
- 64
- Makes
- 0
- Views
- 656
- Reviews
- 0
Updated at source:
Model information
- Source
- Printables
- Category
- Accessories
- License
- Creative Commons — Attribution — Noncommercial — Share Alike
Most of the thousand existing filament unrollers are a ready designed and static system. I took some ideas from the Web, Printables, Thingiverse and remade the design from scratch, maybe to one or another can find her/his idea. So I thanks the creators.
Because of the MMU3 which I installed recently I wanted to keep PTFE tube lengths short. I needed to mount unrollers and the org. Prusa MMU3 buffer on top of my enclosure, as this is standing with the MK4 on a 700x700mm Workbench. No space around to expand!
What is different in my system?
- There are only two roller widths designed (unless you design something more): 65mm and 86mm. 80% of my rolls work with 65mm. Experience with MK3s+ and MMU2s with RMU buffer is great. Principle unroller has stayed the same. Ball bearings (BB) type “608” are very common and cheap. So I stuck with that too.
- Older designs use a 8mm axle, steel, aluminum, aluminum tube, … for keeping the BB in place. I have two versions in the files directory with printed axle or with hole for 12-15mm long axles (Ø8mm alu tube is sufficient), many of my newly built unrollers have printed axles (just to receive the BB).
- So the basic unroller consists of three main parts:
- 2x “UnrollerSide” with hole for 8mm axle or with axle printed axle. Unroller side is fitting all roller sizes.
- 2x "Roll" 65 or 86mm length. Fits BB easy. Each roll has a fixed side with a groove, whereas the other side is free for your filament roll-size. The groove keeps your spool on track.
- 2x “Link” for UnrollerSide, type “65” or “86”.
- 4 Ball bearings (BB) 608.
That is all you need 3x2 printed parts and 4 BBs. Assembly is a hit: just snap it together, this is reversible.
- Now the MMU3 forced my to care for PTFE tube guide. Therefore, I designed 4 cantilevers which receive a “PTFE-Slider”. PTFE tube can only be inserted from outside, provsion is made that the tube does not runn through, but finds a stop. This PTFE-Slider is mounted on the cantilever. We have two sizes of cantilevers, fitting the 65 or 86mm system. At the ends the cantilevers have kind of bayonet lock, as the cantilevers are a bit formed slimmer than the unroller they have some tension, providing a safe sitting on the unroller. The PTFE slider is hammered on the cantilever, once you kno the type and direction. Type 1 and type 2 serve different angles. Each one can also be turned 120 degrees from origin. This provides you a large variety of mounting, see my photographs. In my case it was necessary to direct the PTFE tube in different angles to reach the MMU3. Finally the unrollers received a 1.2mm thick foam tape on the four edges (each ca. 40mm long). This will keep the unroller better in place (see later “clamp”).
Note: Once the slider is hammered on, it may be hard to remove it without destroying the slider. A bit grinding of the sliding surface and maybe “a hair" of sanitary grease helps you slide the PTFE tube holder. Sliding can be important in case of you have a 86mm unroller and the spool is pretty slim, sitting in a.m. groove, so adjust the slider for less friction from spool to PTFE tube. - I used a 320x420mm base plate which received a PLA-frame with borders for mounting all 5 unrollers on top of the enclosure, reaching out over it for half length.
In order to keep the unrollers in place I designed some clamps (clamp-lock and clamp-body). ClampLocks are mounted on the ClampBody by a hex. M3x8mm with a M3 square nut. A washer between hex head and lock and some Loctite on the thread provide the screw being fastened durably to the M3-nut.
The "Clamp" received a 1.0-1.0mm thick VHB-double sided tape (3M) on the side which contacts the plate. Be careful, that 3M stuff sticks like hell (LOL). The unroller fits very good on the clamp, 65mm and 86mm stlye as well. The clamp lock keeps the unrollers very tough in place. If you need to relocate the unroller a bit laterally, then this is also provided within limits.
In my print shop I have over a dozen of these unrollers, all same type, but two sizes. With axles, without axles. I am really happy with this system.
For indicating your unrollers I recently added a flag system: https://www.printables.com/de/model/859322-filament-flags-for-multimaterial-systems-mmu2-mmu3
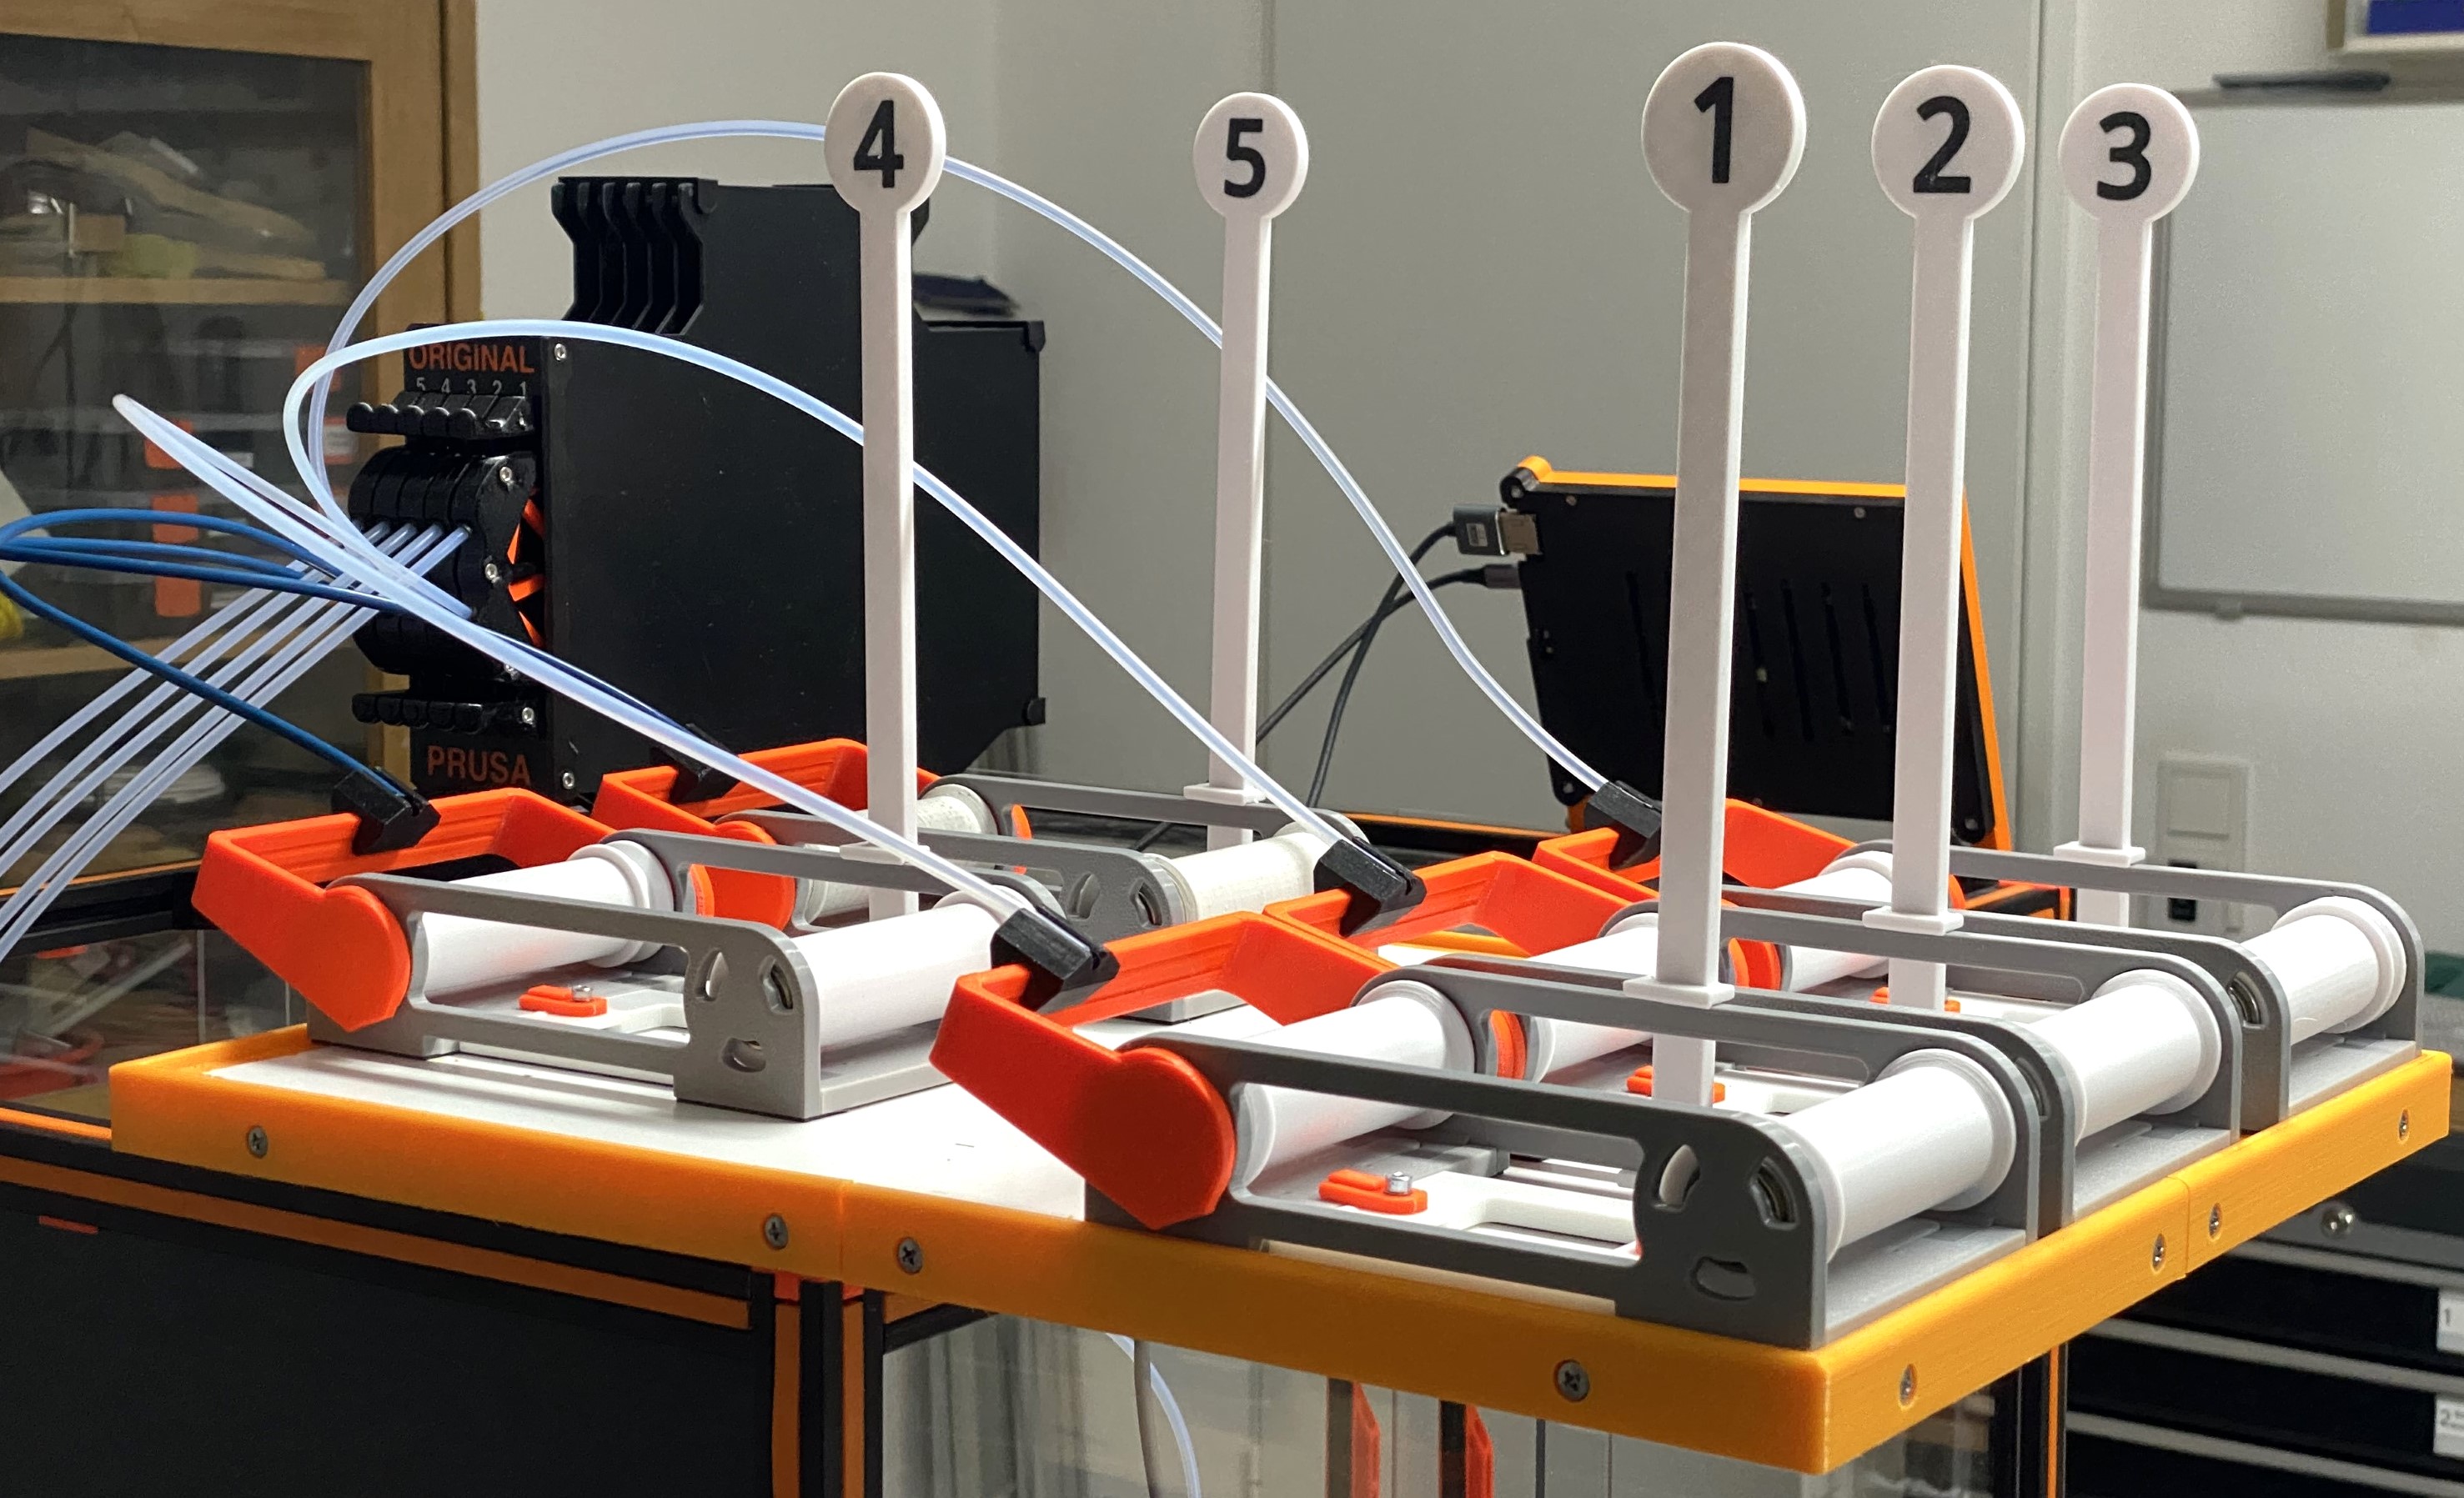
Enjoy and have a Happy printing!
Explore my other Printables: https://www.printables.com/de/@Tritschi