
Sentinel-1 Model (1:64 Scale)
Obliczymy ostateczną cenę na podstawie wybranego pliku. Sprawdzisz ją i zaakceptujesz przed płatnością.
Zapisane na tym urządzeniu.

A 1:64 scale model of the Copernicus Sentinel-1 (A/B or C/D) spacecraft. Split to allow multicolour printing without MMU
- Ocena
- 0 / 5
- Polubienia
- 22
- Pobrania
- 208
- Wydruki
- 1
- Wyświetlenia
- 1152
- Oceny
- 0
Aktualizacja u źródła:
Informacje o modelu
- Źródło
- Printables
- Kategoria
- Vehicles & Machines
- Licencja
- Creative Commons — Attribution — Noncommercial
The first in the Copernicus Sentinel series, Sentinel-1 is a high-res radar imagery satellite, providing an all-weather, day-and-night supply of images of Earth’s surface that are published immediately for free, for all. Find out more here: https://sentinels.copernicus.eu/web/sentinel/copernicus/sentinel-1.
This desktop model is in 1:64 scale - helping all the parts fit on the bed of a Prusa MK4. The parts are also split up such that they can be printed in different colours without needing an MMU but still getting an authentic look for the satellite.
A display stand is provided that can hold the satellite in either direction, either the cool looking version in the picture above or the other way round for the accurate flight attitude.
Printing Instructions
Ideally to print this model in the most accurate colours you would have the following filaments available (including the ones I used):
- Silk Gold(Eryone PLA Ultra Silk Gold)
- Silk Silver (Eryone PLA Ultra Silk Silver)
- White (Prusament PLA Pristine White)
- Black/Glitter Black (Prusament PLA Galaxy Black)
- Glitter Blue (Redline Glitzer PLA Nachtblau)
Below are printing instructions for each piece - the prints are pretty easy but you'll need quite some supports - satellites have a lot of overhangs! I've also provided print files for a Prusa MK4, sliced on PrusaSlicer.
Spacecraft Body
This should be printed in Gold PLA and you will need to print one of either:
- S1AB_Spacecraft_Body_Gold - This represents the original two Sentinel-1 spacecraft - Sentinel-1A (launched April 2014) and Sentinel-1B (launched April 2016, mission ended 2022) .
OR - S1CD_Spacecraft_Body_Gold - This represents the two new Sentinel-1 spacecraft - Sentinel-1C (launched December 2024) and Sentinel-1D (due for launch 2025). These spacecraft include a new AIS ship-tracking payload and the model includes the antennas.
When printing the body you should use a layer height of 0.15mm and you must use supports (preferrably organic tree supports). A raft is recommended due to some smaller parts on the bed. You don't need them everywhere but you can see here where I painted them on:


…and how it looks after:
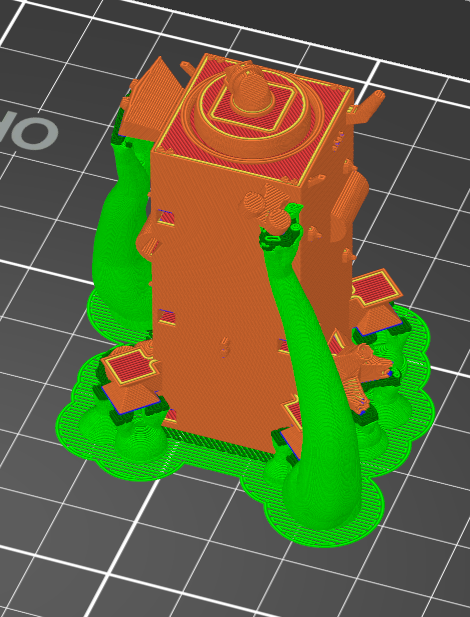
Once printed they should break off relatively easily and give you a nice clean model.
SAR Support Frames
These frames attach to both sides of the spacecraft body and on the real thing support the huge Synthetic Aperture Radar payload. You need to print 2 of these.
These should be printed in Silver PLA and can be printed in this orienation at 0.2mm layer height without supports.

Solar Array Wings
There are two solar array wings, you need to print one each of:
- Solar_Array_Wing_pY
- Solar_Array_Wing_mY
In both cases the printing instructions are the same. You should have three colours available and print them with colour changes. Assuming printing at a layer height of 0.15mm, you should include the following changes:
- Up to layer 10: The first 10 layers should be printed in black or galaxy black.
- Layers 10/11: These should be printing in glitter blue, to mimic solar panels
- Layers 12/13: These should be printed in white to mimic the pattern on the solar panels. To get the effect the following modifier should be set for these layers:
- Infill angle: 90 deg
- Infill percentage: 35%
- Infill pattern: grid
- Bottom solid layers: 0
- Top solid layers: 0
It should end up looking like this:

SAR Antenna Structure
The SAR antenna is actually 5 panels that are unfolded in space to deploy the antenna. The structure of this antenna should be printed like the body in Gold PLA with a layer height of 0.15mm and a raft is recommended. It is also recommended to add small supports around the joins to help form a smoother surface underneath. See the painted supports here:

…and the final look of the print:

SAR Antenna Tiles
Underneath the antenna are 14 transmit and receive radar tiles. For this model these are printed as one piece. This should be printed with White PLA at 0.2mm layer height:

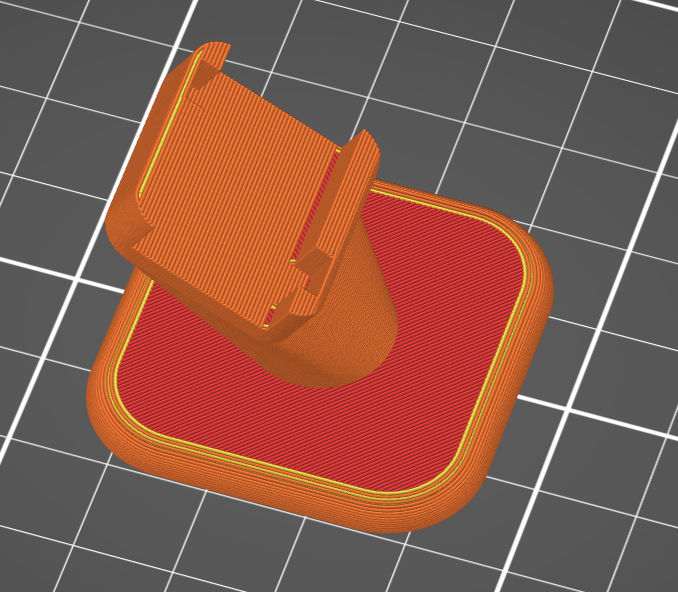
Display Stand
Finally, the display stand can be printed at any layer height, in any colour and does not require supports:
Assembly Instructions
The model is quite straightforward to assemble and is mostly friction fit. To complete it perform the following steps:
- Apply glue (e.g. superglue) to the bottom of the Antenna Tiles and press them into the recess in the SAR Antenna Structure.
- Insert the pin at the top of the completed SAR antenna into the hole at the base of the spacecraft body. It should hold by friction. Note that there should be a small gap between the body and the antenna.
- Press the two frames into the 6 holes on either side of the spacecraft body. They should hold by friction
- Insert the solar arrray wings into the holes on the sides of the spacecraft body. They should both face the side of the spacecraft with more equipment on it (see the photo above). The one with the small cutout goes at the back.
- Drop the completed spacecraft into the display stand