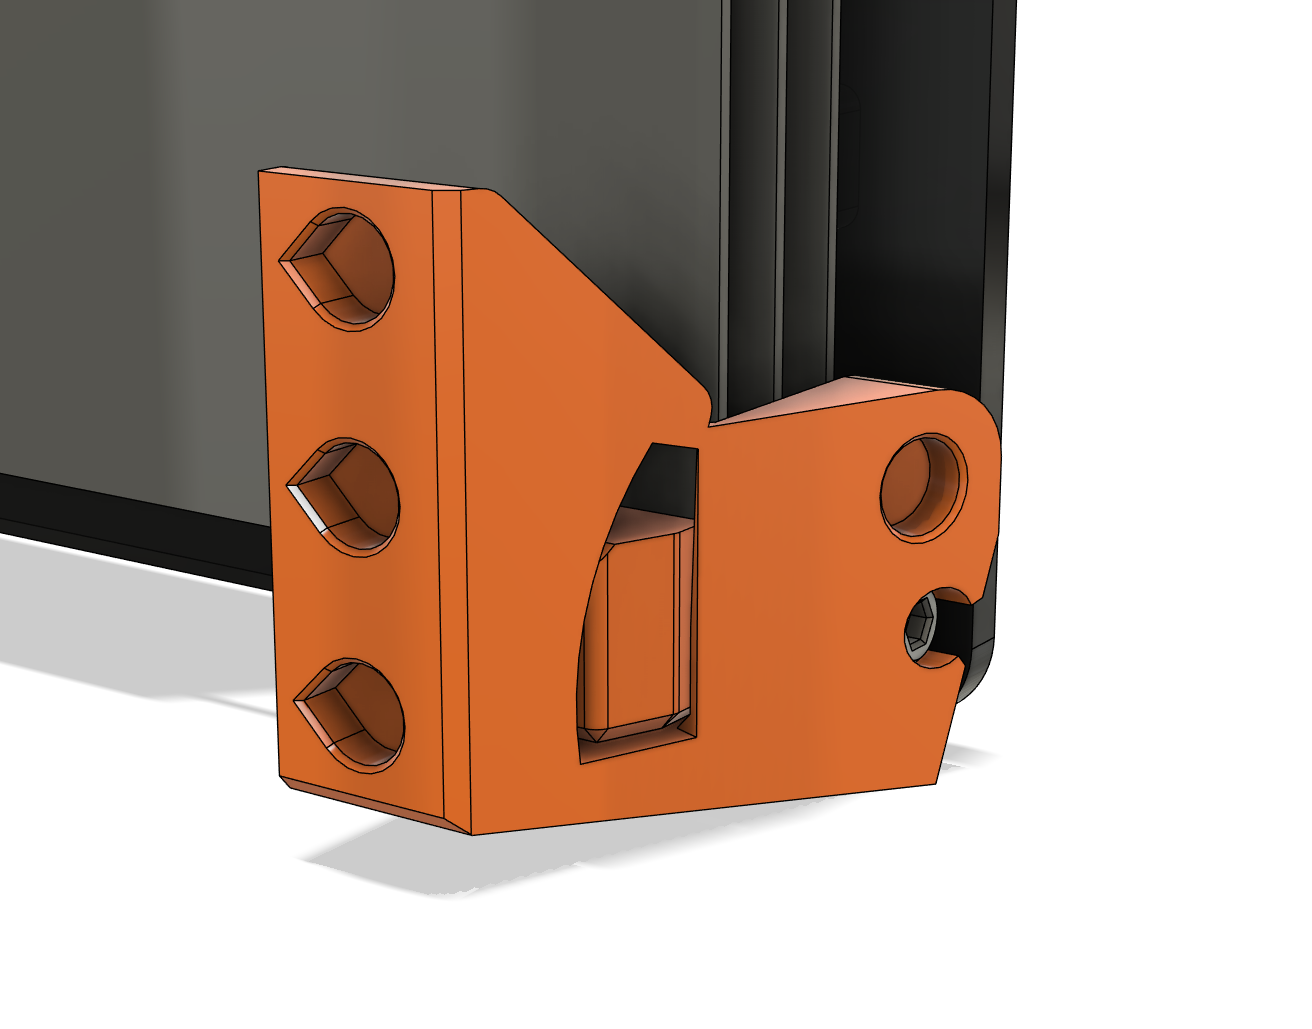
Prusa CORE One/+ SKADIS mod
Obliczymy ostateczną cenę na podstawie wybranego pliku. Sprawdzisz ją i zaakceptujesz przed płatnością.
Zapisane na tym urządzeniu.

Prusa CORE One mod with SKADIS panel and build plate holder.
- Ocena
- 4,967 / 5
- Polubienia
- 2270
- Pobrania
- 4154
- Wydruki
- 187
- Wyświetlenia
- 42 174
- Oceny
- 181
Aktualizacja u źródła:
Informacje o modelu
- Źródło
- Printables
- Kategoria
- Prusa Parts & Upgrades
- Licencja
- Creative Commons — Attribution — Noncommercial
Updates at the end of description |
INTRODUCTION:
This mod allows multiple storage of tools and plate for whoever wants to have all nearby when printing with his brand new Prusa CORE One.
I chose SKADIS panel because I have plenty on my office/workshop and I find this system very useful and there are a lot of hooks and tools that fit those panels.
This mod can tilt forward like a door so you can store up to 3 build plates behind the SKADIS panel, and tools in front with the right hooks.
/!\ As the panel is tilting by 15°, you may choose hooks that well maintain your tools to avoid any drop when opening the door.
OPTIONS:
Among the files I provide, I included 3 options for the Skadis panel:
DXF file is meant for people who wants to make laser cut or CNC the panel
STL “Skadis panel full” to print the panel on a big printer (300x300mm build plate)
STLs “Skadis UR”, “Skadis UL”, “Skadis DR” and “Skadis DL” are the parts needed to print the panel on smaller build plate printers.
HARDWARE needed:
For this mod you will need:
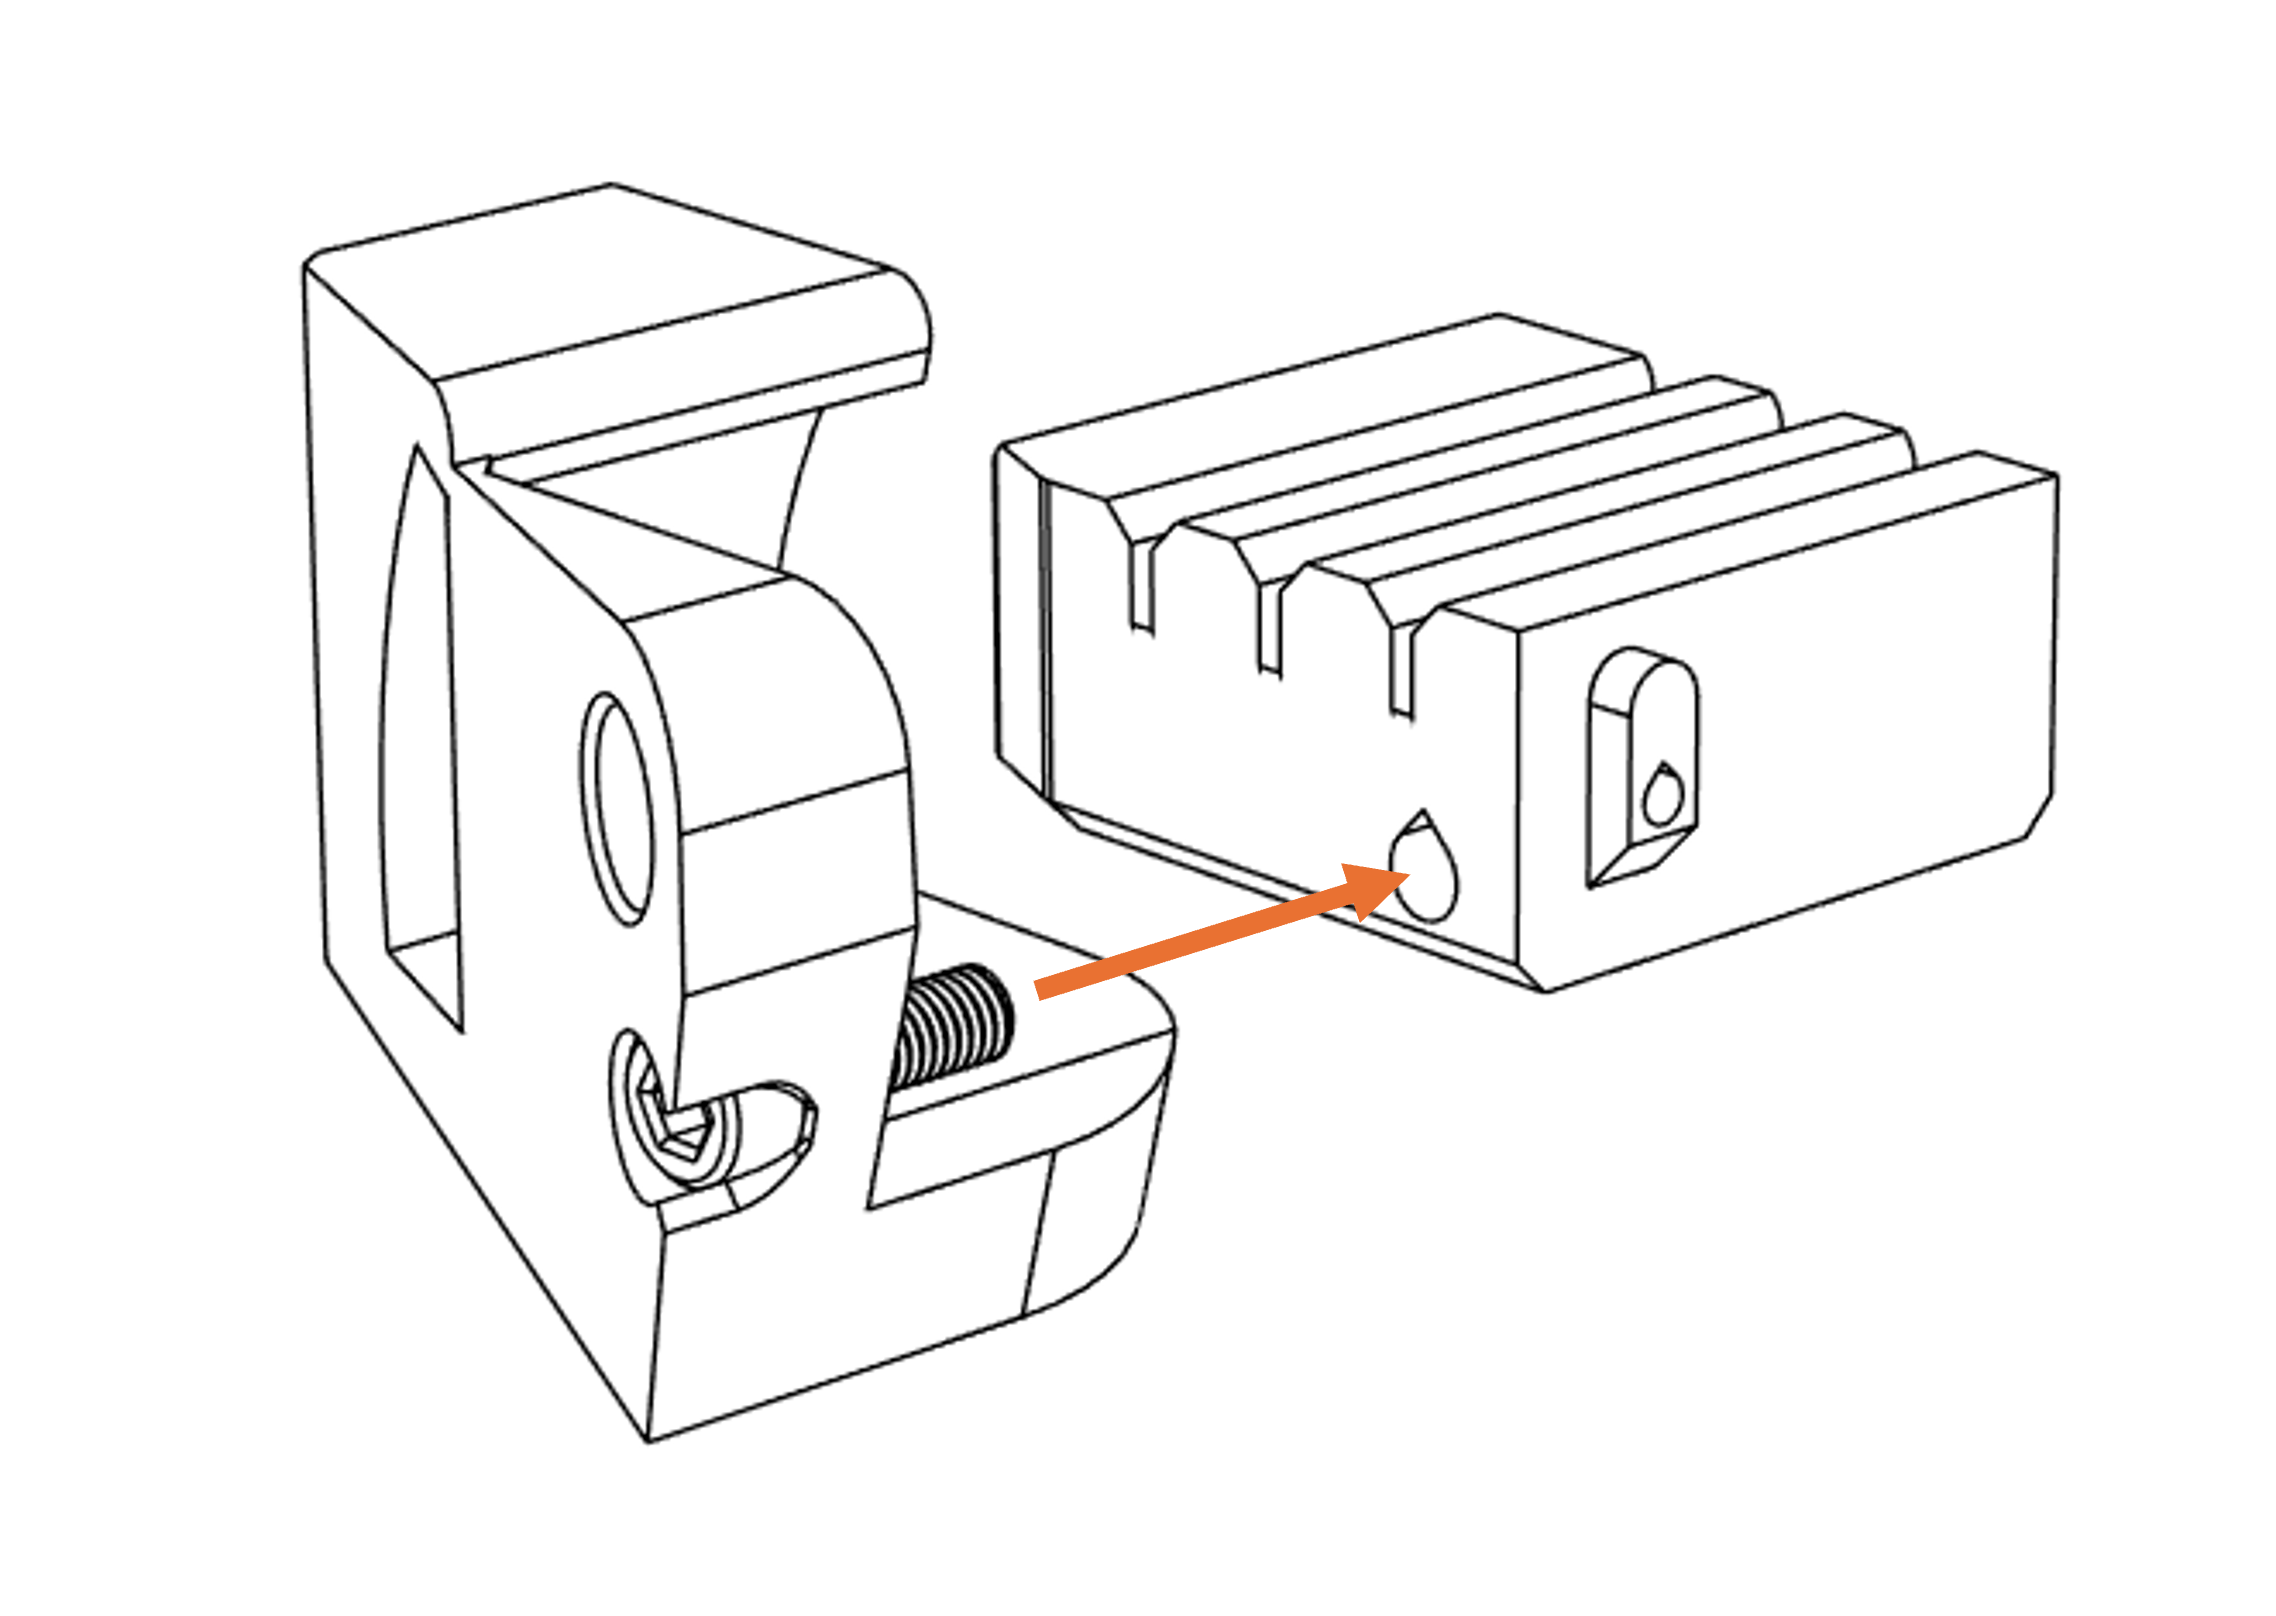
12* 10x5mm magnets
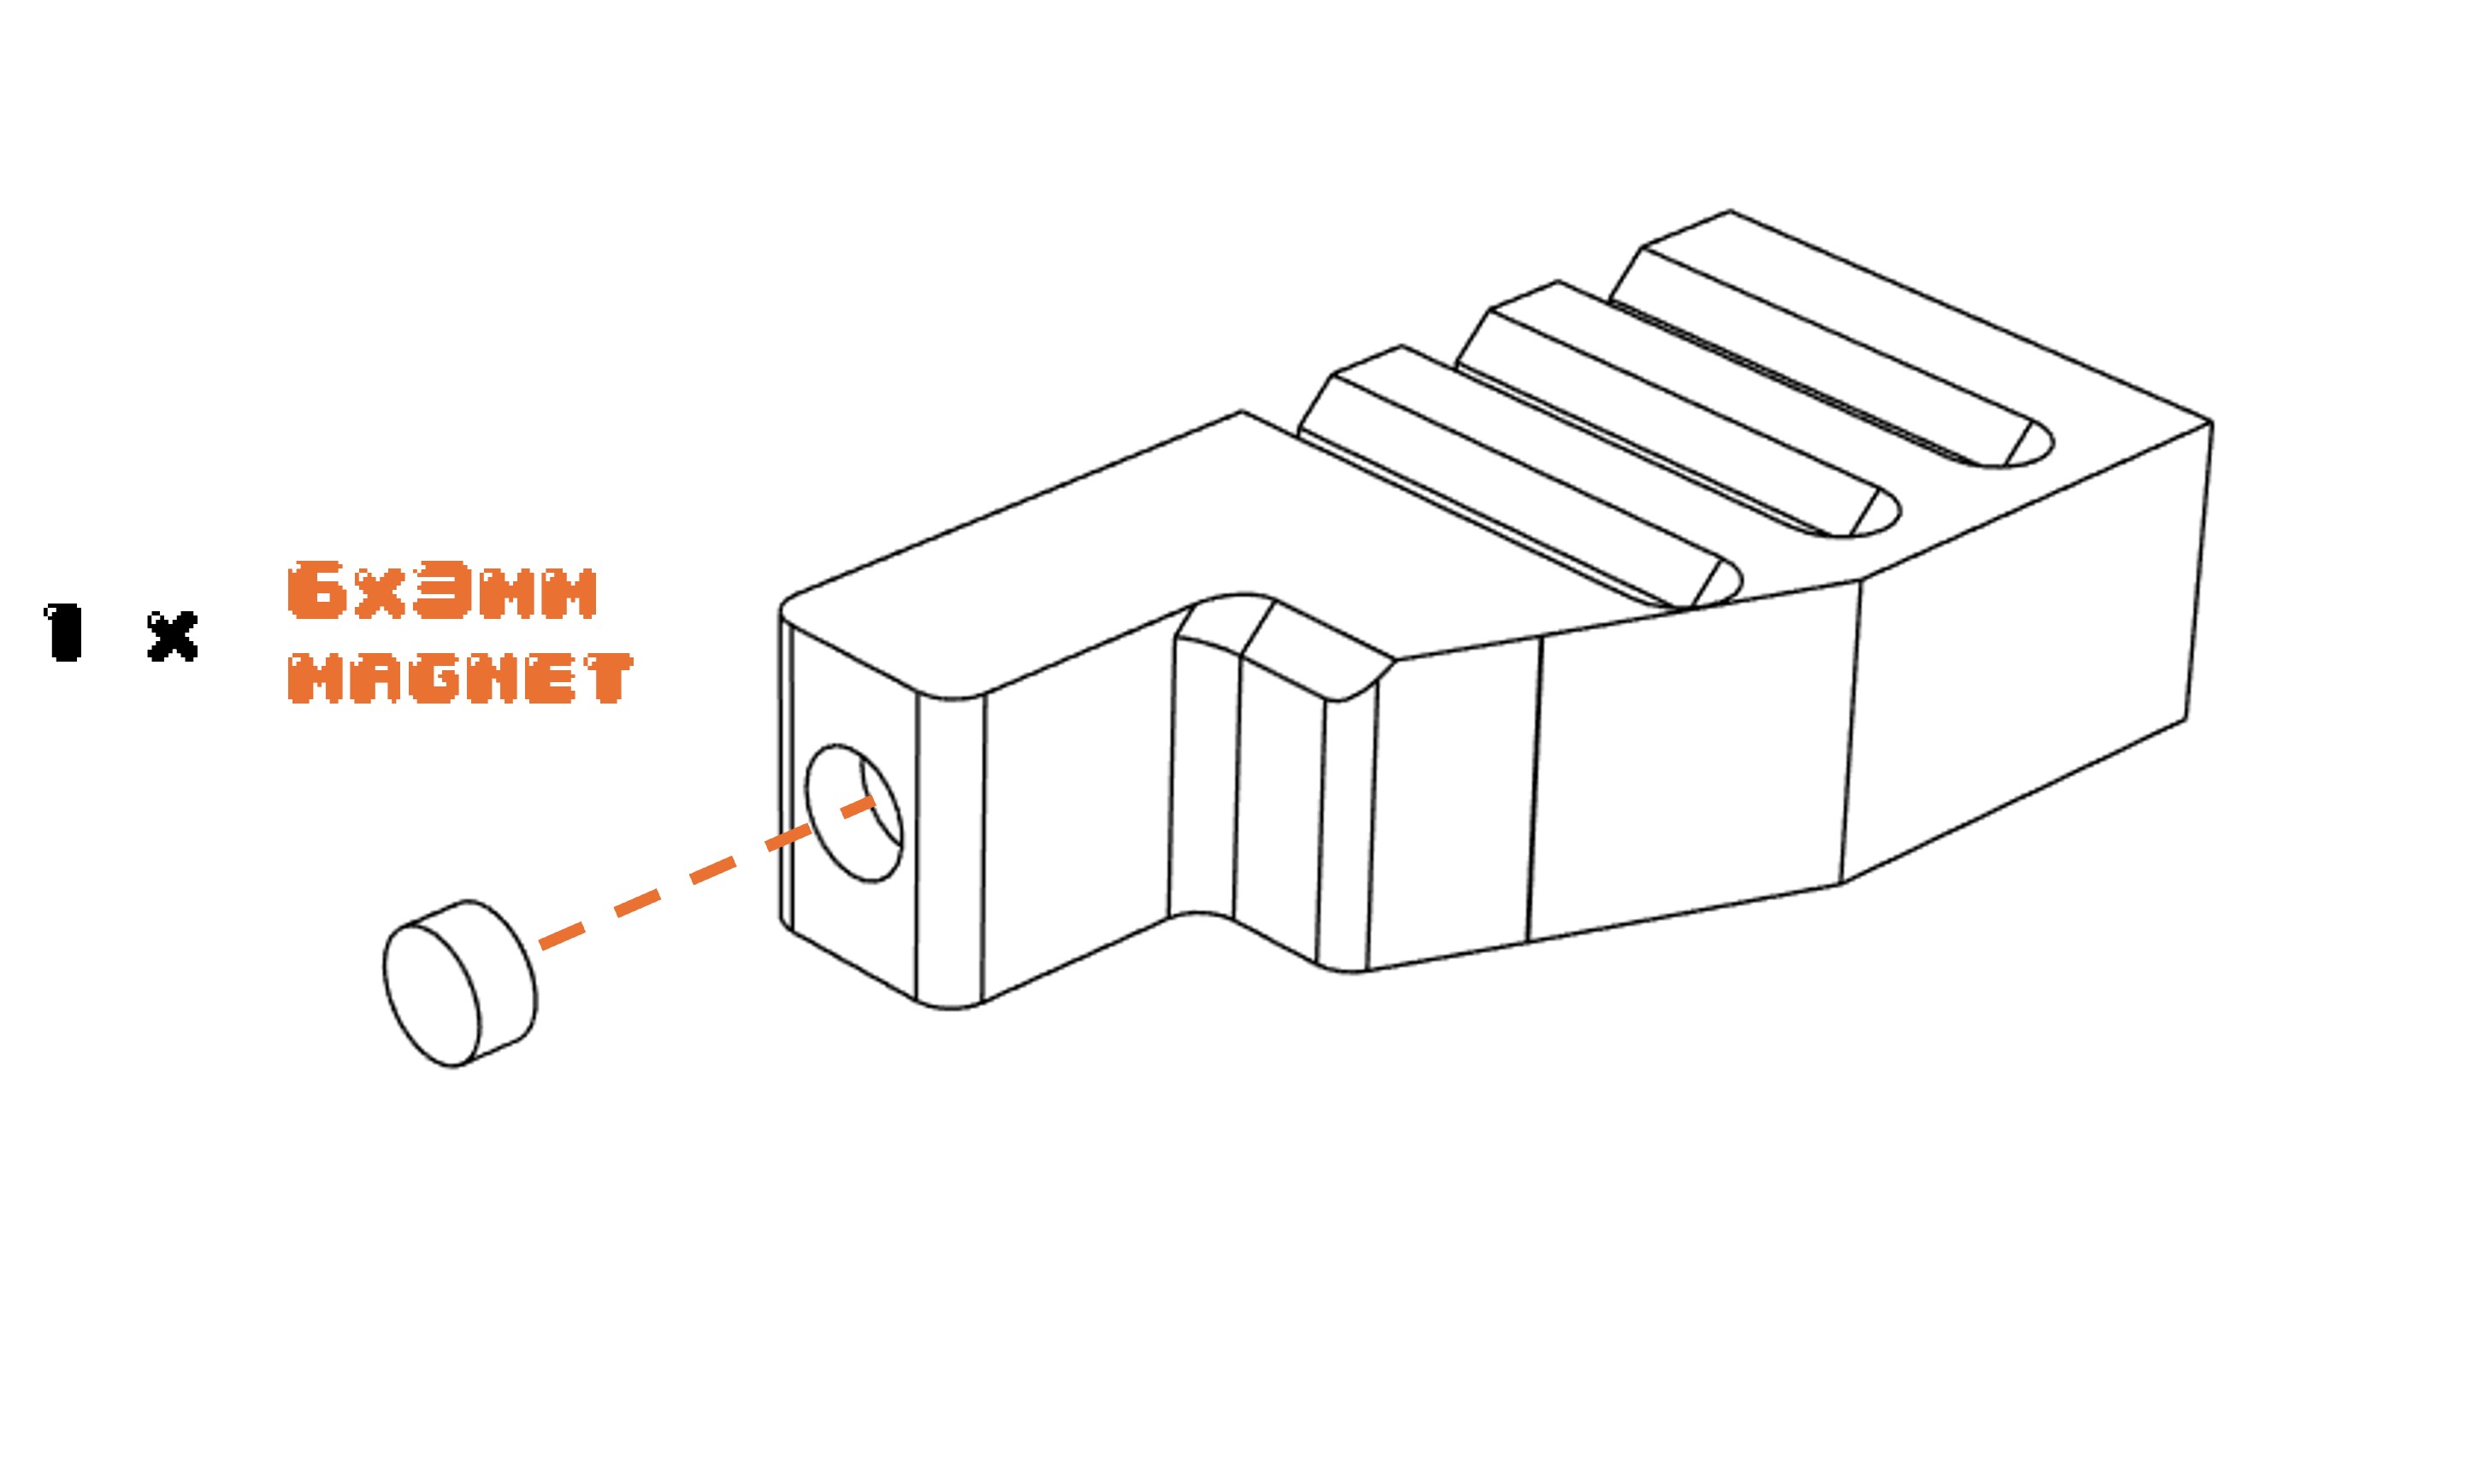
2* 6x3mm magnets
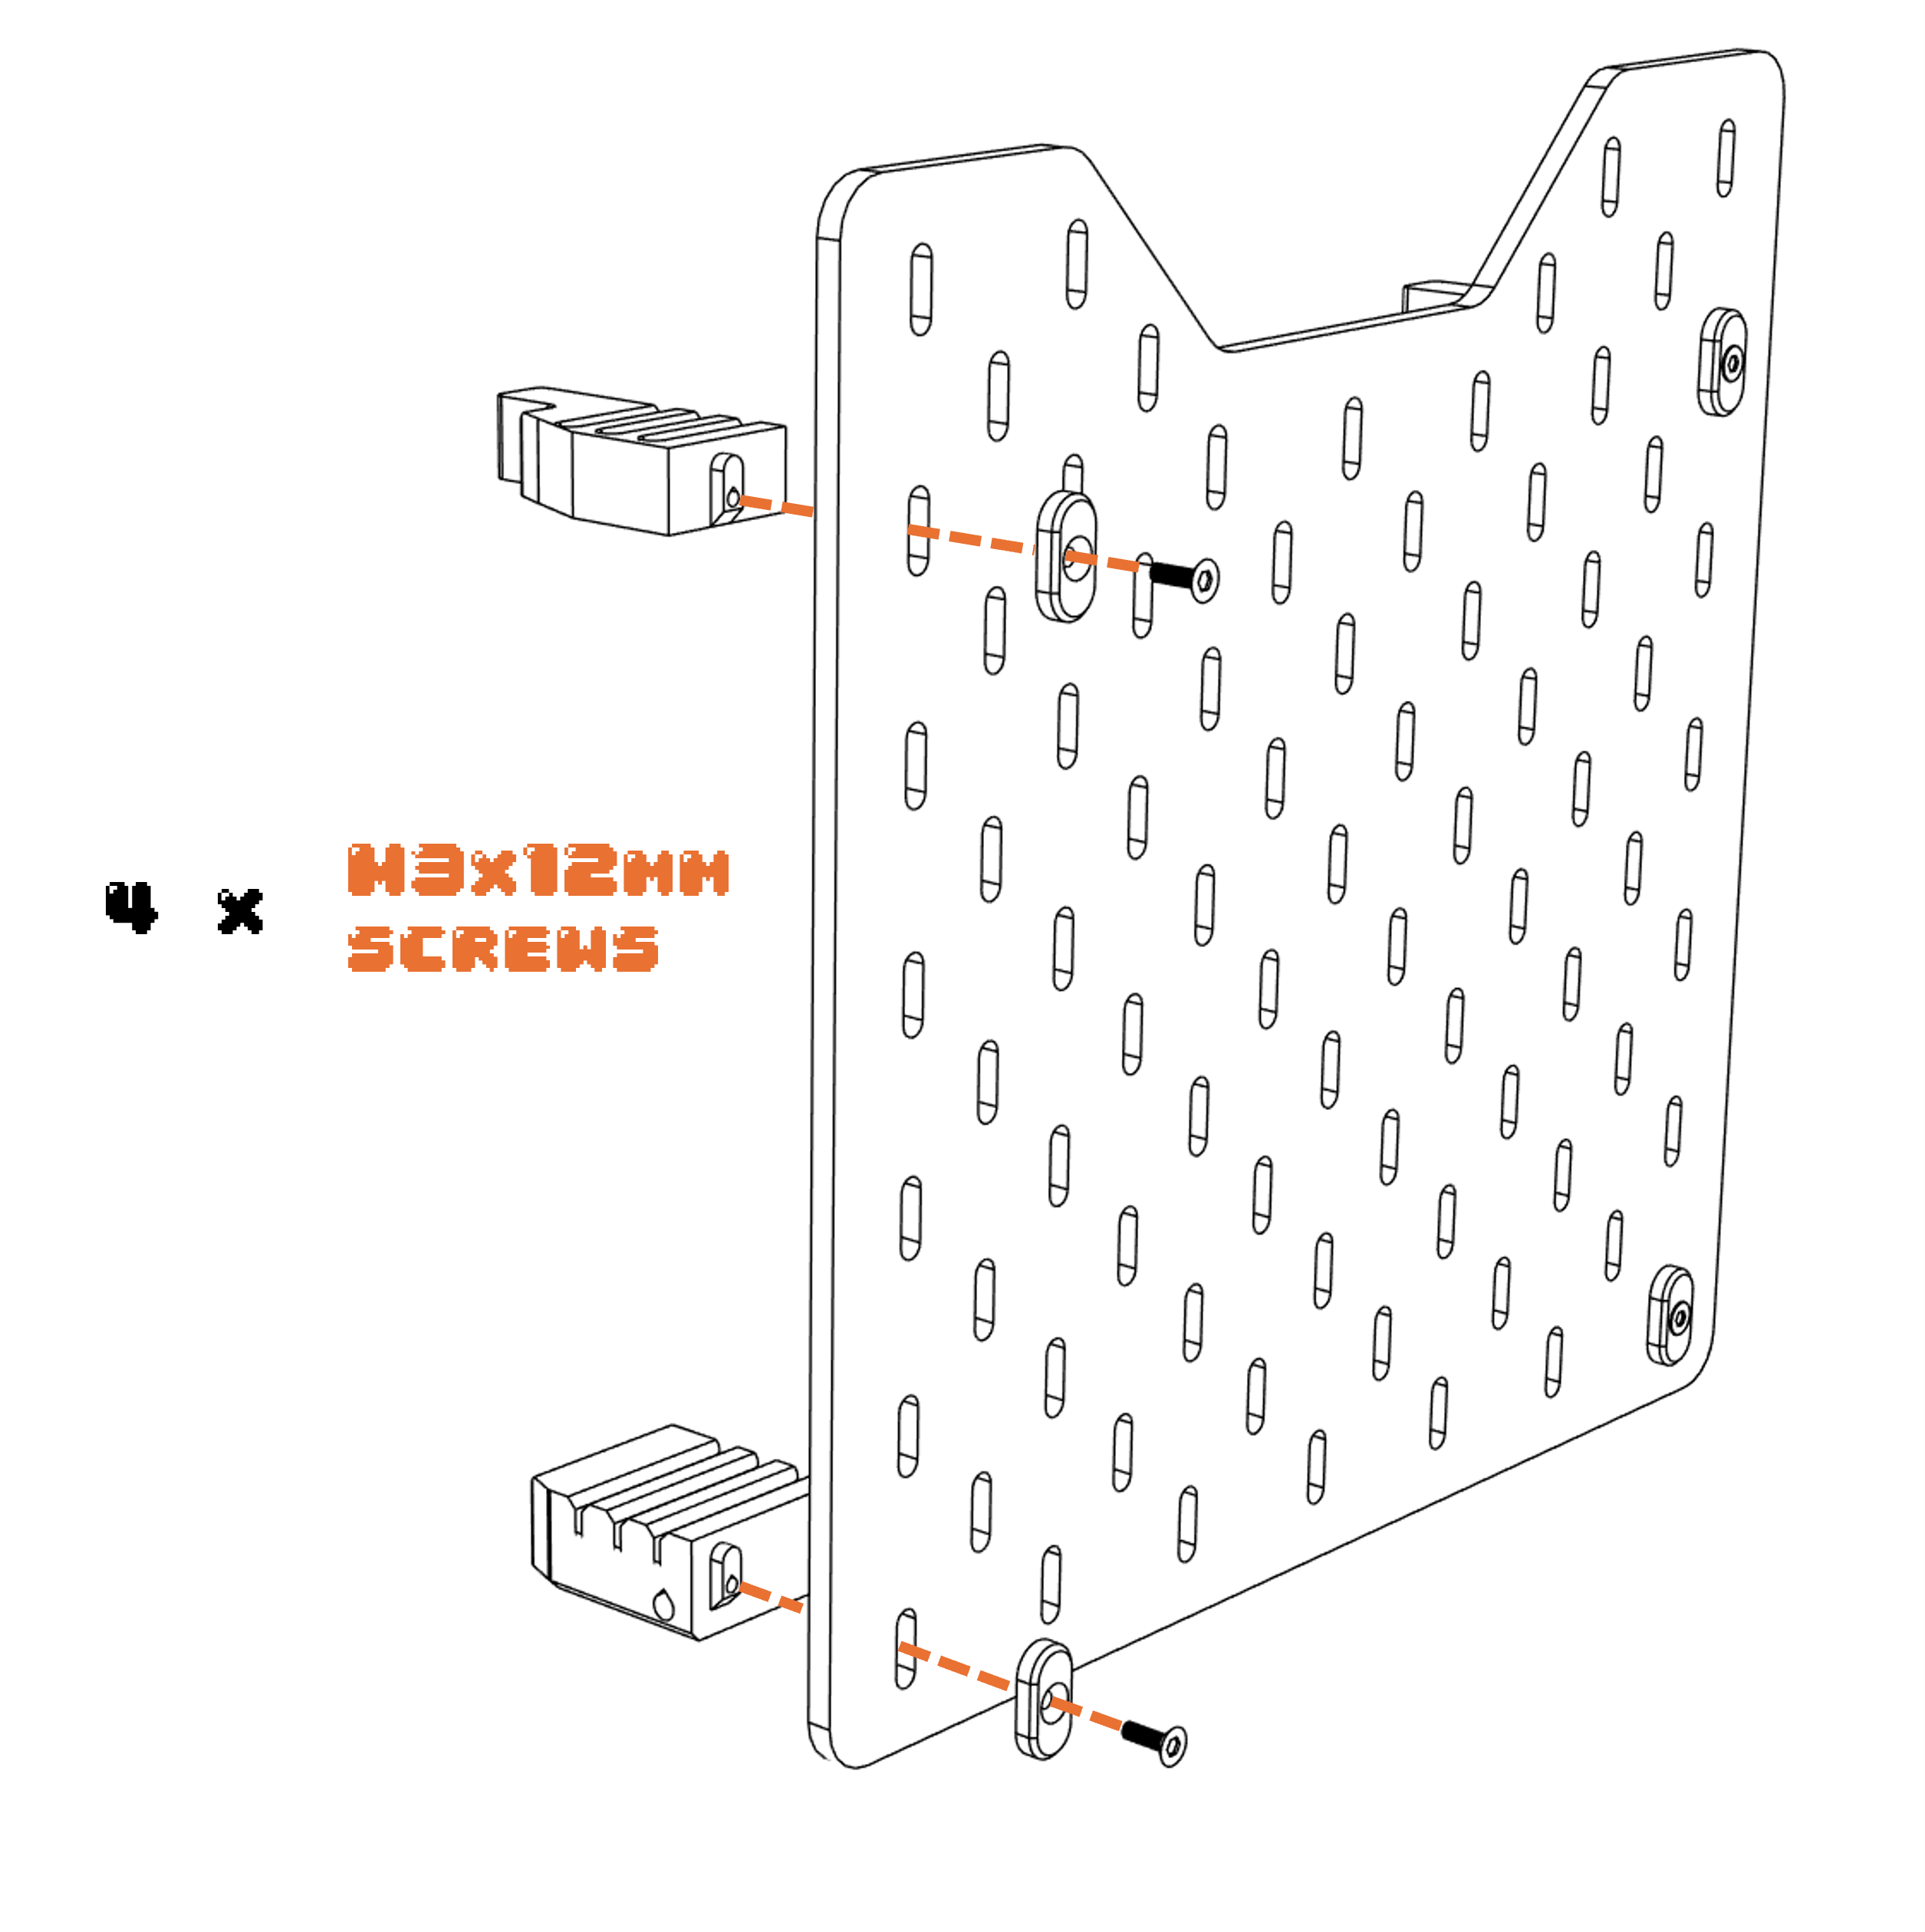
4* M3x12mm screw to mount skadis panel on printed parts
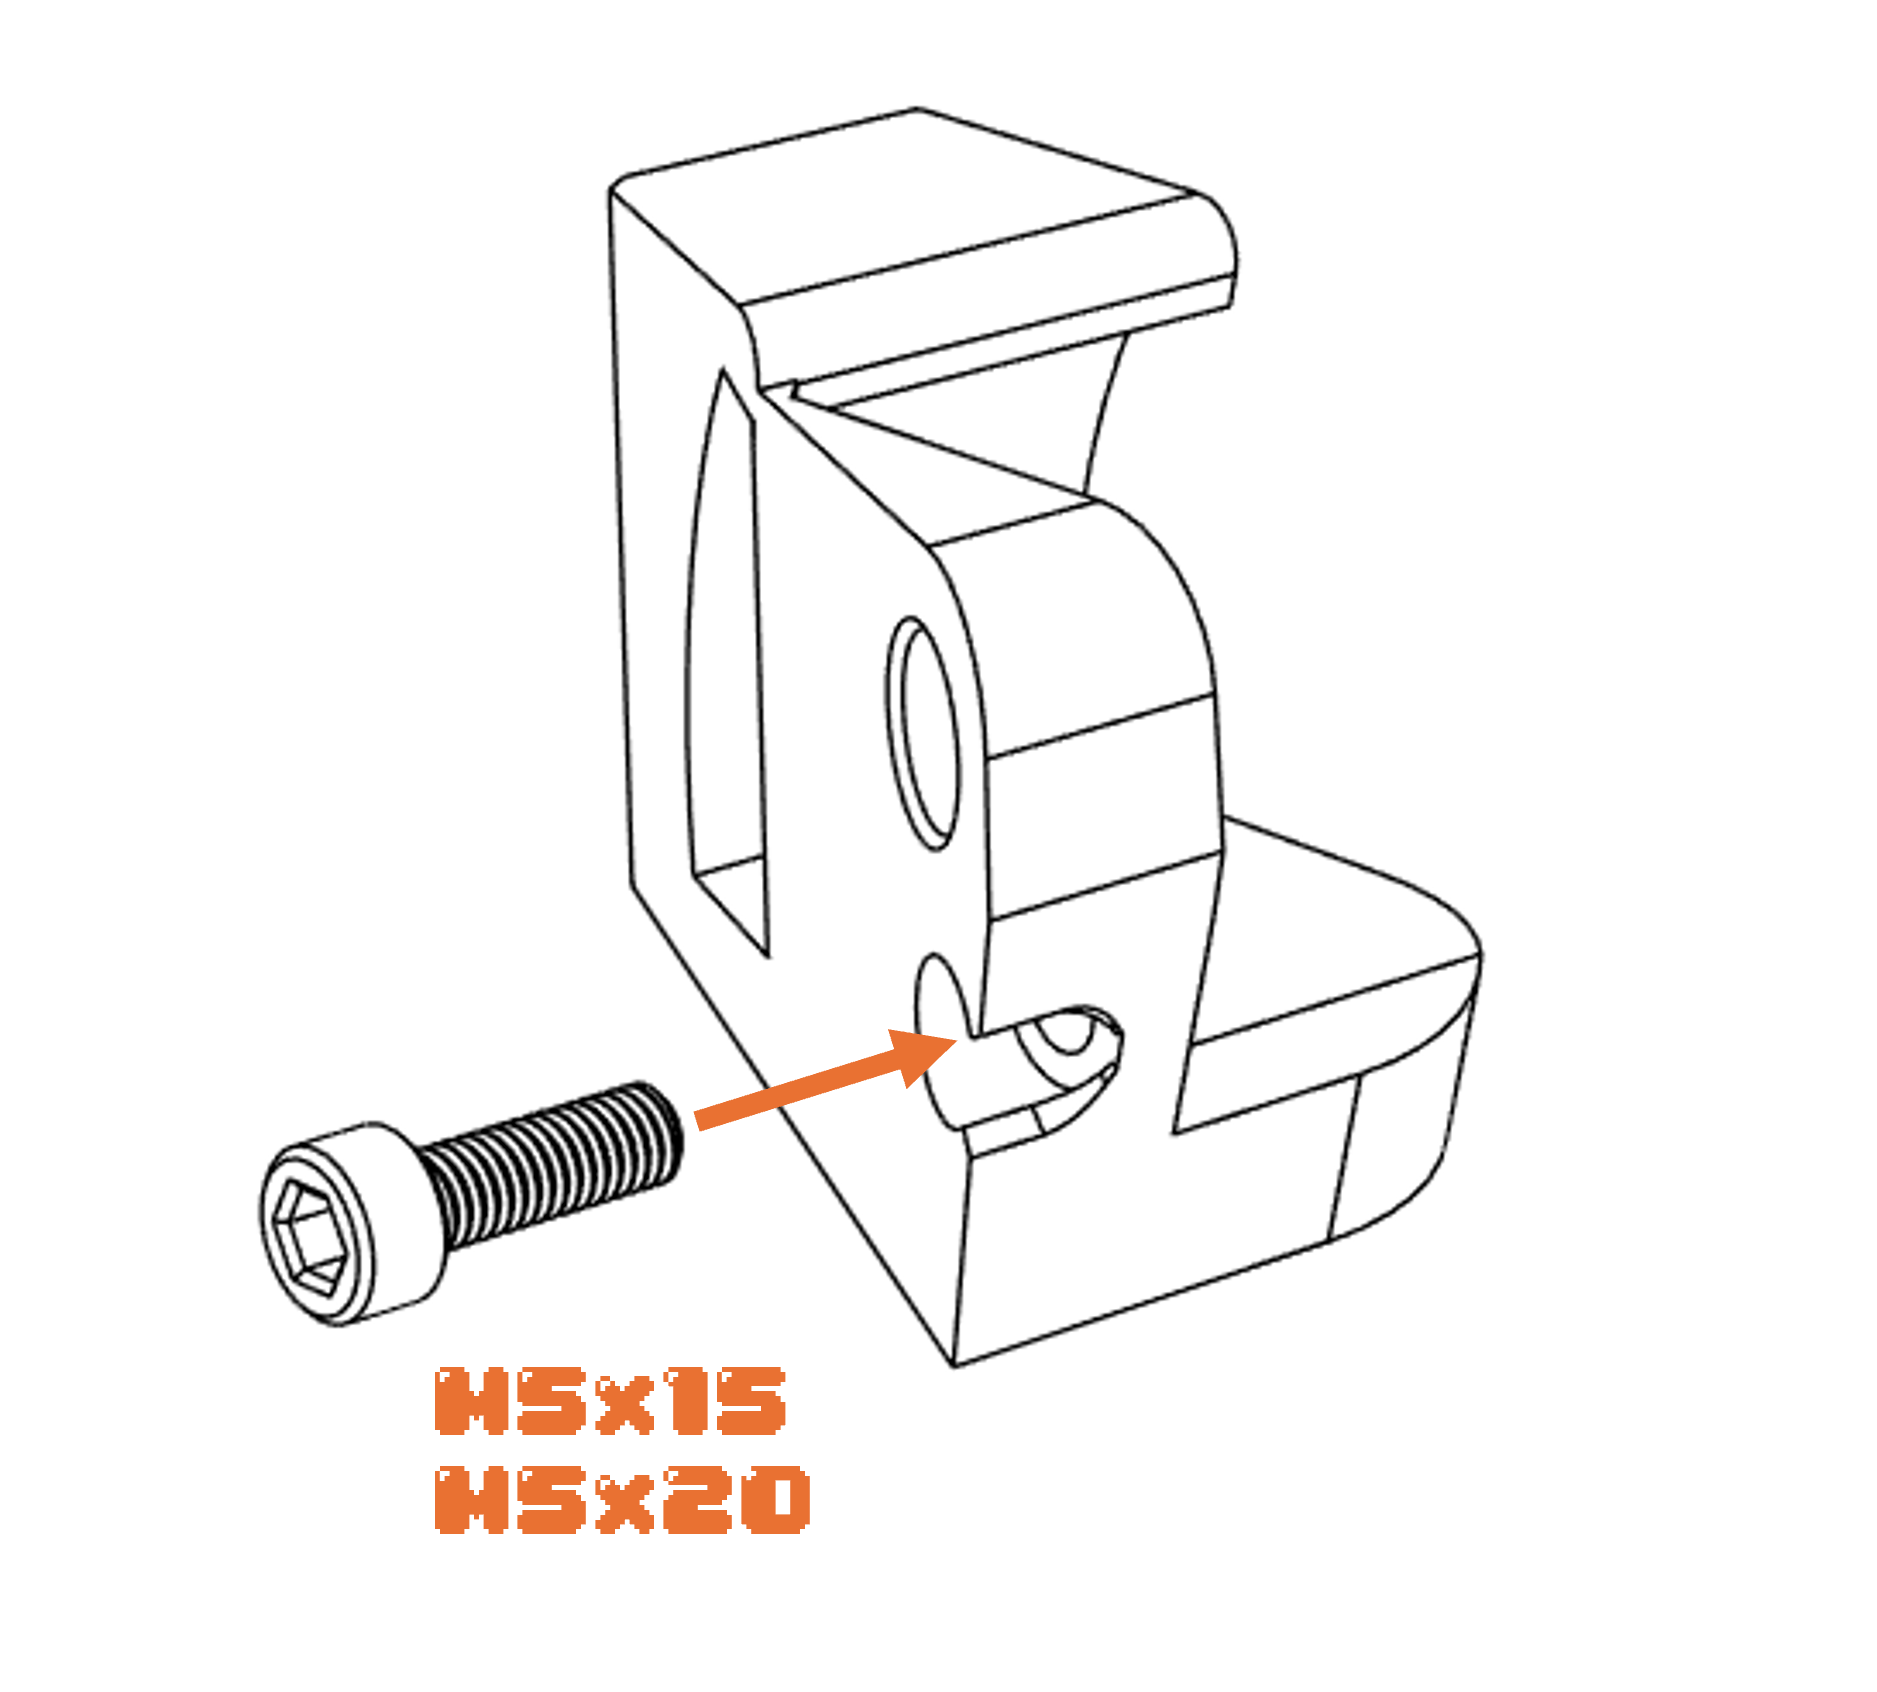
2* M5x15mm (to M5x20mm)for the hinge parts
CONTENT:
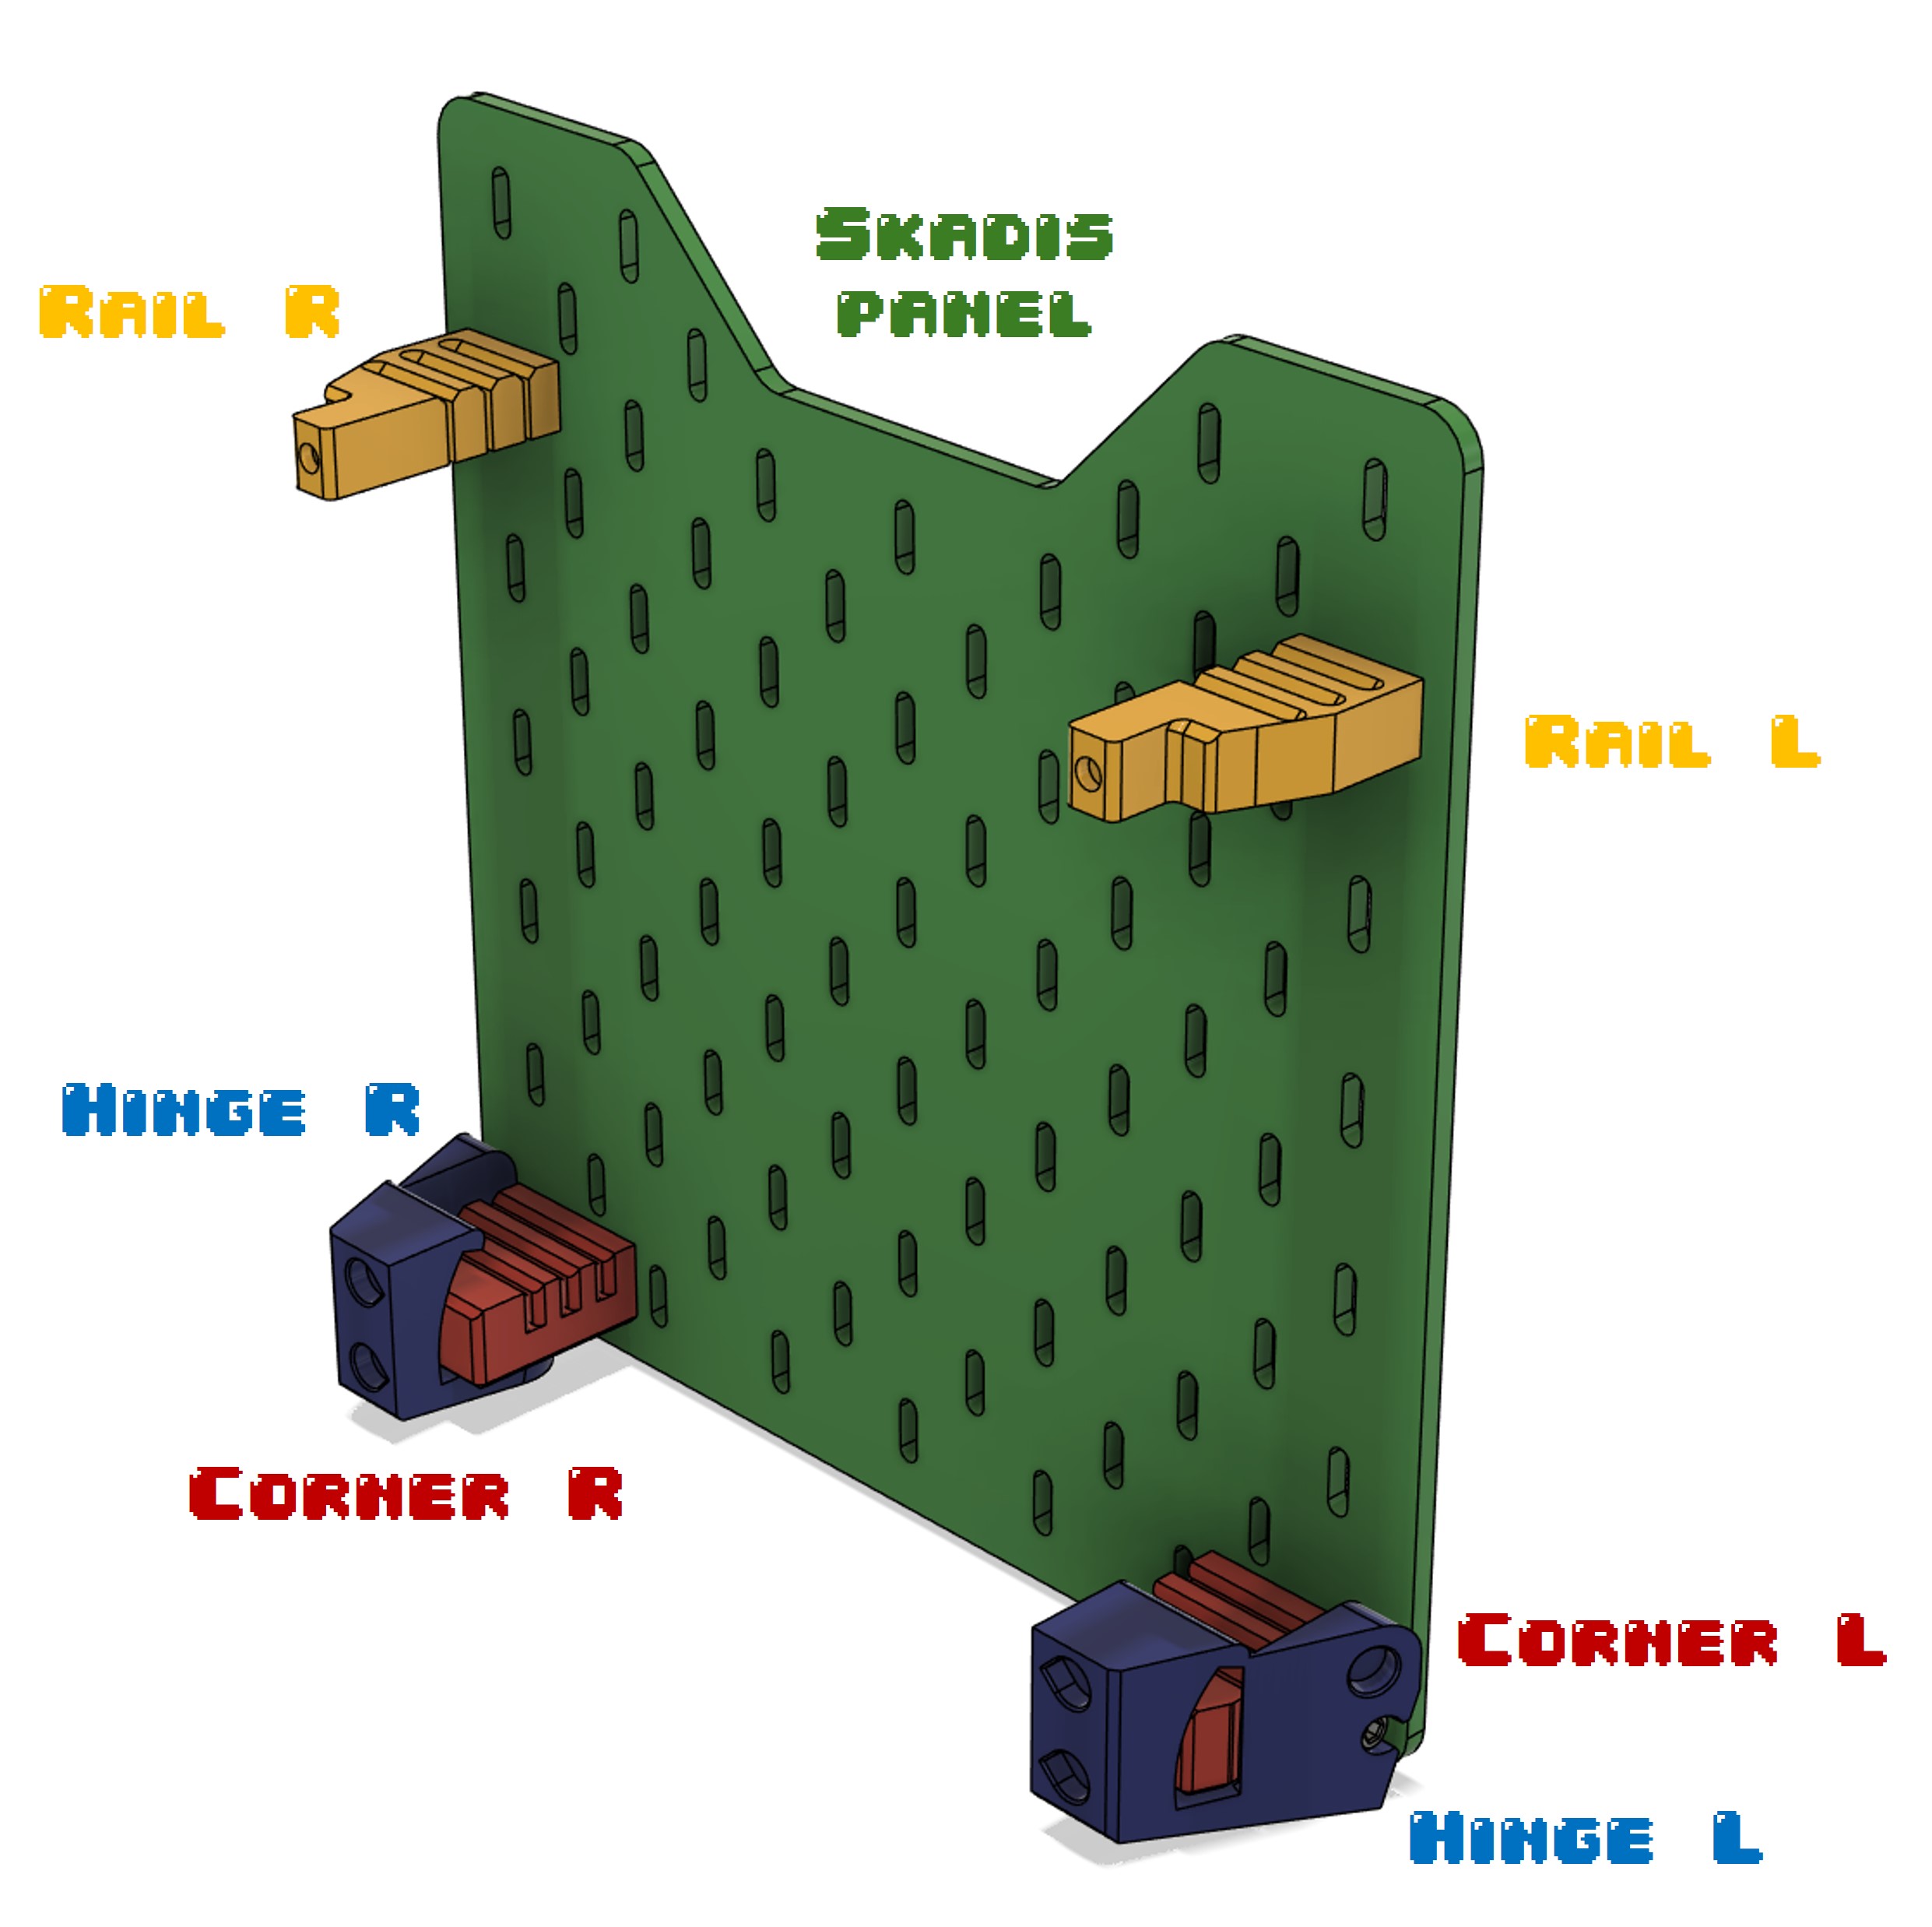
Here are the different components you will have to print:
Skadis panel (see above for options)
Rail Right and Left
Hinge Right en Left
Corner Right and Left
Studs (not represented on the picture below, to fix Skadis on printed parts)
Handle (but Prusa's official should fit so you may not need it)
PRINTING and FILAMENT:
If you print the Skadis panel in four parts, you will have to glue them together, so you need to print them with a filament that's not PETG (exept if you have a special glue for this filament).
Other than that, you can choose any filament you want, but for hinges, corners and rails I recommend PETG to have flexibility.
ASSEMBLY
Here are the steps to assembly the mod. Even if nothing is complicated, I rather detail each step to explain some details.
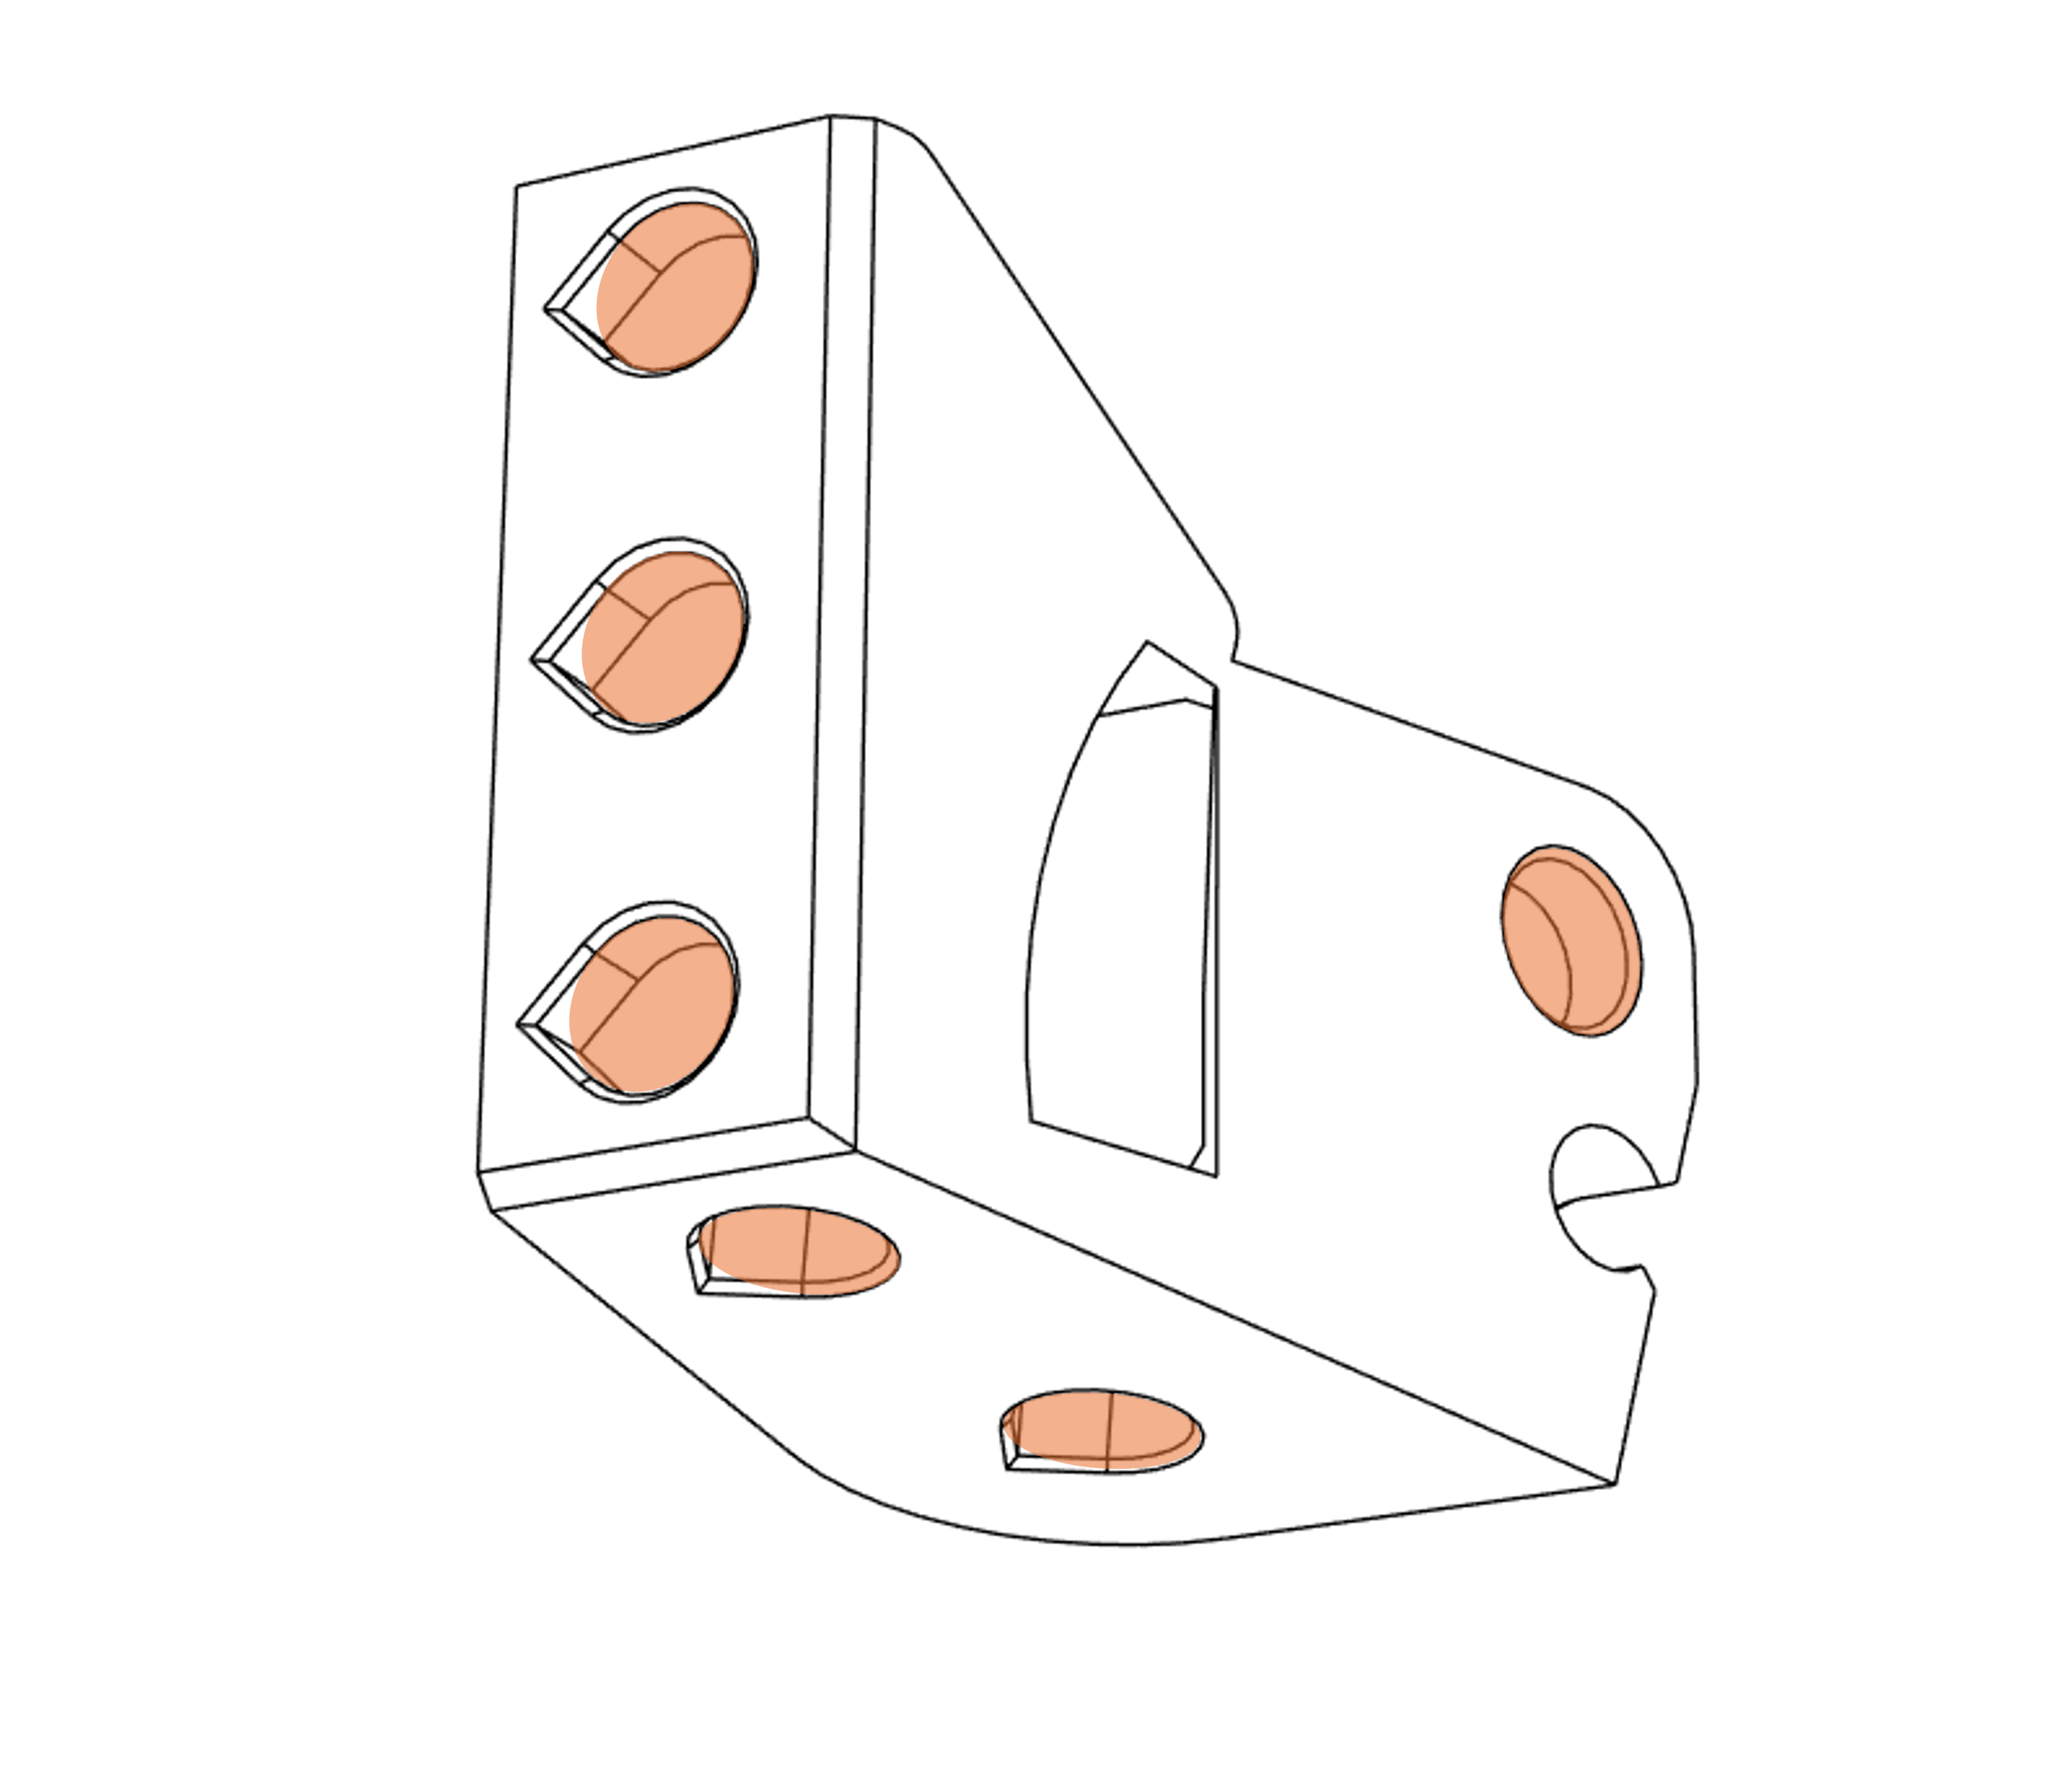
Hinge Magnets:
I recommend to place at least 1 magnet / face, but I planned up to 6 10x5 magnets by hinge.
Rail Magnets:
Hinge Screw:
Corner on hinge:
Corners and rails on skadis plate:
Use studs (you can choose between standard screw and countersunk screws for studs)

I only showed one side, but of course you have to do it for right and left sides.
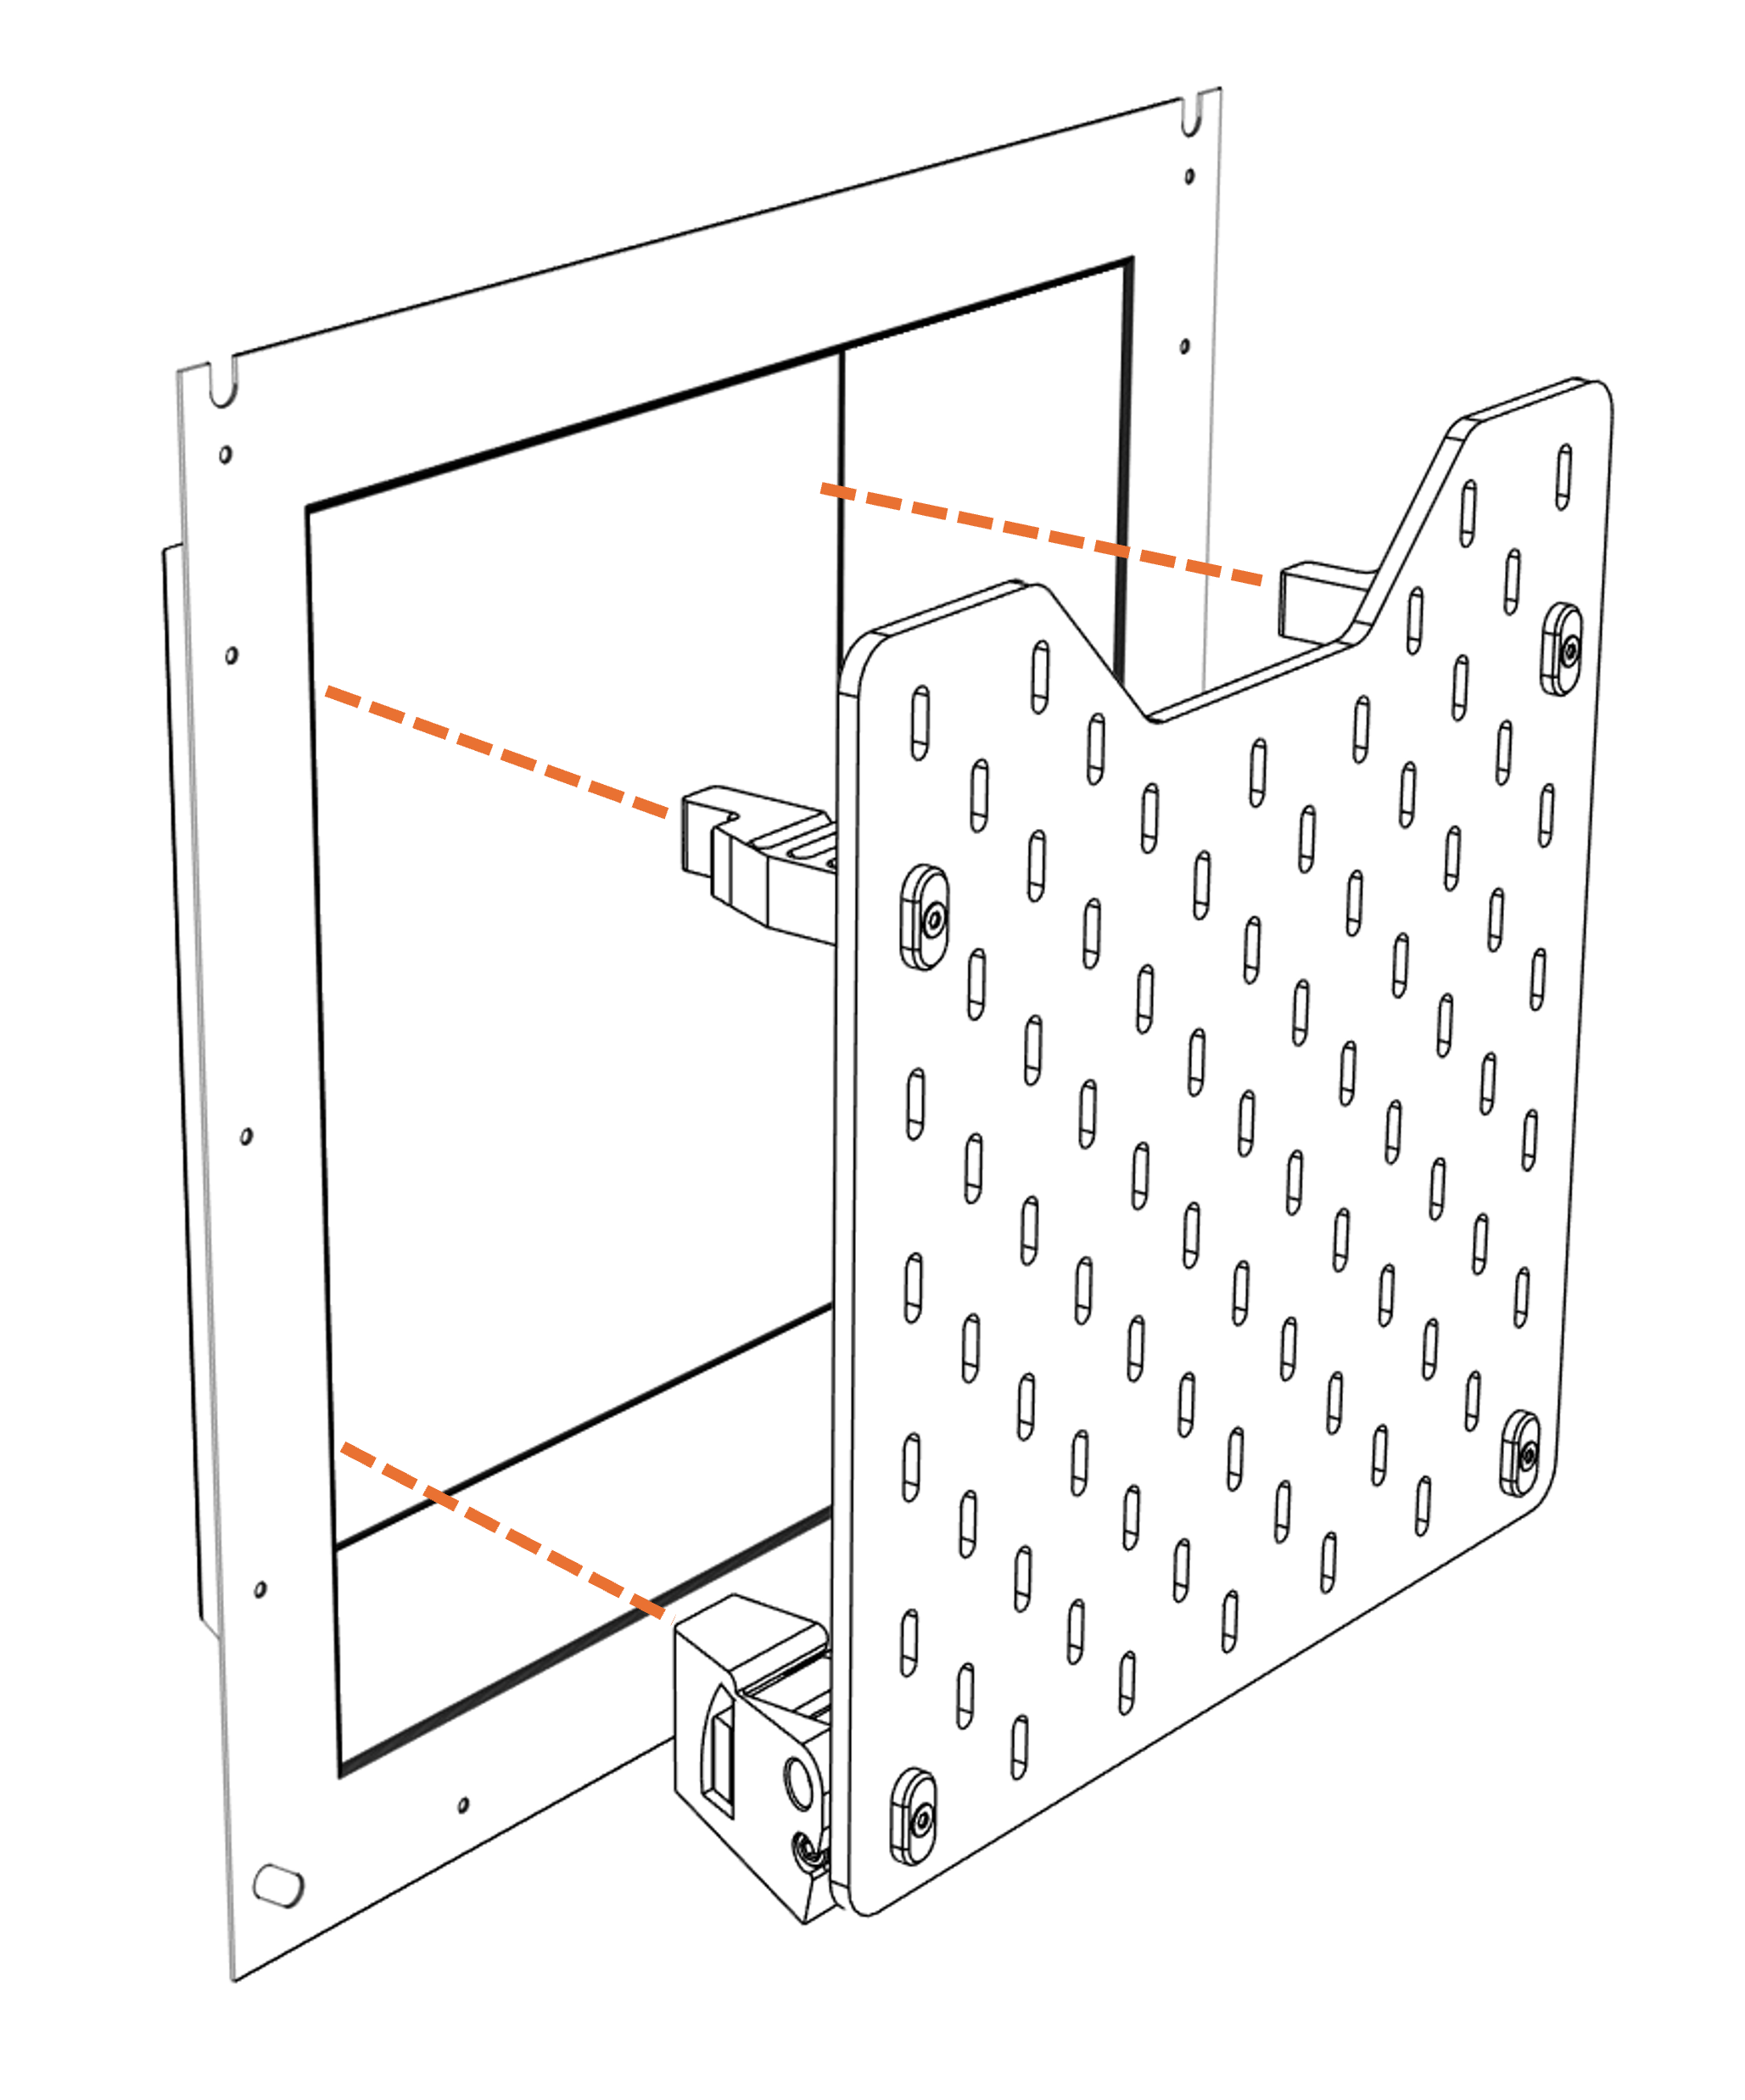
Mod on left panel of Prusa CORE One:
Last step, just place your mod on the left panel of your printer, it should be placed against the bottom of the panel.
COMMENTS:
I hope you will like it, don't hesitate to give me feedbacks or ask anything! :)
Happy printing!
If you want to support me, don't hesitate to like and download the files so I can earn some Prusameters. :)
If you really want to support me, you can tip me HERE.
Thanks a lot! :)
UPDATES:
14/12/2025:
Addition of upper rails and corners for 3mm cut panels.
23/02/2025:
Removed standard splitted SKADIS panel assembly as v-slotted version seems to be a lot better.
10/02/2025:
Creation of folders for split printable panel parts.
Change on printable split panel: I tried do make it easier to assemble panels by doing a V shape gutter along the edges so each pieces slides into others.
/!\ Make sure to first glue upper parts together and down parts together before assembling them.
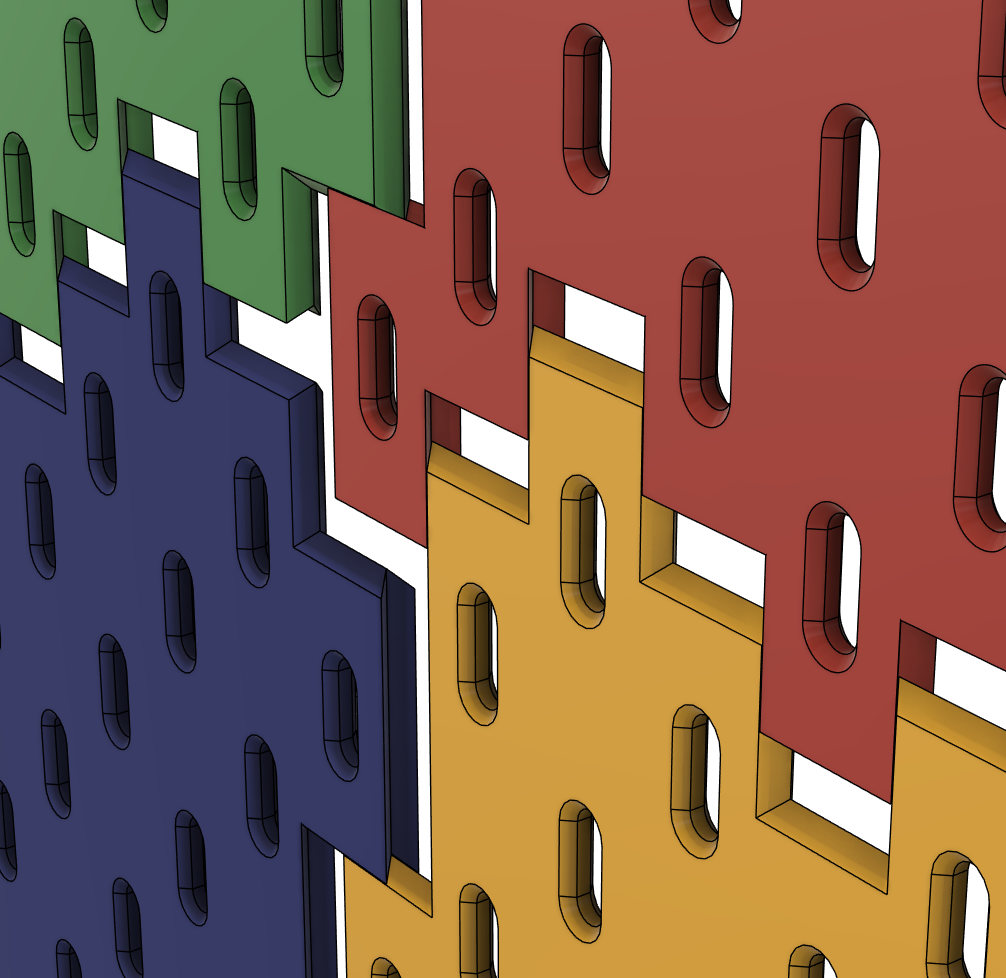
08/02/2025:
Change on hinges: I added another slot for rear magnets as I got feedbacks on them, they seem to be too weak to keep panel on place when open and loaded with tools.