
Ender 3 Pro frame as 4 spool holder and roller stand with or without enclosure
Obliczymy ostateczną cenę na podstawie wybranego pliku. Sprawdzisz ją i zaakceptujesz przed płatnością.
Zapisane na tym urządzeniu.

Reuse of the Ender 3 Pro frame as 4 spool ball bearings roller with or without enclosure
- Ocena
- 0 / 5
- Polubienia
- 10
- Pobrania
- 21
- Wydruki
- 0
- Wyświetlenia
- 252
- Oceny
- 0
Aktualizacja u źródła:
Informacje o modelu
- Źródło
- Printables
- Kategoria
- Accessories
- Licencja
- Creative Commons — Attribution
After the disassembly of an Ender 3 Pro to prepare the recreator3d MK5 PET machine, I would like to find a way to reuse the frame that wasn't used.
So I decided to create a spool stand for 4 spools with 2 configurations (and on bearings for better spinning) :
- with enclosure including dessicant storage
- simple design without enclosure
You need a buildplate of 256x256 (Bambu style) or more to print the parts. I was trying to make the design compatible with Prusa standard buildplates but unfortunately it was not possible ; too small.
I created the design to be compatible to feed filament for the printer by the bottom, the top and near to the printer to be usable by everyone.
Every parts are correctly oriented to be printed directly. Only “4040 extension with handle” and “Auto center bearings holder” parts need supports.
ASSEMBLY :
1 - Choose the configuration you need and print the files :
You can mix like you want. 

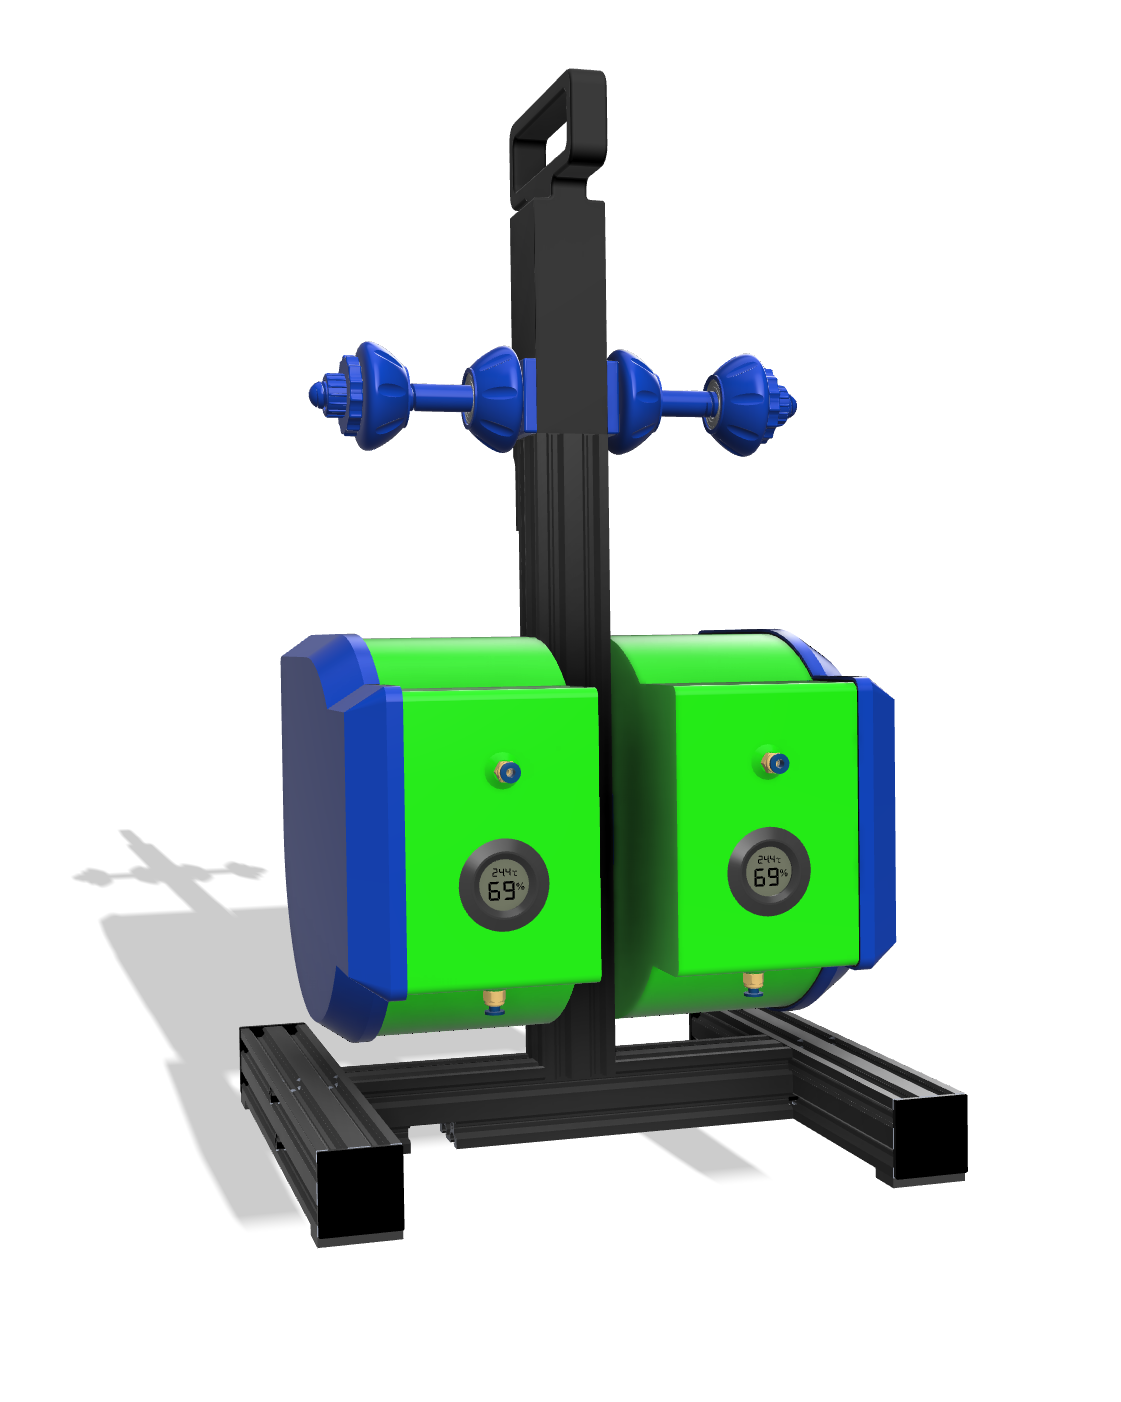


If you want, you can choose same enclosure one above the other :
This is the same spin mecanism in the enclosure or not, it works like this :
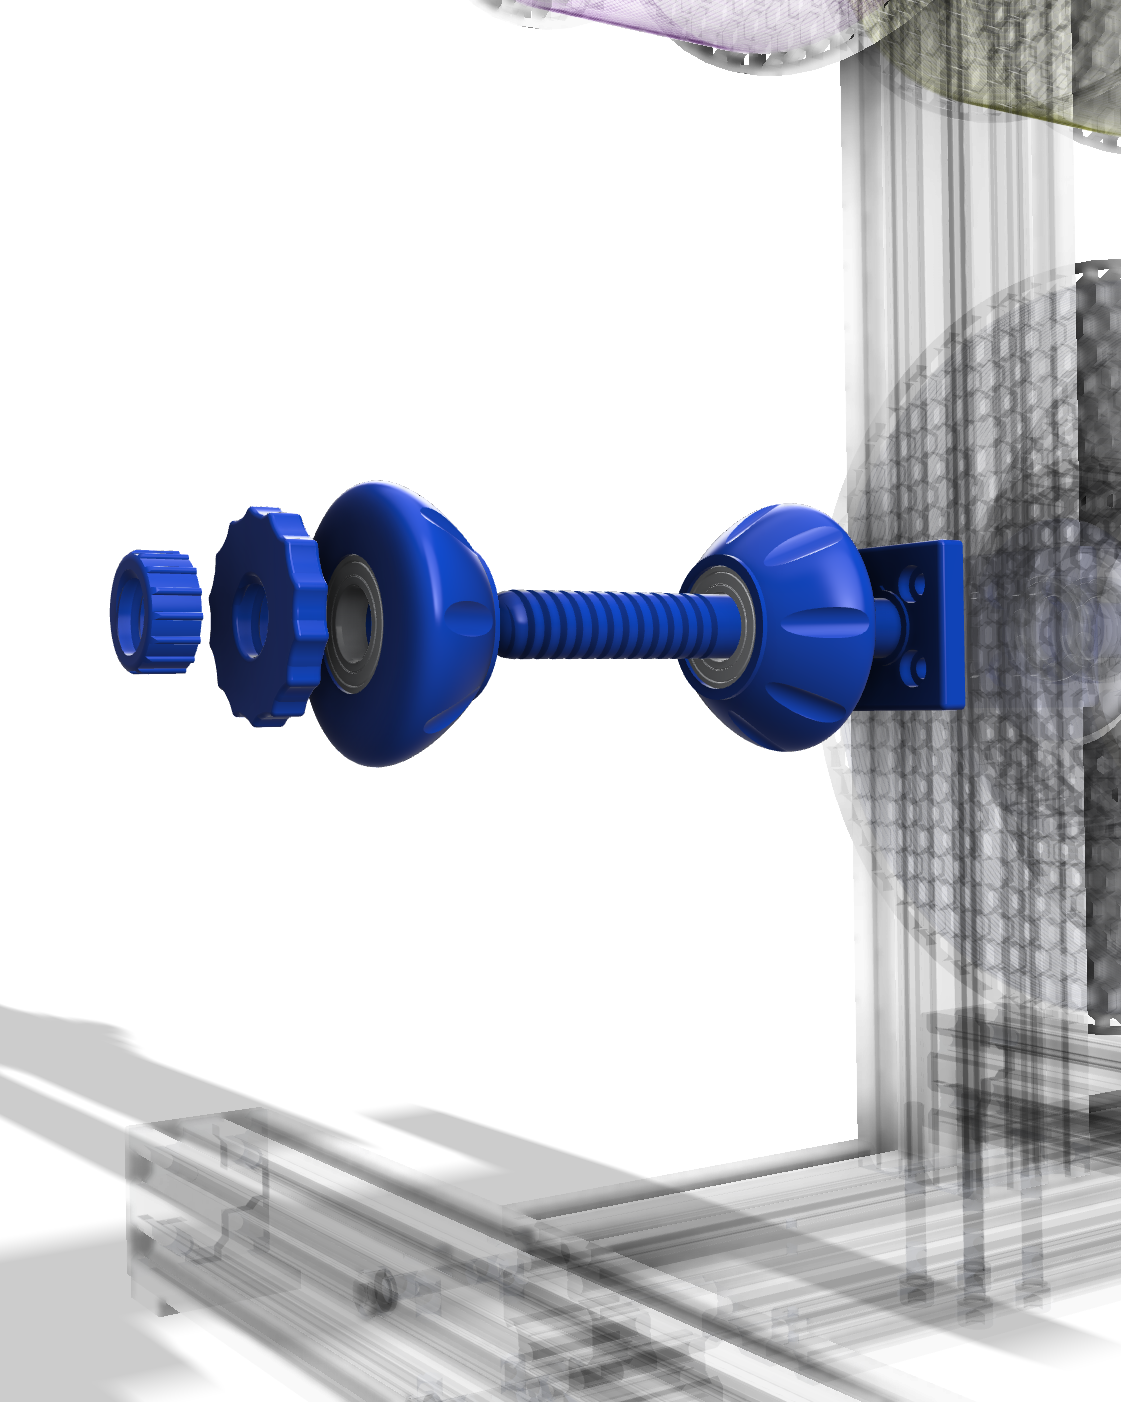
- 2 parts on bearings each side of the spool to auto center it
- 1 nut to constrain the base of the bearings
- 1 lock nut to prevent the nut of uncoming unscrew
Maximum width of the spool hole : 55 mm.
Minimum width of the spool hole : 35 mm
I don't have spools with bigger holes but it's easy to design something bigger if needed.
When you print the main part with the screw (with enclosure or not), you need strong parameters !!
I recommand :
0.2 layer height
5/5 top/bottom
5 walls
50% gyroid
It was printed with PETG and the design was adjusted for this filament. So If you want to print with other material, example PLA, I think you will have to adjust slicer settings for the 2 nuts parts and for the 2 “auto center” parts with bearings. Maybe 102% for PLA. The rest should be OK.
You will need 16 x 6902-2RS bearings to achieve the full installation.
I used these cheap ones :
https://fr.aliexpress.https://fr.aliexpress.com/item/1005007480065128.html?spm=a2g0o.order_list.order_list_main.17.33695e5bLlu2tY&gatewayAdapt=glo2fracom/item/1005007480065128.html?spm=a2g0o.order_list.order_list_main.17.33695e5bLlu2tY&gatewayAdapt=glo2fra
You also need 2 PC4-M10 connectors for each enclosure.
For the enclosure, the design is like this :
You have the “base” with the spinning mecanism integrated, a TPU link and a cover. You can see on the picture that the my humidity sensors indicates “LL” after few hours which mean less than 10% (for 55-60% in the workshop).
I recommend to seal the humidity sensors like this before to install it :

There is a dessicant box in each enclosure :
3 x M3 x 5.7 mm heat inserts
3 x M3 x 8 mm BHCS screws

To fix the main part of the mecanism (with or without enclosure), you will need for each :
- 4 x M5 x 8mm screws BHCS
Optionnal : you can use 4 * M5 x 12mm for each top spools holders in the 4040 extension if you want stronger fixation
And for the 2 bottoms spools holder, you will need to add :
- 8 x M5 t-nuts (to fit in the 4040 extrusion) = 4 for each
2 - 4040 extension :
You need to print the extension with supports and with strong settings.
I recommand :
0.2 layer height
5/5 top/bottom
5 walls
50% gyroid
Don't worry, the design is partially empty inside to save filament :
It's strong enough to support the weight of the full stand without problem !!
You will need to prepare and place in the 4040 extension :
- 8 M5*9.5 heats inserts
To assemble the frame, you need to put Y axis of the Ender 3 Pro vertically screwing by the bottom by original screws.
Be careful, you need to orientate the holes that was used to screw the Y endstop on the top and back. We will use these holes to fix the 4040 extension I made.

To assemble the 4040 extension, you will need to screw 2 M3 x 35mm FHCS
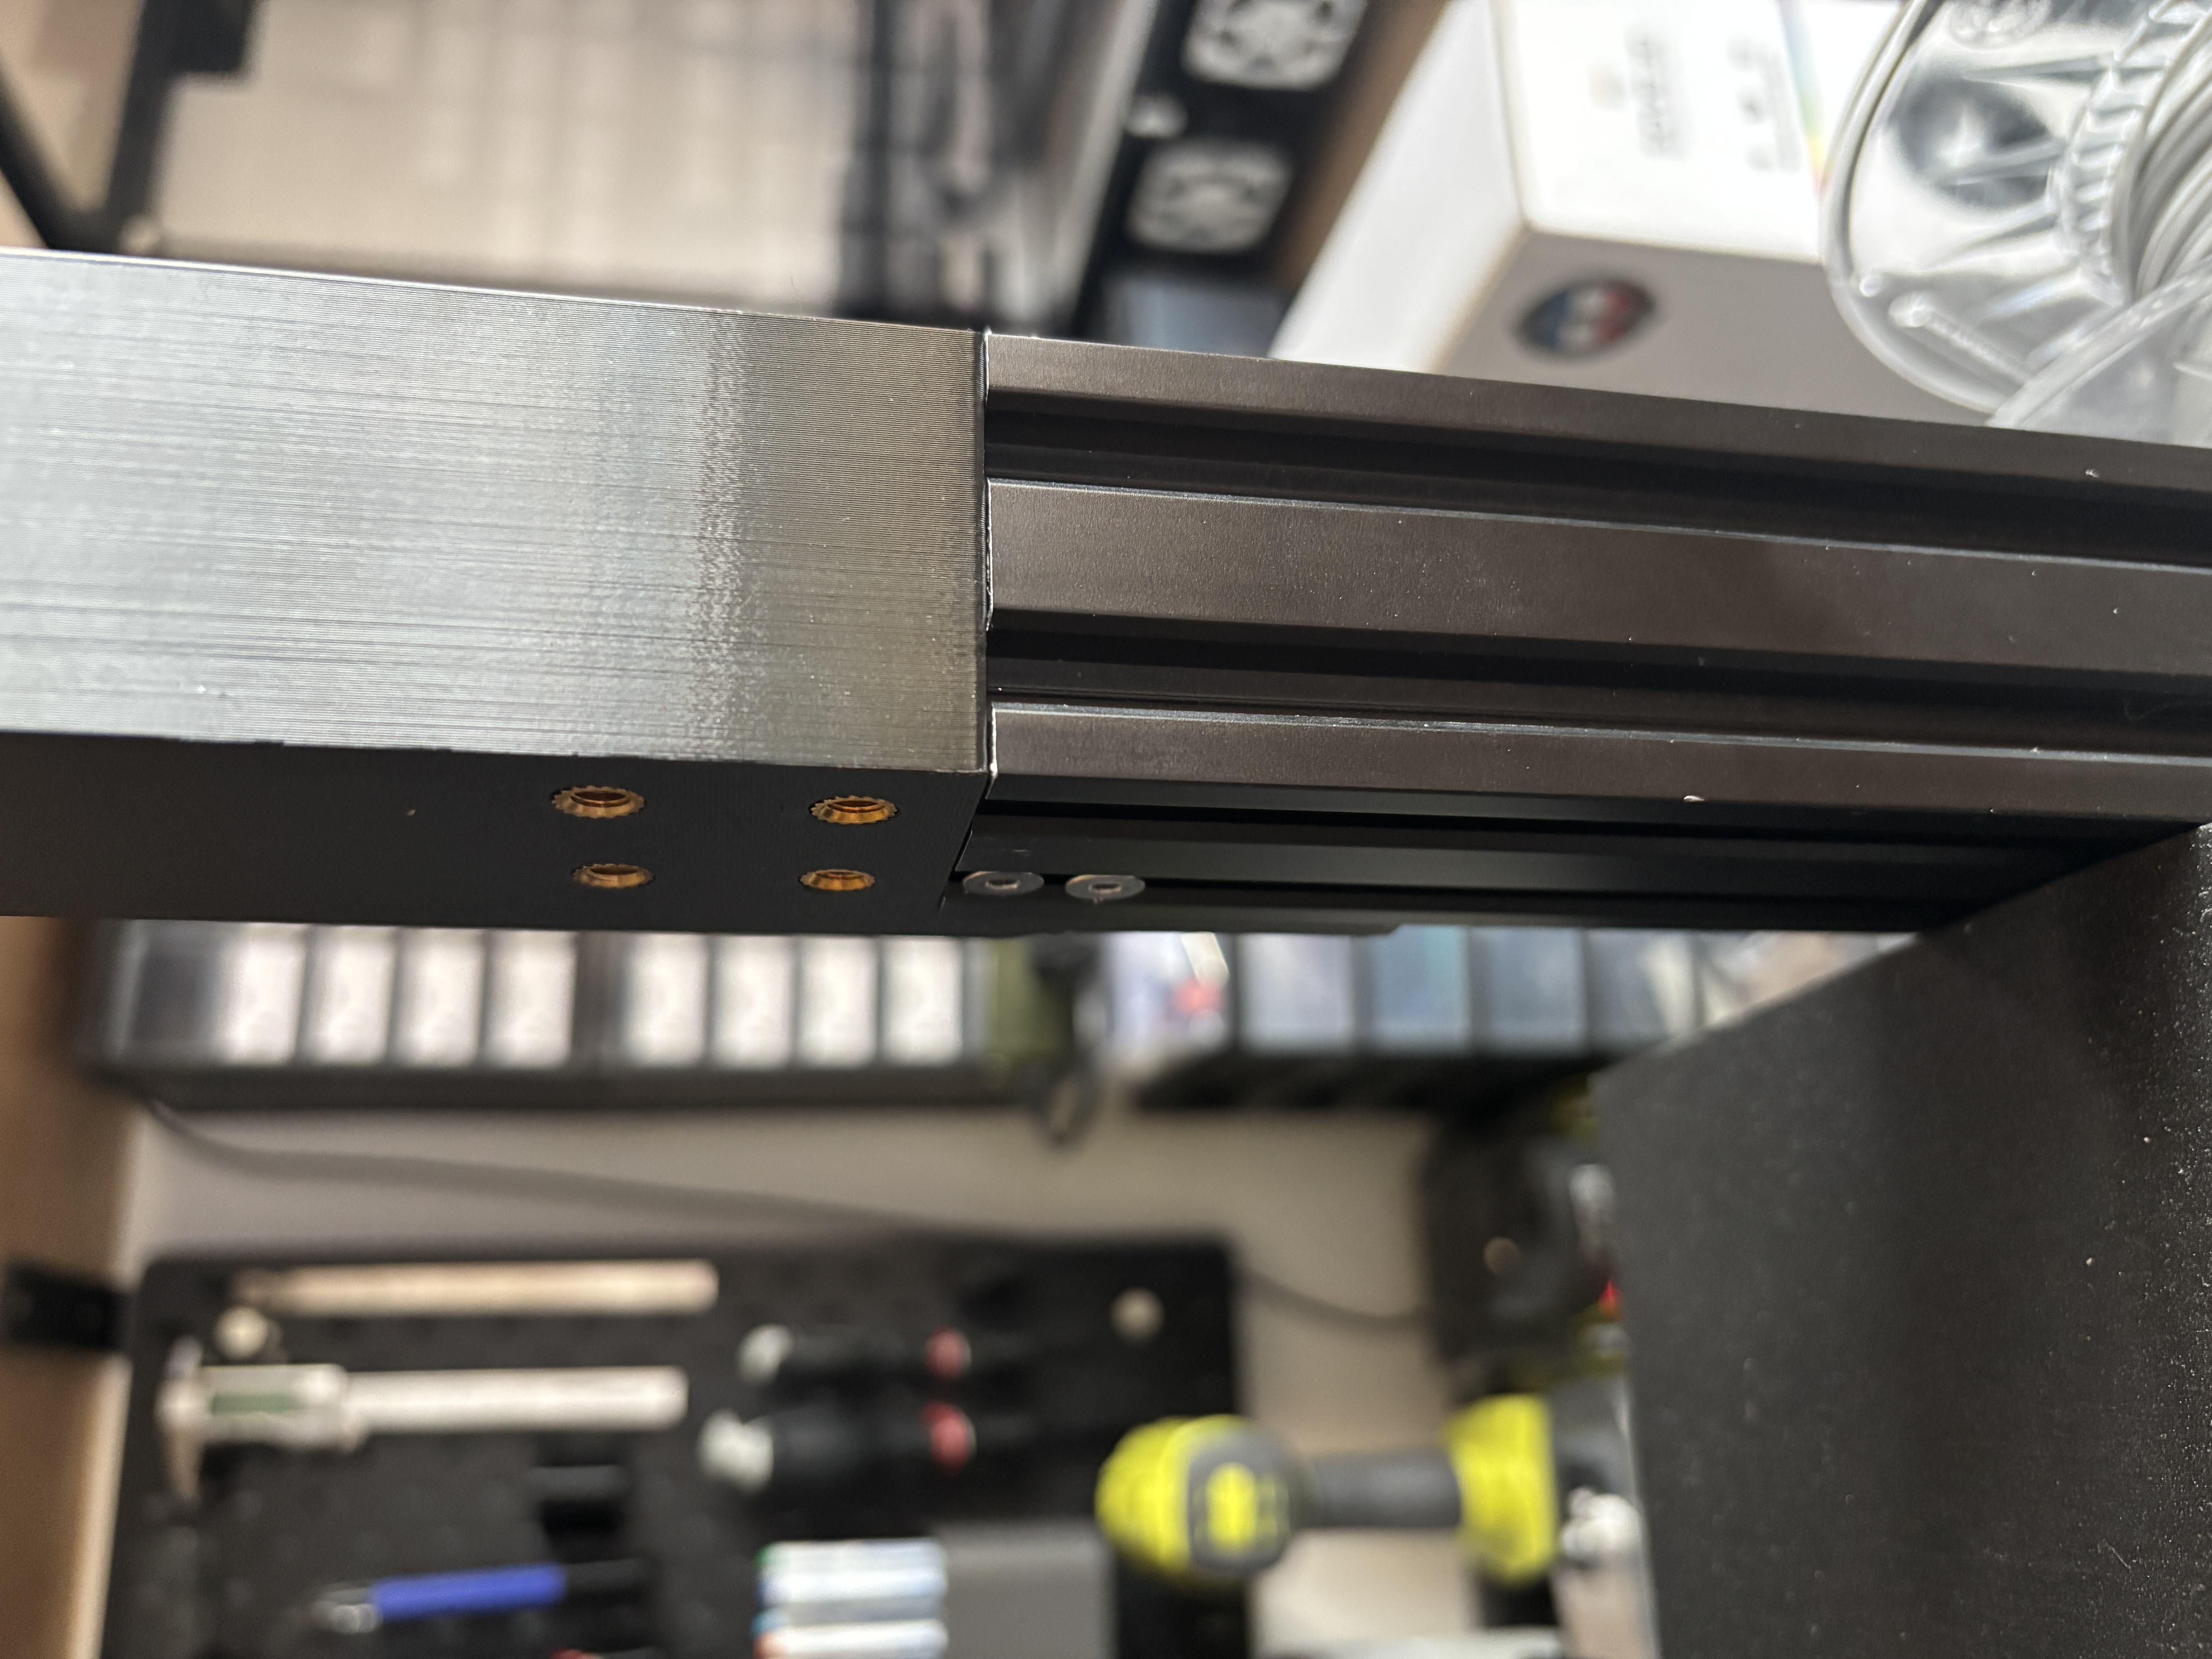
On the back of the extension, you need 4 M5 t-nuts and 4 M5 * 8mm BHCS screws to ensure everything is strong !
3 - Install the 4 spool holder of your choice :
or
or …
Enjoy !!