
Filament Drybox (the best-of-the-best components)
Obliczymy ostateczną cenę na podstawie wybranego pliku. Sprawdzisz ją i zaakceptujesz przed płatnością.
Zapisane na tym urządzeniu.

There are many great drybox designs out there, but here are the best components from each of the designs I've tested.
- Ocena
- 4,889 / 5
- Polubienia
- 227
- Pobrania
- 614
- Wydruki
- 8
- Wyświetlenia
- 5637
- Oceny
- 9
Aktualizacja u źródła:
Informacje o modelu
- Źródło
- Printables
- Kategoria
- Accessories
- Licencja
- Creative Commons — Attribution — Noncommercial — Share Alike
I wanted a drybox that would keep my filament dry during the humid months and I really wanted to eliminate the MMU3 buffer that takes up tons of space and keeps feet of filament constantly exposed to the humidity.
After researching this, I was blown away by all the different drybox designs out there, but after much research (and lots of trials-and-failures) I've settled on a hybrid design using the ‘best of the best’ of components from multiple different designs and some custom created components of my own.
Drybox History (as best as I can tell)
First off, everything I've done here is based on learnings from a chain of innovative work from pioneers before me! From what I can tell these were the key steps in getting to this point (my apologies if my history is off or if I missed anyone key):
- Mar 2023 - @Kato22_445783 published this design that leverages a cereal container and desiccant bin to keep the filament dry. However it was just storage and didn't support printing from the bin (and this was even inspired by Josh Murrah here that dates back to Feb 2022)
- Aug 2023 - @GunplaMark_876550 published this improvement on the design, but again it didn't yet support printing from the bin.
- Jun 2024 - Stephen (@IVDxConsulting_45366) made the big jump of printing directly from the bin in this design (which also eliminated the need for the MMU3 buffer)…oh ya!
- Jul 2024 - @GunplaMark_876550 published this improvement on Stephen's design
- Nov 2024 - @tcosta_240835 changed the game with this design that eliminated the rollers (cutting the bearing count in half) and instead suspended the roll from the center of the spool for improved reliability/stability.
My Solution
My hybrid design is a mix of the best-of-the best components from each of the above designs based on my learnings from building each one (and running into various problems):
- The Base (which requires minimal filament to print) and Universal Hubs are @tcosta_240835's design.
- I really find that tcosta's design of suspending the spool from the center hole is so much more reliable than the rollers in the earlier designs.
- With the old rollers, the spools just seemed to skid along instead of rolling as designed.
- With this design, it's awesome that you can grab the container and flip it over to move it or change the desiccant without having to worry about the spool jumping off the rollers.
- This design nicely handles spools of any width that will fit into the cereal container.
- I really find that tcosta's design of suspending the spool from the center hole is so much more reliable than the rollers in the earlier designs.
- The Arms are my own design that is a minor improvement on @tcosta_240835's original design. My design:
- Makes the Arms a little stronger (as you have to bend the Arms to change the roll so I didn't want them to break)
- Makes the mounting holes less likely to strip out
- Accommodates different (especially longer) M3 screw lengths. This allows you to easily use what spare size screws you might have lying around and doesn't requiring drilling out the holes for long screws.
- The Hygrometer Bracket is @GunplaMark_876550's design as it's easier to print than @IVDxConsulting_45366's. Combining this bracket with tcosta's design is huge because this bracket pushes just slightly against the top of the spool. This is critical because:
- It provides just a tiny bit of friction to prevent the spool from unwinding too much when filament is being pulled by the printer
- It prevents the filament from jumping around the top edges of the spool (which prevents jamming) when the MMU3 pushes filament back into the box on unload.
- The Coupler Nut is @IVDxConsulting_45366's design…simple and effective!
- The Desiccant Bin is @GunplaMark_876550's design. I really like how easy it is to fill and place it into the lid of the container. I much prefer this over having the desiccant loose in the bottom of the cereal container (which makes it much harder to change).
Note: I was really worried about the filament jumping around the bottom edge of the spool and getting jammed, but in my tests, as long at the filament stays on the top of the spool (which the Hygrometer Bracket ensures) then the filament will straighten itself out when pulled by the printer.
Printing Instructions
- Just print everything directly in the orientation in the STL files
- No supports are required
- Use any filament you want (I used PLA, which was fine)
- 15-20% infill is fine
The most challenging component to print is the Hygrometer Bracket, but keep it oriented as it is in the STL. For that I added a brim to provide a little more surface area on the print sheet, but you might not need it if you are using a textured sheet or good filament.
Additional Parts List
- Cereal Containers (1 per drybox)
- Digital Hygrometer (1 per drybox)
- Bowden Tube Coupler (1 per drybox)
- Color Changing Desiccant
- 608 Bearings (2 per drybox)
- M3 screws (5 per drybox) which can be any length from 8mm to 20mm) and one M3 nut
- If you don't have spares, I like this 600pc assortment (https://www.amazon.com/dp/B0D1457XQ3) of M3 screws/nuts because they are super low-profile so they don't scratch your desk/shelf as you move the boxes when flipped upside down. However they do tend to get stripped on the hex end if you don't have a good allen wrench.
- PTFE tubing, 2.5mm inner diameter (if you don't already have it for your MMU)
Assembly Instructions

Base & Arms:
- Place the Base in the lid of the cereal container (it only fits in one orientation so flip it around if it seems off)

- Drill four holes (using a 3/32" or 2.5mm bit) in the lid using the four holes in the Base as a guide
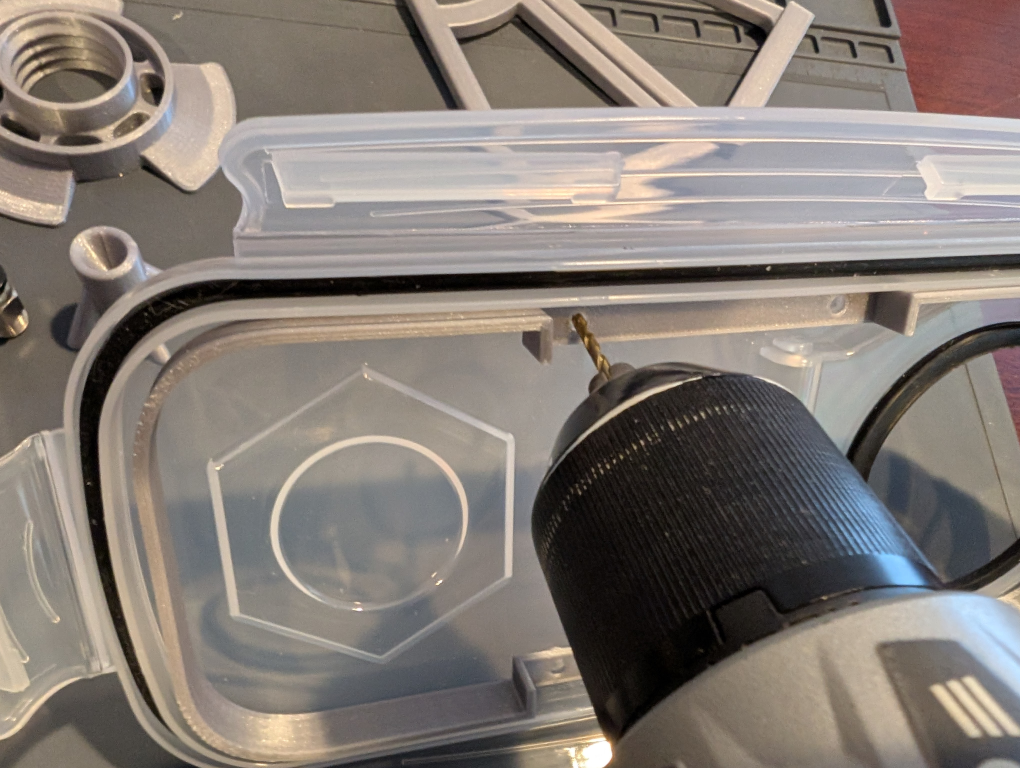
- Add the Arms to the Base and secure them through the lid & Base using M3 screws (any length from M3-8mm up to M3-20mm will work)


Note: If you use long 20mm screws, they pop out the top of the base of the Arm, but it's fine as I intentionally ended the mounting holes just before the top surface of the print so they easily pop through, if needed.
Universal Hub and Bearings:
- Force the 608 bearings into each end of the Universal Hub spool holder (you may have to push the hub onto a hard surface to force the bearings into place)

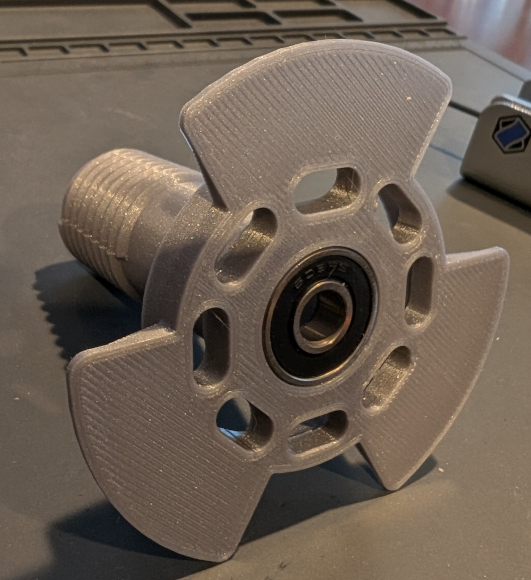
- Screw the Universal Hub onto your filament spool and insert the Hub onto the Arms.

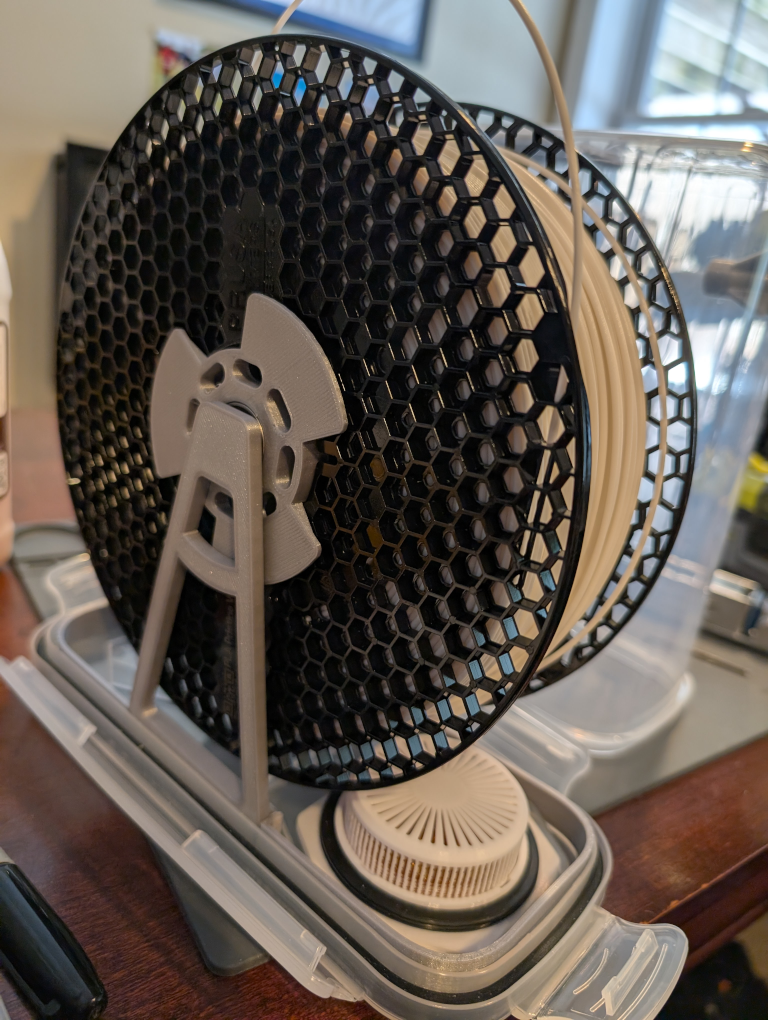
Note: You want the loose end of the filament to be on the top of the spool and pointing toward the hole in the cereal container lid.
Hygrometer Bracket:
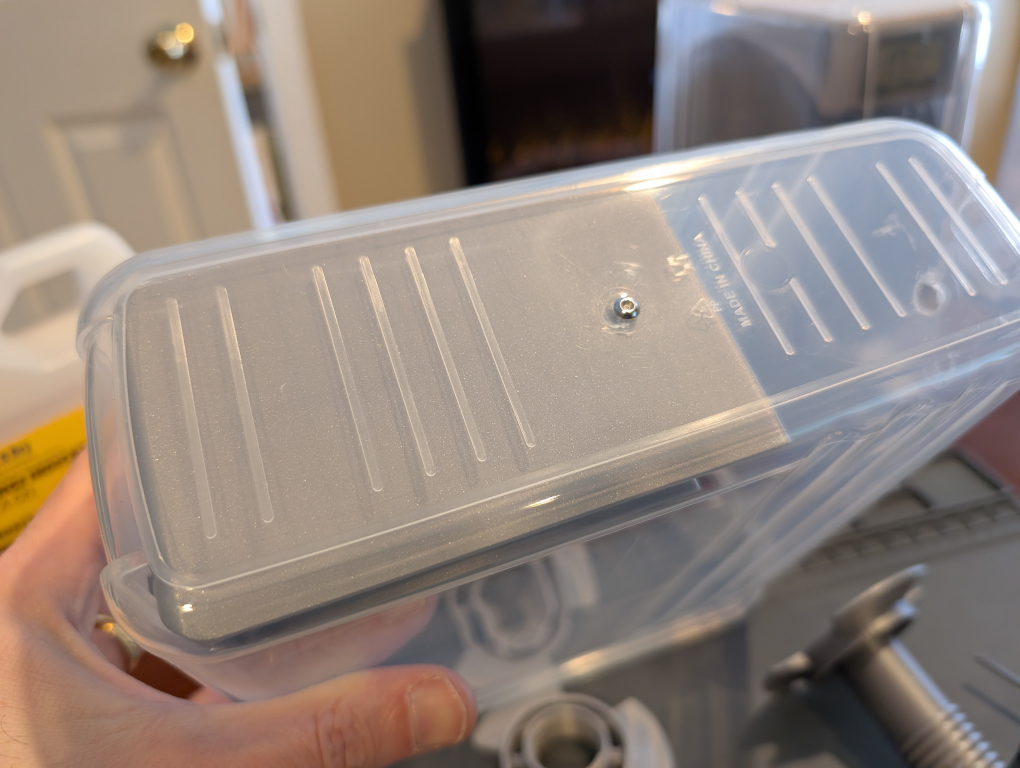
- Drill a hole (using a 3/32" or 2.5mm bit) through the ‘bump’ in the center of the cereal container base

- Force one M3 nut in the Hygrometer Bracket
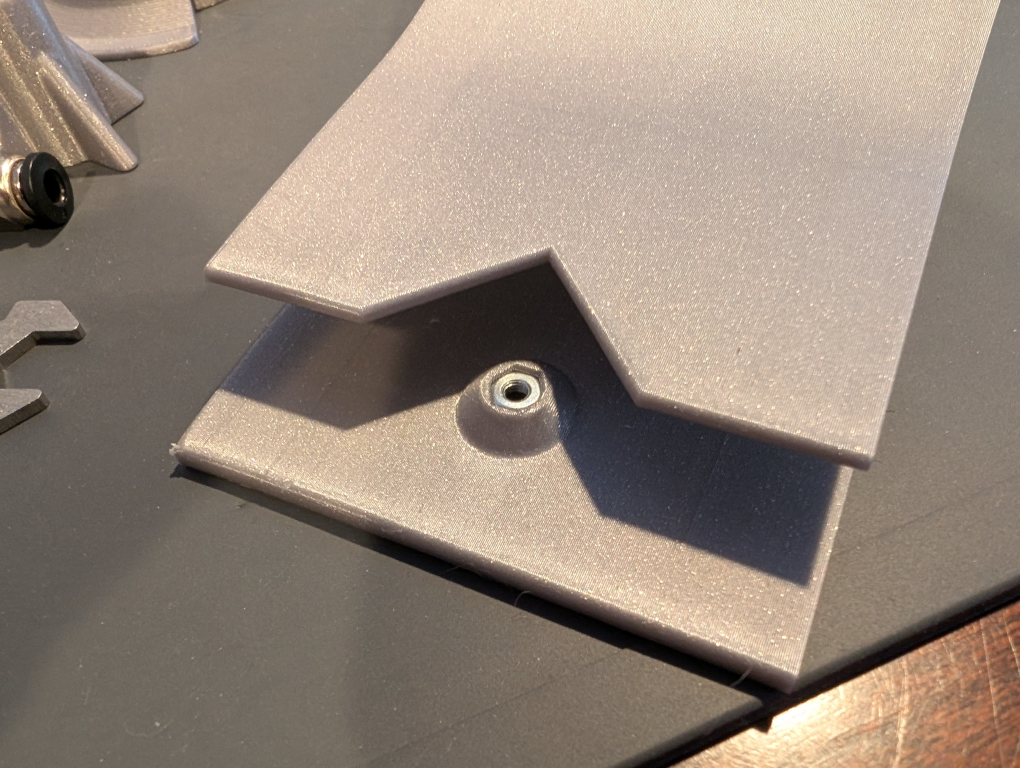
- Face the Hygrometer Bracket toward the wider side of the cereal container and secure it using an M3 screw (any length from M3-8mm up to M3-20mm will work)
Bowden Tube Coupler:
- The hole goes on the narrow side of the cereal container. First cover the area of the hole with masking or painters tape and mark it ~2" (or ~4.5cm) down from the top

- Drill a hole (5/16" or 8mm). It's best to start with smaller drill bits and work your way up to 5/16"…like 3/32", then 1/8", then 3/16", then 1/4" then 5/16".
Note: The 5/16" hole can be a little tight for the Coupler Nut so you may have to wiggle the drill bit around a little to widen the hole slightly
.
- Finally, screw the Bowden Tube Coupler into the hole and connect the Coupler Nut on the inside of the cereal container to secure it.

Desiccant Container:
- Pull off the flip-top lid on the cereal container to expose the hole that's usually used to pour the cereal
- Fill the Desiccant Bin to the top with desiccant and screw on the Desiccant Lid.


- Insert this Desiccant container into the hole of the cereal container
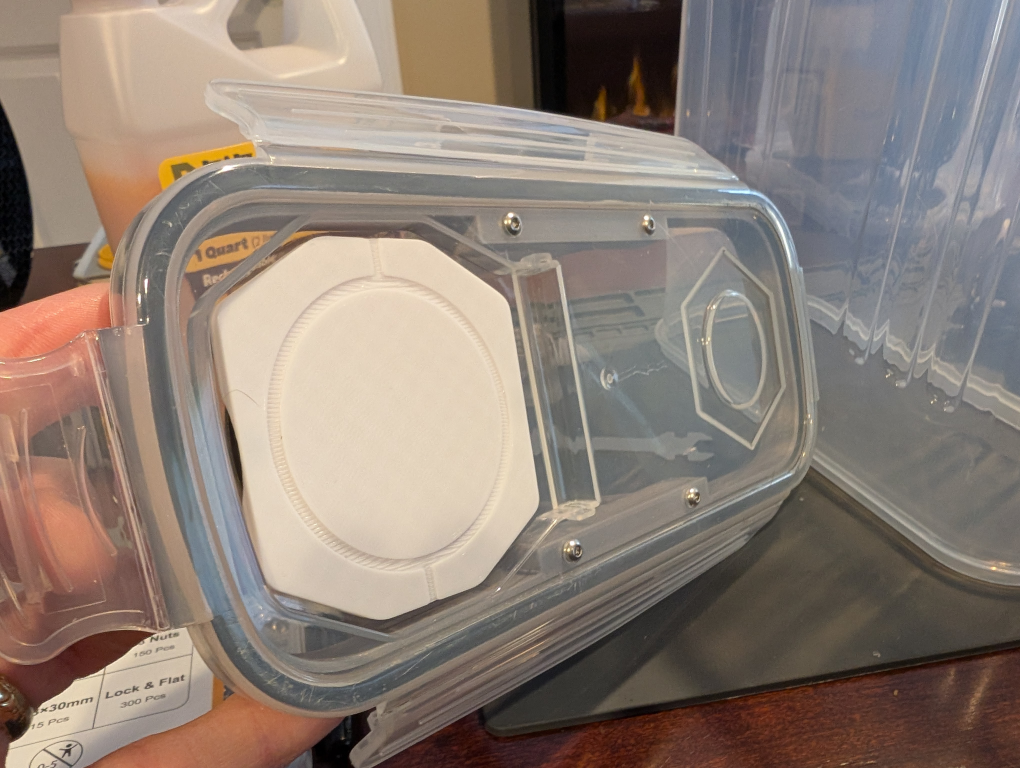
Feed the filament through the Coupler Nut and secure the lid to the cereal container.
It's done!
