
1 / 24
Hercules DJControl Mix stand on ball joints
Zamów wydruk tego modelu
Obliczymy ostateczną cenę na podstawie wybranego pliku. Sprawdzisz ją i zaakceptujesz przed płatnością.
Zapisane na tym urządzeniu.

DJControl mix stand on ball joints with phone holder
- Ocena
- 0 / 5
- Polubienia
- 30
- Pobrania
- 34
- Wydruki
- 0
- Wyświetlenia
- 476
- Oceny
- 0
Aktualizacja u źródła:
Informacje o modelu
- Źródło
- Printables
- Kategoria
- Audio
- Licencja
- Creative Commons — Attribution — Noncommercial
SzczegółyPliki (16)Wydruki i komentarze (Wydruki: 0) (Komentarze: 2)Remiksy (0)Kolekcje (23)Powiązane
Update 12.02.2025:
- reinforced main arm added (phone holder)
Update 26.02.2025:
- Basket holder - thread length increased
Update 27.02.2025:
- Dual-joint variant added. Much more rigid:

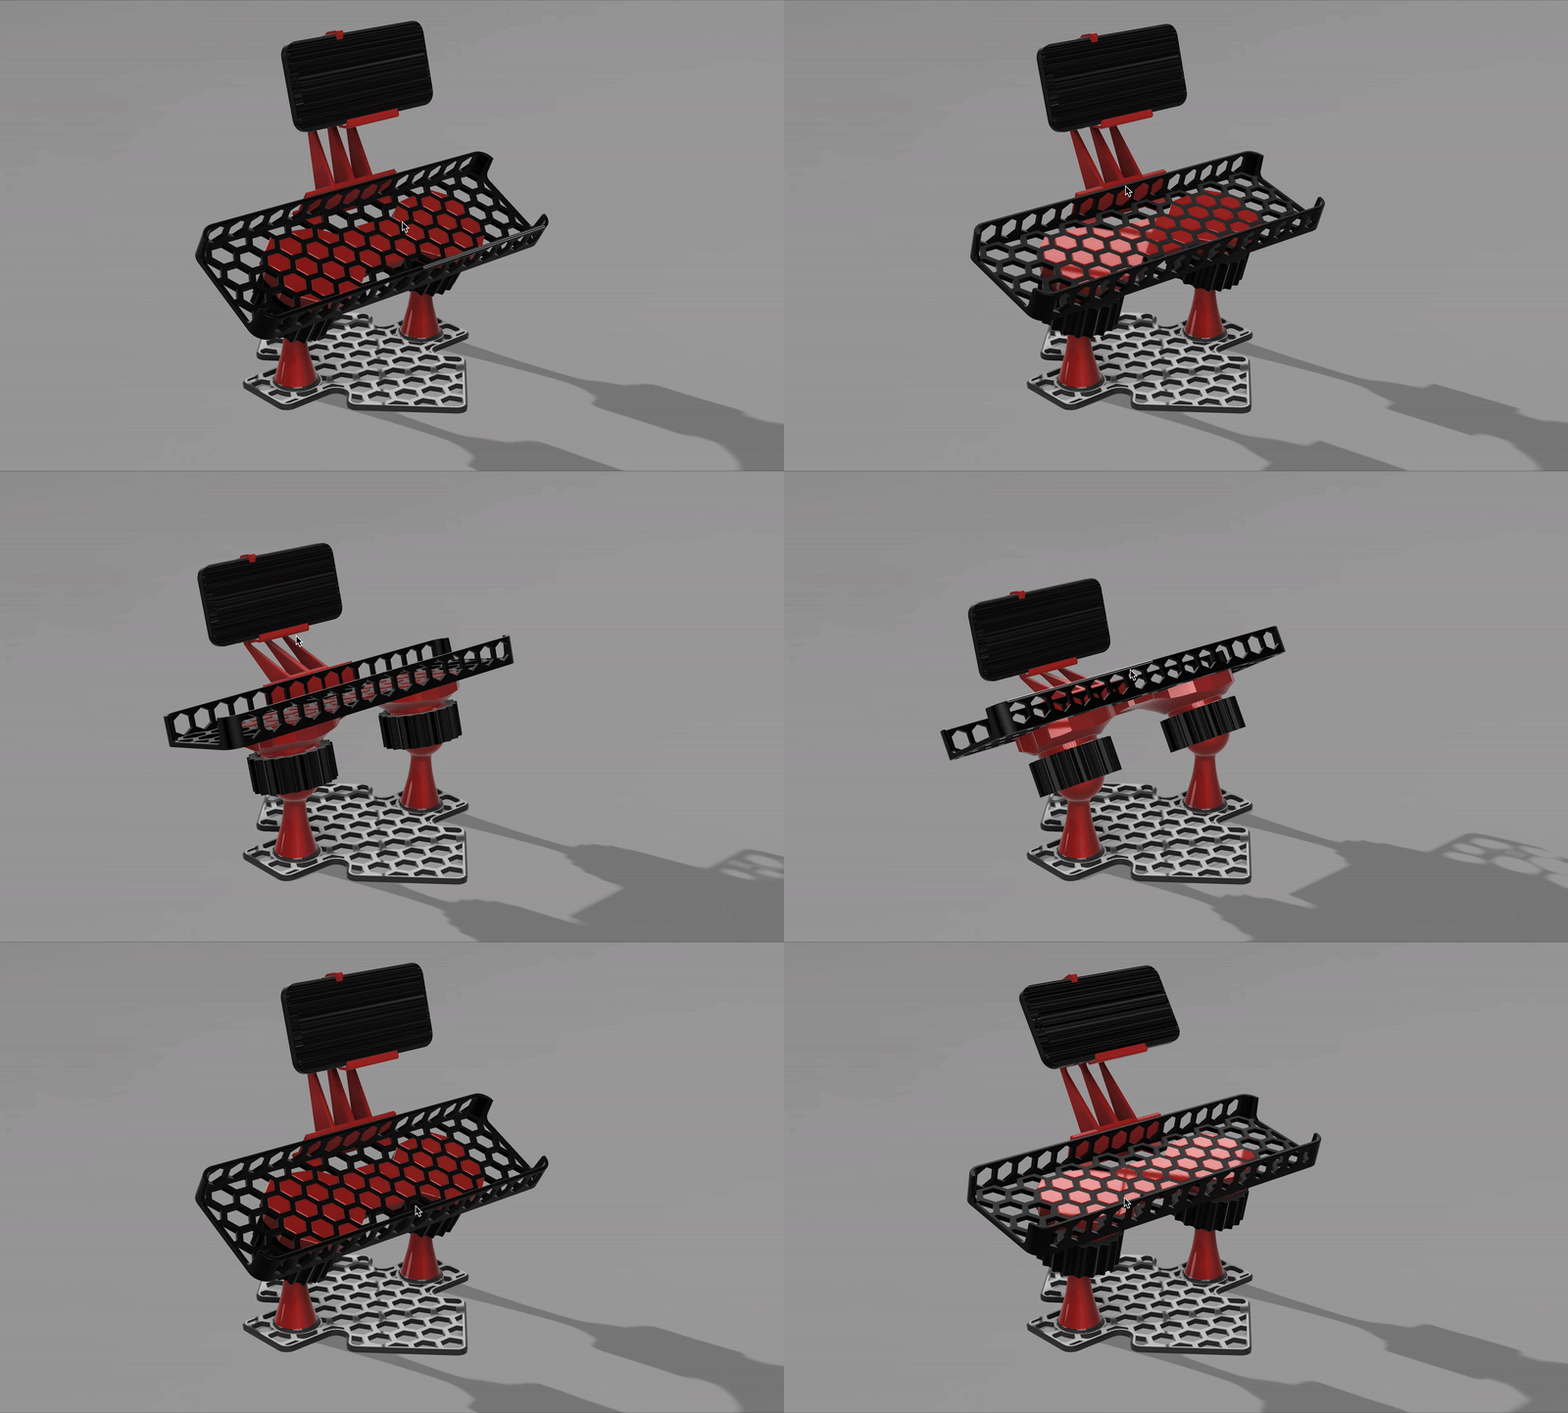
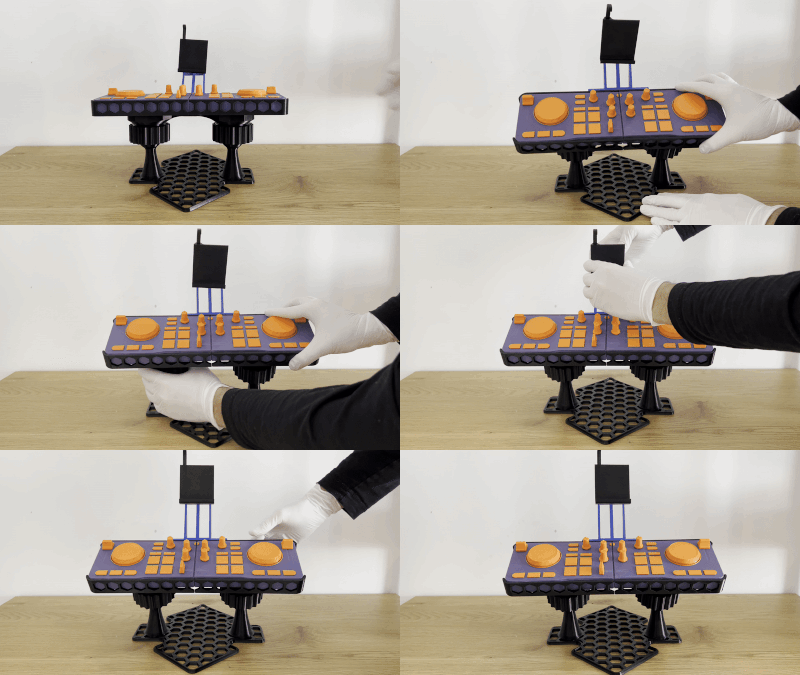
Update 02.03.2025:
- Dual joint base - reuploaded with more rigid one
Model consists from several parts:

- Basket (there is also splited version for regular print beds)
- Basket holder - single or dual joint variants (print without supports and without brim)
- Nut (big)
- Base - single or dual joint variants
- Ball rod
- Main arm (some supports required) - phone holder
- Nut (small) - phone holder
- Holder (some supports required) - phone holder
- Pin - phone holder
Assembling:
- Put on big nut on ball rod (for dual joint variant - all the same, but 2 times):
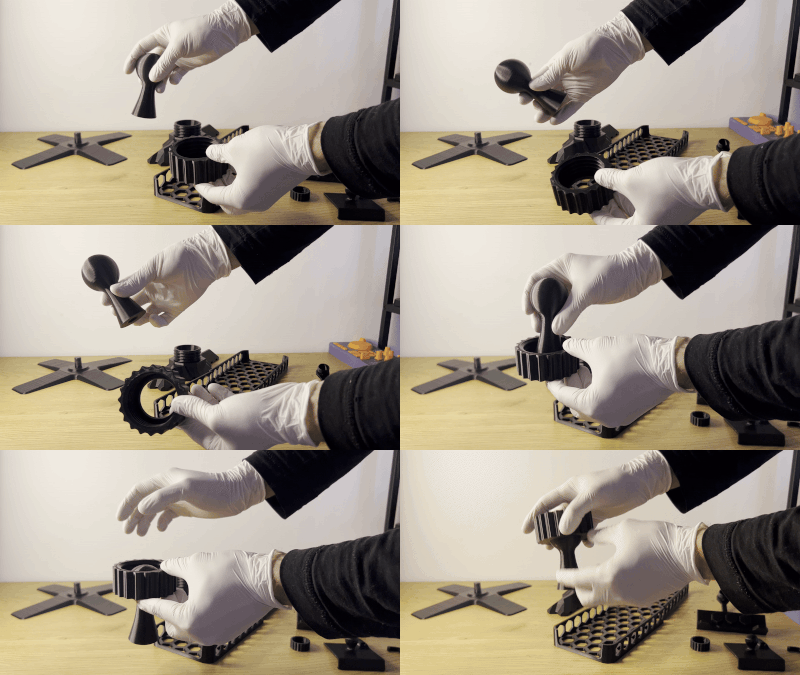
- Screw ball rod into base(for dual joint variant - all the same, but 2 times):
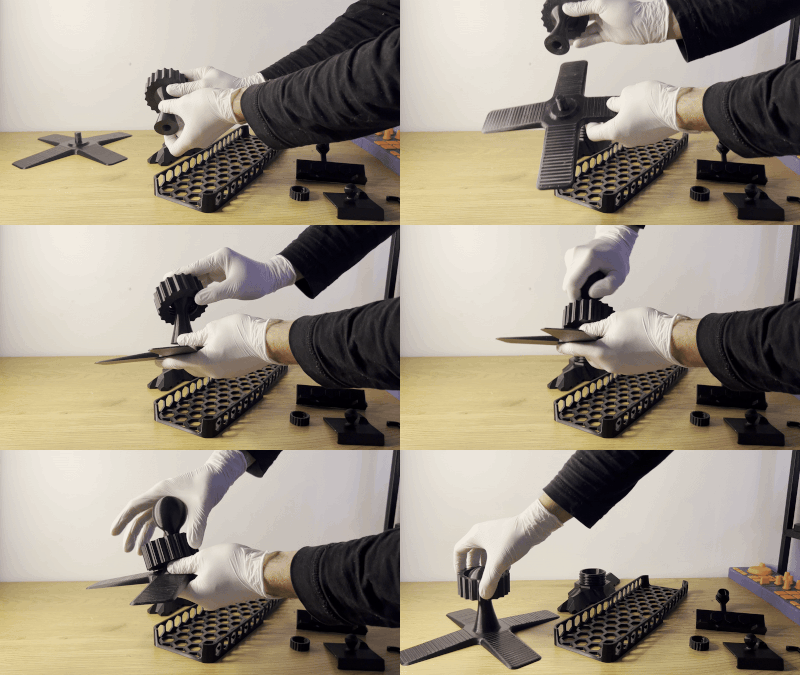
- Connect basket holder with big nut(s):
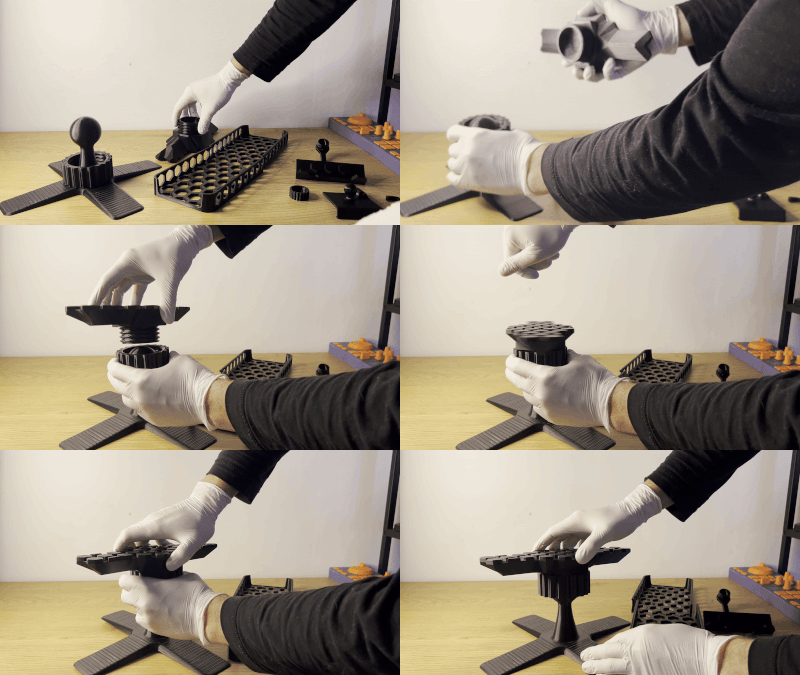
- Connect basket:
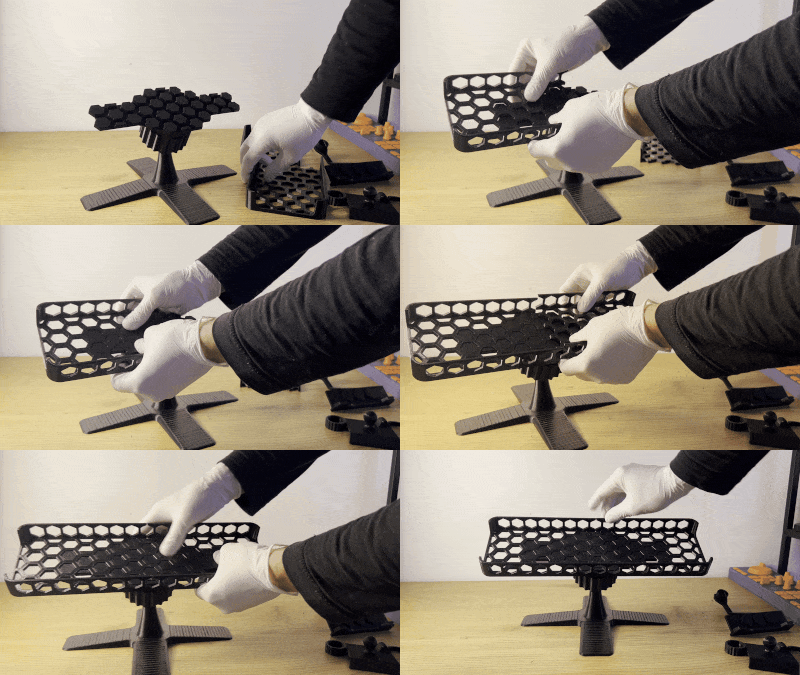
Phone holder:
- Connect main arm to the basket:
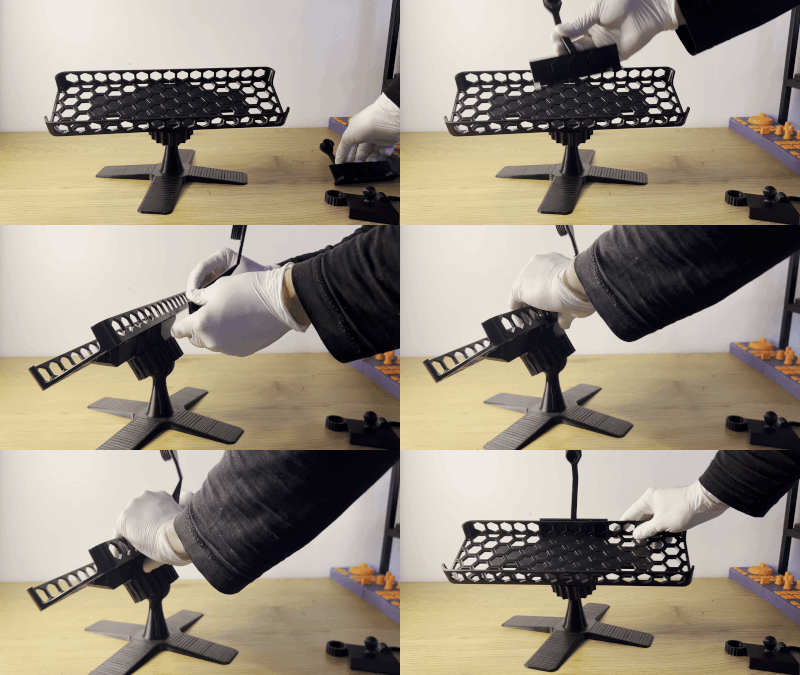
- Press with some power small nut onto ball at the back of holder:
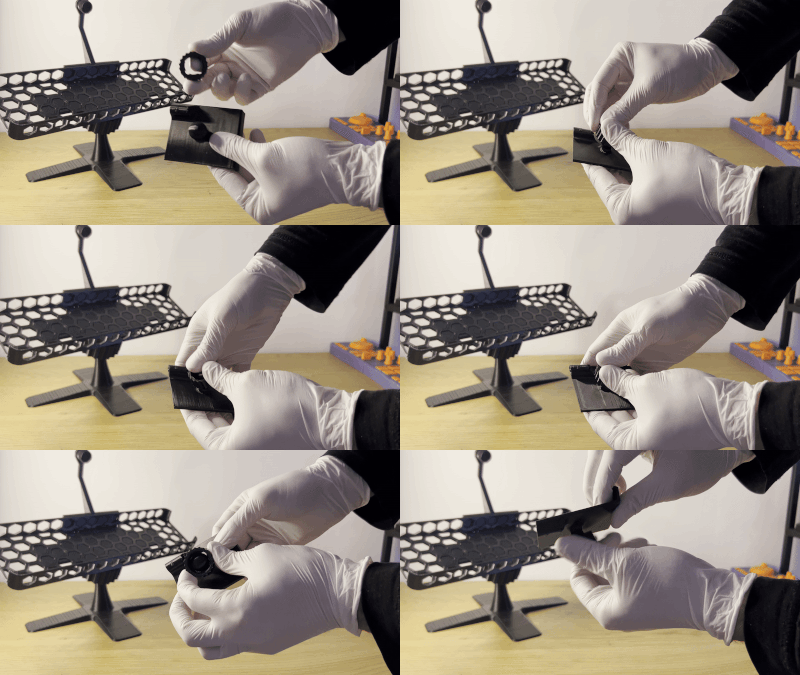
- Connect holder to main arm:
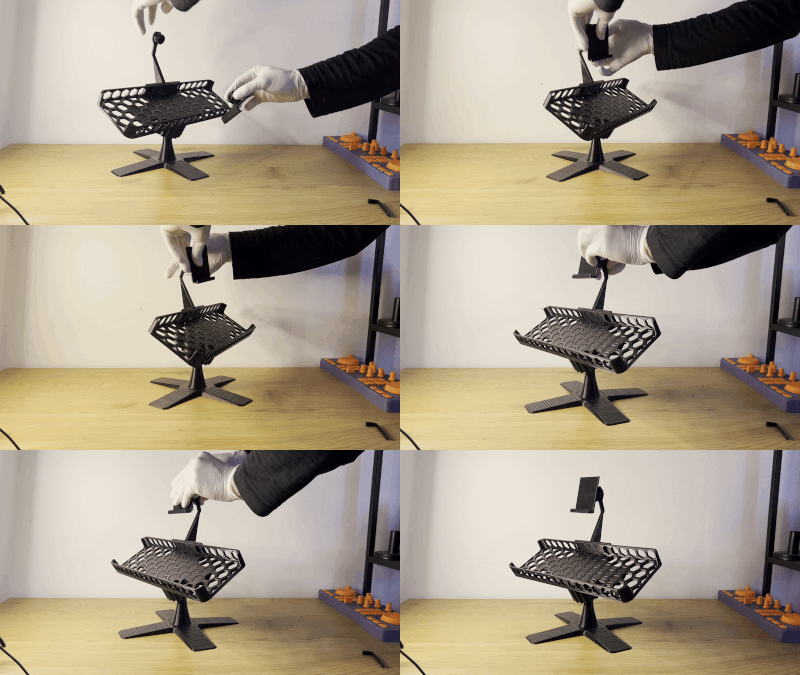
- Fix your phone with pin:
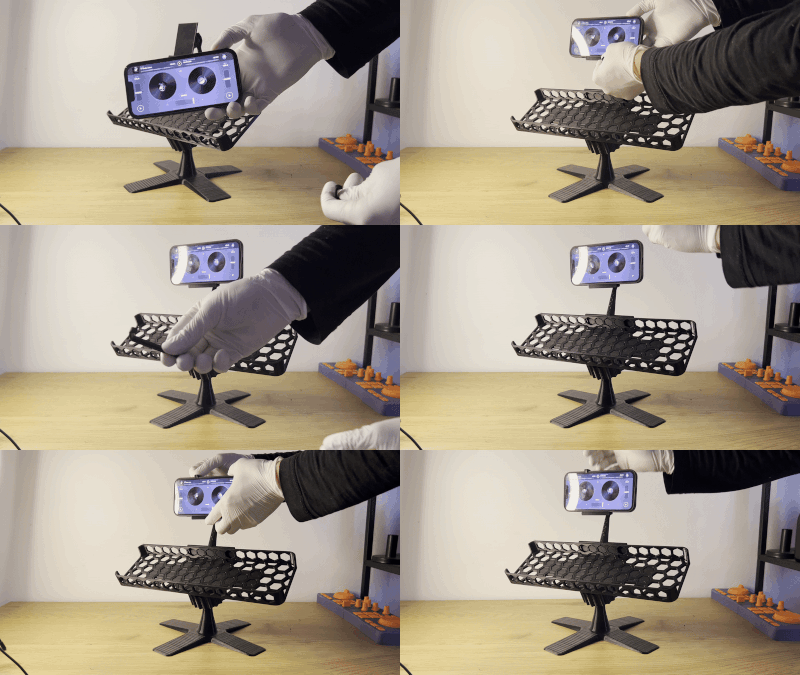
- Install your DJControl Mix controller, adjust stand and phone holder to the needed angle by loosing nuts a bit and then screw them back firmly.
All parts on pictures were printed with black PETG on regular print bed (220 x 220)