
nomadBox - heltec WiFi LoRa 32(V3) case, GPS, BME280, buzzer, rotary encoder
Obliczymy ostateczną cenę na podstawie wybranego pliku. Sprawdzisz ją i zaakceptujesz przed płatnością.
Zapisane na tym urządzeniu.
small meshtastic/meshcore/etc case for heltec wifi lora 32 V3, with, gps, temp sensor, rotary encoder
- Ocena
- 5 / 5
- Polubienia
- 34
- Pobrania
- 195
- Wydruki
- 1
- Wyświetlenia
- 2309
- Oceny
- 1
Aktualizacja u źródła:
Informacje o modelu
- Źródło
- Printables
- Kategoria
- Electronics
- Licencja
- Creative Commons — Attribution — Noncommercial
Case for Heltec WiFi LoRa 32 V3
This case is designed for the Heltec WiFi LoRa 32 V3 and includes the following components:
Included Components:
GPS Module (NEO-6M or GT-U7)
On/Off Switch (S3P = SRS3P, 19.4 x 5.6 x 5mm) → Link
GY-BME280 Sensor
3000mAh Battery (974058)
Buzzer (12mm)
EC11 Rotary Encoder
Screws Required:
4x M3 × 12mm (thread length) sheet metal screws → for fastening the back cover
2x M2 × 4mm sheet metal screws → fastening the switch (same as the ones fastening the Heltec display)
2x M2 × 4mm sheet metal screws → fastening the heltec board (same as the ones fastening the Heltec display)
2x M3 x 6mm (thread length) sheet metal screws → fastening the GPS module
2x M3 x 8mm (thread length) sheet metal screws → fastening the GPS module with the GPS antenna holder
Assembly Instructions:
Install the switch
Place the switch as shown in the photo.
Use an M2 screw (same as the Heltec display fastening screw) to secure it.
Install the EC11 Rotary Encoder and Buzzer
First, insert the EC11 rotary encoder.
Then, place the buzzer into its slot.
Secure the buzzer using the buzzer fastener—this will be held in place by the back cover.
If the buzzer fastener is too high, use sandpaper to adjust its height.
Install the GY-BME280 Sensor
Place the sensor into its designated slot.
Melt the two small cylinder heads with a soldering iron to fasten it.
Optionally, cut a small piece of foam to cover the sensor from the inside, protecting it from internal heat.
Mount the Heltec Board
Use a washer and an M2 screw (same type as the Heltec display screws) to secure the board.
Install the SMA connetor
put the SMA connector to is place, wasten the screw
it us practial to put a rubber washer between the antenna and the SMA connector when the antenna is screwed into its place to secure it
Install GPS control board
Put the control board into its place
Put the GPS antenna holder on the GPS control board, and fasten the screws
Wiring:
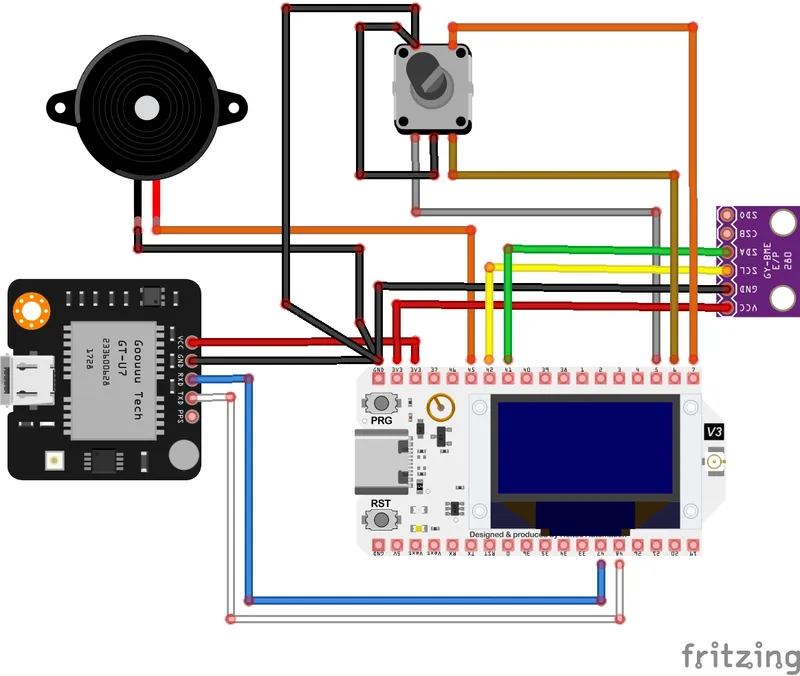
Configuration changes:
Enable canned messages in android:
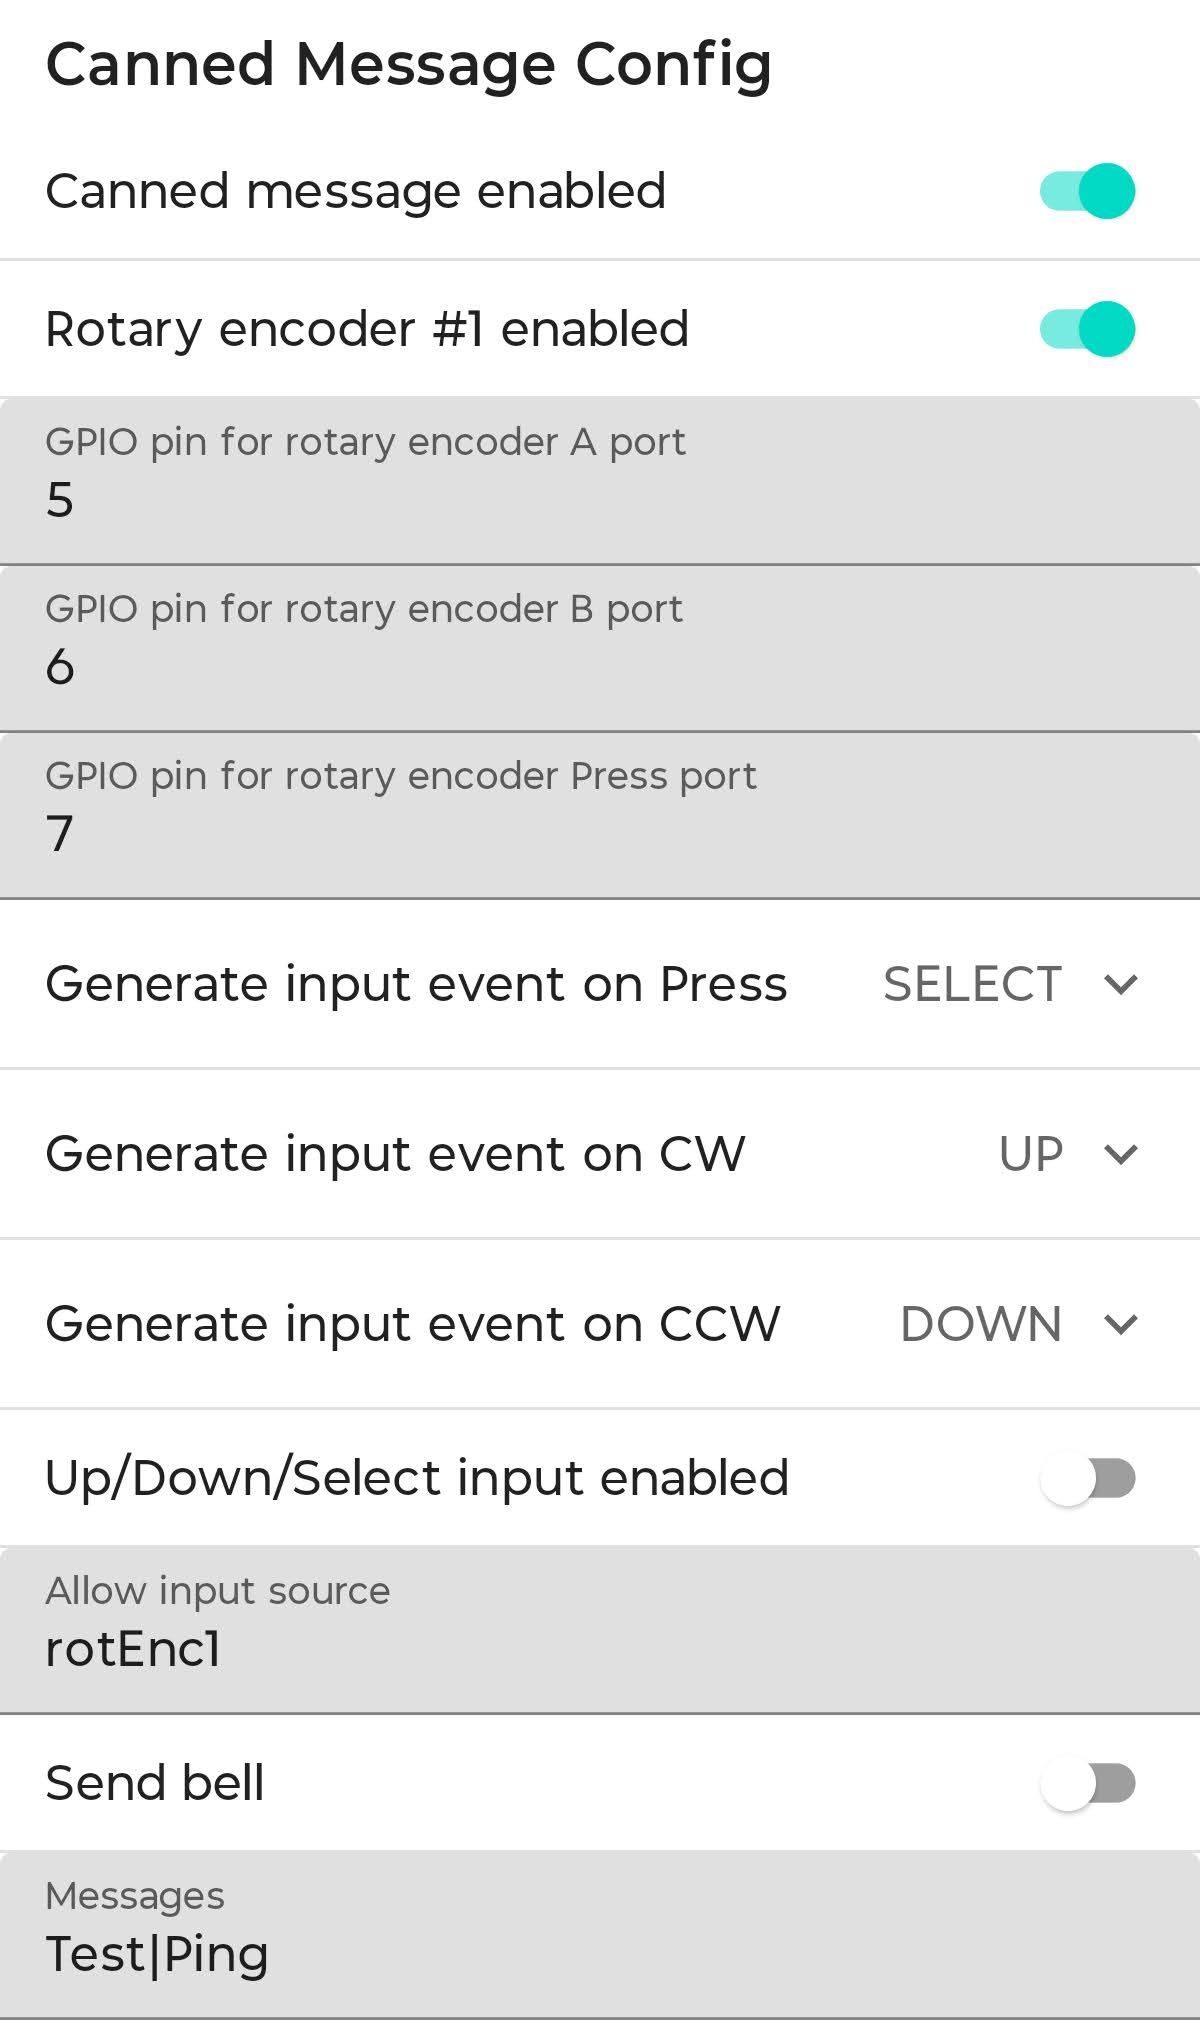
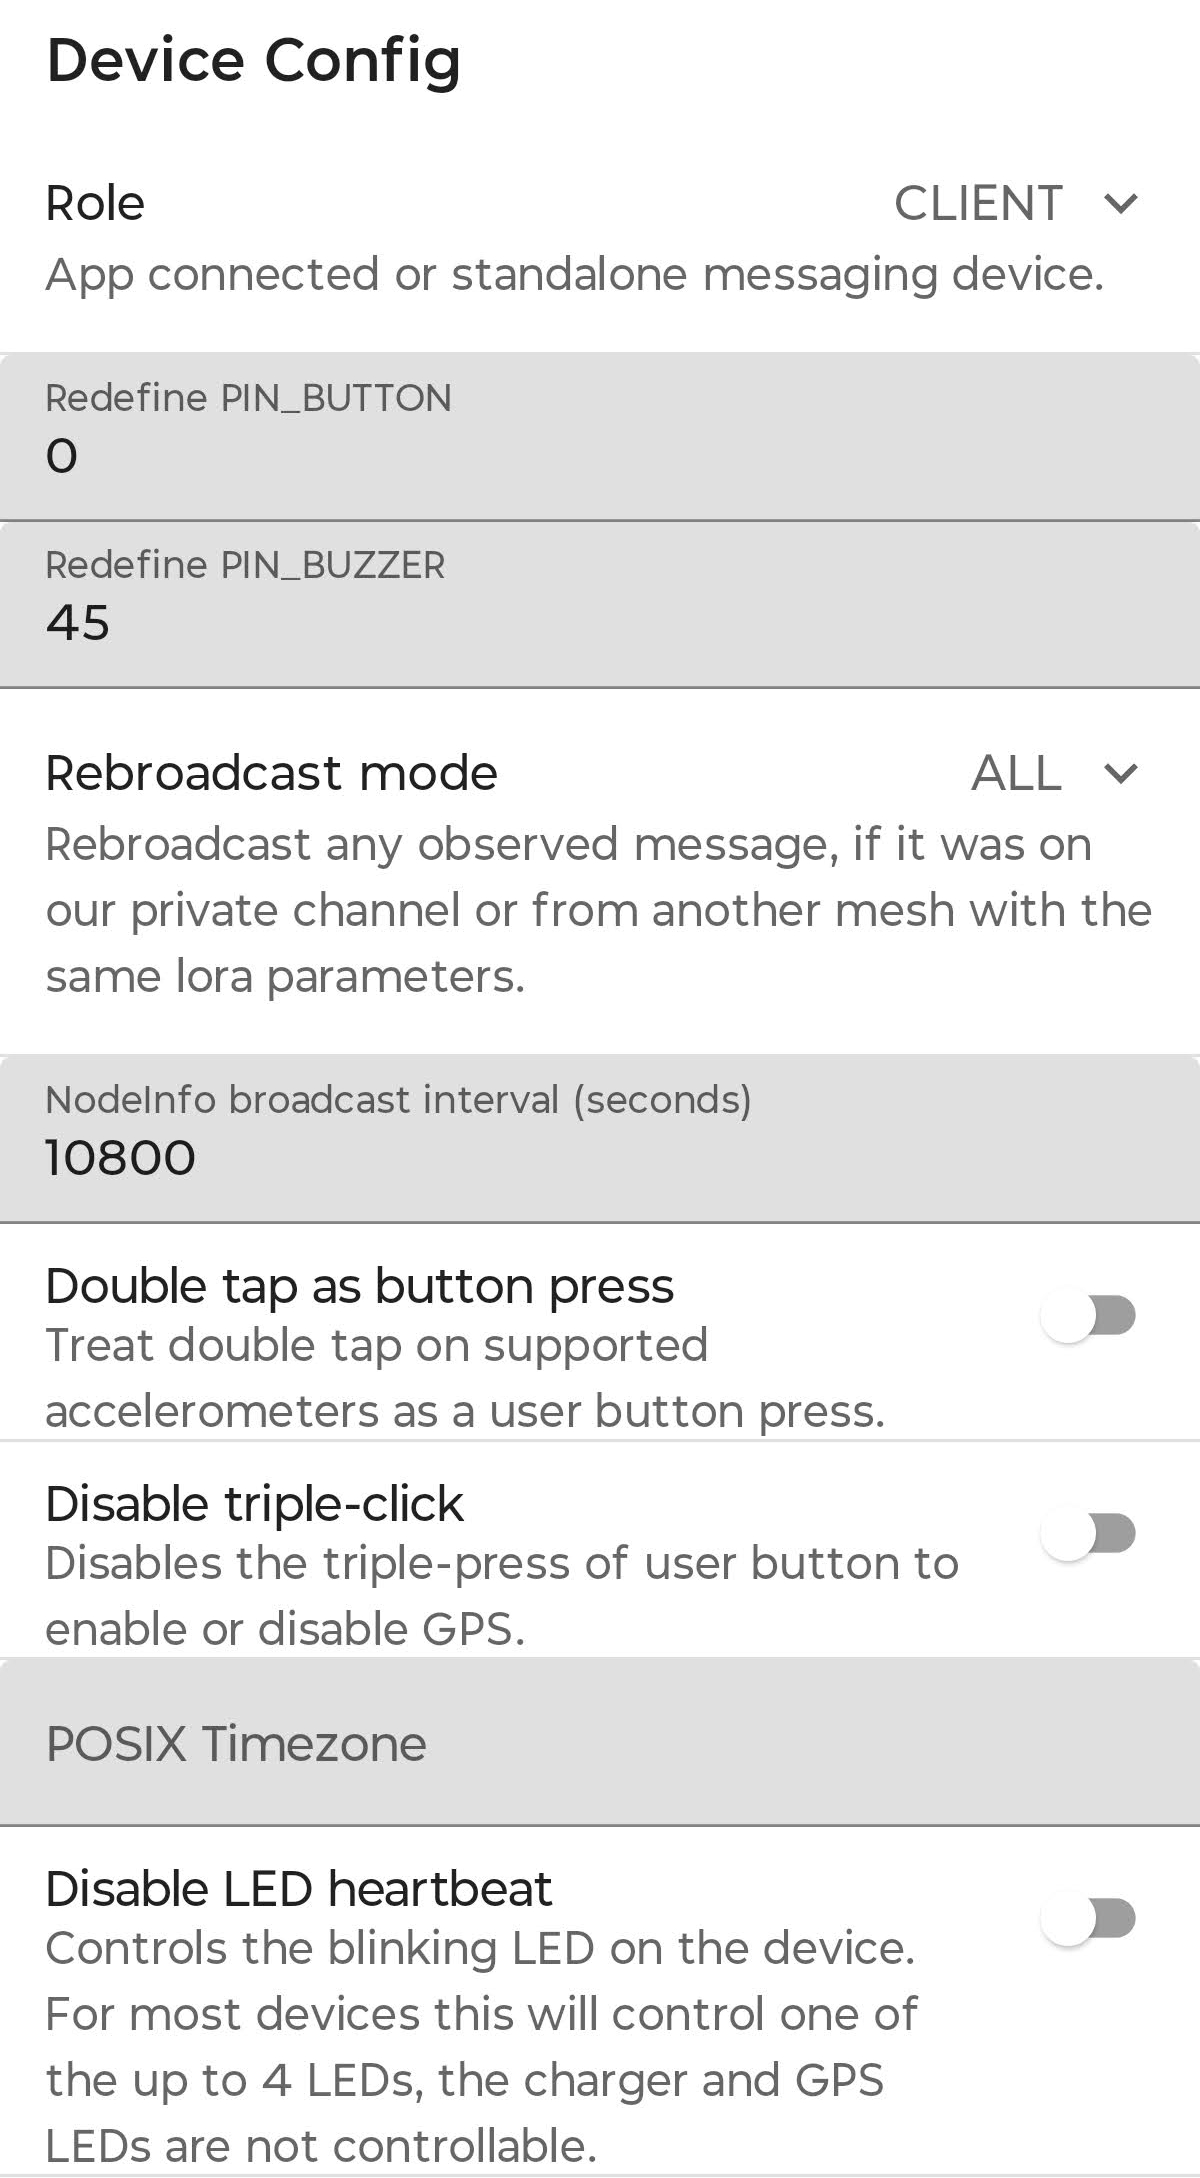
Enable buzzer:
Enable GPS:
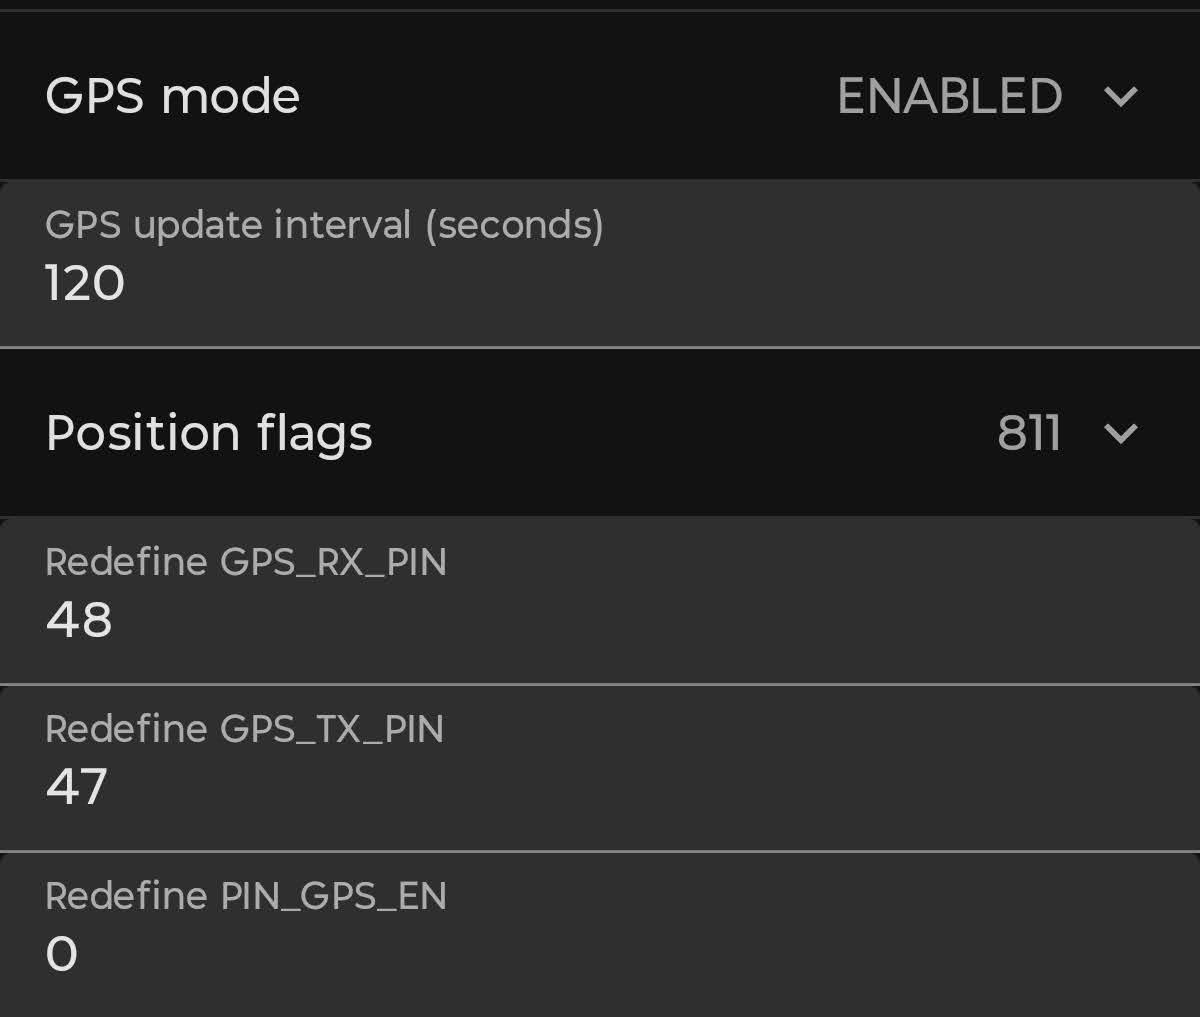
Notes:
Tested with GT-U7, it fits.
The design has only been printed once, so minor modifications might be needed.
17.12.2025.
- added a hole under the reset button, to be sure the reset button does not tuch the plastic