
BSP-D8 Vertical/Portrait Mod
Obliczymy ostateczną cenę na podstawie wybranego pliku. Sprawdzisz ją i zaakceptujesz przed płatnością.
Zapisane na tym urządzeniu.
Informacje o modelu
- Źródło
- Printables
- Kategoria
- Video Games
- Licencja
- Creative Commons — Attribution — Noncommercial — Share Alike
NOTE:
This mod is (mostly) IRREVERSIBLE. Do not attempt unless you are absolutely sure this is what you want.
As a follow-up to my previous spacer clamp mod, this new method requires replacing the internal extension bridge mechanism with a shortened version, as well as trimming the external covers by 59mm(29.5mm per side).
This mod is intended to be used with phones only, and will not work well with tablets, if at all.
Specifications:
- Supported width - 70-175mm
- Works very well for vertical clamping, less so for horizontal
- NOT recommended for use with tablets
- Tested only with BSP-D8
Print notes:
- Tested with PLA
- Supports needed?
- For d8_bridgeBase.stl, I used 2.0mm pillars with 65° threshold for the curved base, but you are free to experiment what works for you
- No supports needed for the other parts
- Depending on printer accuracy, some manual filing might be required on the leg fittings of d8_bridgeCover.stl to make it fit properly with d8_bridgeBase.stl
Instructions:
NOTE - The pictures in this guide were taken after I've completed the mod, and since it's irreversible, do not be alarmed if my controller looks different from your un-modded one.
Tools needed
- 3D printer (well duh)
- Phillips #0 screwdriver
- Tool capable of cutting plastics (I used a mini circular saw)
- Double-sided tape
- Filing tool or sandpaper
- Prying tool
Disassembly
- Remove the 8 screws at the back
- Gently lift the top half of the controller on each side containing the main components to separate it from the back shell
- Detach the flex cables from the PCBs by lifting the latches
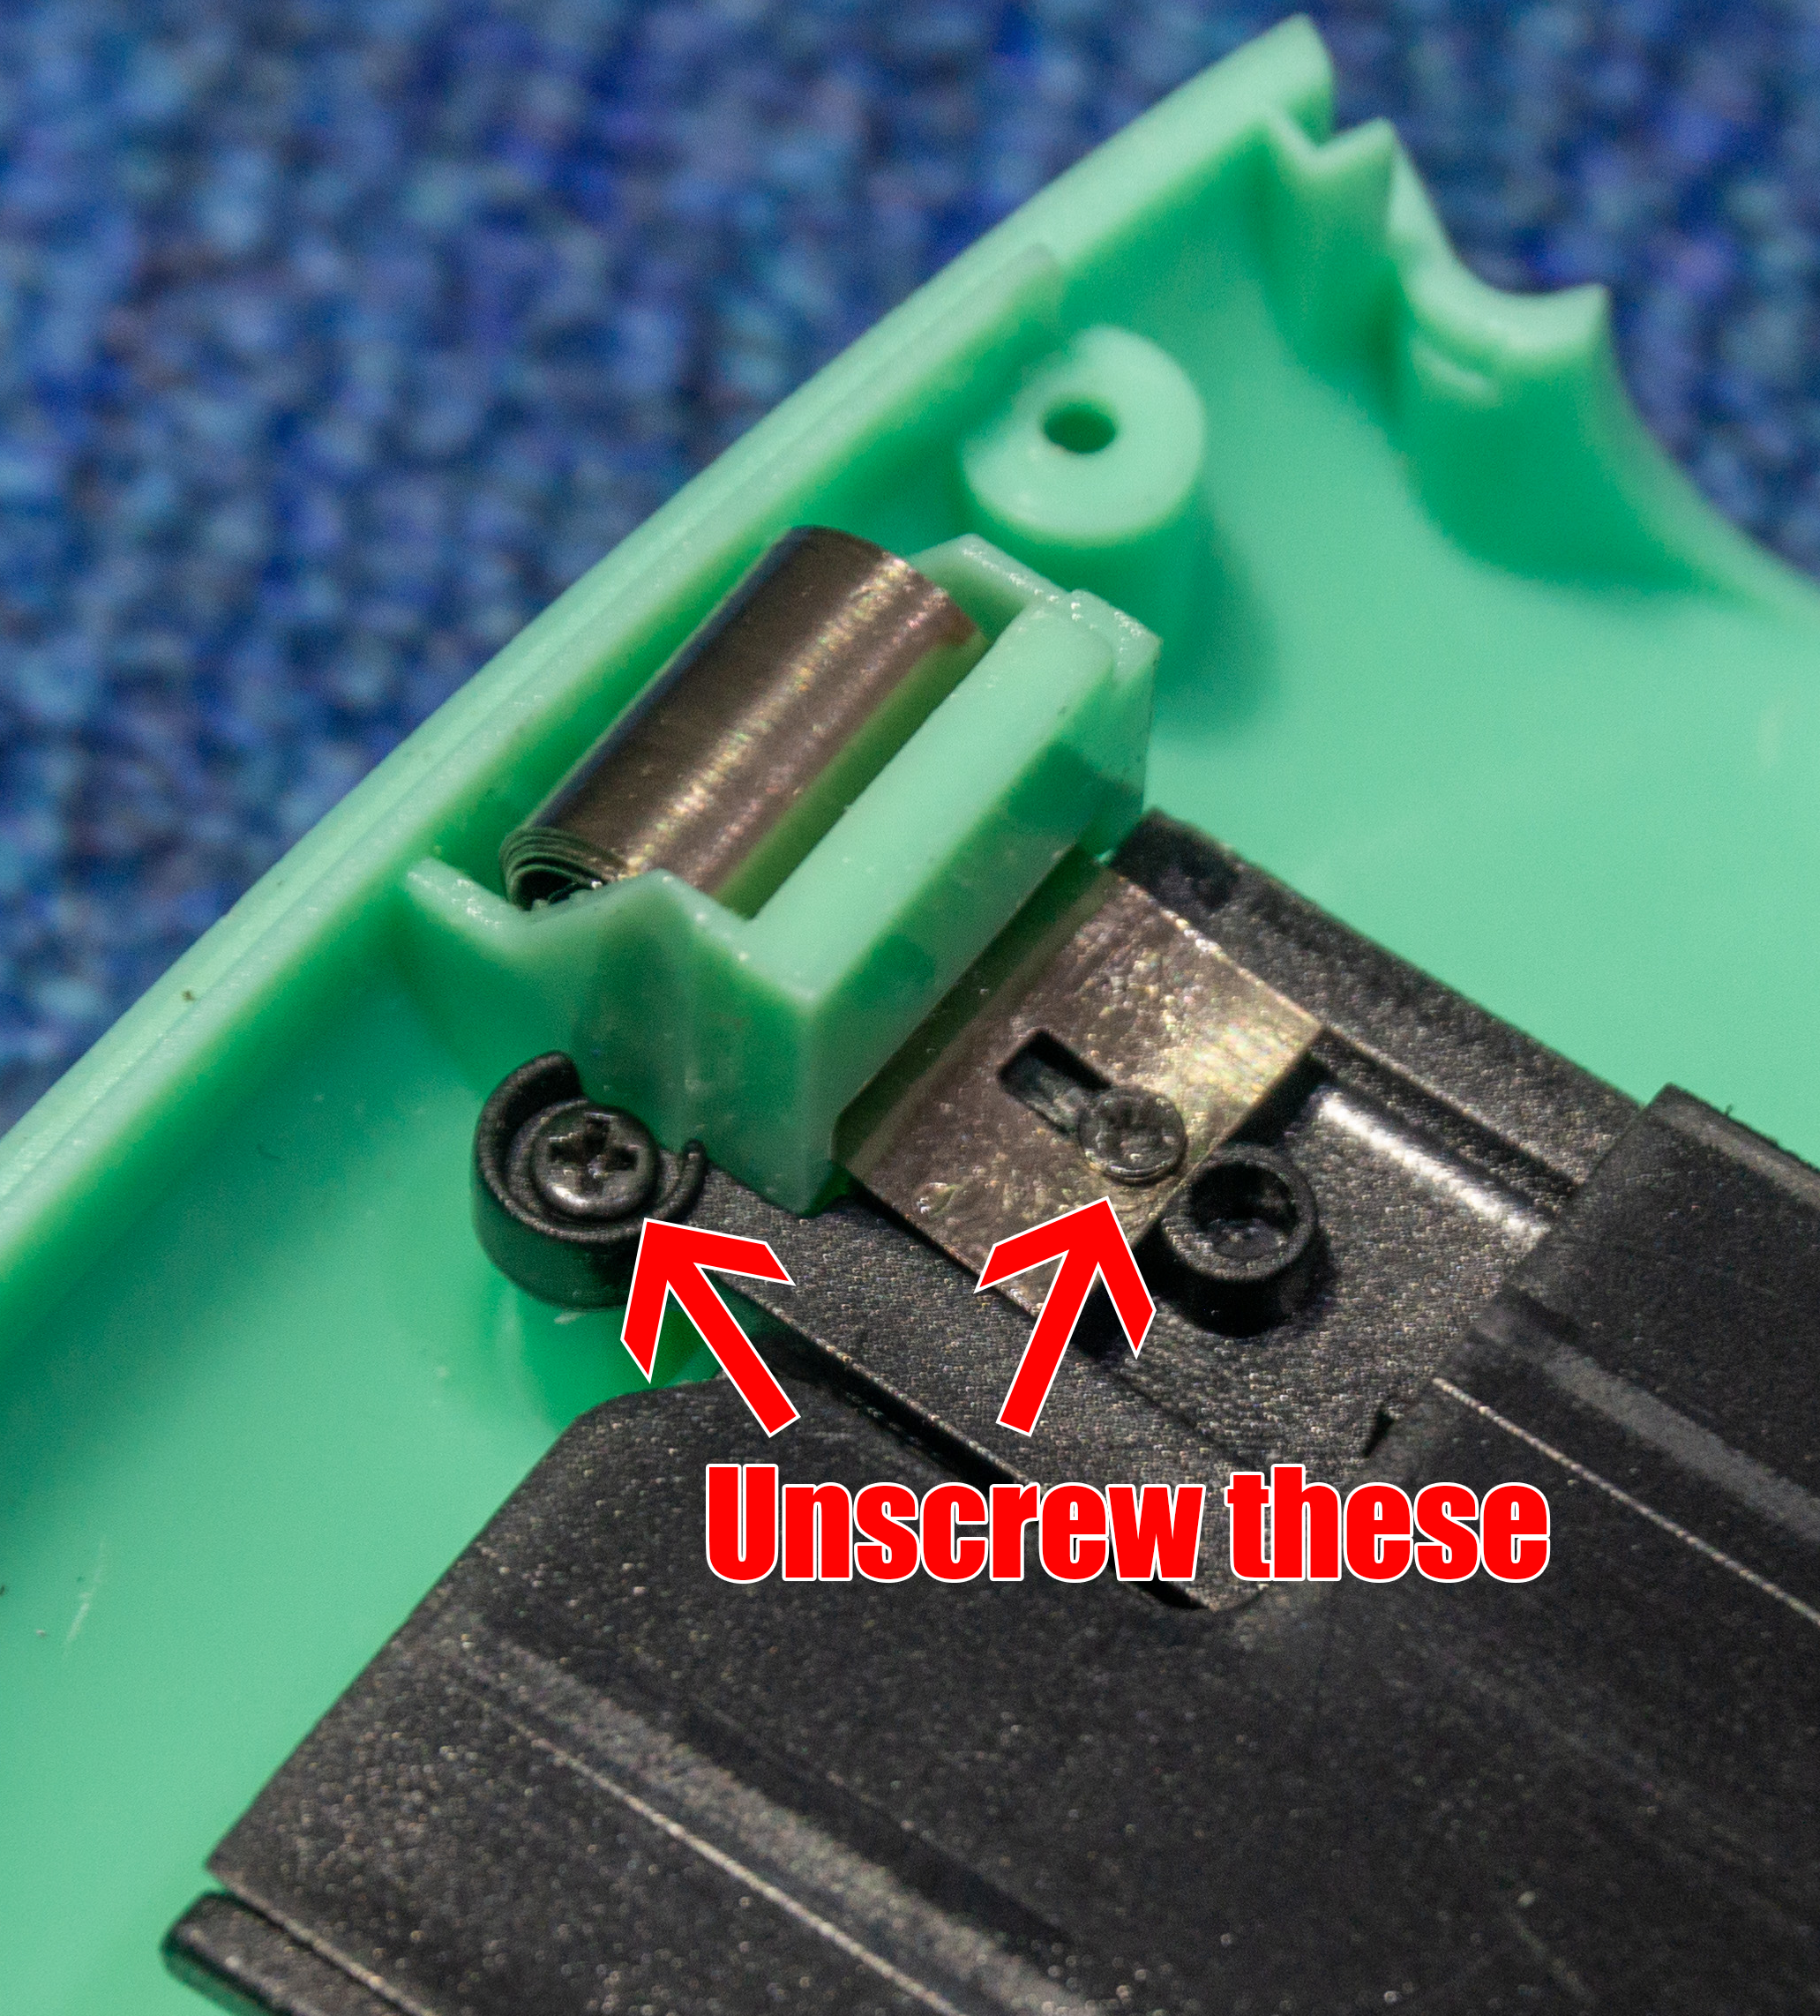
- Remove the screw that secures the bridge arm to the back shell on each side
- Remove the screw that secures the spring to the main bridge - note that the spring will retract once it's been separated from the main bridge
- Separate the main bridge from the back shells
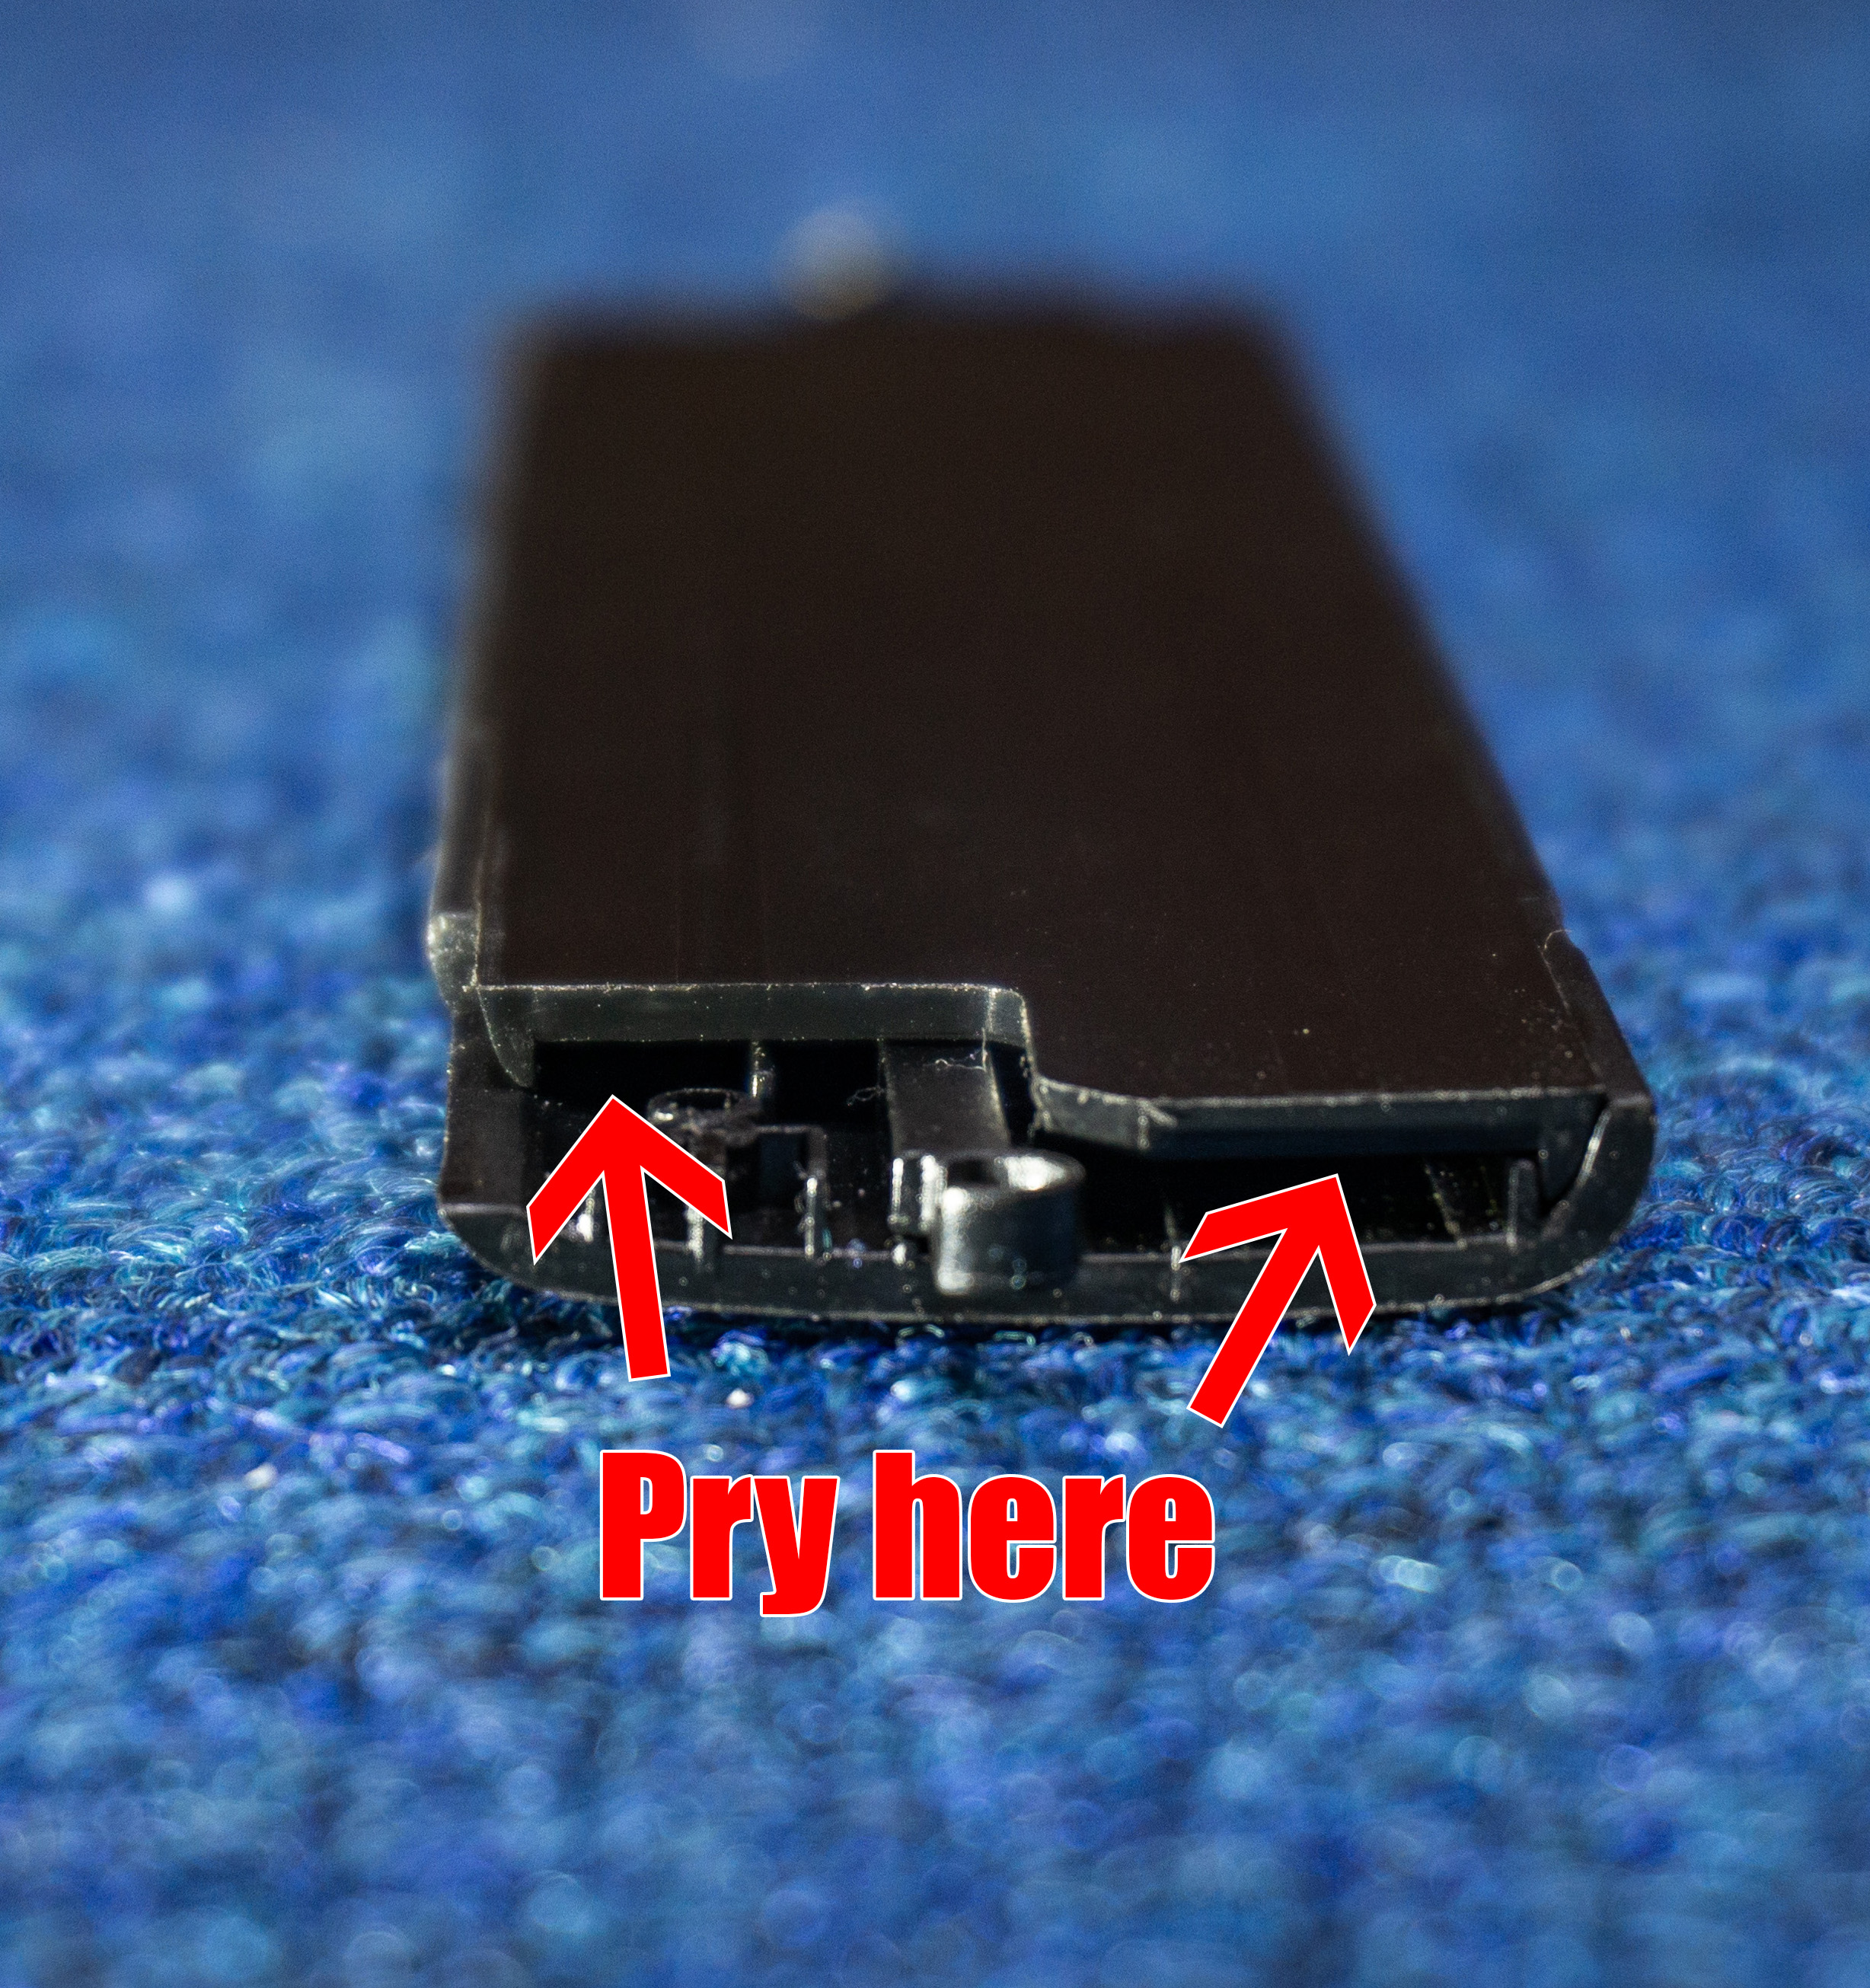
- Use a prying tool to open the main bridge
- Start by inserting the tool into the gaps at the sides and sliding your way inwards and towards the middle
- Peel the flex cable from the cover
- Do it gently since it's secured with double-sided tape
- If you broke it, or don't want to reuse the cable, you can purchase your own - AWM 20624, 10pin, 0.5mm pitch, 350mm length, same side
Trimming
- Use a sawing tool to trim off 29.5mm from each back shell's bridge cover
- Use a filing tool or sandpaper to smooth out the trimmed edges
Assembly
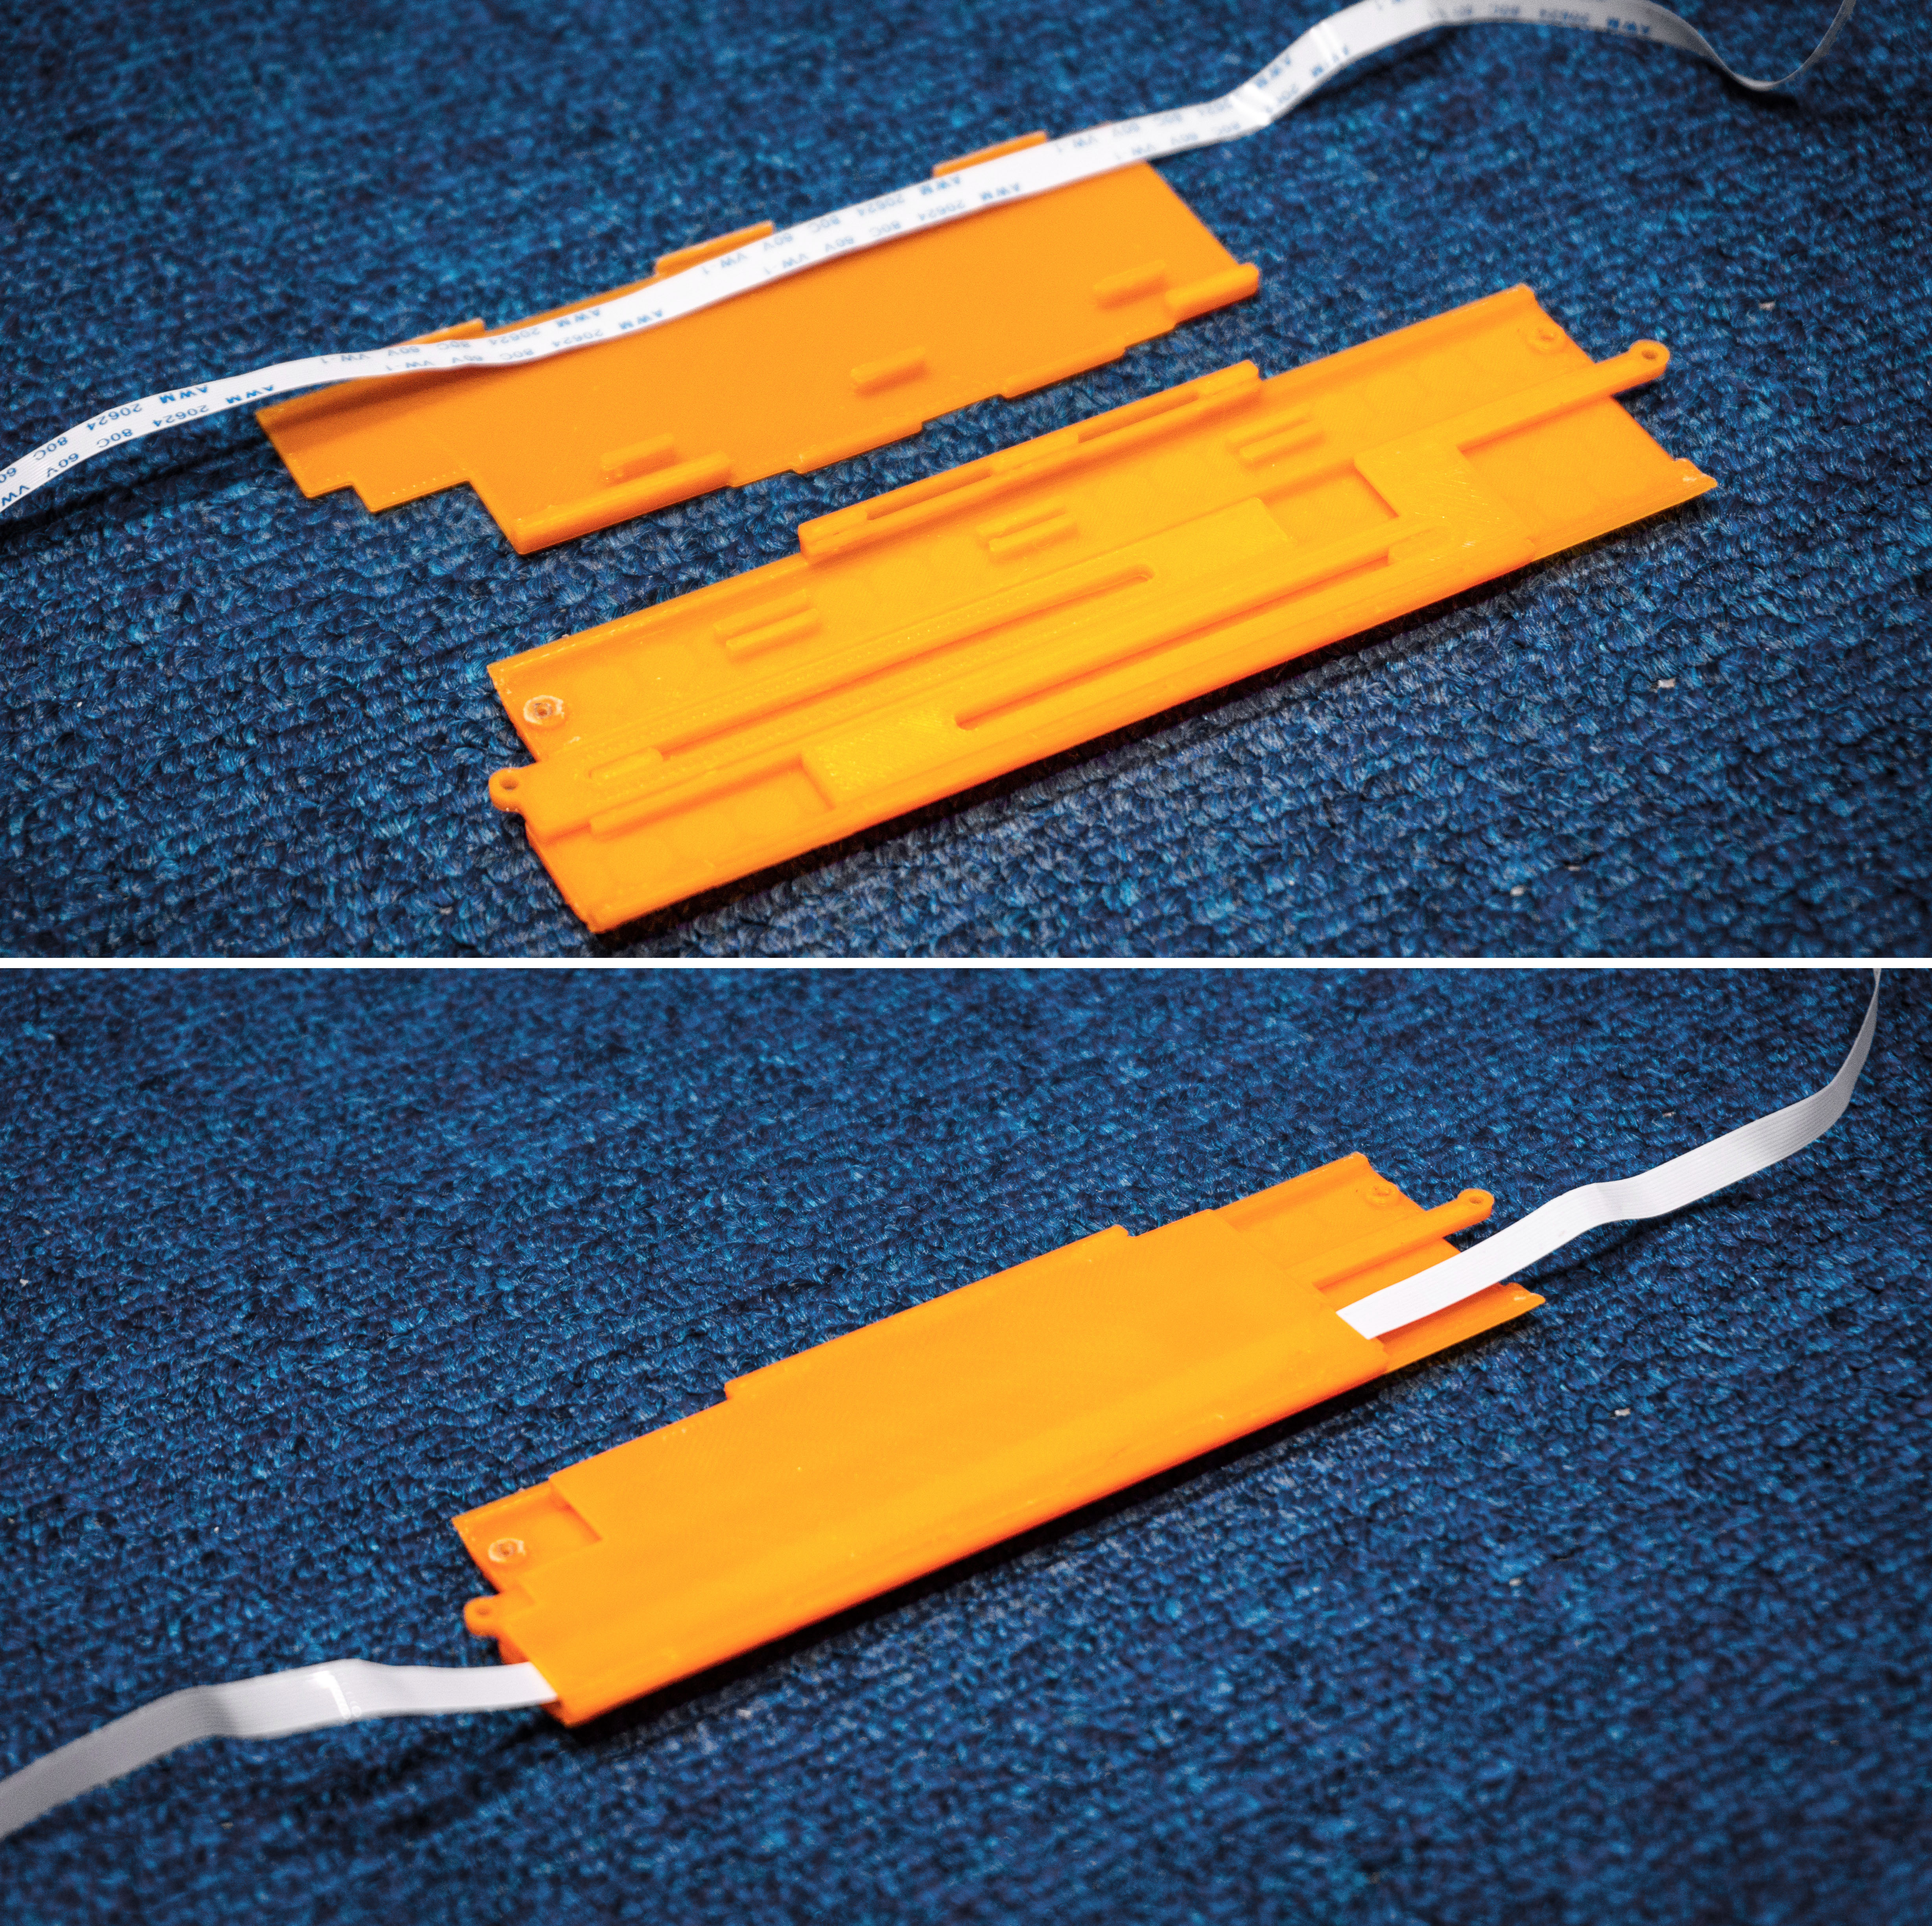
- Layout the 3D printed parts as shown
- Left arm goes into the upper slot of the bridge while right arm goes to the bottom
- Trim off any stray bits or stringing so that they can slide smoothly
- Secure the flex cable to the cover with double-sided tape
- Blank-side (the side without the words) to face the cover
- Preferably towards the lower side of the cover
- Ensure you leave enough length on each side
- Press fit the cover onto the bridge
- Use a filing tool or sandpaper to trim the leg fittings of the cover if it does not fit into the bridge
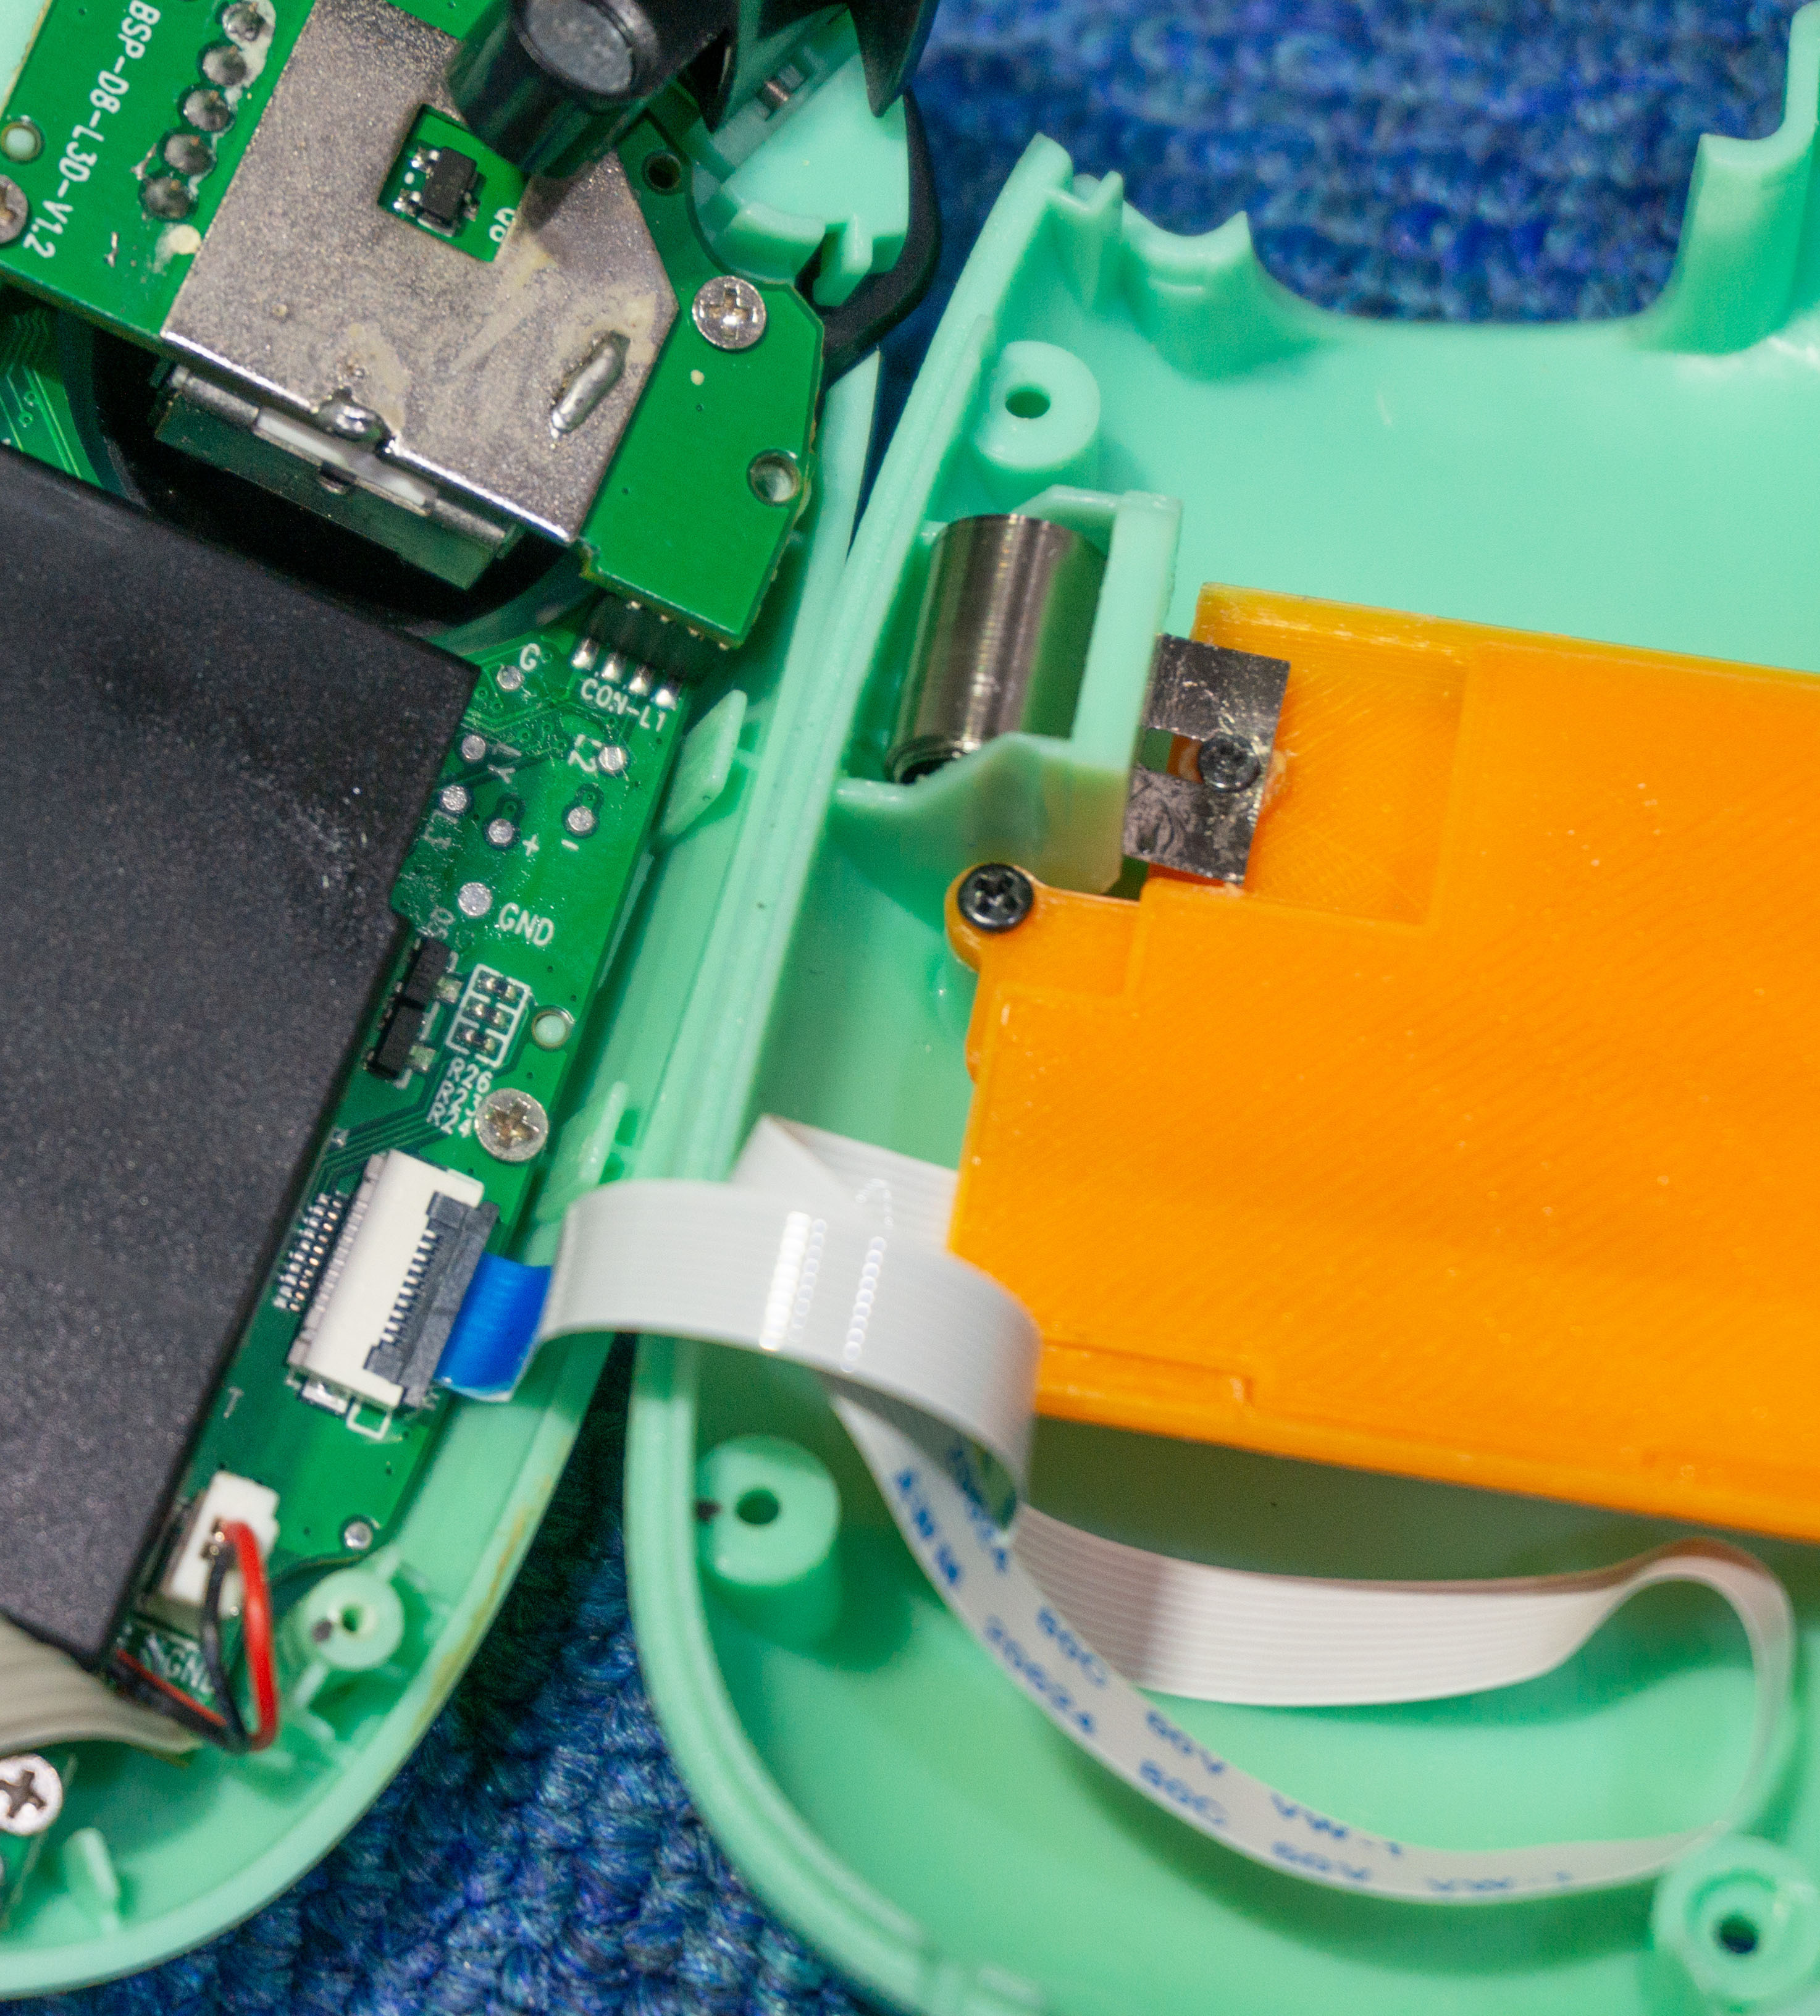
- Make screw threads into the hole on the bridge where the spring will attach to
- I drove a screw into the hole and it managed to tap the threads, but your mileage may vary
- Insert the new bridge into the back shell
- Secure the arm to the back shell with screws
- Secure the spring to the bridge
- Use another tool to hook onto the spring's hole and stretch it over the hole on the bridge, then screw it in
- Insert the flex cables into the PCBs and close the latch
- Tuck the excess cables neatly into the recessed space in the back shell
- Close the controller and secure the 8 screws at the back
Enjoy your BSP-D8 Jr. :)

PS - Ignore the grey part in the middle of my controller. I messed up the trimming and had to print that to cover my mistake. You wouldn't have this in the final product if everything goes smoothly.
Undoing the mod
For people who want to undo this mod in the future, I've uploaded another file called d8_extendCover.stl. This can be fitted onto the external covers to regain its original length, but it's NOT a 1:1 restoration due to the increased thickness of the restored bridge.