
WordClock 14x14 Classic - 2025
Obliczymy ostateczną cenę na podstawie wybranego pliku. Sprawdzisz ją i zaakceptujesz przed płatnością.
Zapisane na tym urządzeniu.
WordClock 14x14 Classic - 2025. Retro version of my WordClock 2022. Solder free installation with lot of new features.
- Ocena
- 5 / 5
- Polubienia
- 40
- Pobrania
- 166
- Wydruki
- 4
- Wyświetlenia
- 1650
- Oceny
- 3
Aktualizacja u źródła:
Informacje o modelu
- Źródło
- Printables
- Kategoria
- Electronics
- Licencja
- Creative Commons — Attribution — Noncommercial
BIG news on 18.07.2026: Software version V2.0.0 available!
WordClock 14x14 Classic received its biggest update yet. I fully rewrote the configuration portal and added lots of new features and improvements to the software.
To name a few of them please read this list and have a look at the pictures below.
I am really looking forward to know your feedback and impressions.
As you might expect this was a tone of work and you can download the new update for free via the internal software update of your WordClock or with the ESP32 flash script as usual.
Enjoy and I hope you will like it 😊😁😊
WordClock 14x14 Classic V2.0.0 new functions
Complete redesign of the web interface with much more modern design with lots of new features:
New Welcome page with Status section on the start page to see if there are configuration problems or new software updates available.
Preview function of the WordClock front plate with set colors and live shown time.
Responsive design with dynamically adjusted sections and content.
Multi language support fitting to the 2 available languages. Just use your WordClock in your desired language now. All texts were translated in the web configuration to your local language.
Day and Night mode of the web configuration in a light or dark design.
Complete redesingend Smart Home URLs page including test and URL copy button functions with new options replacing the old text based list.
Fully redesigned notifications for activation and deactivation of the classic Offline Mode with much more useful hints about this functionality.
New Profile page with some more useful information to the WordClock 14x14 Classic project any my projects on Printables or GitHub.
Other new functions:
New setup method vie WiFi WPS function before the known WiFi Captive Portal is set up. Just click 1 button on your router or access point to add your WordClock to your network. After this you can set the language and other settings. WordClock will guide you through the process and tells you the received IP-address on startup to complete the setup directly in the new web configuration portal. No WiFi password entering needed any more. =)
New scrolling text function which was much requested to add dynamic texts to the display in BIG letters. This is possible to setup, test in the web interface and the resulting URL can be copied with 1 click to add to your own smart home environment as http-URL as with the classic versions of WordClock.
Random color time texts and background color if the device is in Day Mode.
Lots of smaller bug and problem fixes, e.g. if the time server is no longer available. The configuration corrects itself automatically now.
Improved reconnecting of the portal to the device after restarts.
Separate colors for Day and Night mode for the time text and the background color.
Separate brightness settings for the time text and the background LEDs allowing to use the same color for both with different brightness settings to create totally new effects and impressions.
Optional automatically performed searches for new software updates with notifications in the web interface.
New startup texts and informations on the LED display with bigger and better readable texts.
New maximum amount settings for WiFi connection and time server tries before the configuration is automatically rest to be able to use the WordClock again without flashing it in case you switched your WiFi router or the time server is no longer available.
Smooth LED word transition to get a more refined look of the time piece.
Removed functions:
The „Reset WiFi only“-function was removed because it was integrated into the complete new „Reset all settings“-function for improved usage.
Here area some pictures showing the new version web interface:


Here are the informations about this project with the previous infos pre V2.0.0:WordClock 14x14 Classic - 2025. Retro version of my WordClock 2022.

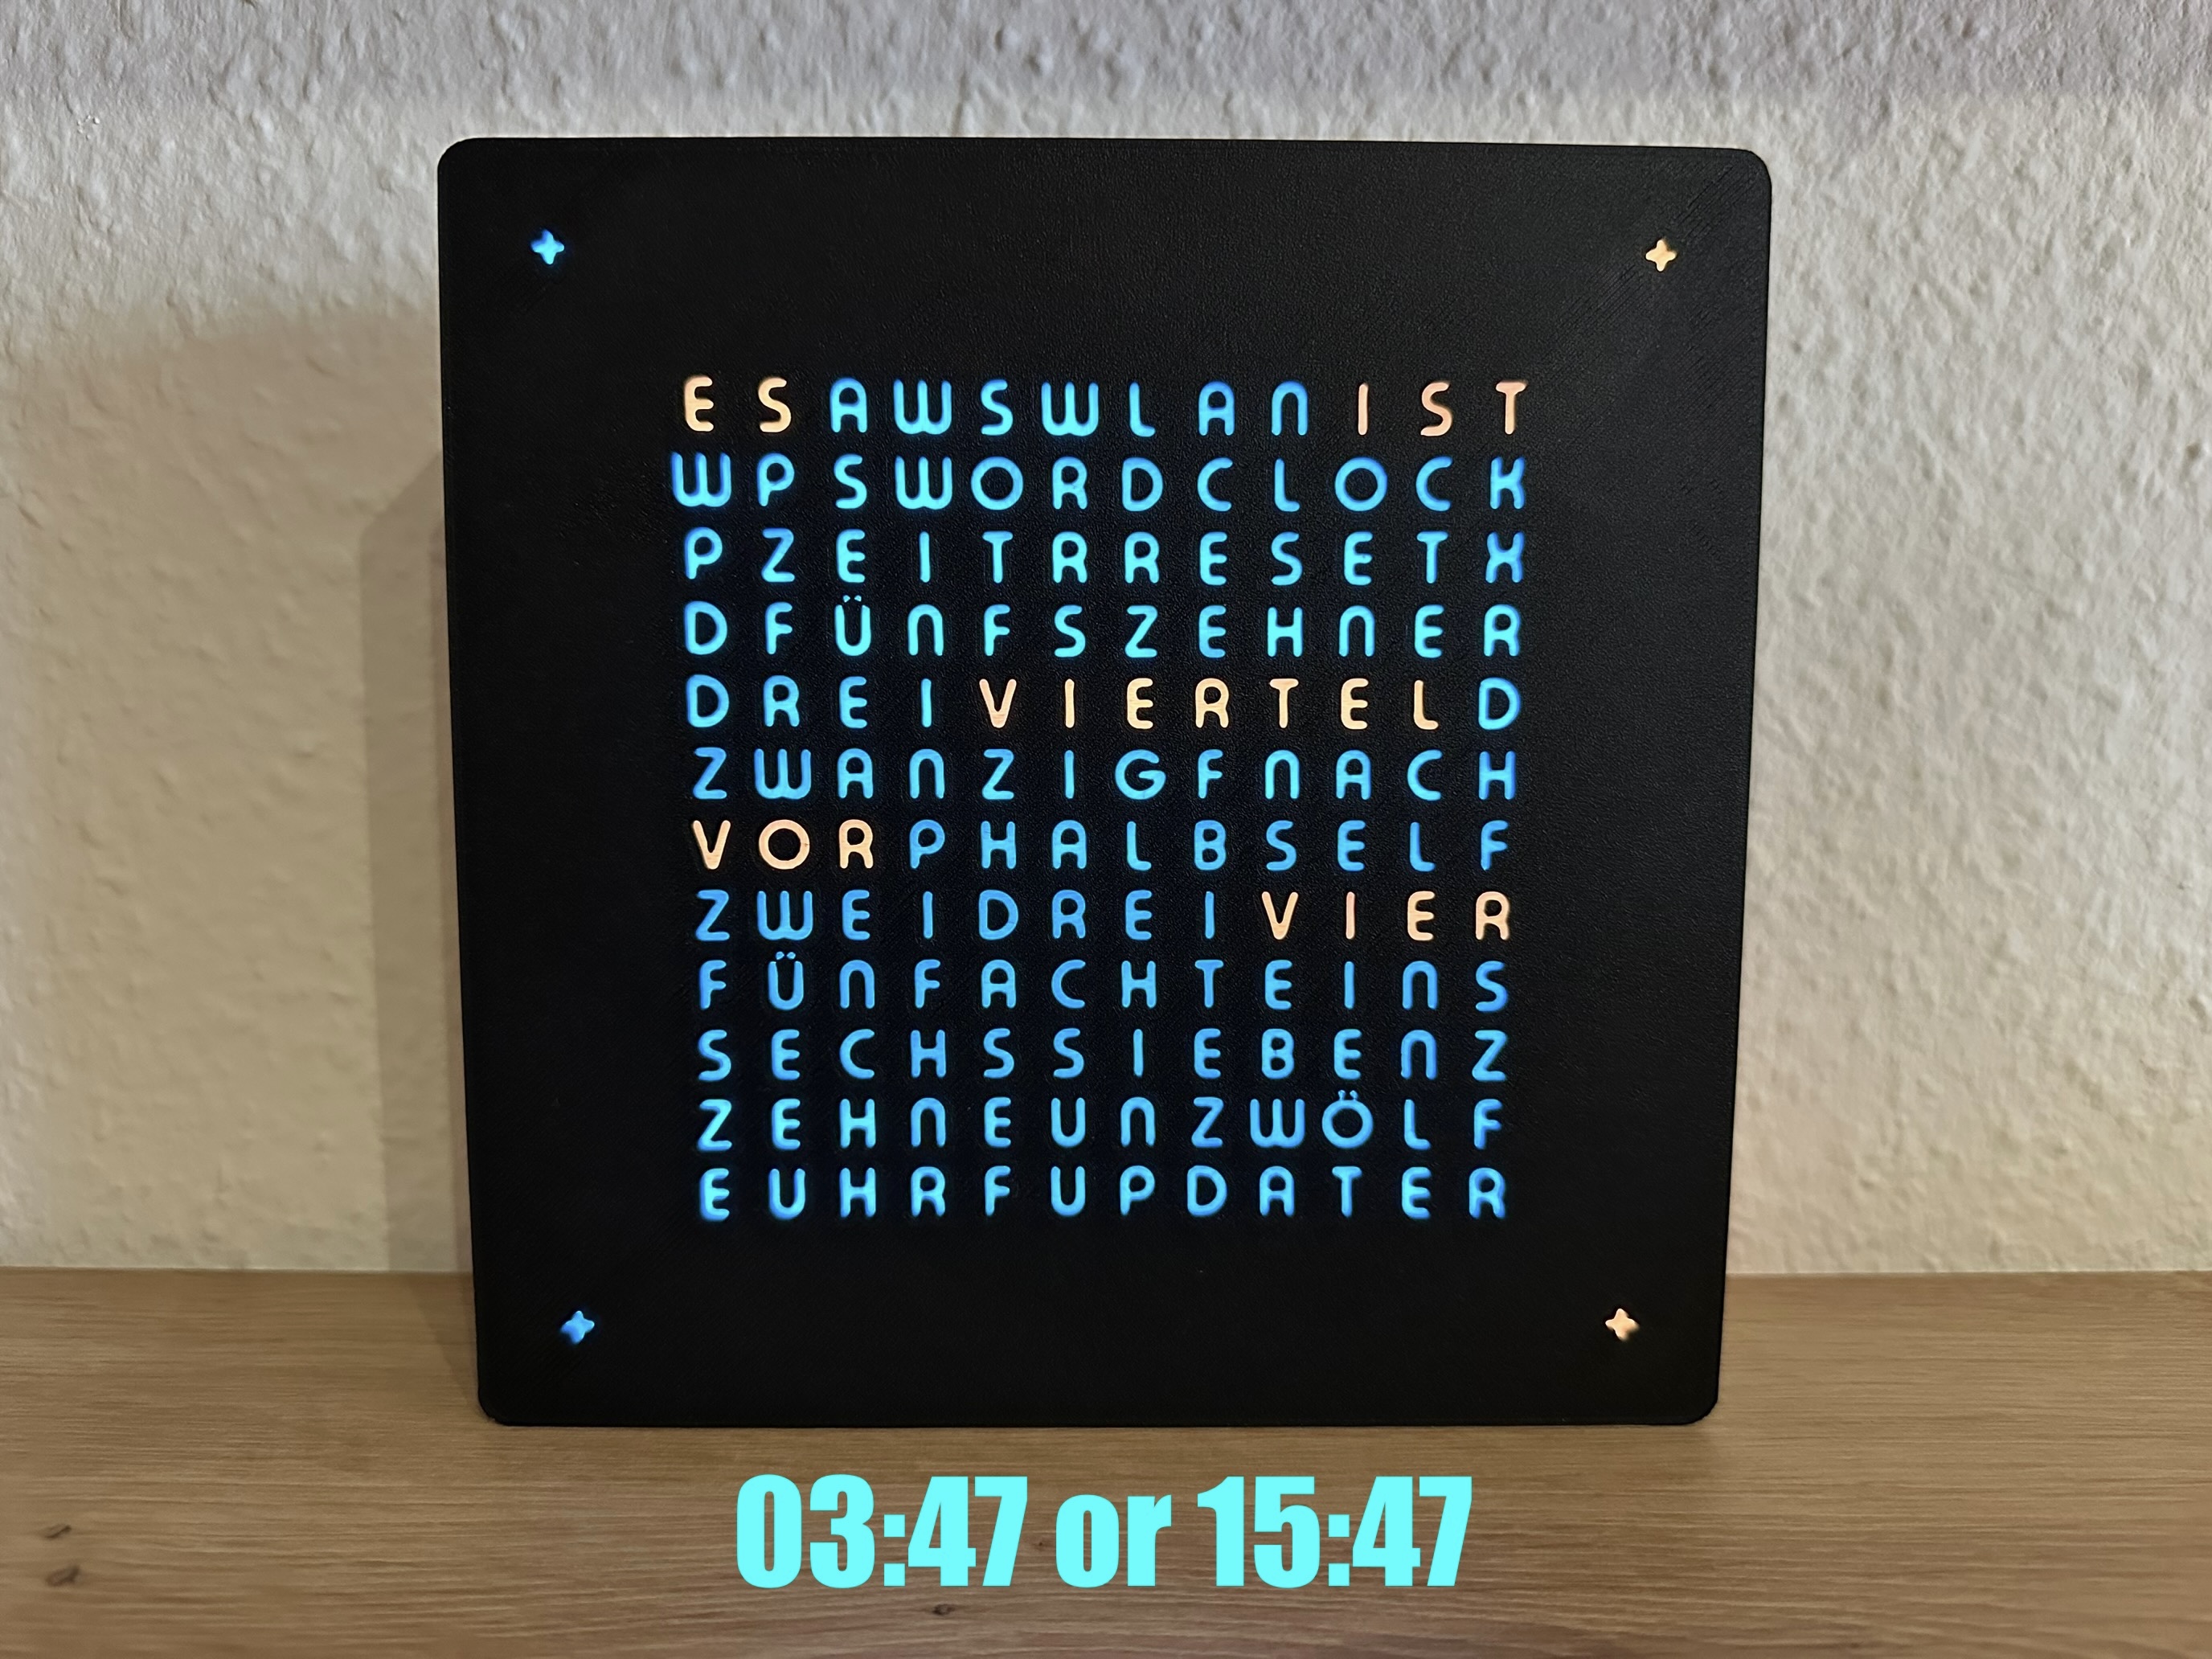
Available in English, German and East German language in 3 different fonts and a new case.
Solder free installation with lots of new features. =)

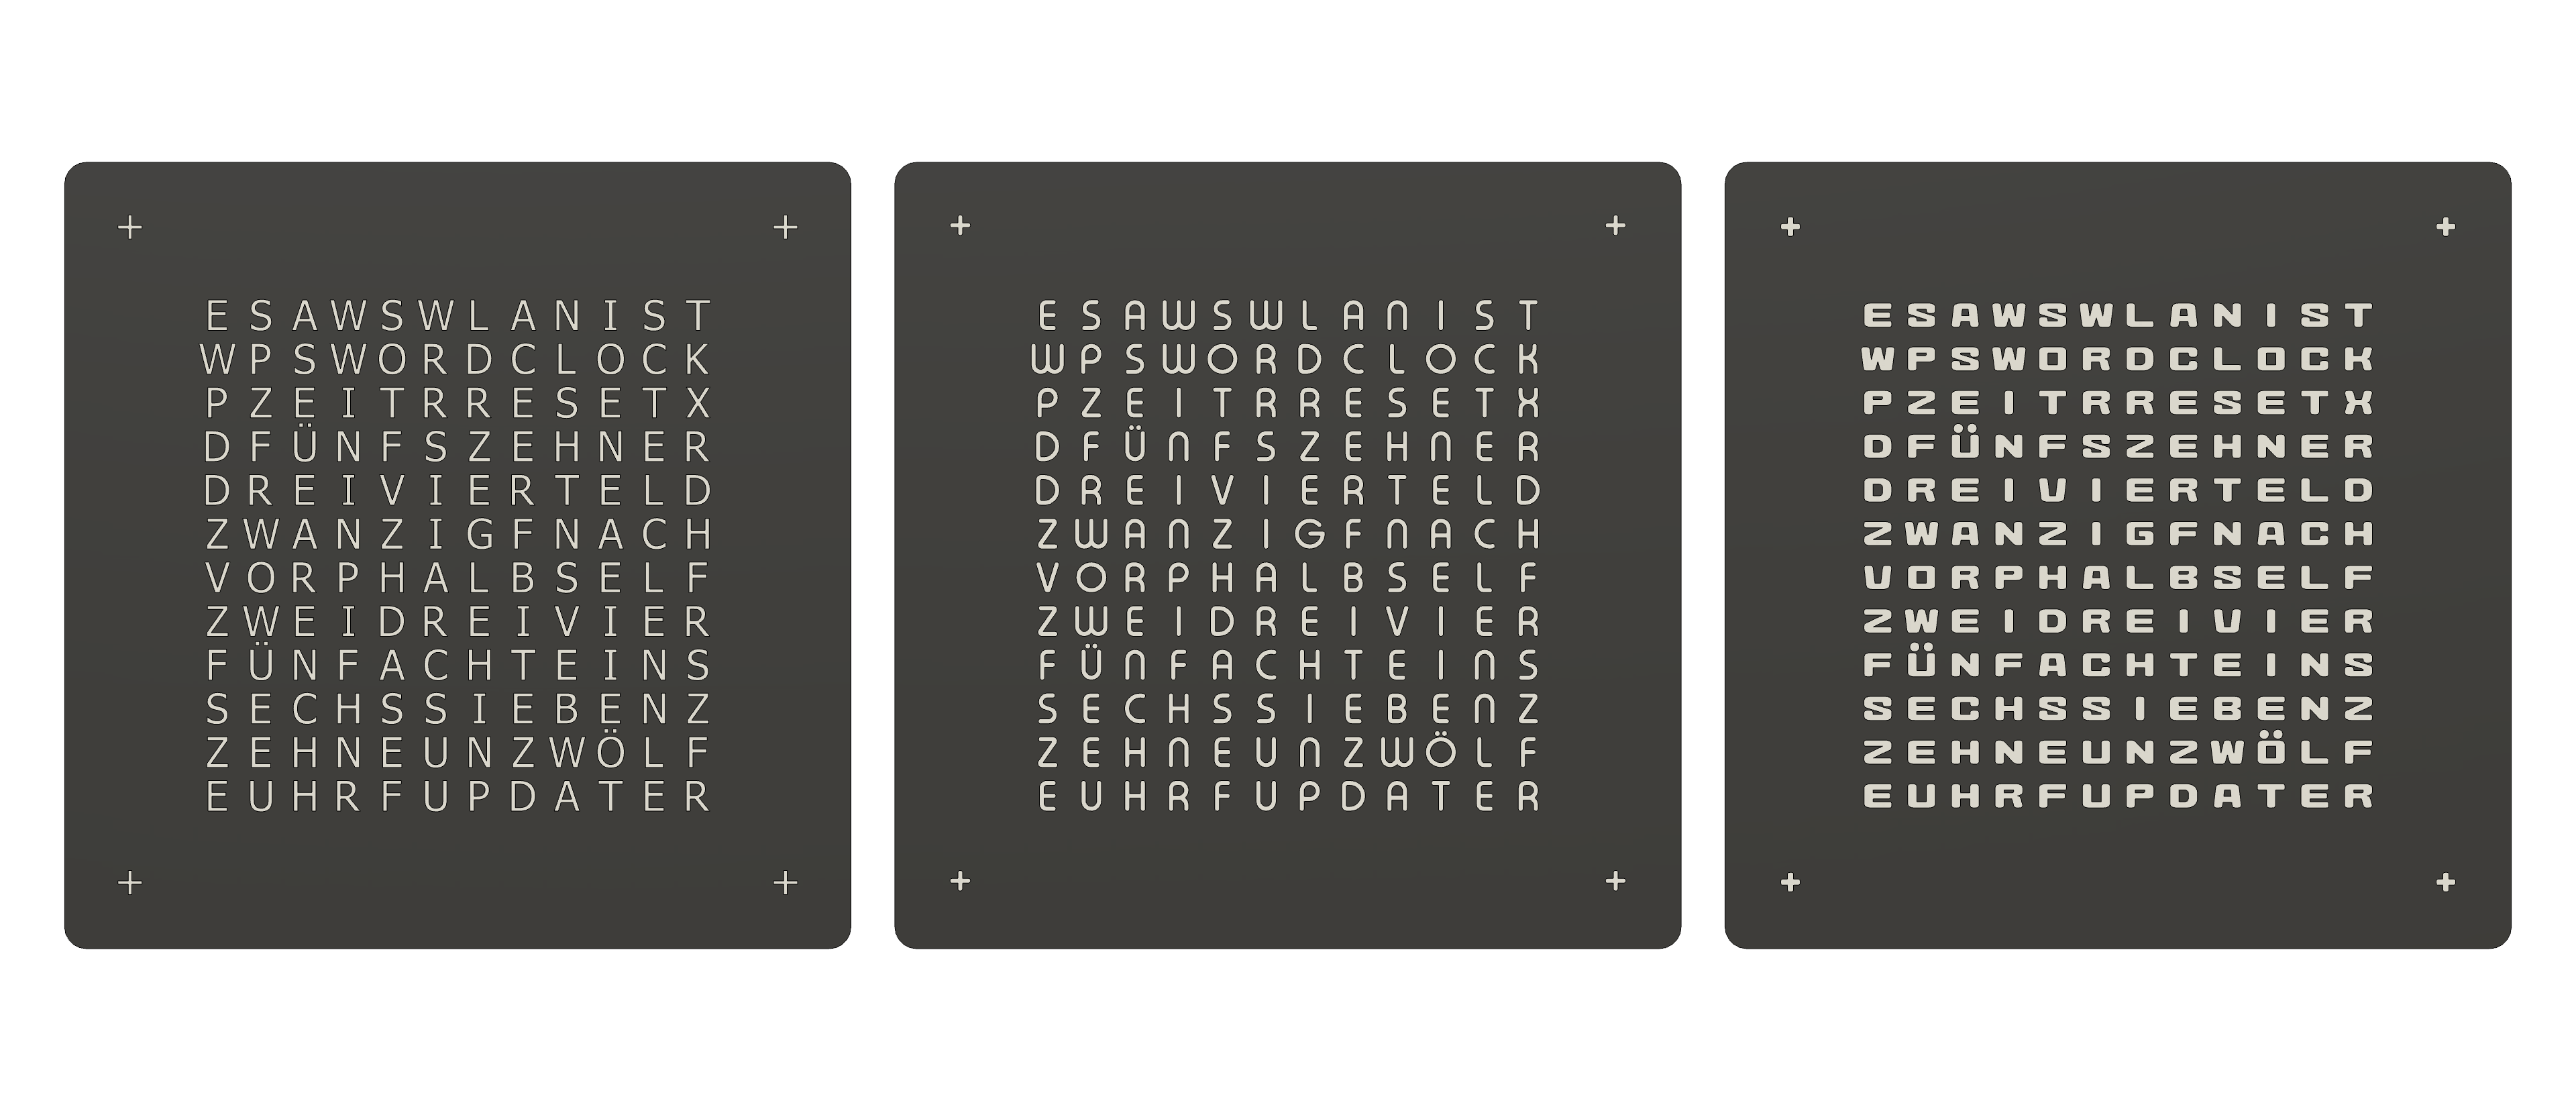
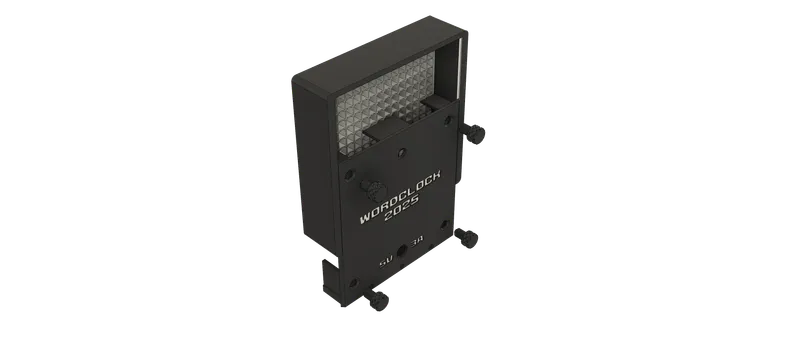
Hope you like this new variant! =)
Integrated web configuration interface:
This WordClock can be used in "Online Mode" with WiFi usage or in "Offline Mode" without the need of a local WiFi. In both modes you will be able to use an internal configuration portal to configure your WordClock. See pictures below of the Online Mode:


Setup the code for the WordClock and WiFi setup:
Method 1 (NEW):
Use the ESP32 Web Flasher: https://awsw-projects.de/esp32-web-flasher/
Method 2:
Use the the new script to flash the ESP32 without the need of the Arduino IDE to flash the ESP32. Use option “6” to flash the “WordClock 14x14 Classic” code to your ESP32.
See the FAQ section too for more details to the code software.
Follow this video to see how it works:

Update the code of a running WordClock:
Updates can be done “Over The Air” / “OTA” with the internal WordClock web portal.
You will find a section to get the update without the need of a computer with 2 clicks.
Parts needed:
1x 16x16 LED matrix (Use this one. The case is made to fit to it only!)
1x NodeMCU ESP32 USB-C (Use this one. The case is made to fit to it only!)
1x USB power supply 5V / 3A or e.g. the USB-A port from this one (No direct USB-C!)
1x USB-A to USB-C cable (5V, 3A) (No direct USB-C!)
3x M3x16 screws
4x M3x8 screws
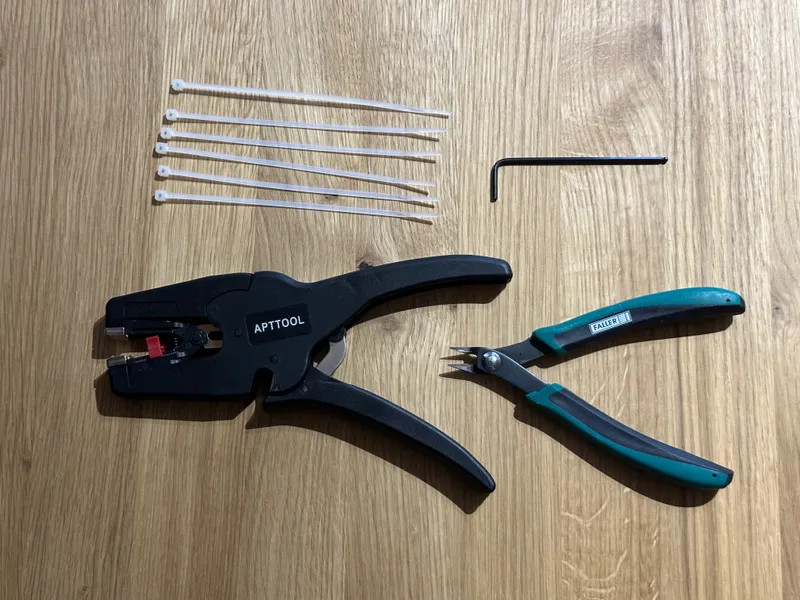
Tools needed:
1x FDM 3D printer and PLA filament in black and white
1x M3 allen key
1x side cutters (to cut the cable ties and cables cleaner)
4x cable ties
1x soldering iron set (if you want to solder)
1x 3rd hand (if you want to solder)
Wiring:
Connecting the parts for this WordClock is as easy as possible.
You may need to solder or connect solder free 3 connections only to the ESP32.
The small holders in the lid can be used for a small cable ties to secure the cables.
Have a look into the pictures how to arrange the LED matrix in the front part to ensure that the direction of the LEDs is correct.
In case you want to solder, the only change compared to the solder free variant would be to solder the 3 wires to the ESP instead of using the named plugged cables. Details will not be described here due the connections are the same as for the solder free variant. The Wago clamps would be used in this case too, because they are really handy to use…
Please check the table which pins are connected for the project as well as the pictures:
USB-C port: | ESP32: | LED matrix: | Wire color: |
5V | VIN | 5V | Red |
GND | GND | GND | Black or White |
| D32 | DIN | Green |
Here is a step by step guide how to connect all the cables:
With the help of the following pictures you will see how to wire the device, easy as 1,2,3:
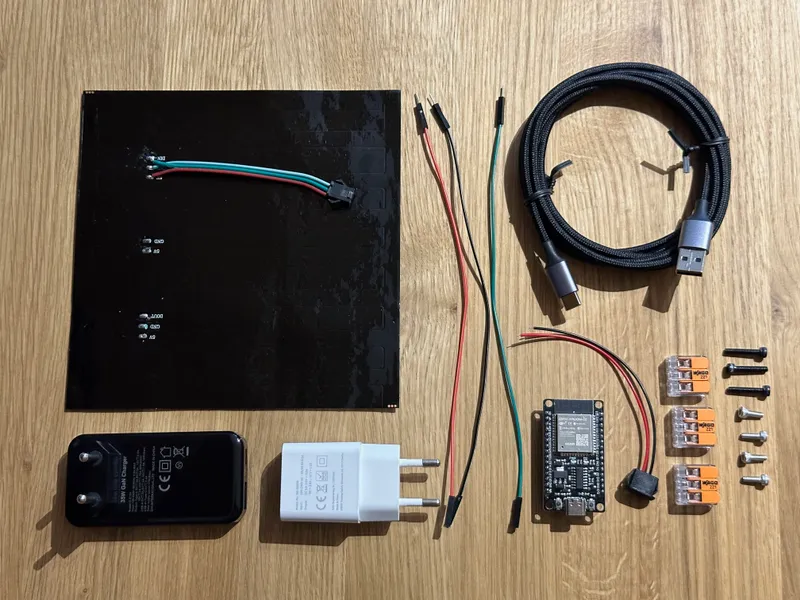
Here you see all the required parts.
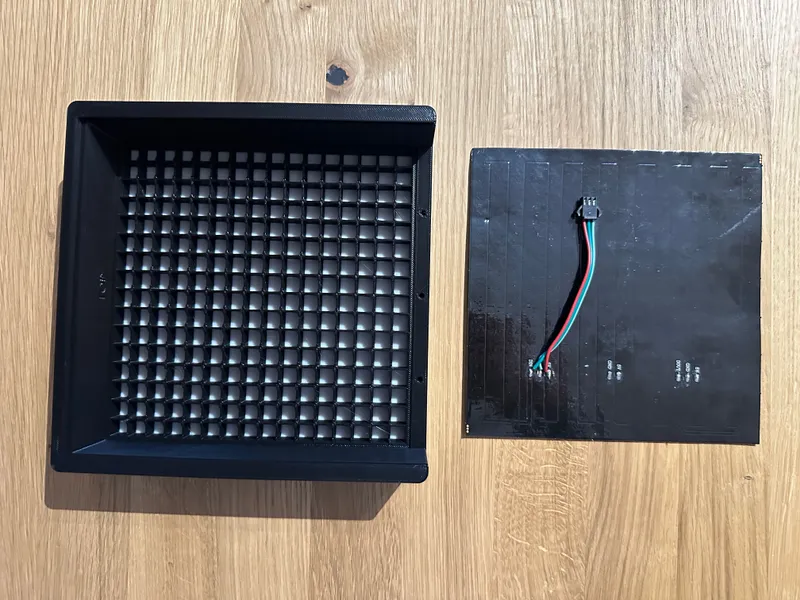
Cut off the middle and lower cable pairs from the matrix to avoid electric short circuits. The cables at „DIN“ have to remain. The result is shown here.
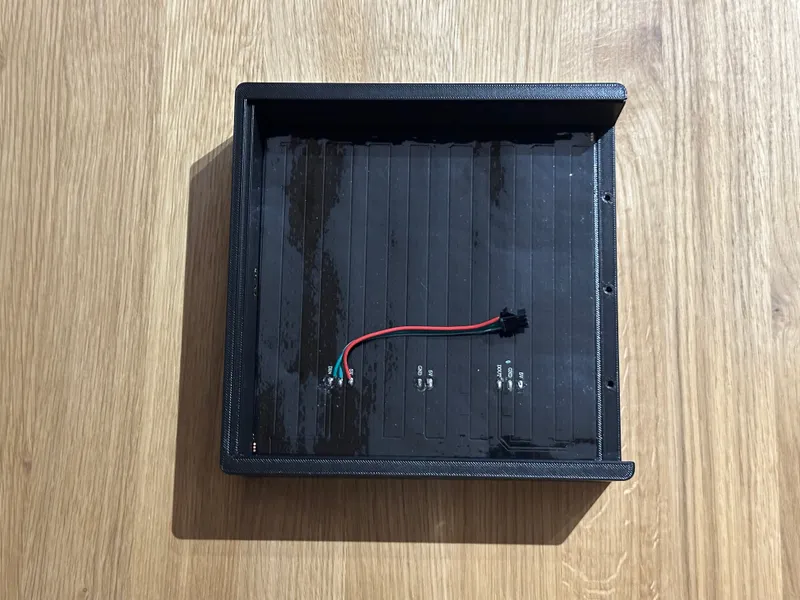
Add the LED matrix in the orientation as shown.

Now continue with the parts in the lid. The new lid looks a little different in the 2025 variant of it as shown above, because it got several new improvements implemented based on users feedback, but you will be able to follow along with the 2024 pictures below very easy too. =)
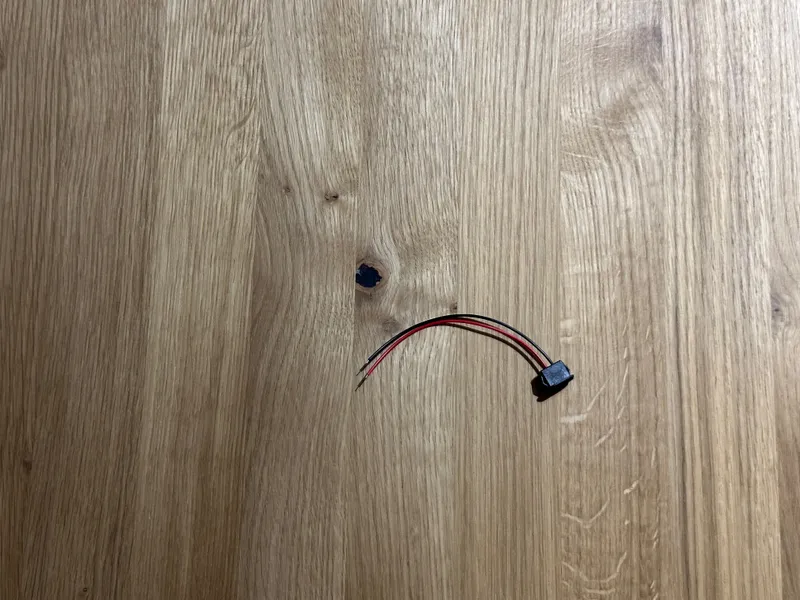
Next strip the 2 USB-C port wires 11mm and push it into its place in the lid. It will click in place with a bit of the force. ;-)
You will find a 11mm long mark in the case to help you finding the right strip length. See the upper edge in the picture above with the "11".
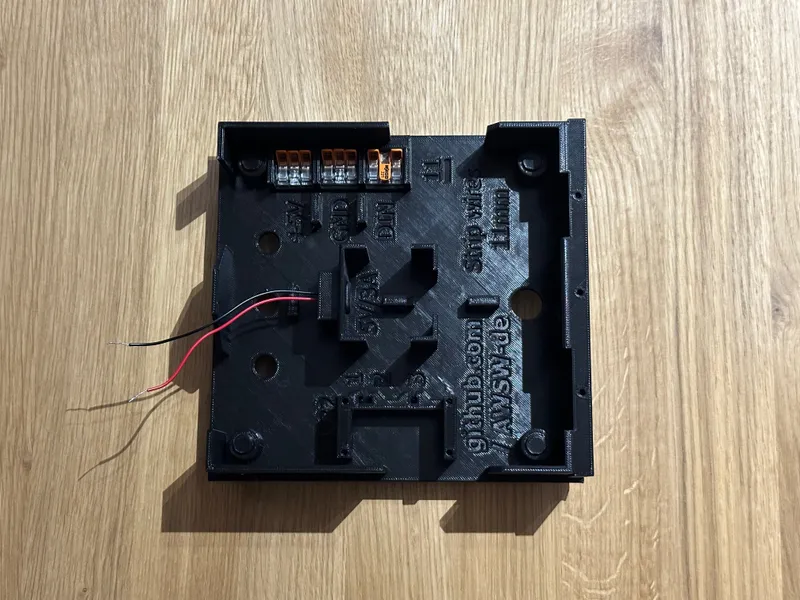
Open the 3 Wago clamps and put them into their holders in the lid as shown.
Remember the 1,2,3 under the clamps as:
1 = red = 5V
2 = black or white = GND
3 = green = DIN
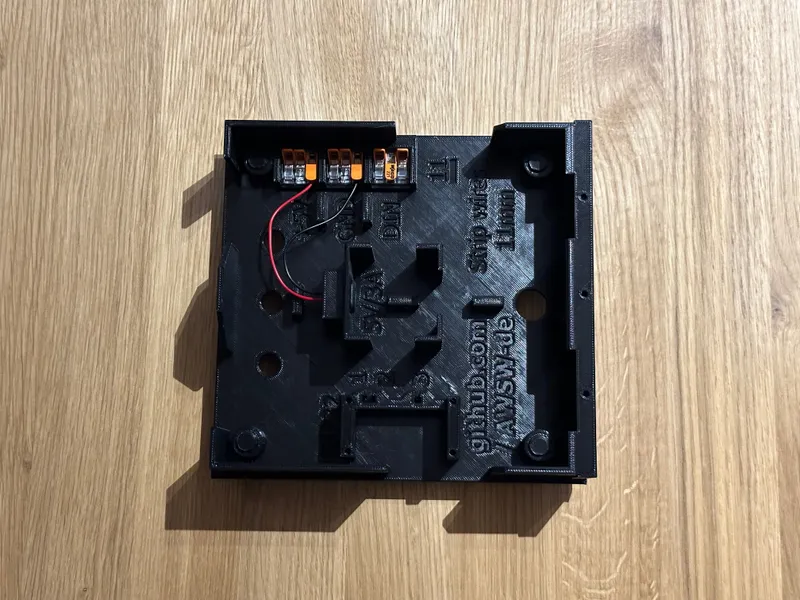
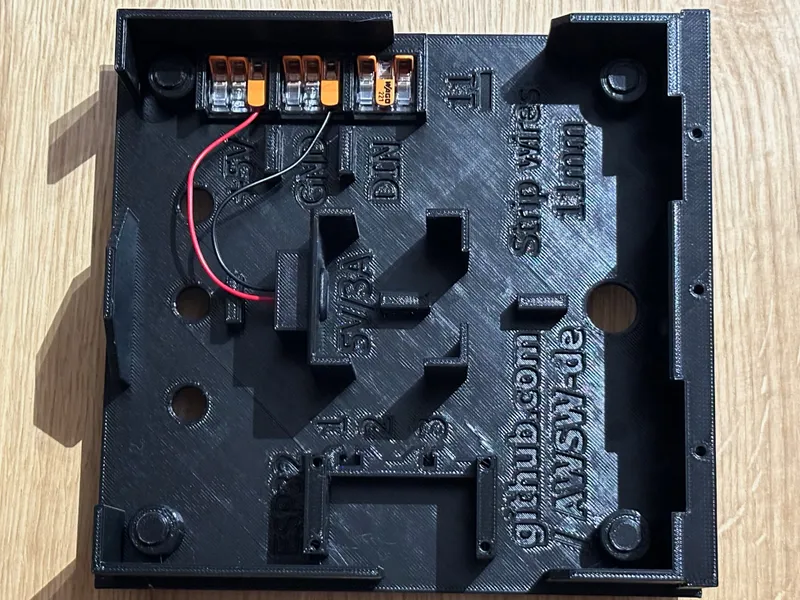
Add the 2 stripped USB-C port wires to the clamps 1 and 2 as shown and close the clamps on the used slots.
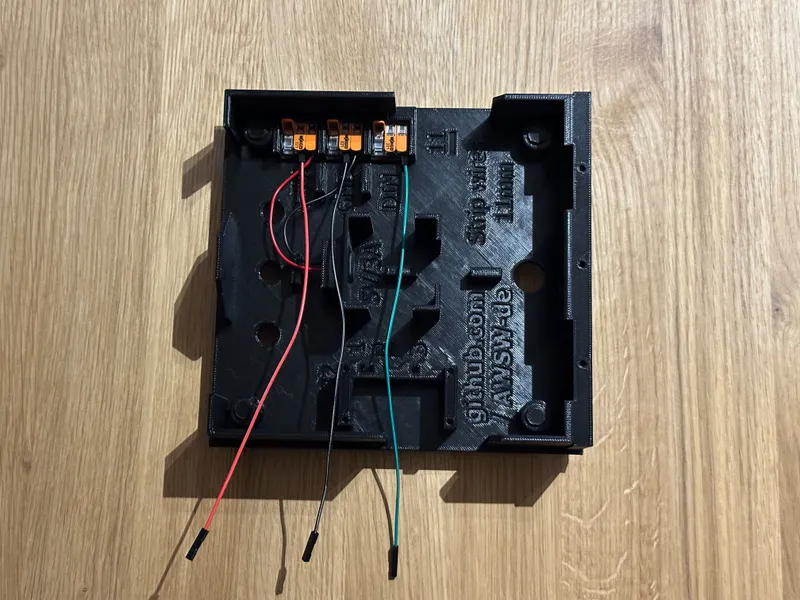
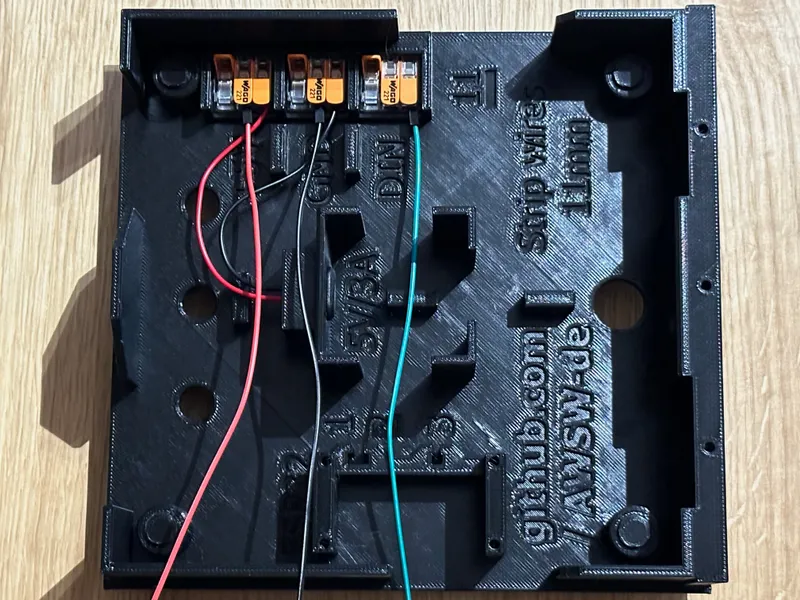
Add the 3 Female-Male cables like shown to the clamps and close their slots as:
1 = red = 5V
2 = black = GND
3 = green = DIN
The male pin part of the cable is pushed into the clamps.
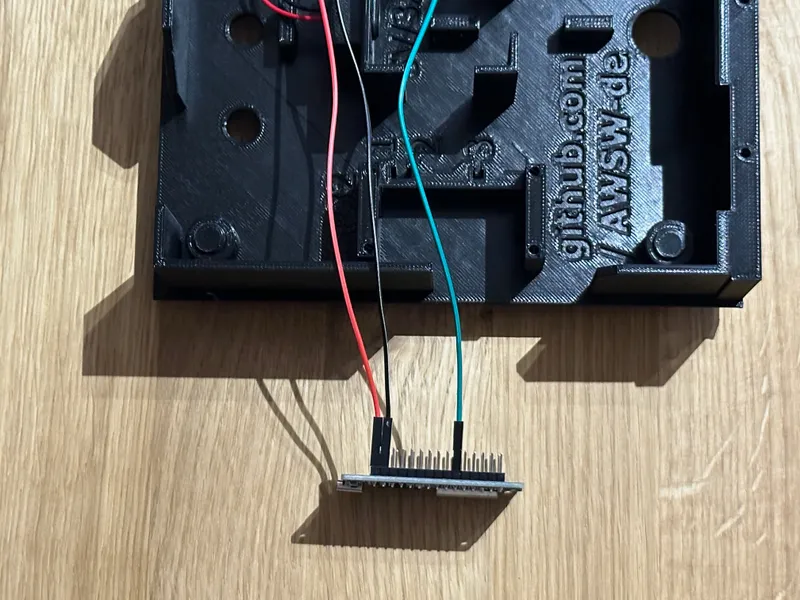
Add the “female” part of the cables to the ESP32 like shown:
VIN = red = 5V
GND = black = GND
D32 = green = DIN
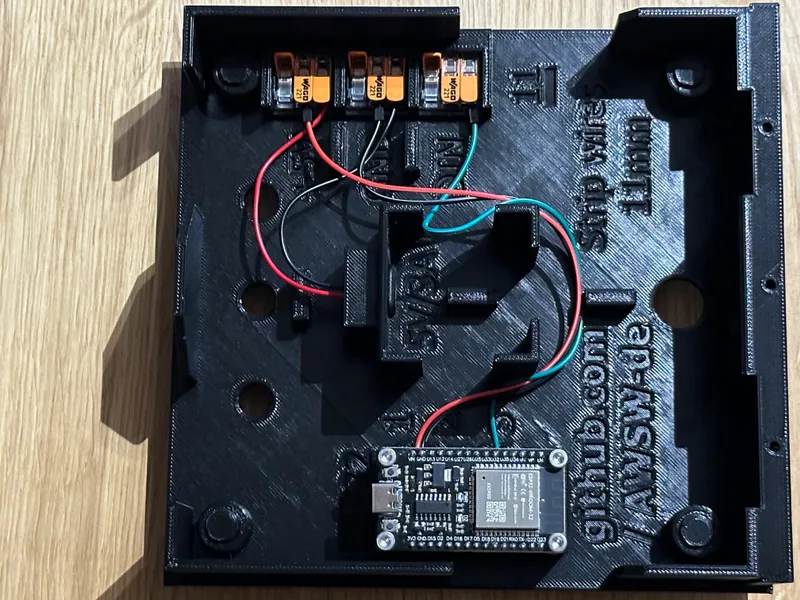
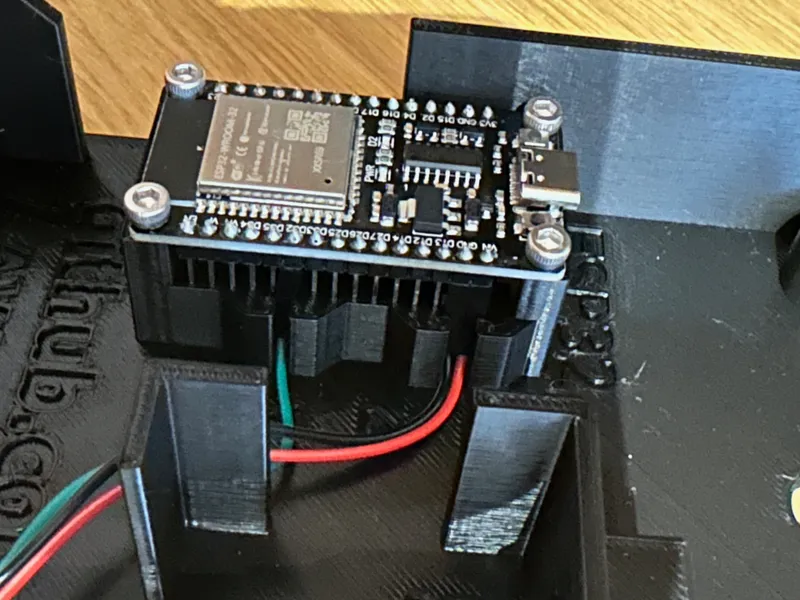
Carefully push the ESP32 and the 3 cables with their black posts in to the tight holder part of the lid as shown.
Route the 3 cables out of the small slots.
Secure the ESP32 in place with the 4 M3x8 screws.
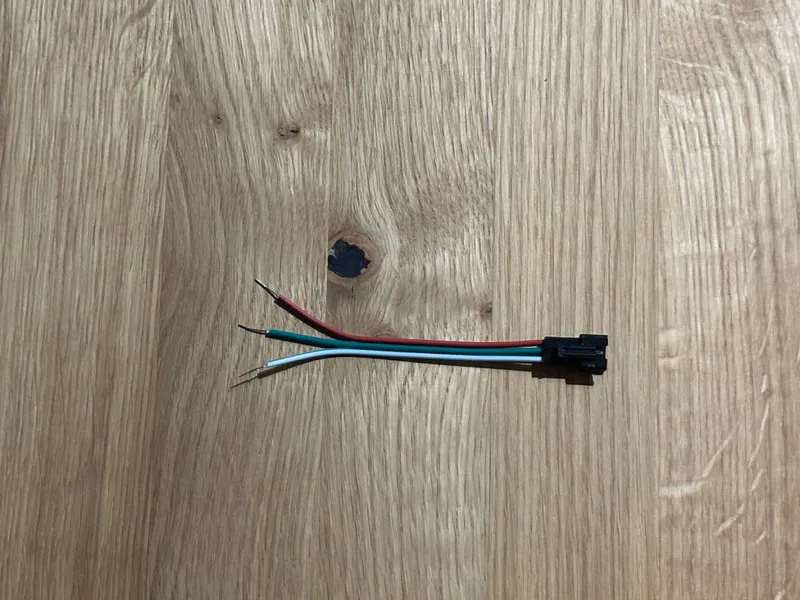
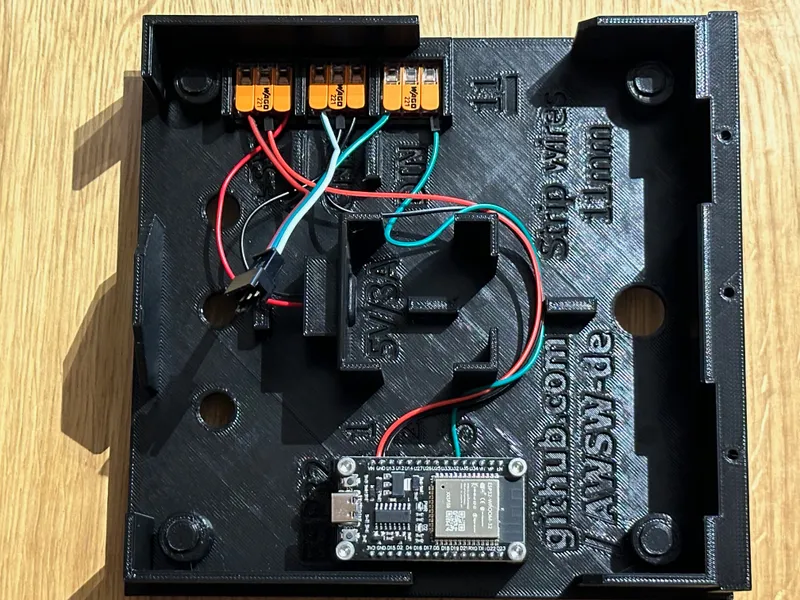
As last part add the with the LED matrix delivered connector to the circuit.
Do not forget to strip its wires 11mm too.
Add the 3 last wires as shown and close the Wago clamps:
1 = red = 5V
2 = white = GND
3 = green = DIN
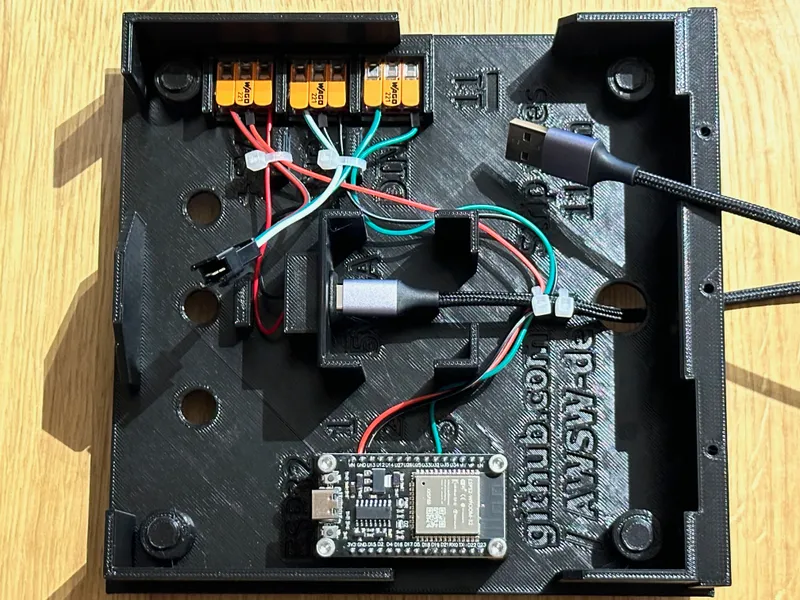
Add the USB-C part of the USB-A-to-USB-C cable through its hole in the lid and plug it into the USB-C port like shown.
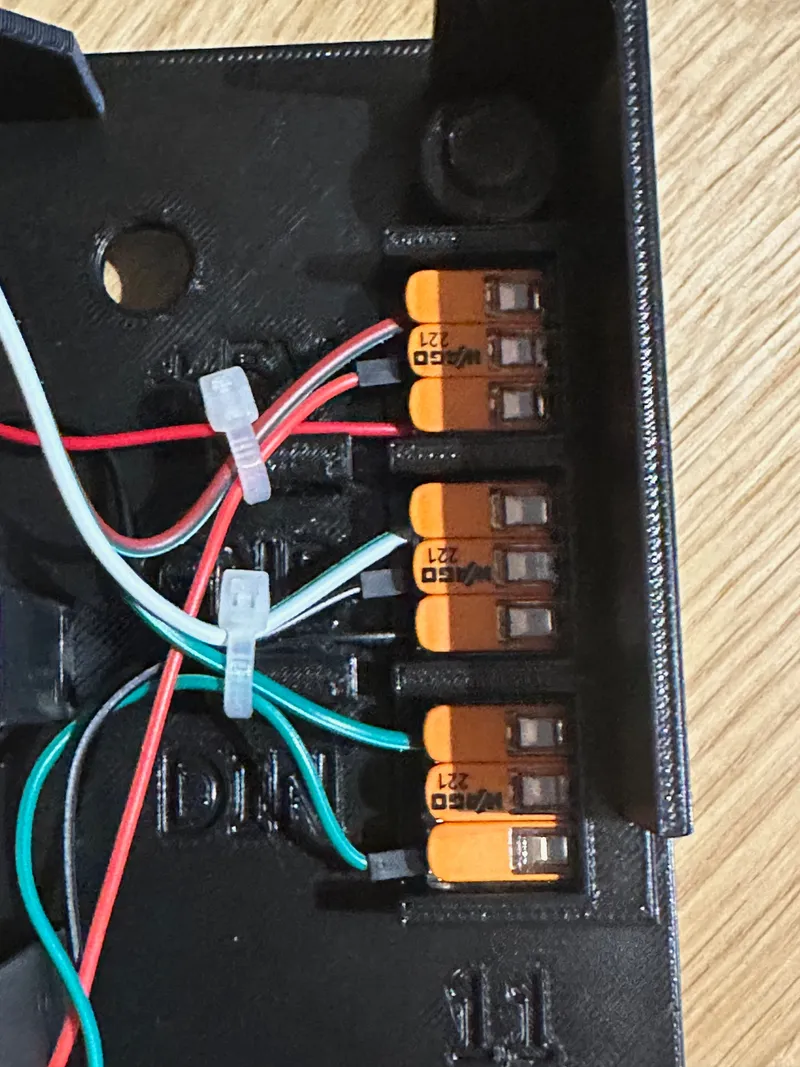
If you followed all instructions carefully, checked them again and check that all clamps are closed.
Please add some small cable ties to secure the cables in place. Especially the power cable should be secured in place.
If you haven't uploaded the code to the board yet, you should perform this action now!

As last action you have to do is to connect the LED matrix to its connector in the lid.
Slide the lid carefully together with the front part as shown.
The lid pushes the matrix down and holds it in place. No tape or glue etc. needed.
Use the 3 M3x16 screws to fix the lid in place to the front.
Plug WordClock to its 5V/3A power supply. Follow the WiFi setup video for WordClock.
Check the function and you finished the WordClock setup.
Enjoy! =)
Printing instructions:
0.2 speed profile used on Prusa MK4S.
No supports needed for all parts.
Fuzzy skin for the outside of the front part activated.
Textured sheet used:
If you use a textured sheet too, let it cool down completely after the print and wait for the part gets loose by itself. Do not pull on it to avoid ripping off the letters!
In my case it takes 45-60 minutes after the print has ended and the part just lays loose on the print bed.
Do not touch the print bed and clean it with Isopropanol alcohol before printing.
The option “Avoid crossing perimeters” was set active for the front parts in Prusa Slicer.
The 4 screws should be printed with 30-50% infill just in case you need to screw them in a little harder. I could use 15% infill good as well.
Using a brim was not needed in my tests, because I cleaned my textured sheet with dishwashing liquid carefully with a new sponge and then with isopropanol alcohol again on the printer to make the parts stick really good. If you face problems with adhesion feel free to add a 5mm brim to the front and lid part.
For this new model I tried some new printing options like shown below:
For the front part from 0mm to 2.6mm set the infill to 100% to get a good light seal.
IMPORTANT:
Two (2) color changes in the front part from black to white and to black again are required at about 1.2mm and 2.6mm height to create the diffuser layer. Why “at about”? Well it depends on your layer height. I used 0.2 layer heigt:
0.2mm = Changes at 1.2mm + 2.6mm
Color changes are done in this order:
1st color = black = layer 0 to 1.1mm
2nd color = white = layers 1.2mm to 2.6mm
3rd color = black = layers 2.7mm to the end of the print
To read how such a color change is done, you will find a really good article here.
See also pictures below:

100% infill set from 0-2.6mm

Color changes at 1.2 and 2.6 mm set.

Check the result from above…
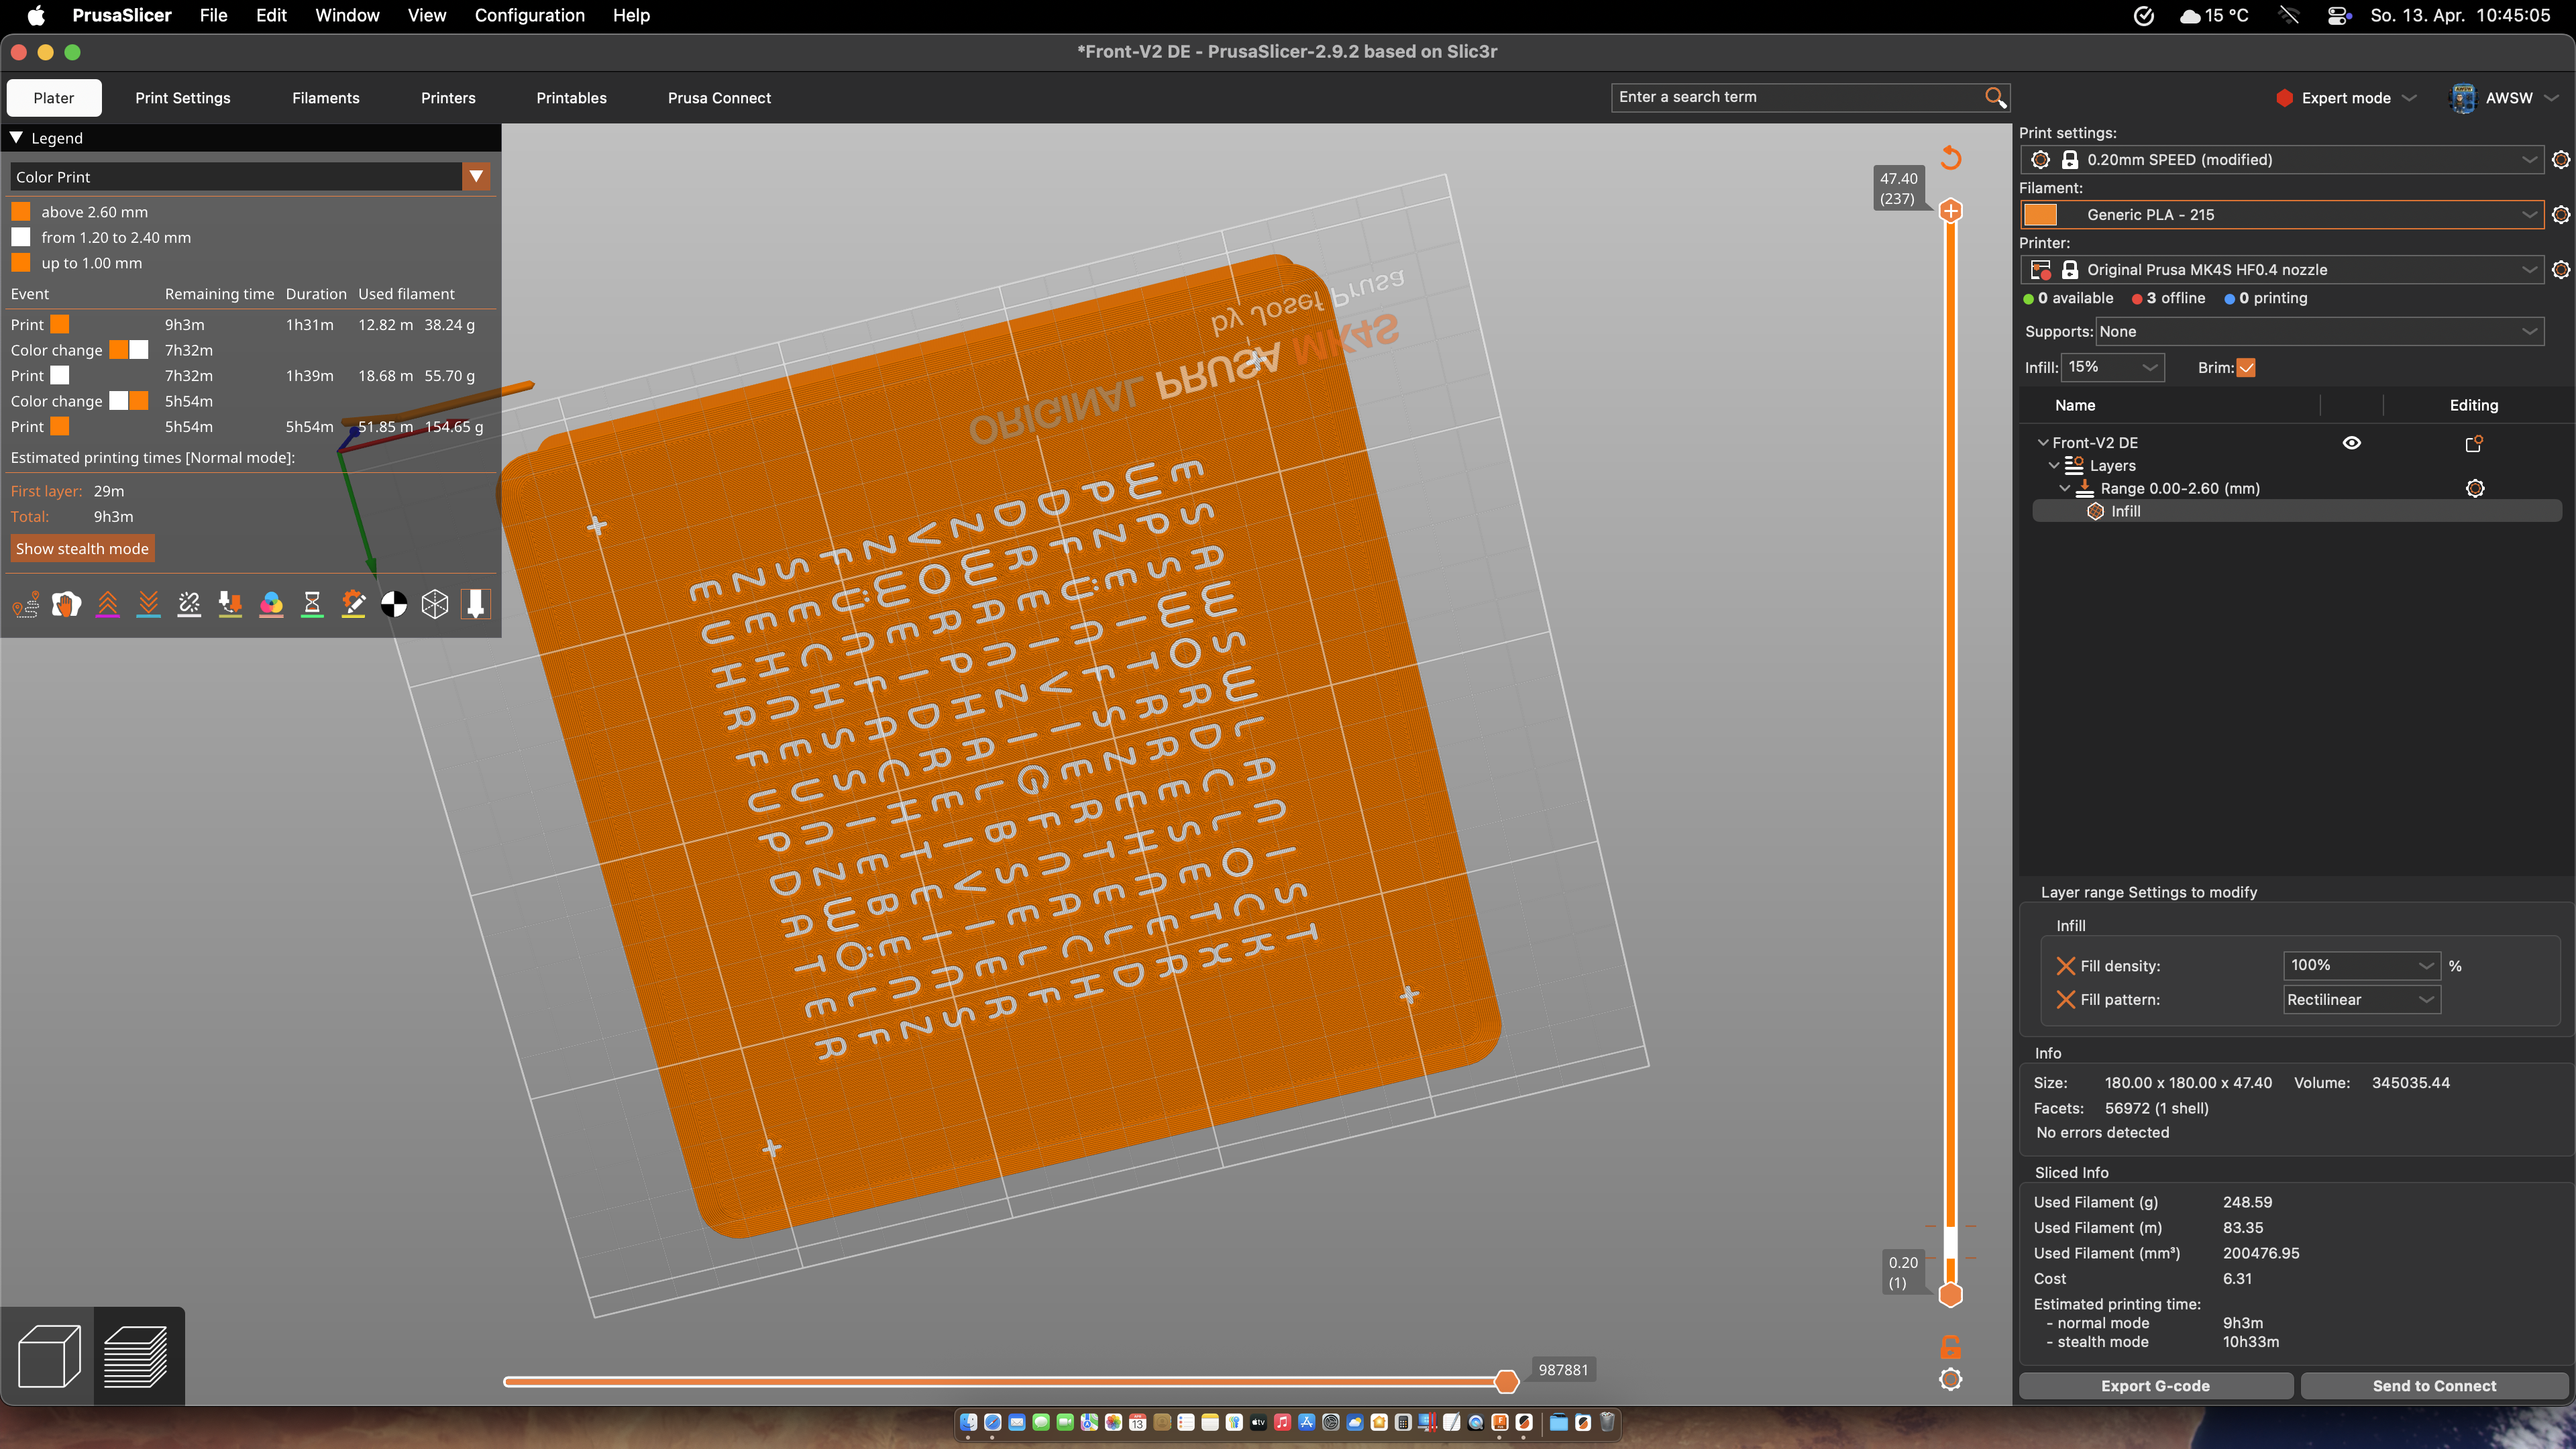
and below to see if the diffusor layer will work out!

Optoinal you can set a similar color change for the lid part too.

Check the result before printing too.
For the following details, please refer to the previous model article: WordClock 16x16 - 2024
Most functions and options are used from the 2023/2024 models, except for the in this reduced model missing extra words and therefore functions like Telegram integration.
WiFi Setup
Code download from my GitHub repository.
Smart Home integration
Alternative Smart Home environment integration via Apple shortcuts
FAQ
Happy printing =)