
K1 Sugar-Skull Extruder with Filament Cutter
Obliczymy ostateczną cenę na podstawie wybranego pliku. Sprawdzisz ją i zaakceptujesz przed płatnością.
Zapisane na tym urządzeniu.

A modified K1 OEM extruder that adds a filament cutter, filament runout sensor, and improved heat dissipation.
- Ocena
- 5 / 5
- Polubienia
- 95
- Pobrania
- 269
- Wydruki
- 2
- Wyświetlenia
- 3261
- Oceny
- 4
Aktualizacja u źródła:
Informacje o modelu
- Źródło
- Printables
- Kategoria
- Creality Parts & Upgrades
- Licencja
- Creative Commons — Attribution — Share Alike
Want to show appreciation? Consider checking out my Ko-fi
After struggling with finding a good solution to add a filament cutter to my printhead for use with a 3DChameleon MMU, I decided to just make my own.
NOTE: G-code is still being worked on and will be specific to the K1 Max, though it may work with other models with some modification. K1/K1C may need a printable bumper for the cutter arm. K1 Max can actuate the cutter with the left belt tensioner. v1 of the G-code is now available at the bottom of the article.
I do not recommend trying to cut tough CF filaments. Even with the double-tap in my g-code, it's sometimes not able to cut the filament fully, which can potentially lead to clogs. It does cut regular filaments just fine, however.
This extruder reuses all the guts of an OEM Creality K1 extruder, specifically the newer unicorn extruder.
The BOM is as follows:
Gears, Spring, Detent, M3 Screws, and Assembly harvested from an oem extruder.
NEMA 14, 12 teeth motor (same as oem)
4x M3 VORON heat set inserts (or any M3x5x4 inserts)
1x M2x8 Self-TappingSelf-Tapping Screw
1x M3x8 Hex Head Screw
1x 4mm Steel Ball (can be harvested from a 608 bearing)
1x Pen Spring
1x Micro Switch (D2F-L or similar)
1x 9mm 60 Degree snap-off blade (The longer blade with the hole)
Heat Resistant Filament (i.e., ASA-CF, ABS-CF, PA6-CF, etc.)
Print face down, with 4 walls and at least 20% infill. No supports are needed.
Assembly Instructions:
First, carefully disassemble your OEM extruder. You will want to harvest every metal part. Please note that before transferring the parts to your printed extruder, there is a built-in support where the spring lies that you will want to carefully remove.
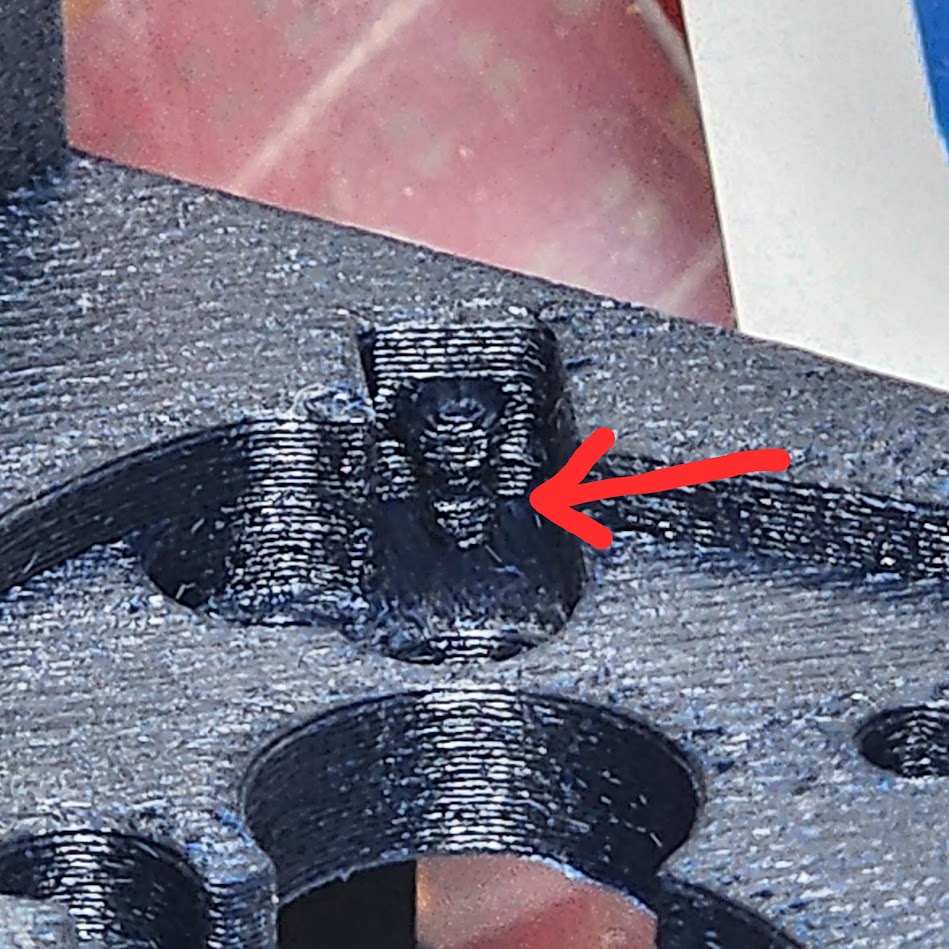 | 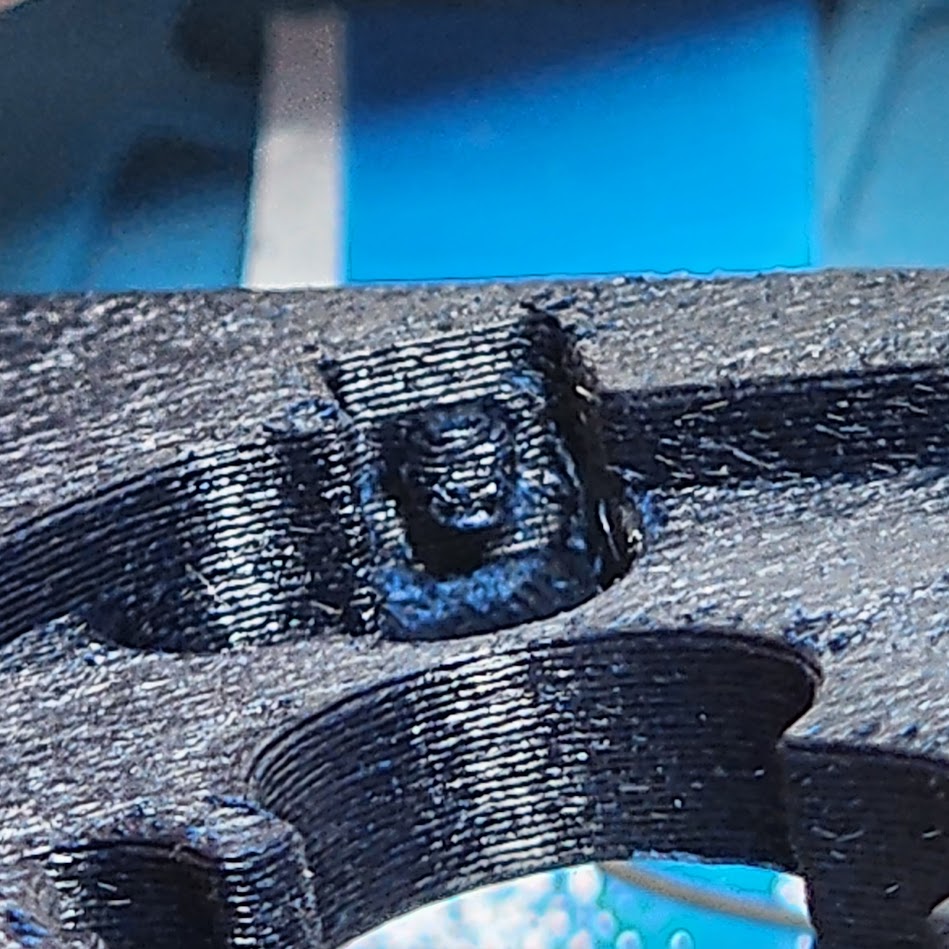 |
Tolerances are a bit tight, so you may want to use a diamond file to clean out the smaller holes a bit. The metal parts should fit in with some light pressure. You don't want them loose, but you also don't need to struggle to push them in.
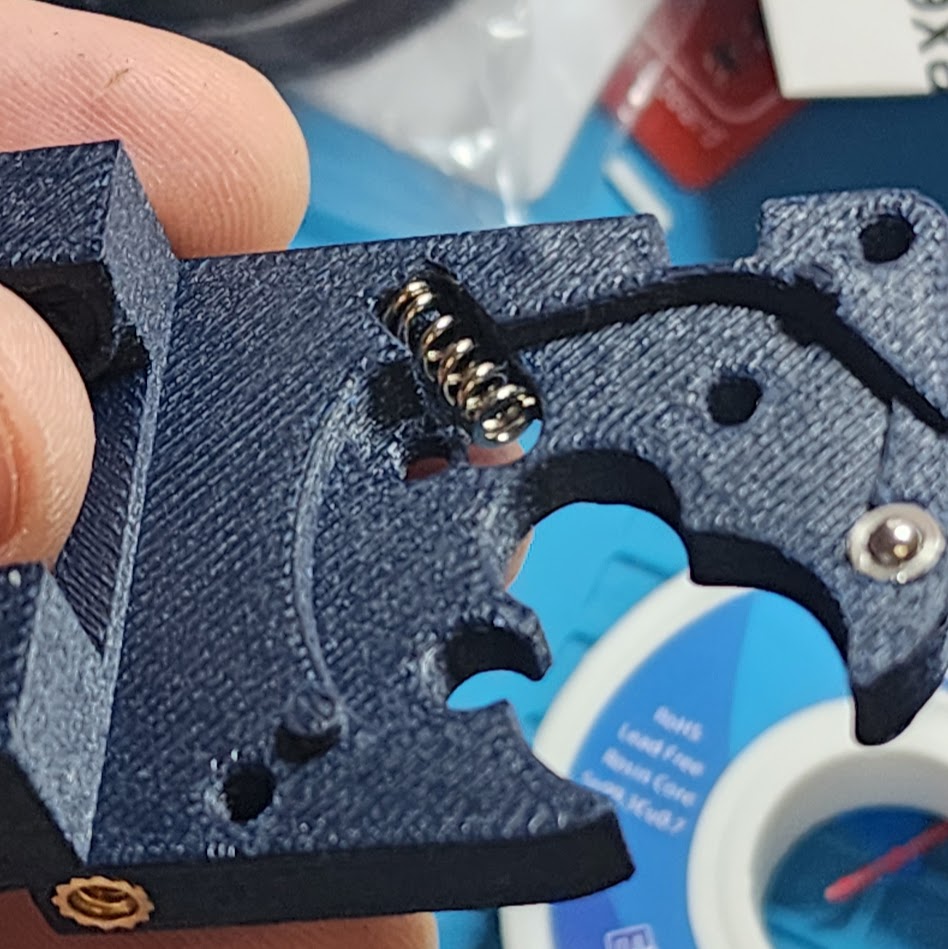 | 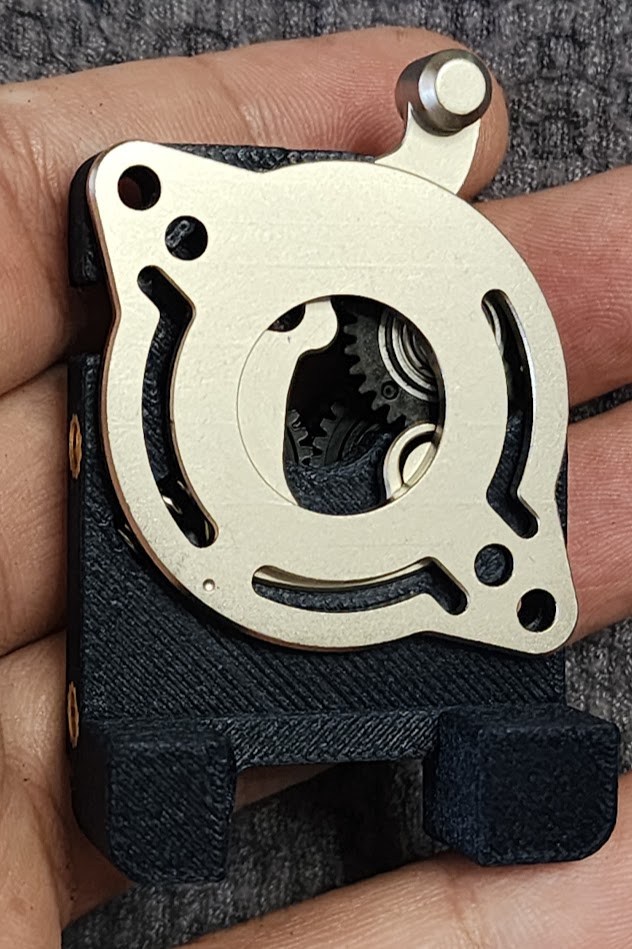 | 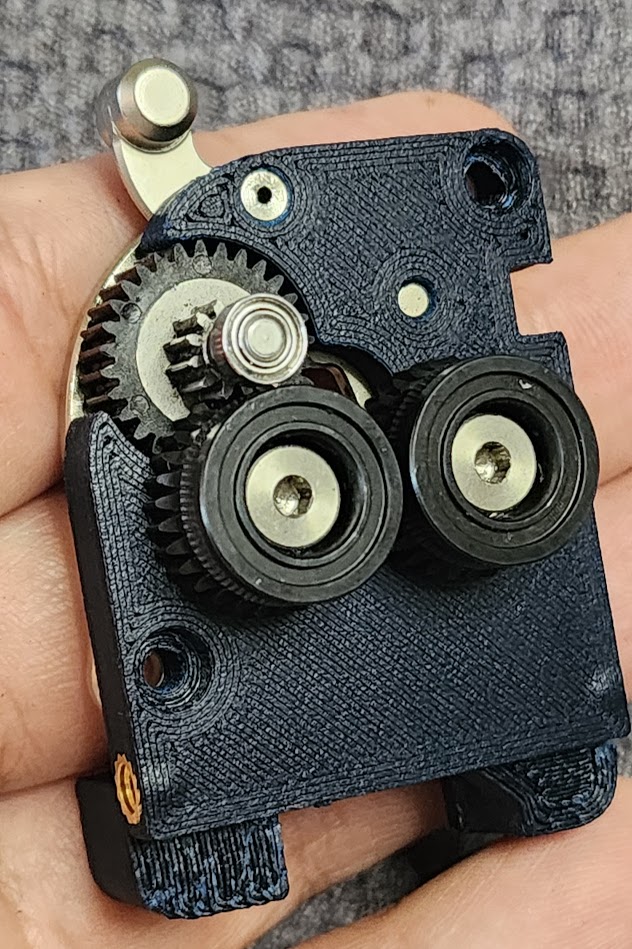 |
Gears should be able to turn freely. The hardened all metal gears work great here if you want to upgrade.
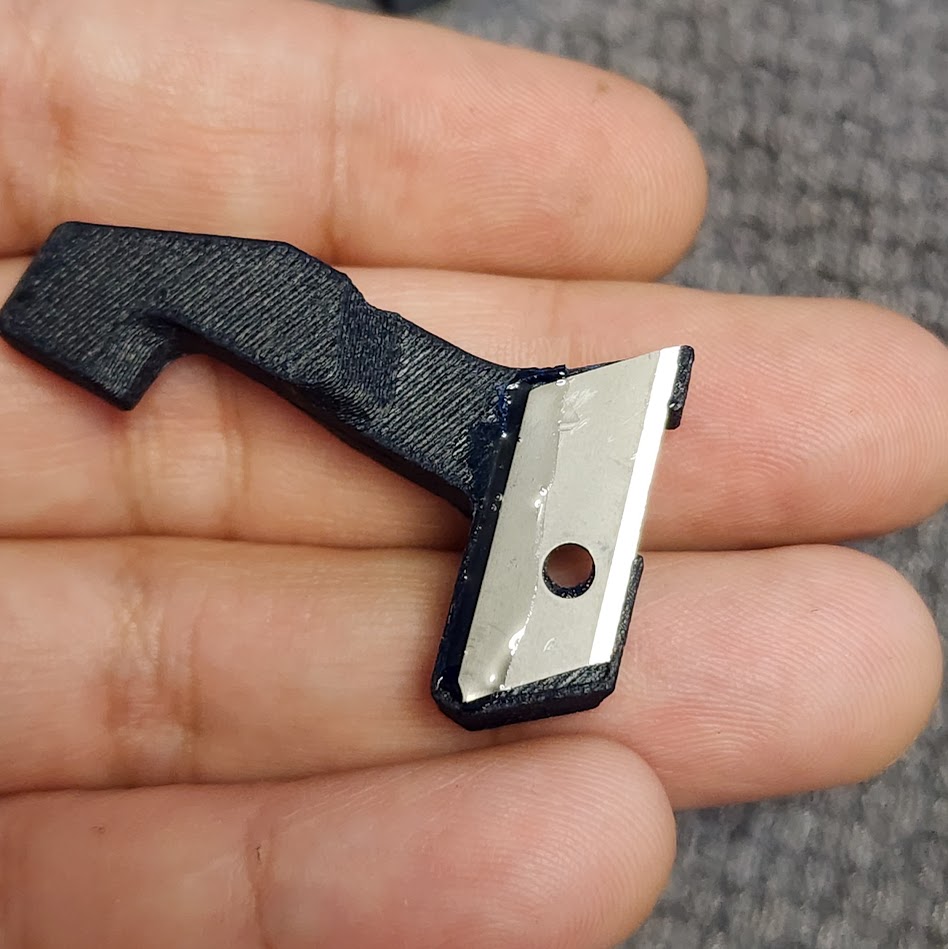
Next, snap your blade off and glue it into place on the blade holder. Note that every blade seems to be slightly different depending on the manufacturer, so you may need to trim some of the edges of the blade holder to ensure it fits. Glue is an absolute must. I used a thick crazy glue to give it some structure.
For wiring and installing the switch onto the front extruder cover, please reference Henlor's instructions here.
Glue the pen spring into the extruder back, and fit the end of a bowden tube into the bottom of the extruder cover. Make sure it is fully seated into the hole and test for any catches by sticking some filament down from the top of the extruder. Cut the bowden tube flush with the bottom of the extruder once you are satisfied with the fit.
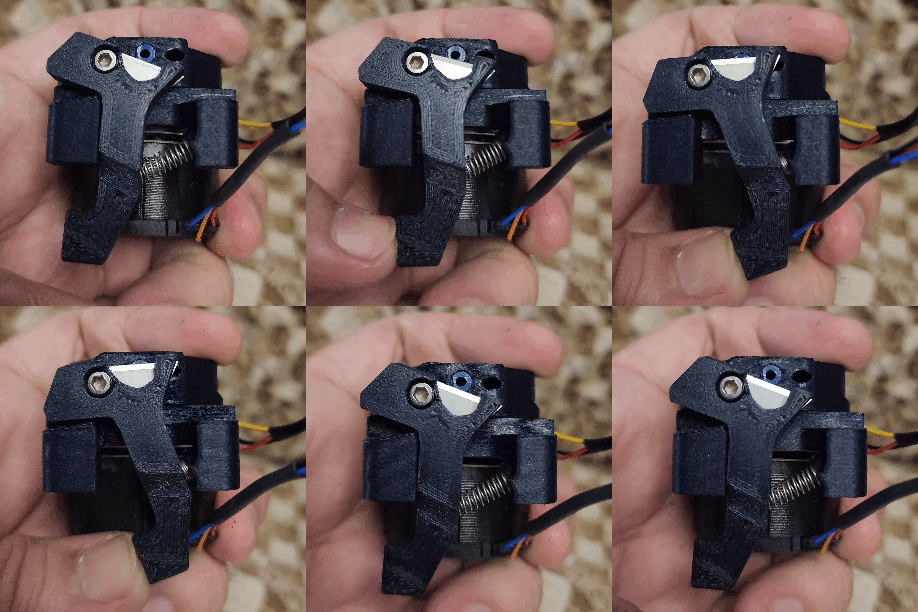
Finally, assemble the same as an oem extruder, with the filament cutter arm screwed on last. The cutter should be screwed down completely, but not so tightly that the spring struggles to move it. You do not need to glue the spring to the cutter arm.
While not necessary, I do recommend printing BuckyBrainz Motor Heat Shield to help with heat creep, as well as sticking a heatsink on the motor. Note: because of the raised height of the extruder, I would not recommend installing a fan onto the extruder motor, as it may interfere with your printer walls. A riser is also heavily recommended.
Slip the washer onto the top of the unicorn nozzle and slide the extruder into place. Once screwed in, test the cutter arm. Ensure it does not catch on anything. The action should be smooth, and the spring should slap it back into open position.
Note, you may need to snip off the cable guide at the back of the extruder. Mine was already cut off from trying to fit another extruder design, so I was not able to check for fitment issues
G-Code
For the G-code, you can either copy and paste it into your printer.cfg or upload the MMU.cfg into your printer via Klipper and type this into printer.cfg: [include MMU.cfg]
This code is very simple, as I wanted it to be compatible with whatever MMU you happen to be using. This is only for K1-MAX, and I do not have access to the K1/K1C to test. It may work with @smolboi's bumper, though you will need to modify the y and x values of my code.
#K1 Sugar-Skull Code. Thanks to @Smolboi for the conditional g28 code#All MMU GCODE will live here#For K1-MAX. Tweak as needed for other printers.
[gcode_macro Fil_Cut]gcode: CG28 G90 M104 S220 G0 X24 Y280 F15000 G0 Y306 F1000 G0 X3 F2000 #If the blade doesn't fully cut the filament, lower X to 2 or 1 G0 X24 F10000 G0 X3 F2000 #Change the X here as well G0 X24 Y280 F10000
[gcode_macro CG28]gcode: {% if "x" not in printer.toolhead.homed_axes or "y" not in printer.toolhead.homed_axes or "z" not in printer.toolhead.homed_axes %} G28 {% endif %}
Edit 6/22/25: Added a model with “teeth” to the bottom overhang to make it printable without supports. Thanks to Fernie from the Simple AF discord for the idea.
Edit 7/12/25: Extended the back of the blade holder by 2mm to make better contact. Should improve cuts now.
Edit 10/5/25: Resized and chamfered the bowden tube hole at the top of the extruder. This will allow the bowden tube to enter deeper into the extruder. It should also help the filament feed a little better.
Edit 8/1/26: For some reason the washer was missing from the models? I uploaded it again. I must have accidentally deleted it at some point! My bad!