
ORCA - Flush / Purge Volume Test for MMU's
Obliczymy ostateczną cenę na podstawie wybranego pliku. Sprawdzisz ją i zaakceptujesz przed płatnością.
Zapisane na tym urządzeniu.

This is a flush volume test for calibrating your MMU colour change volumes on any printer.
- Ocena
- 5 / 5
- Polubienia
- 81
- Pobrania
- 711
- Wydruki
- 4
- Wyświetlenia
- 3289
- Oceny
- 3
Aktualizacja u źródła:
Informacje o modelu
- Źródło
- Printables
- Kategoria
- Test Models
- Licencja
- Creative Commons — Attribution — Noncommercial — Share Alike
Flush / Purge Volume Calculator
########################################### Intro##########################################
This is a calibration test setup in Orca slicer to help calibrate your flush / purge volumes and get you closer to the perfect colour change.
Full credit to Ciuf_Ciuf on Makerworld
I set this up to test colours for my MMU
https://www.printables.com/model/1314513-low-rider-mmu-for-any-klipper-printer
###### Please post your Makes ######
Please like this, download and post the make if you built it
It helps us makers with feedback and gets us some Prusameters as most people don't pay it forwardFeel free to support my projects - https://ko-fi.com/gcodegearhead
########################################### Instructions##########################################
- Load in the 3mf file and select your printer.
- If you have only 2 filaments choose the 2 filament 3mf
- If you have 4 filaments choose the 4 filament 3mf
- Choose your filaments
- 1 and 2 are a pair
- 3 and 4 are a pair
- Make sure you have set your flushing volumes to 0
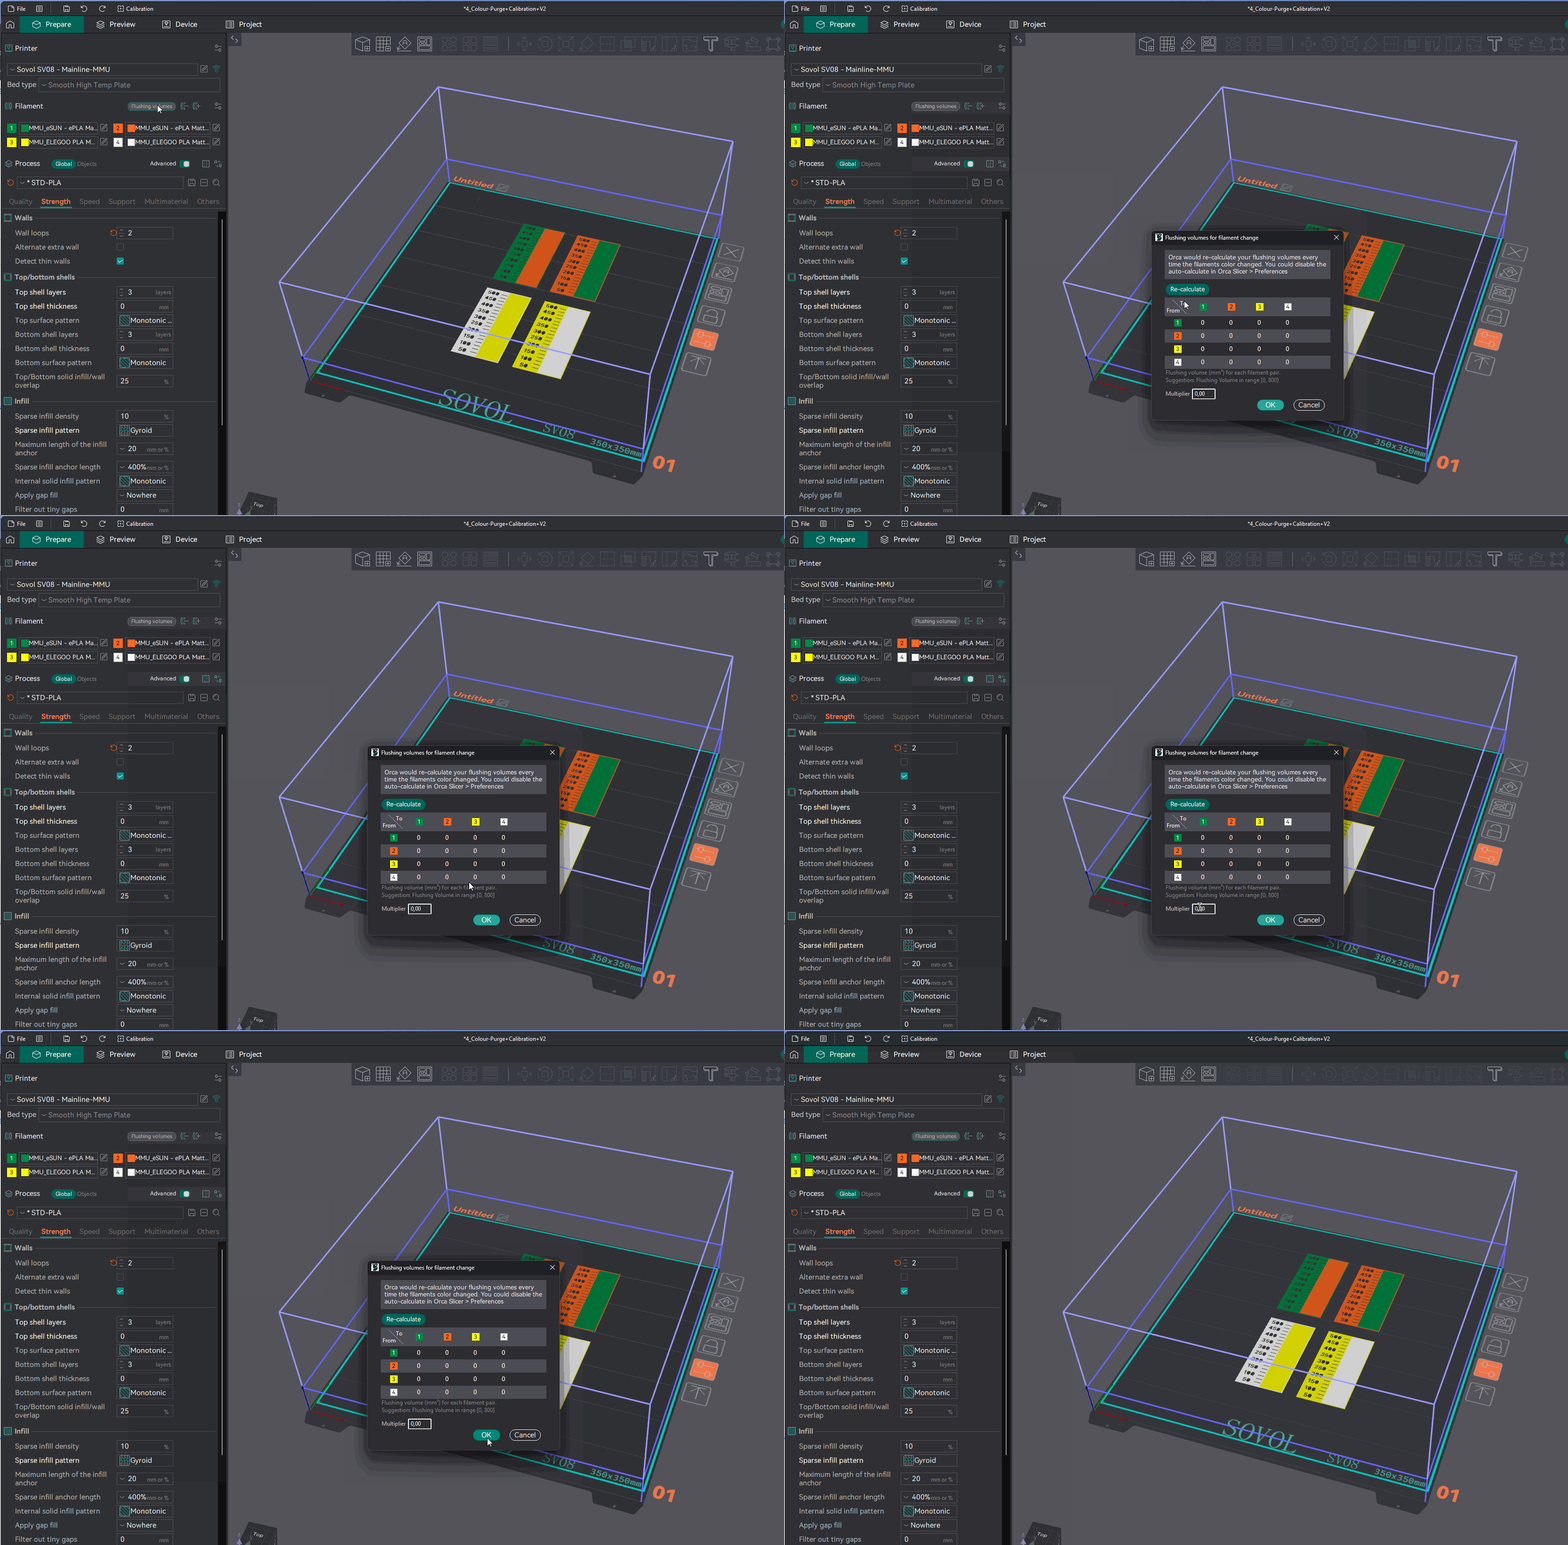
- Slice
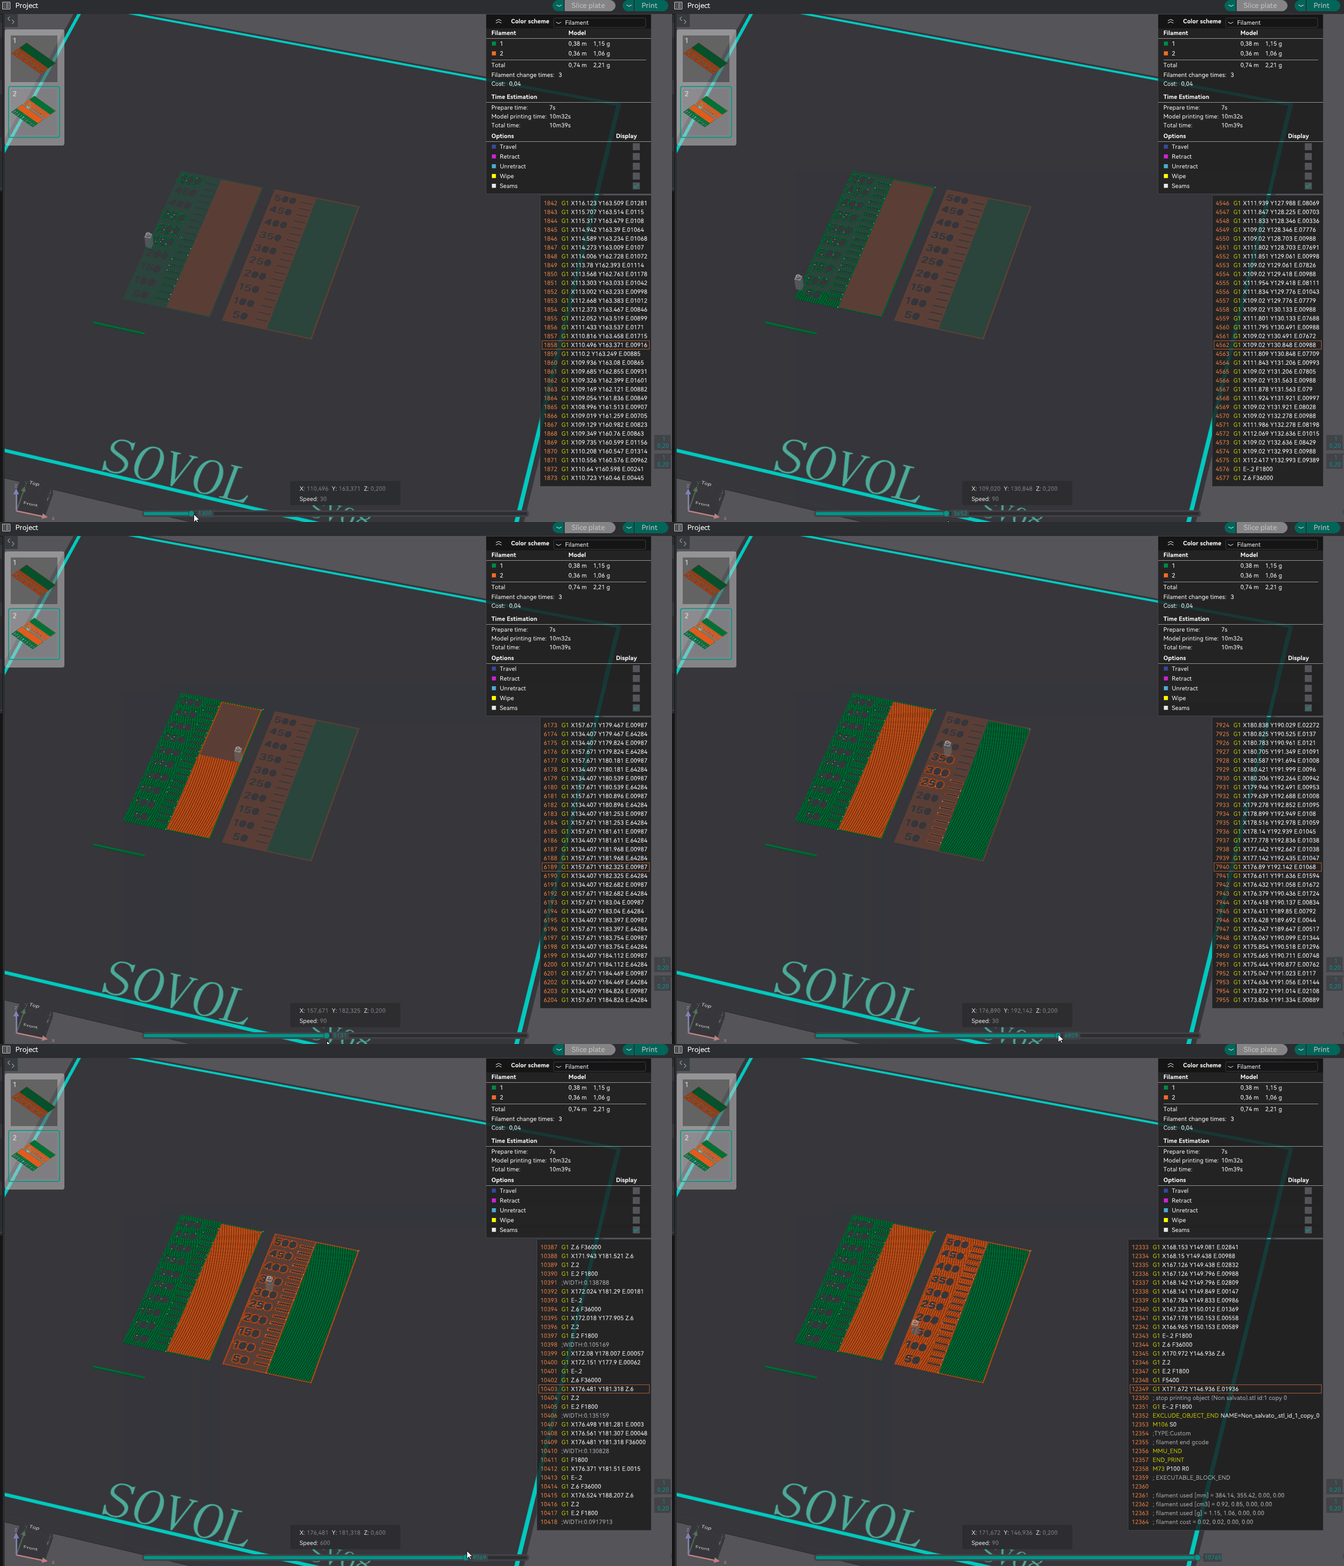
- Check the preview looks like the gifs above.
- Ensure filament is loaded in the right MMU lanes
What to Check if your model is different.
What it should look like and what you should check if not.
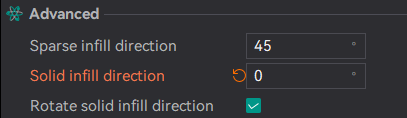
- If your lines are not horizontal, make sure the below is set
- Ensure your colours follow the order of the gif above when sliding through the print preview
########################################### How to Interpret Results##########################################
Look at the corresponding number where the colour has fully changed from the one to the other.
Add a little bit of buffer eg+20 to that, go back to your flush volumes, set the multiplier back to 1 and enter in the values you just calculated and save it.
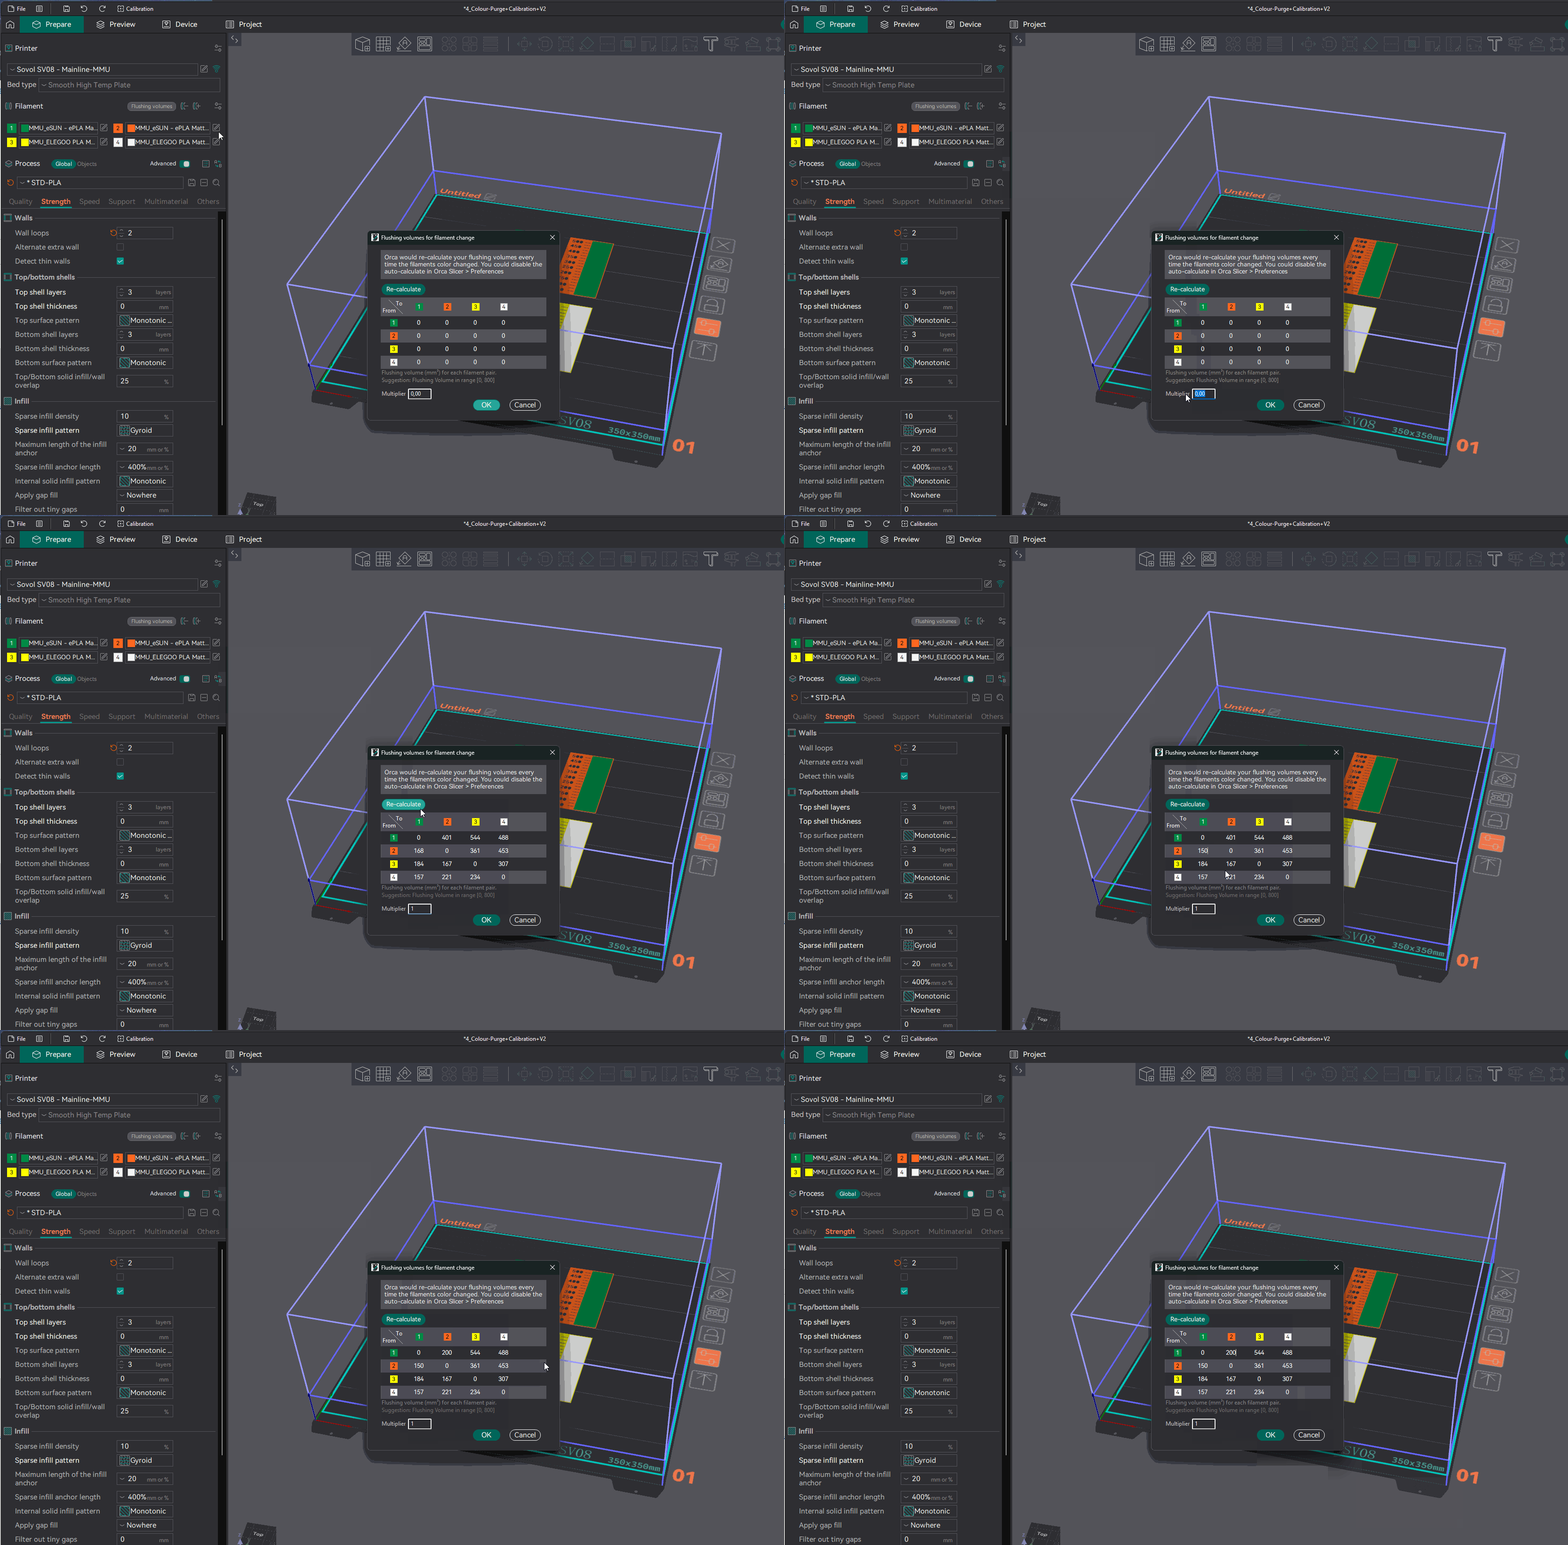
If you print and see you need less purge or more then adjust the flush volumes in the table.
Any issues let me know.
Feel free to support my projects - https://ko-fi.com/gcodegearhead
Cheers