
Magnetic Rhombic Dodecahedron
Obliczymy ostateczną cenę na podstawie wybranego pliku. Sprawdzisz ją i zaakceptujesz przed płatnością.
Zapisane na tym urządzeniu.
A dissected rhombic dodecahedron magnetic geometric toy, assembled origami-style from a flat, support-free print.
- Ocena
- 0 / 5
- Polubienia
- 3
- Pobrania
- 15
- Wydruki
- 0
- Wyświetlenia
- 90
- Oceny
- 0
Aktualizacja u źródła:
Informacje o modelu
- Źródło
- Printables
- Kategoria
- Math
- Licencja
- Creative Commons — Attribution — Share Alike
The rhombic dodecahedron has, as intimated by the name, 12 faces, which are rhombi of which the major axis is longer than the minor axis by a factor of 1.414.. (sqrt(2)). Similarly, when 30 golden-ratio (1.618...) rhombi are assembled into a solid, one ends up with a triacontahedron. This is not our first rhombic rodeo: see Polydron Panels Party and Polydron Frameworks Collection, both of which include, amongst others, the aforementioned two rhombic shapes.
Now add magnets…
Inspired by Roger von Oech's rather pricey Ball of Whacks, which is a rhombic triacontahedron dissected into 30 identical pyramidal shapes with embedded magnets, we endeavoured to do the same with the rhombic dodecahedron. As with the commercial offering, the resultant pyramidal shapes each contain 6 magnets - one behind each of the four triangular sides, and two behind the rhombic face/base. When these magnets are suitably and consistently oriented, this allows the pyramids to be assembled not only into the dodecahedral ball shape, but also into an infinite range of other configurations.
Then defussify…
The challenge is to correctly embed the magnets with the minimum of fuss, where fuss is defined as post-processing, assembly, or manual interventions, specifically pausing of the printer to insert the magnets, which, though feasible, would have to happen at least twice per print, and be fraught with risk, due to the multiplicity of magnets in close proximity, as well as the weird angles at which they reside.
It was eventually decided to pursue an origami-style design using 6mm round neodymium magnets of which we happen to have a ridiculous stockpile, courtesy of our favourite Eastern bazaar (the four-letter one starting with t and ending with u, though no doubt others will serve equally well, or badly, as in our experience.)
Some notes on the procurement of 6x3mm magnets
Because they consistently short-change (cheat) their customers (or at least this one), it is difficult to know what the exact dimensions of the delivered magnets will be: usually the desired 6mm diameter is spot-on, demonstrating that it is not a manufacturing tolerance issue. The thickness, on the other hand, is invariably significantly less than promised. When ordering 6x2mm round magnets, they rarely exceed 1.6mm (i.e. 20% thinner than promised), and you can consider yourself fortunate if your supposedly 6x3mm magnets are actually 2.5mm in thickness - on one occasion they even tried to fob us off again with the same 1.6mm thickness instead of 3mm; some returns and refunds resulted on these occasions, and to give them credit they did not argue, question, or refuse, but rather rapidly and efficiently addressed our complaints. The bottom line is that a design should preferably cater for wide variability in at least the thickness of the magnets.
The design - flat, with flexures and living hinges
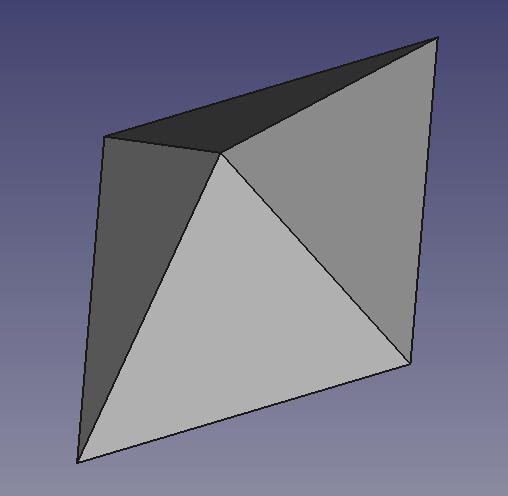
A rhombic dodecahedron is split into twelve pyramids, with the base of the pyramid being the rhombic face, and the sides extending to the origin (the very centre of the shape).
This shape was then virtually flattened into a butterfly:
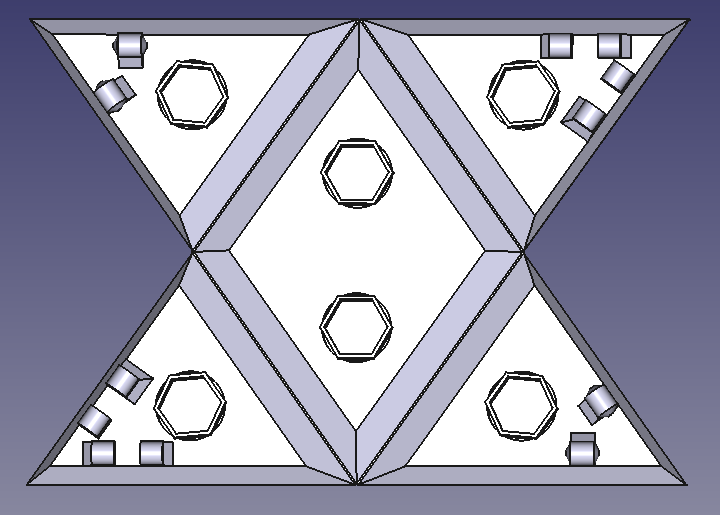
Hexagonal flexures line cavities into which the 6mm round Nd magnets can be pressed - any thickness up to at least 3mm will work. In general thicker magnets should be stronger (= better), but even the 1.6mm-thick magnets work acceptably well. Then the sides are folded up and clicked together courtesy of the latching mechanisms on each edge. The hinges consist of a single 0.2mm layer, resulting in a pleasingly sharp edge. It is surprisingly durable too - even though it is only required to survive one folding operation, it was found during iteration of the design that the pyramids can be assembled and opened back up repeatedly, with little or no apparent ill effect on the hinges. Removing the magnets is a horse of a different colour, though, so be sure to get it right first time. It is important that the magnets be mounted consistently - see the scheme below:
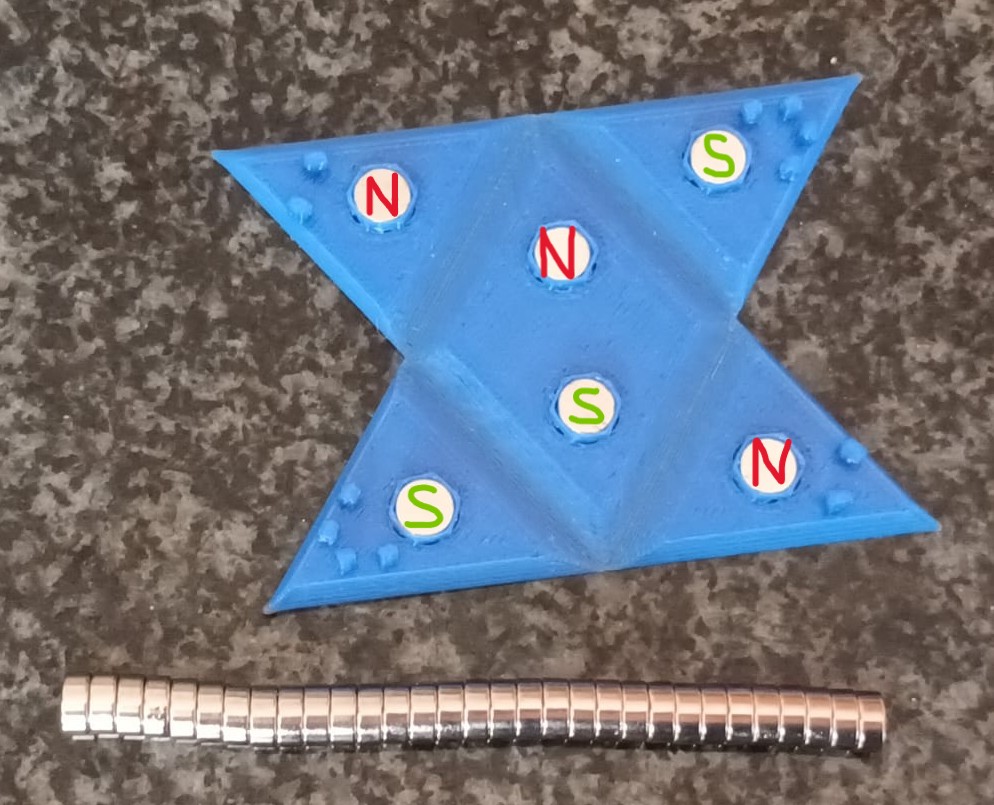
A magnetic compass can be used to identify the magnetic polarity - a magnetic north will attract the southern-pointing end of the compass and vice versa. After having ascertained this, the easiest way we have found is to leave one piece open/flat, with its magnets inserted correctly, and then using it as a reference for correct magnet orientation while assembling the rest of the pieces. Press the magnets firmly into place, then lift the triangle corners and click the edges together one by one. It should be a tight fit - we do not want it to open easily or accidentally. With all the outside faces having been printed flat on the print bed, the finish should be beautifully smooth.
Printing
Testing was done using mainly PETG, but it was found that PLA also works, somewhat surprisingly. Use 0.2mm layer height, especially for the first layer, as that also defines the hinges. Variable layer height may help to ensure the latches are cleanly formed, though 0.2mm throughout also works just fine. No brims or supports required, as intended.
To ensure that the printing lines do not accidentally align with one or more of the hinge lines, the first layer (bottom) fill pattern was set to Concentric. This also makes for a pretty outer finish. Alternatively the default monotonic (or rectilinear) fill can be used on the bottom layer, with the fill angle set to 90°, if the shape is oriented as shown in the project file.
The latches should be very tight to engage, as mentioned. Use both thumbs, if needed. However, if it really takes excessive force to mesh, or perhaps even breaks instead of engaging, you can back off the tiniest little bit using XY-size compensation in the slicer, to the tune of a few tens of microns at a time. So maybe first print one or two test units until you have dialed in your printer.
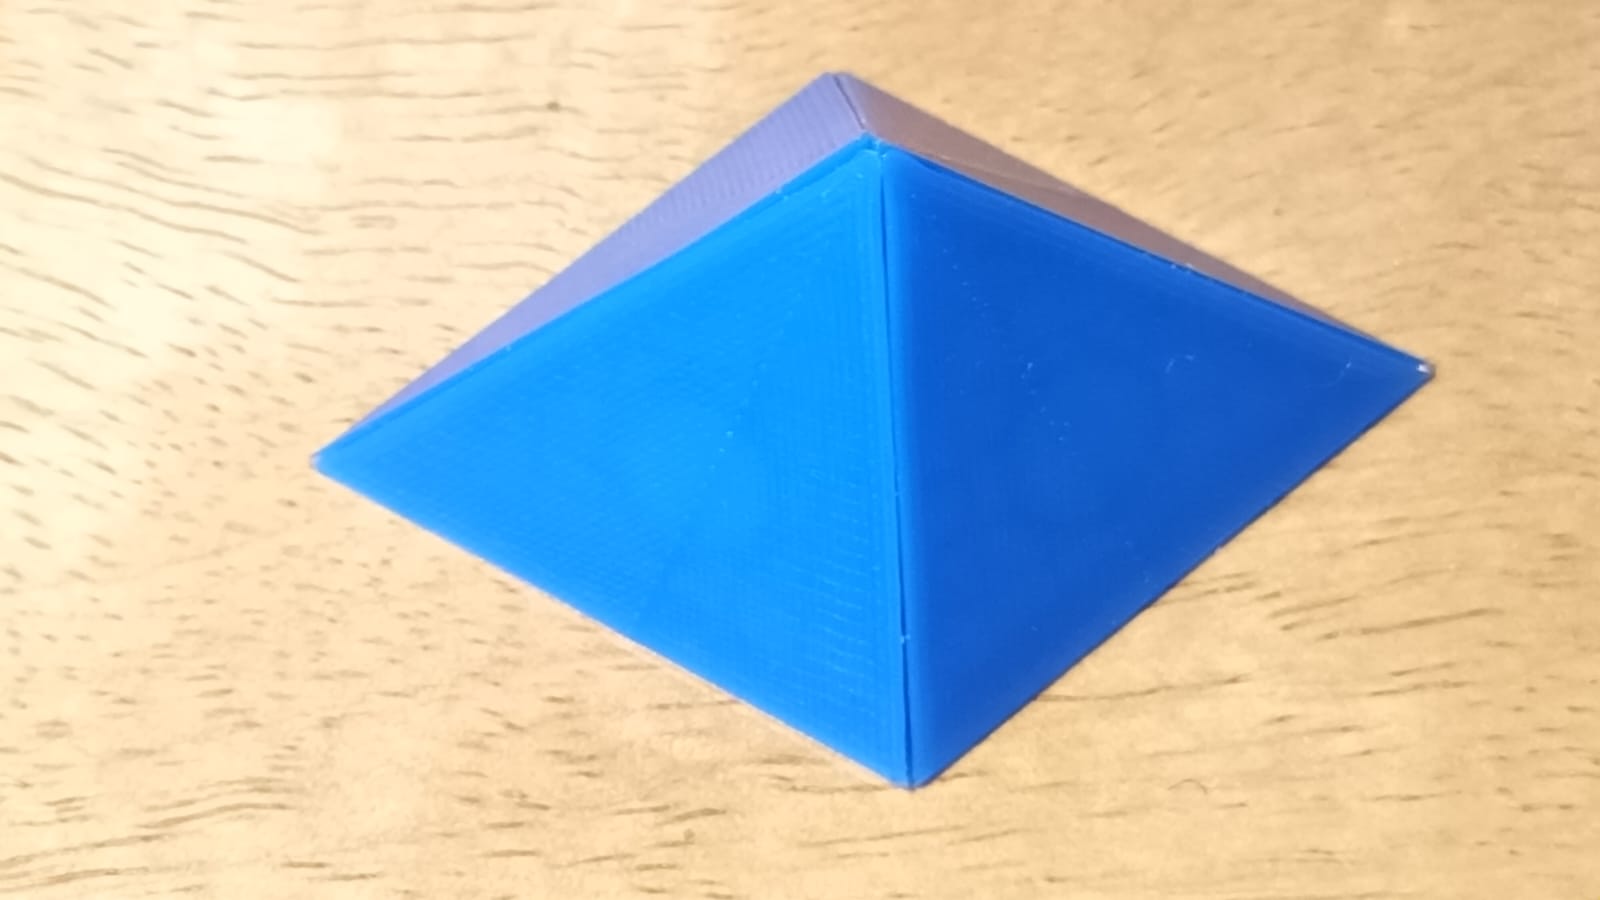
The sides should snap into place, with little or no gap on the edges, all of whom should be sharp and well-defined. If you really have to or want to open it again, a sharp knife edge can be inserted and used to pry it open. With luck it won't break. But no big deal if it does - being mostly hollow, each piece uses a mere 5g of material.