
Zipper slider replacement (standard)
Obliczymy ostateczną cenę na podstawie wybranego pliku. Sprawdzisz ją i zaakceptujesz przed płatnością.
Zapisane na tym urządzeniu.

Replacement parts for a (standard bale) zipper slider
- Ocena
- 5 / 5
- Polubienia
- 458
- Pobrania
- 922
- Wydruki
- 3
- Wyświetlenia
- 5171
- Oceny
- 2
Aktualizacja u źródła:
Informacje o modelu
- Źródło
- Printables
- Kategoria
- Mechanical Parts
- Licencja
- Creative Commons — Attribution — Noncommercial — Share Alike
==========================================================
UPDATE: I have released an improved version v3 which can be found here
==========================================================
3D printable replacement parts for a standard bale zipper. If you need a reverse bale zipper (with the u-shape on the bottom part of the slider), see my other design: Zipper slider replacement (reverse)
The slider can be attached to a zipper without unsewn ends.
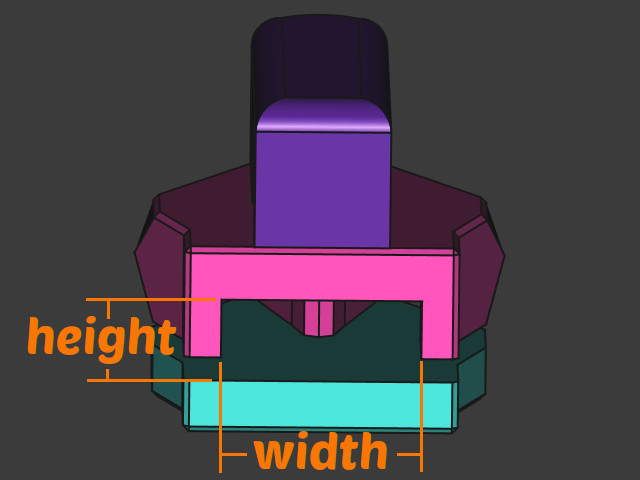
Dimensions
Slider is available in different dimensions
6.50 mm width, 2.40 mm height
6.80 mm width, 2.80 mm height
Print instruction
These are very tiny parts with a tight fit. You need a well tuned printer for this.
Can be printed with a standard 0.4 mm nozzle
Print at 0.2 mm layer height (model is designed this)
Use 5 top and 5 bottom layers
Print very slowly for more strength and accuracy. I suggest max 30mm/s
Assembly
Place the bottom part below the zipper and slide the top part on the bottom part on top of the zipper and while holding them together try closing the zipper. Having a part of the zipper closed makes it easier for final assembly with glue.
If the test fit worked good, add some glue to the connecting parts of the bottom and top parts of the slider and also the handle. Watch out that you do not get any glue on the zipper itself. Place the parts again around the zipper and hold them in place. Place the zipper handle on top, but don't forget to insert the puller first. Hold everything firmly together and let the glue dry.
Tip: apply some silicone spray for smoother movement of the zipper.