
Sealing (sorta) the Sovol Zero Electronics Bay
Obliczymy ostateczną cenę na podstawie wybranego pliku. Sprawdzisz ją i zaakceptujesz przed płatnością.
Zapisane na tym urządzeniu.

The Sovol Zero's electronics bay has a lot of openings to the chamber. Let's plug some of those.
- Ocena
- 5 / 5
- Polubienia
- 15
- Pobrania
- 83
- Wydruki
- 1
- Wyświetlenia
- 690
- Oceny
- 1
Aktualizacja u źródła:
Informacje o modelu
- Źródło
- Printables
- Kategoria
- Other Printer Parts & Upgrades
- Licencja
- Creative Commons — Attribution — Noncommercial — Share Alike
The electronics bay on the Sovol Zero is separated from the chamber, but not terribly well. There's a bunch of places where air can slip past, which means if you're heating your chamber for ABS/ASA or other warp-prone materials, you're also heating your electronics unnecessarily. The electronics bay is also open to outside air for cooling, which means you're losing heating efficiency.
These models try to address some of this. I might add to this over time; if you'd like to play along and hunt for leaks yourself, grab the Sovol Zero CAD files and just take a look around the back panel. The goal here isn't a perfect seal; in fact, that'd probably create more problems than it would solve. I'm just trying to contain the heat where it belongs, and keep it away from where it doesn't, as much as is practical.
Pick a filament appropriate to your chamber temperatures. If you're bothering with any of this, you probably have an idea of how hot things will be in there; I leave it as an exercise to the reader to work out an appropriate choice here.
Some of these parts are a very tight fit, because they're meant to friction-fit into position; if your parts don't fit where they belong, don't force them; you're likely to break something. Instead, take this as an opportunity to calibrate shrinkage for the filament you're using.
Electronics Bay Upper Cover
The entire upper part of the electronics bay opens up into the chamber. Worse, the fan that blows over the mainboard is angled such that the easiest place to draw air from is going to be that giant hole overhead.
(2026 edit: a great alternative option for this part is one that solves several problems at once. @Segan Designs put together a handy model that redirects the inlet of the auxiliary sheet fan from the back panel of the printer to the opening at the top of the electronics bay into the chamber, which gets rid of two sources of ambient air leading into the chamber (the fan and the electronics bay opening), and gives you a convenient way to circulate air in the chamber for pre-heating. At the time of this writing, the version that blocks off most of the electronics bay is only at OnShape; the version on Printables is a narrower version that would require some additional blocking/insulation for the same effect.)
This model comes in two parts: a lower support that friction-fits over the upper lip of the plastic electronics bay panel, and an upper cover that attaches to it. The reason for the separation is printability; there's a bunch of small extrusions on the support side for clipping to the panel, and the cover piece projects in the opposite direction, so the alternative to this was going to be a lot of support material wasted, or printing the whole thing vertically with questionable supports. (I've provided the step for the whole thing, if you'd like to combine the two pieces and try your hand at it.)
I suggest printing the lower support at a 45° angle along the corner edge, the way the STL is oriented; the reason for this is to improve strength at the tiny joints between the extrusions and the back plate (if you print it along the flat back plate, it'll print great…and then those little extrusions on the side will snap off the first chance they get). You shouldn't need supports, but I won't stop you if you want to add them for the holes. Orient corner-to-corner so it fits on the build plate.
For the upper cover, if you have access to a printer that isn't the Zero, print it vertically, for the same reason as above: it'll improve the strength of the corner. Otherwise, just place it down on the back side with the holes facing up, and orient corner-to-corner as above.
The lower support takes three M3x4x5 heatset inserts; attach the support to the cover with M3x12 SHCS. Once assembled, remove the rear steel panel, and just slide the cover into place. You'll probably have to wiggle it up and down a bit to get it to slip over the enclosure plastic; try to support the enclosure panel from the other side with your free hand.
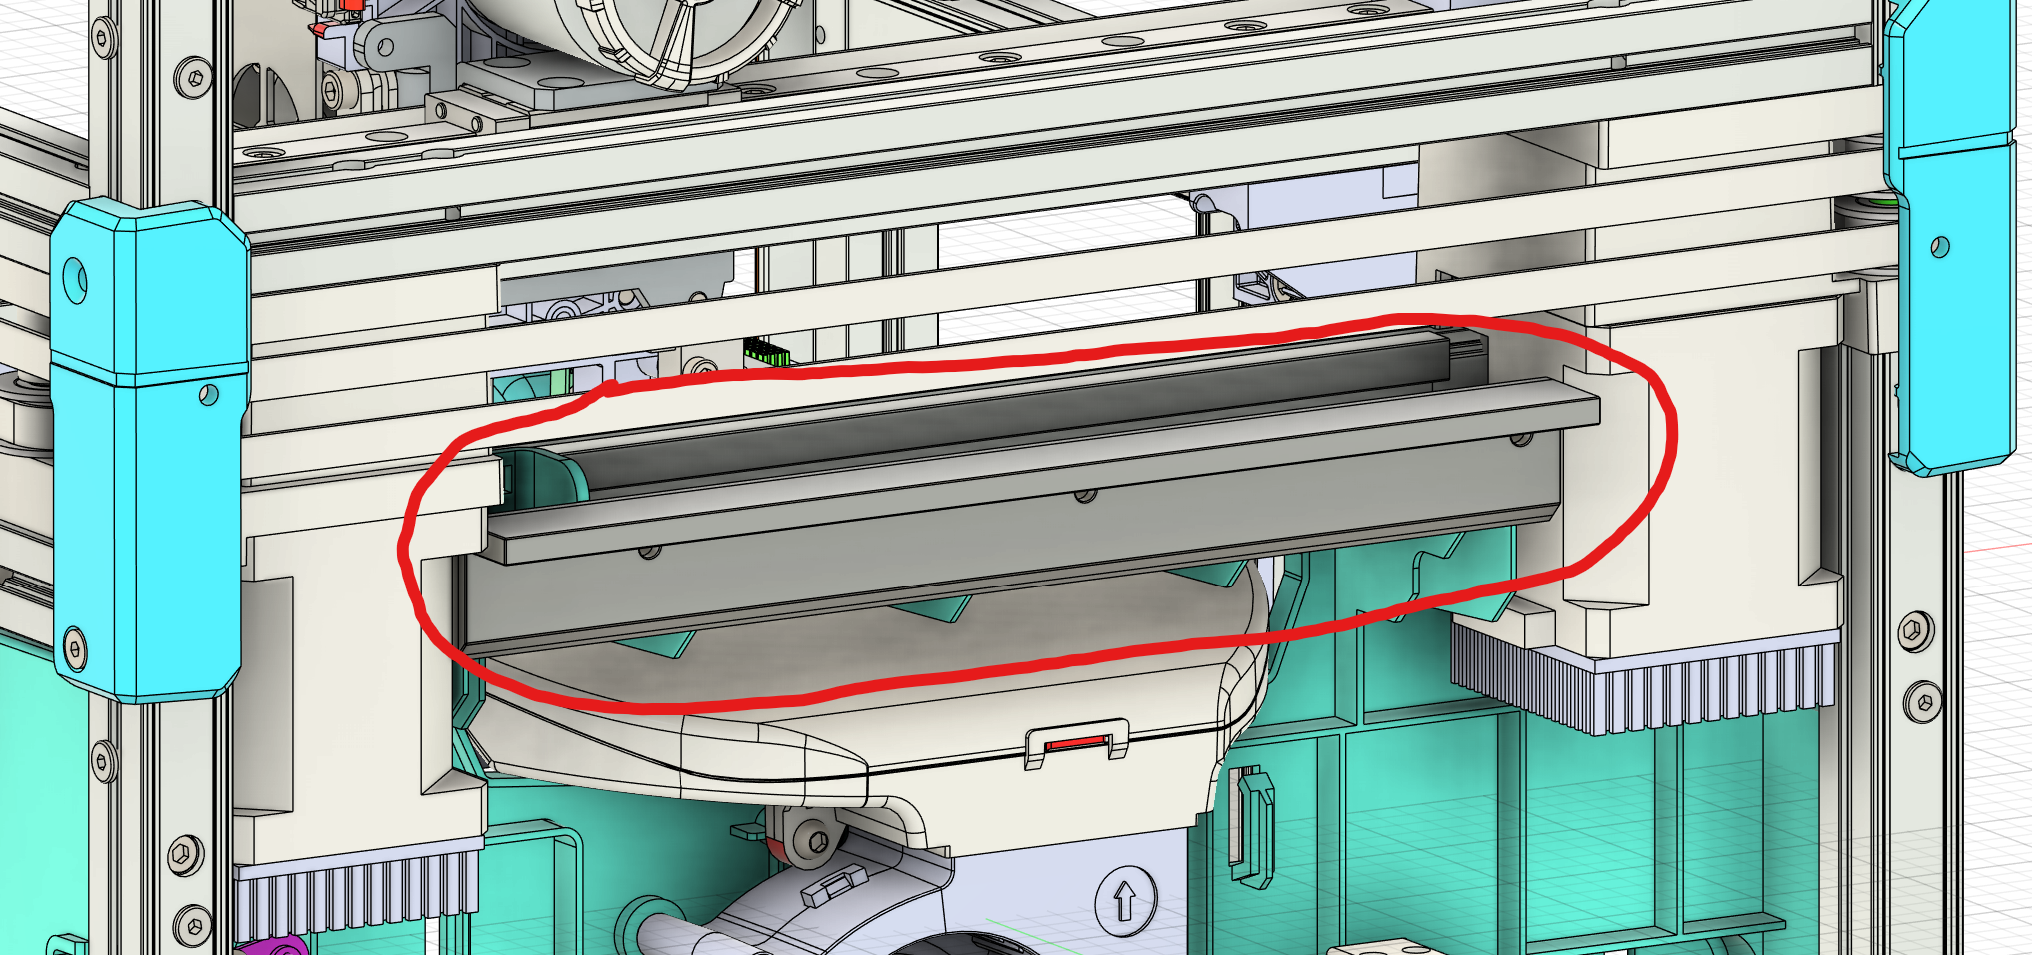
Lower Panel Plug
Plugs the (unused cable access? I'd love to know what this was originally meant for…) hole at the bottom of the rear panel of the Sovol Zero, leading to the electronics bay just below the mainboard. Not much else to say about it: clip it in and you're done. It's a very snug fit, and kind of a pain to get out once it's in there.
Print it with one of the 45° long edges face down on the build plate, and the rest angled up, without supports. You might need a brim around it to keep it steady, but it's tiny and prints quickly. Note that if you print it with the flat face down, the little clip-in ears will almost certainly break off on you when you try to install it, depending on what filament you used.
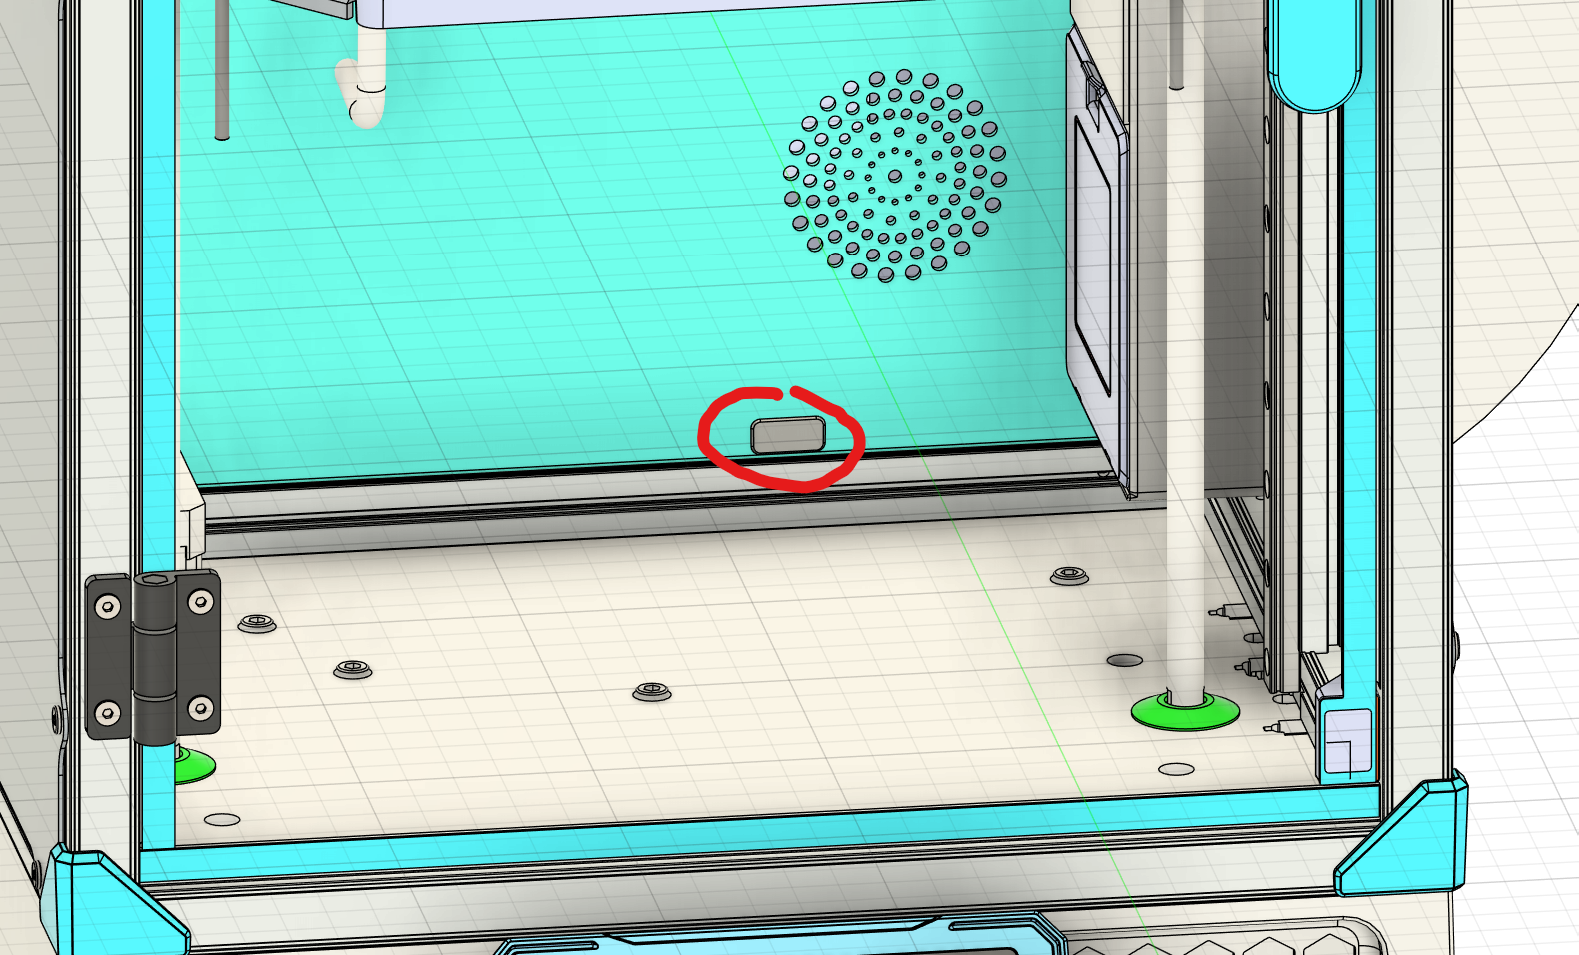
Middle Panel Plugs
There's a pair of holes that appear to have been meant for cable management in the electronics bay about half-way up the rear panel, with a clip behind them. Print two of these; both holes are the same size. Just like above, this can be a snug fit. And just like above, for the same reason, try printing it at a 45° angle, this time on the short edge (without support), although it's a lot less necessary with this one (the clips are just little stumps for this piece, so there's a lot less worry about the tabs breaking off)

Not Blocked
I haven't blocked off the ventilation behind the mainboard, mostly because there isn't a great way to attach anything there; press-in clips like with the lower hole would probably work, but would be fragile. Cover it with heat tape (or PIR, see below) if it really bugs you.
I haven't blocked off the exhaust because there's too much stuff in the way between the outside and the inside (fan, charcoal, encasement) to make it worth accidentally choking the filtration fan because you forgot to open it up. (The stock blockoff plate is already enough of a pain to remember about, and don't get me started on the fan geometry for filtration when the blockoff is in use...)
I haven't made a block-off for the aux fan because the geometry is a pain, and just like the exhaust, there's little to be gained and a chance of accidentally forgetting to unblock it. The opening around the fan shroud is probably a better candidate, but pliable high-temp gasket material of some kind is almost certainly a better choice here.
There are small gaps along the left and right side of the main electronics bay panel; as above, it's probably a good candidate for some sort of flexible high-temp gasket material.
Other Thoughts
Like I mentioned above, some sort of gasket around the aux fan is probably a good idea. Cork /n-buna gaskets between the steel panels and aluminum extrusions (rather than the foam tape Sovol used) would be simple and cheap to add without changing the geometry of anything important, and give a bit of thermal disconnection between the two (and probably lower noise a bit). Just be careful around the belt routing.
If you're going to all this trouble, you might also look into insulating the whole chamber properly with PIR (polyisocyanurate, available in quite a few thicknesses at hardware and builder supply stores), or using other appropriate materials. There's 15mm (extrusion depth) of space on the sides, top, and above the electronics bay, tons of room under the bed, and a little bit of room in front of the back panel, at the very least enough room for reflective bubblewrap or heat tape. DON'T USE EPS OR XPS FOAM or anything not rated for your chamber temperatures, and for the love of god don't put flammable foams in your chamber. Don't burn your house down for a spicy printer.
Changelog
2025-08-01 - Added the middle panel plugs, revised the lower panel plug slightly.