
3D Printed Yarn Winder – 100% Printable
Obliczymy ostateczną cenę na podstawie wybranego pliku. Sprawdzisz ją i zaakceptujesz przed płatnością.
Zapisane na tym urządzeniu.

Organize yarn and cords with this fully 3D printed winder – simple design, no extra parts required.
- Ocena
- 4,2 / 5
- Polubienia
- 457
- Pobrania
- 711
- Wydruki
- 5
- Wyświetlenia
- 8769
- Oceny
- 5
Aktualizacja u źródła:
Informacje o modelu
- Źródło
- Printables
- Kategoria
- Tools
- Licencja
- Creative Commons — Attribution — Noncommercial — Share Alike
Summary
This is a 100% printable yarn winder. It allows you to wind individual threads into balls easily, quickly and without any problems.
Key Features
- Fully 3D printable, requires no screws, bearings, rubber bands or glue
- Fast yarn winding with a 1 to 3.25 transmission ratio
- Easy yarn removal from the machine thanks to open guide spiral, no cutting required
- Print in place rotary handle, allows comfortable turning
New Version Available
I have released an improved, fully PLA-printable gear-driven version of this yarn winder.
It includes all upgrades from this model plus a redesigned mechanism for easier printing and smoother operation.
New Version - only PLA, 100% printable
Development tree
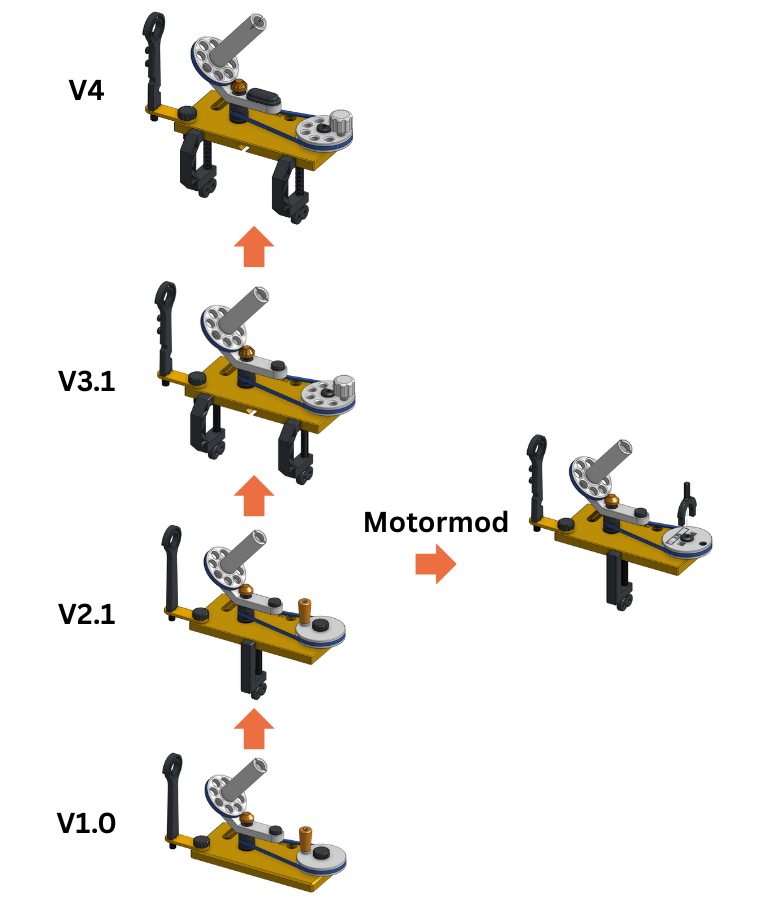
Changelog
| Changes | |
| V1.0 | Initial Release  |
| V2.0 | The Clamp Update
 |
| V2.1 | Service-Update
|
| V3.0 | The Tension and Motor Mod Update 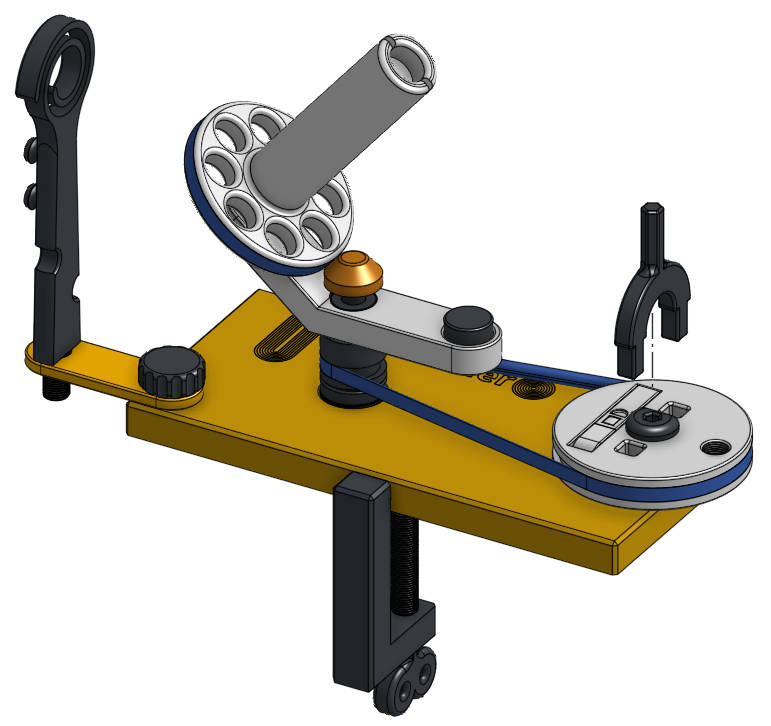
|
| V3.1 | Service-Update 
|
| V4.0 | Thread-Update 
|
Parts that have been superseded can be found in the ‘Older Version Parts’ folder.
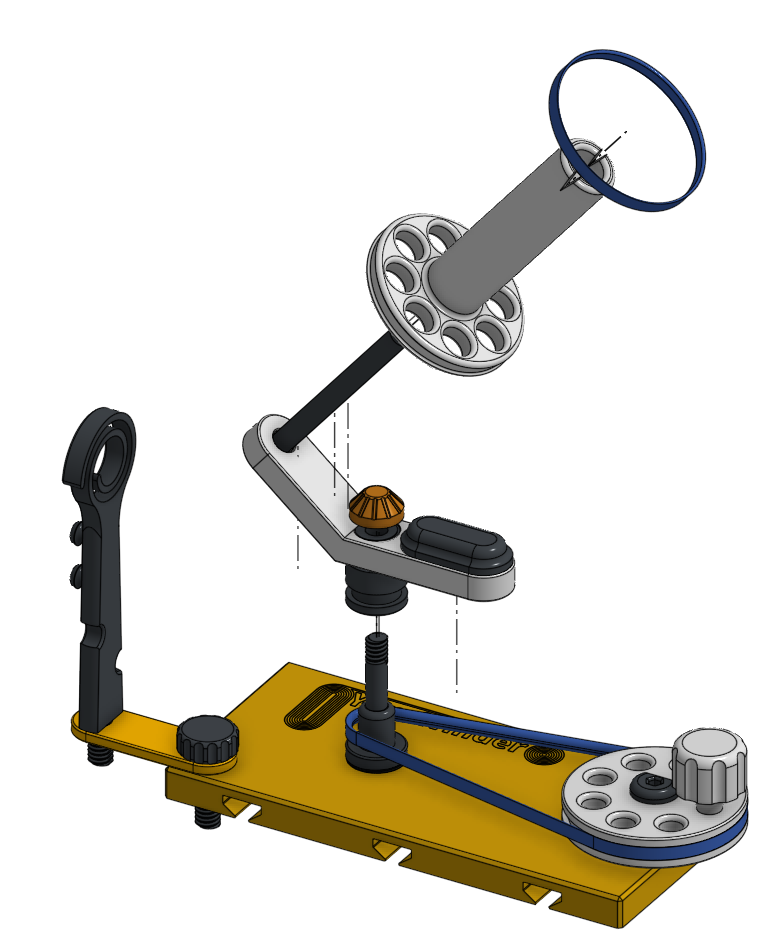
Assembly
Tip: Lightly sanding and lubricating the rotating parts can improve smoothness.
Step 1 – Spinning Unit Preparation
- Screw the spinning wheel screw into the spinning centre.
- Place the weight into the recess.
- Screw the drive screw into the spinning centre.

Step 2 – Plate Assembly
- Attach the outrigger to the plate using the outrigger bolt.
- Screw the yarn guide into the outrigger.
- Screw the axis into the plate.
- Position the drive wheel spacer in the plate recess and mount the drive wheel on top.
- Fasten the drive wheel using the drive wheel screw.

Step 3 – Connecting Drive System and Spinning Unit
- Place the drive belt into the drive wheel and lay it ready around the axis.
- Slide the fully assembled spinning unit onto the axis and secure it with the axis end.
- Stretch the ring onto the spinning wheel.
- Place the spinning wheel onto the spinning wheel screw.
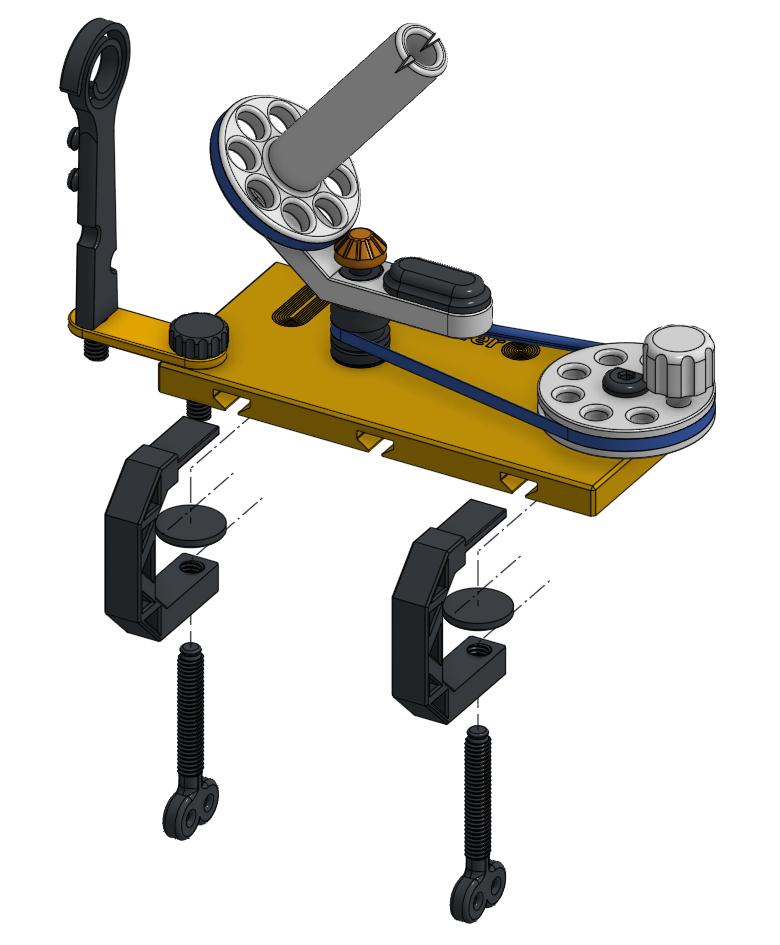
Step 4 – Table Clamps
- For as many table clamps as needed, screw the clamping screw through the clamp mount.
- Push the foot onto the joint of the clamping screw.
- Insert the clamp mount into the plate wherever required and tighten to secure.
Motor-Mod
The motor mod allows the yarn winder to be operated with a cordless screwdriver or similar device. The modified drive wheel has an emergency turning handle so that the wheel can also be operated without a motor. When not in use, the emergency turning handle folds seamlessly into the wheel.
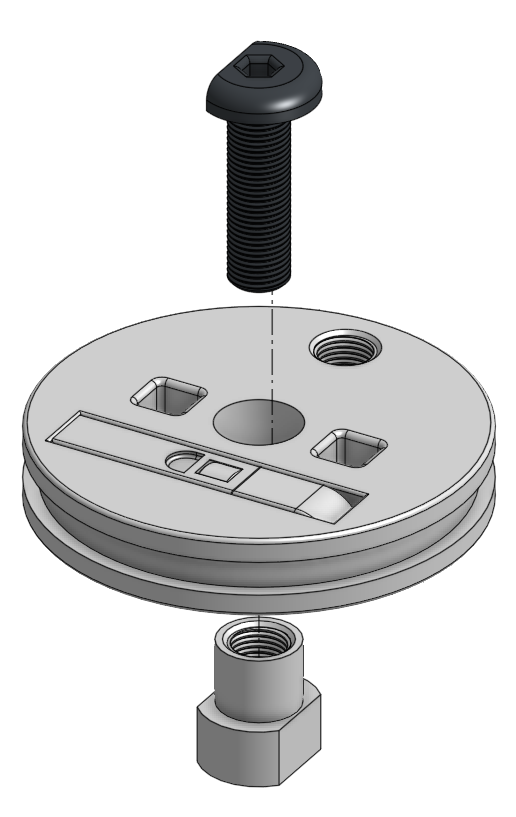
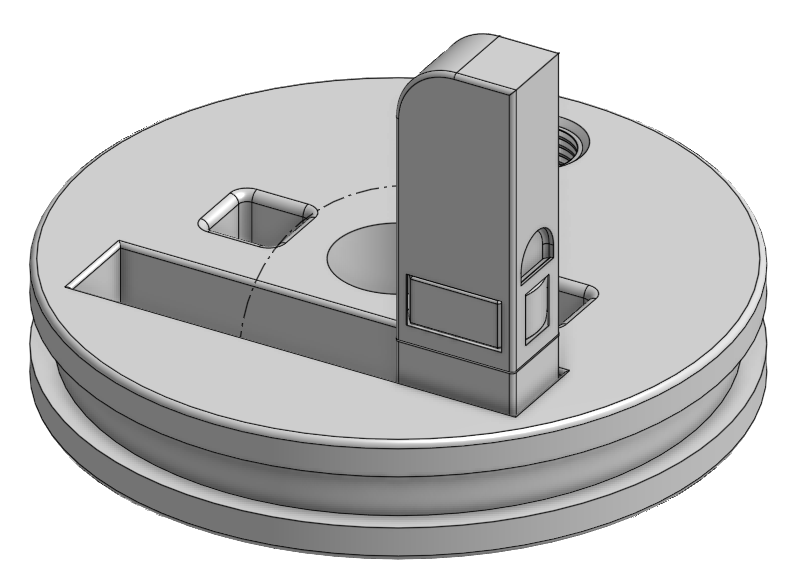
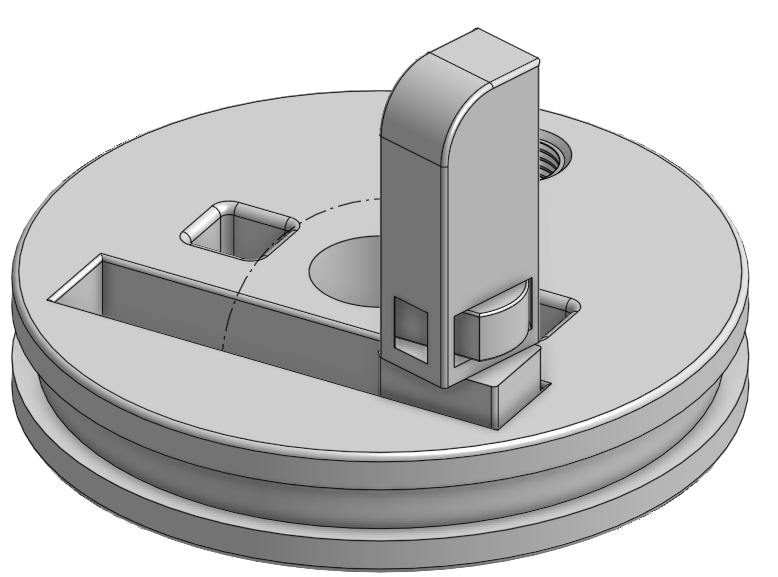

Motor Mod README!
The motor mod should be used with caution. Since the parts are all PLA or PETG, friction heat can cause the parts to melt if operated too quickly.
Done :)


Leave a comment if you like the project or leave a make if you made it too :) have fun winding
Prototype material list
- TPU RECREUS FILAFLEX 70A Navy Blue
- PETG Azure film PETG Black
- PLA 3DJAKE ecoPLA Wood Dark Brown, 3DJAKE matte PLA White, R3D Silk Copper