Can Clicker One
Obliczymy ostateczną cenę na podstawie wybranego pliku. Sprawdzisz ją i zaakceptujesz przed płatnością.
Zapisane na tym urządzeniu.

🥫
- Ocena
- 5 / 5
- Polubienia
- 81
- Pobrania
- 435
- Wydruki
- 1
- Wyświetlenia
- 3917
- Oceny
- 1
Aktualizacja u źródła:
Informacje o modelu
- Źródło
- Printables
- Kategoria
- Office
- Licencja
- Creative Commons — Attribution — Noncommercial — NoDerivatives
The hinge (pin) is made of filament. The keyboard switch used is a Cherry MX (in this case, a replica Outemu Blue switch).
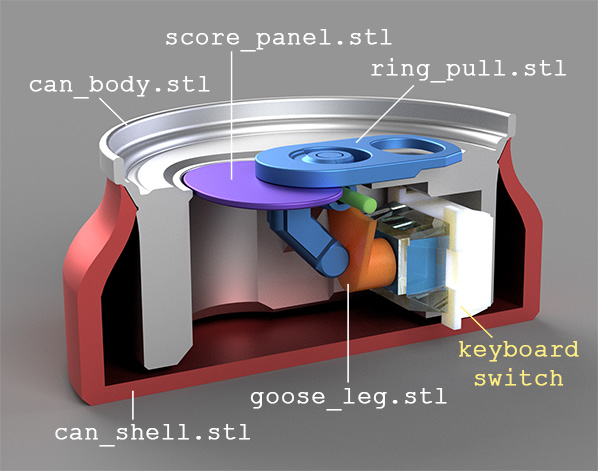
For printing the can body, silver silk PLA works perfectly.
However, keep in mind that you may encounter silk filament which may have poor interlayer adhesion.
All parts are held together by friction, but I think the ring pull and score panel can be glued together. The score panel is an optional part and can be omitted. No Support ✅
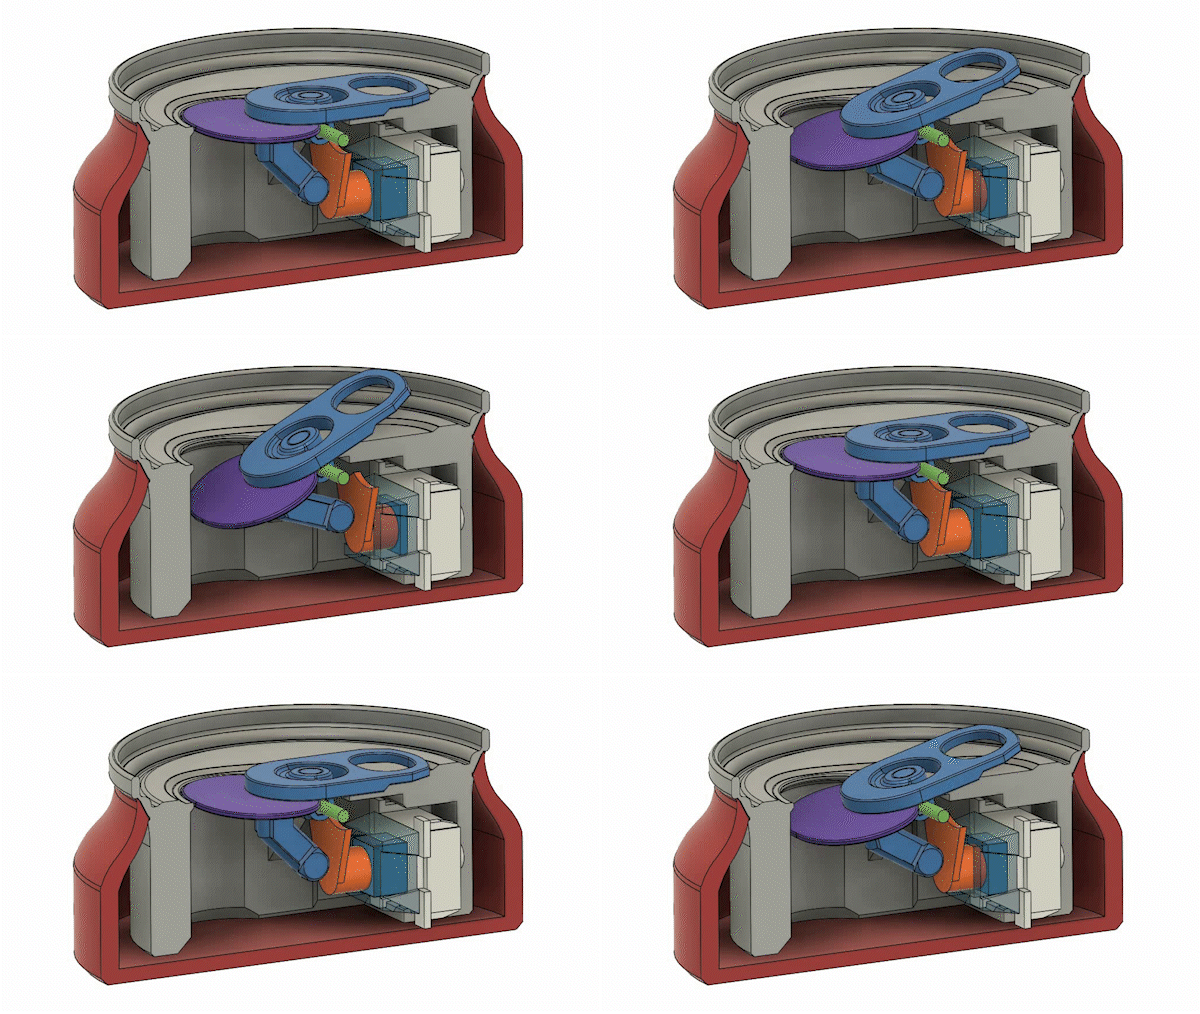
Assembly process:
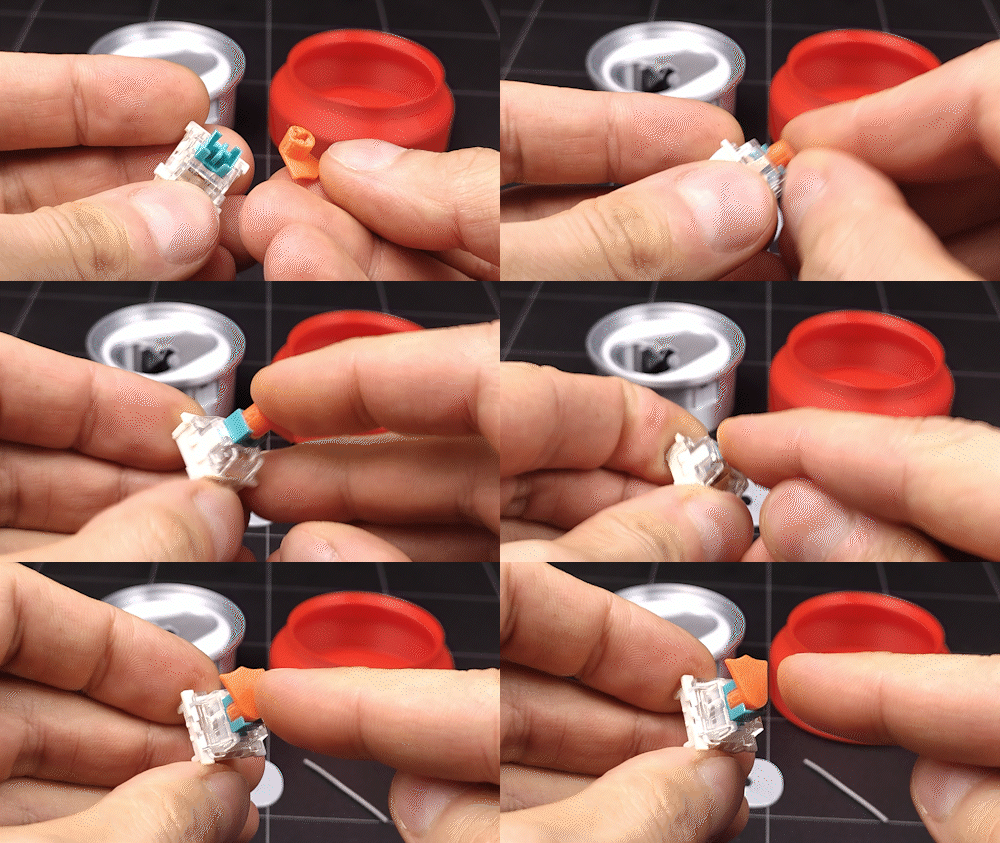
Insert the goose leg into the switch 🦆.
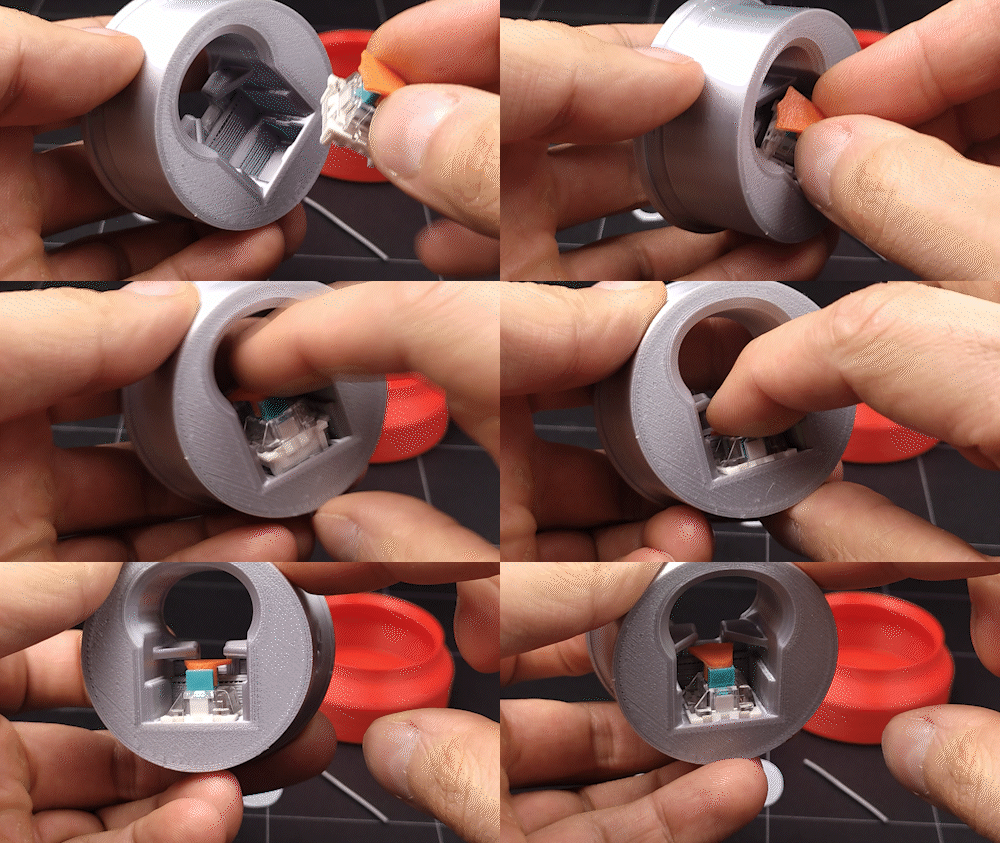
Install the switch into the corresponding slot, with the foot facing upward.
Place the score panel into the ring pull (optional).
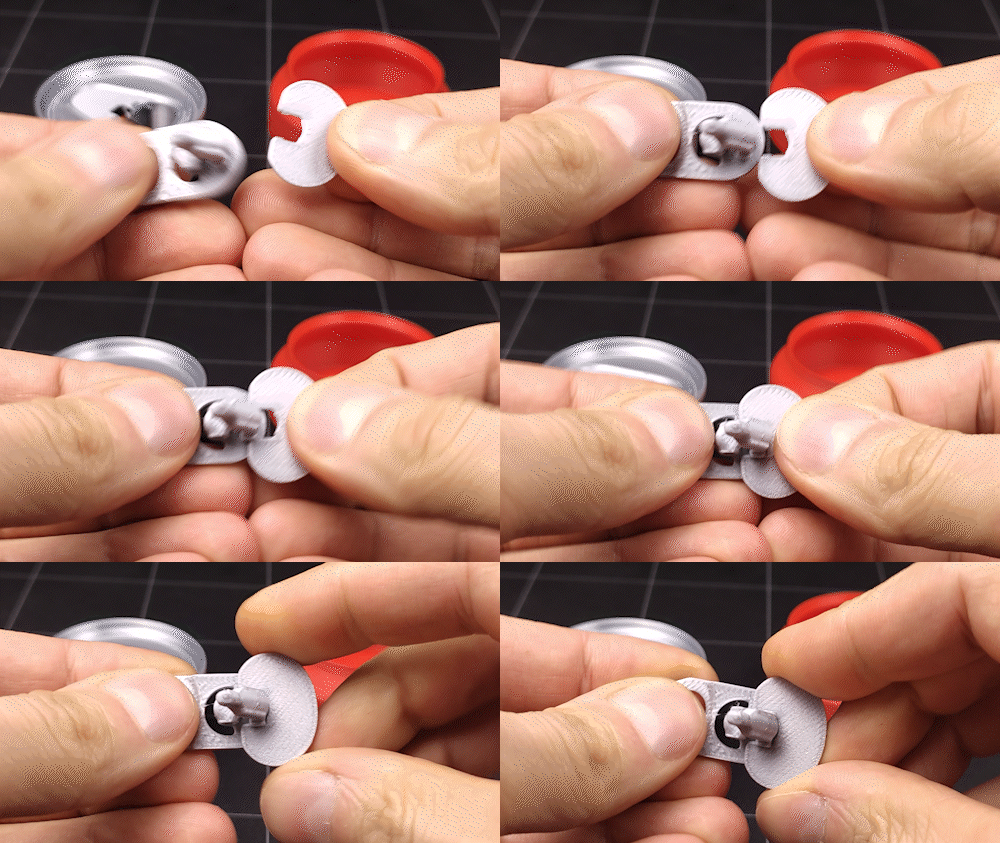
While holding the ring pull, insert the filament through the hole until it stops.
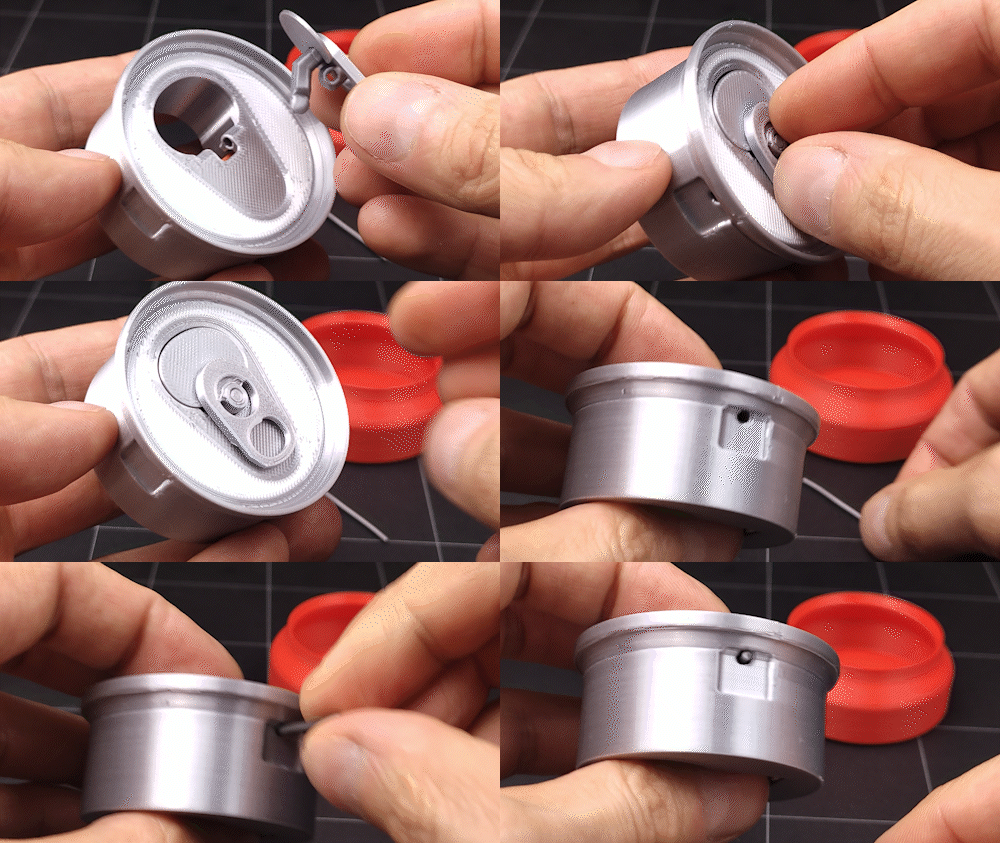
Adjust the filament length on the spot - leave a 2mm margin so it can be removed with side cutters if needed (approximate length: 36mm).
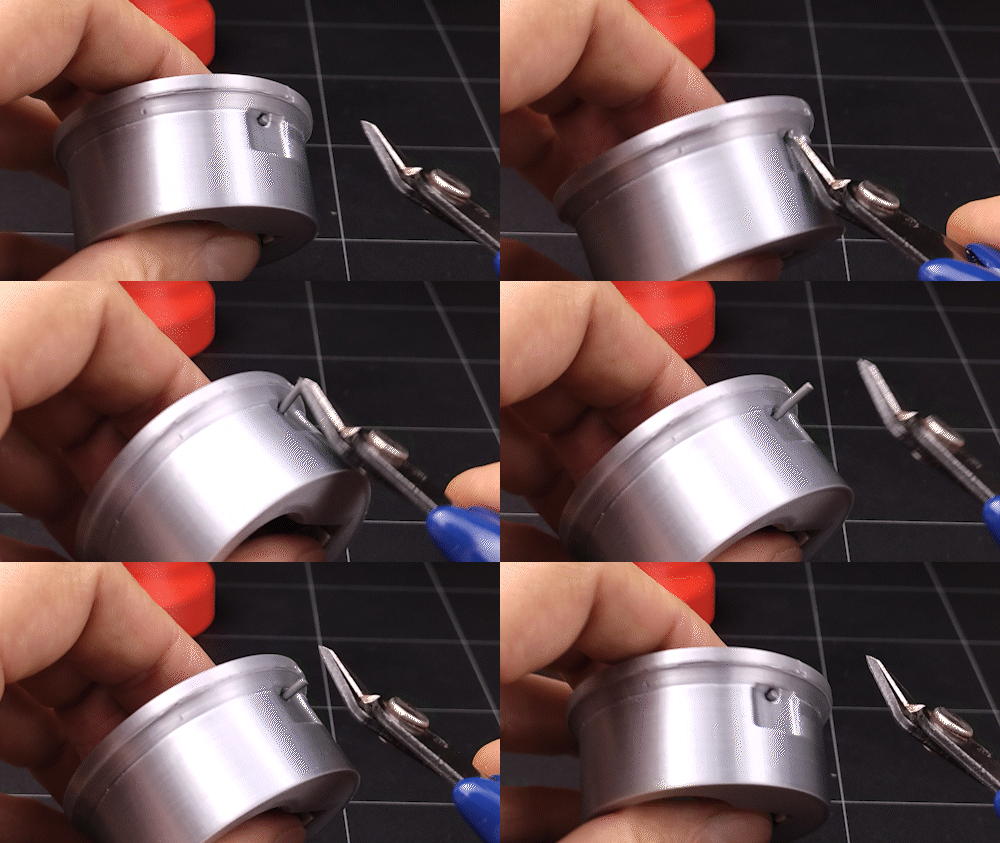
The ring pull should rotate freely on the filament. To prevent any jamming, you can use silicone lubricant, apply it to the contact points of the plastic parts.
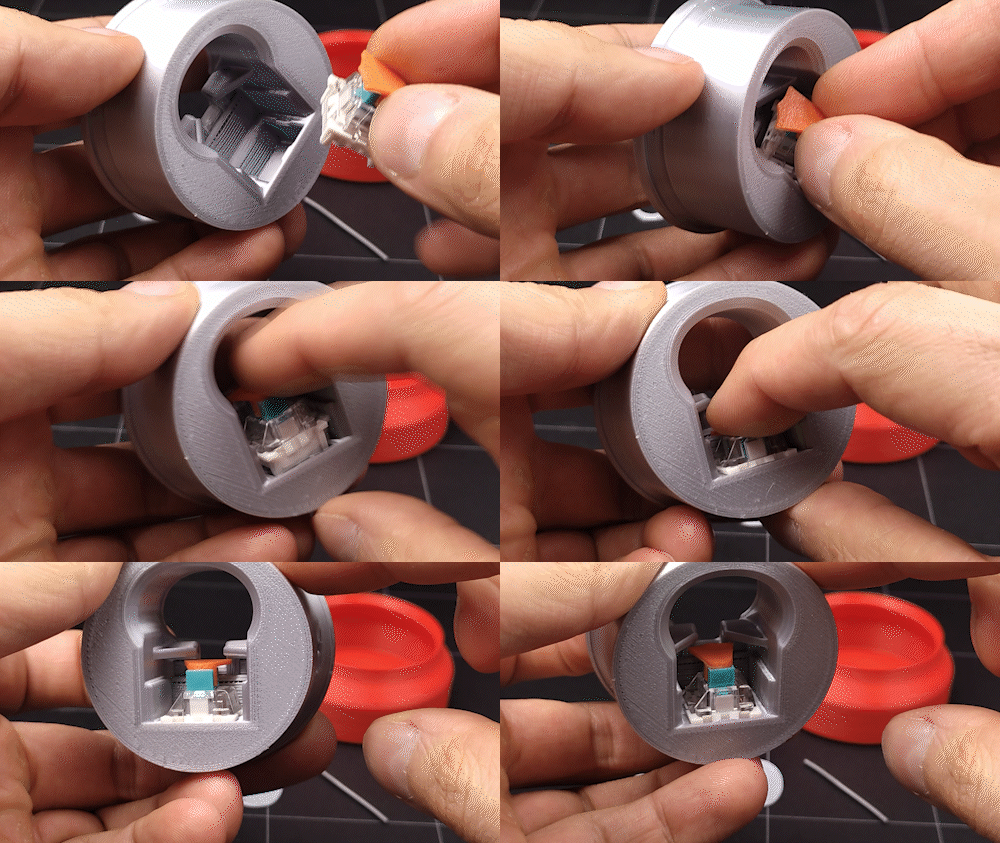
Insert the can body into the can shell.
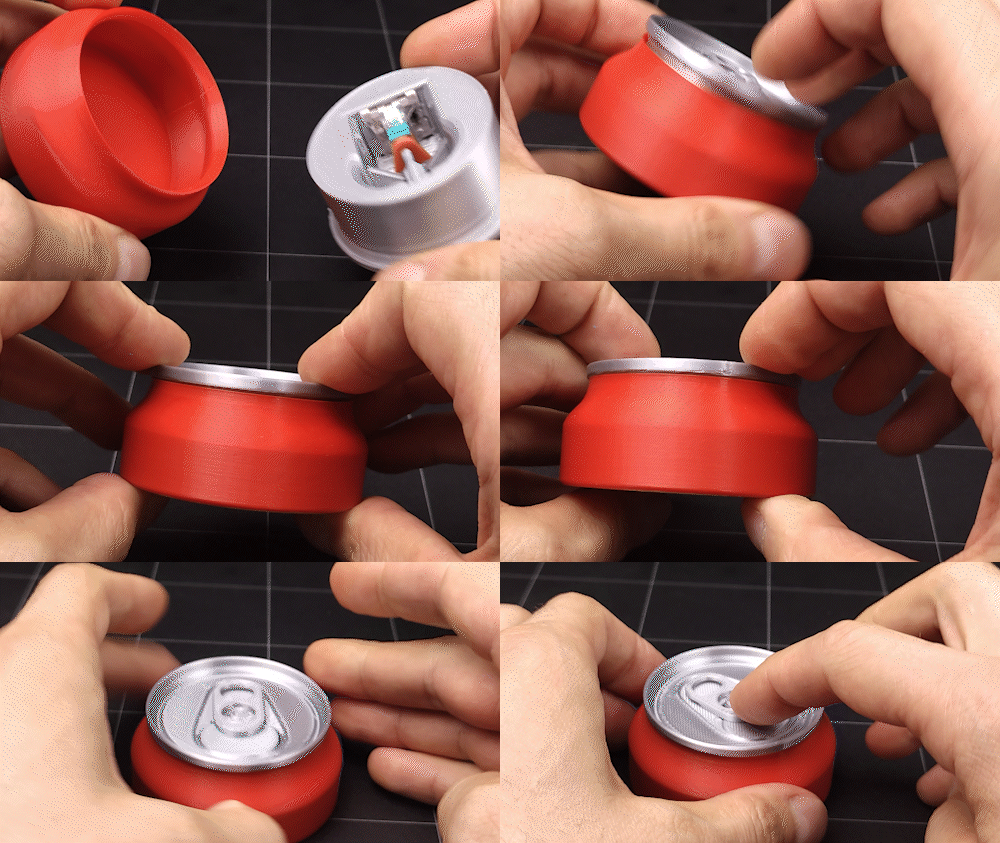
Done! 🥳
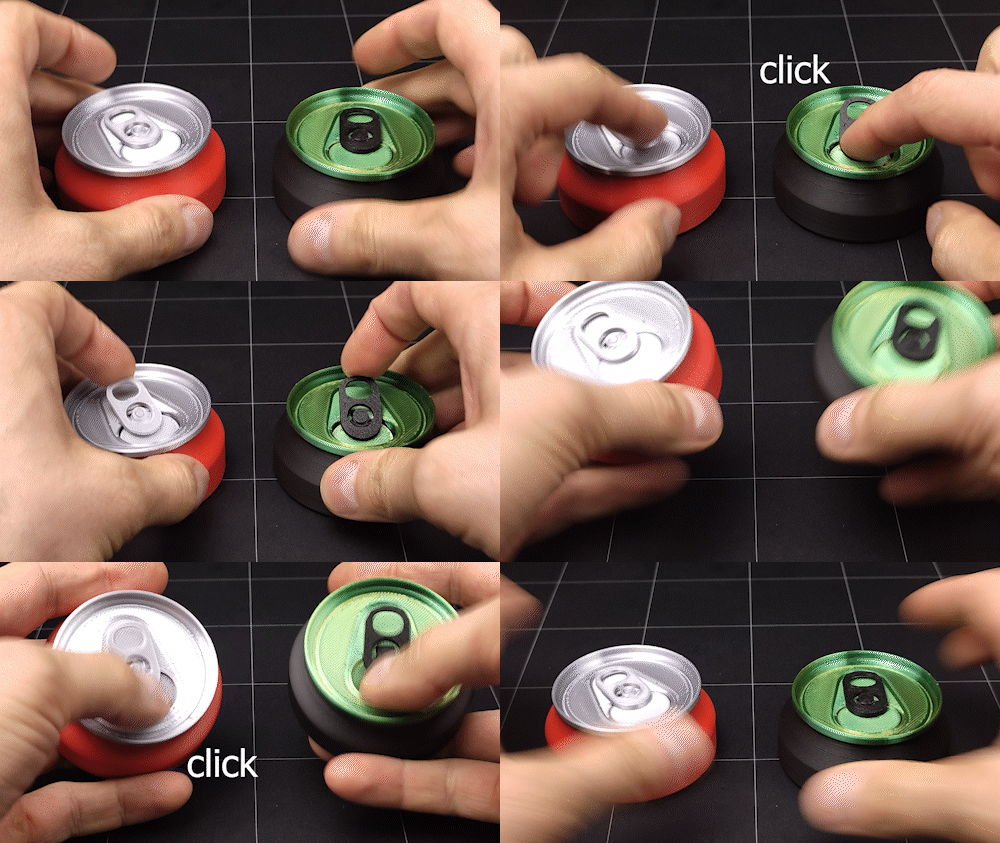
🥫🥫🥫
©Personal use only 💀
👉 Check My Patreon and Boosty 👈
Join my Telegram! ⭐💬
Here 👇 you can support me.