
Midea Porta Split Shutter hose pass-through
Obliczymy ostateczną cenę na podstawie wybranego pliku. Sprawdzisz ją i zaakceptujesz przed płatnością.
Zapisane na tym urządzeniu.

This modular system allows to close the gap below the shutter when passing through the hose of the Midea Porta Split
- Ocena
- 0 / 5
- Polubienia
- 4
- Pobrania
- 29
- Wydruki
- 0
- Wyświetlenia
- 747
- Oceny
- 0
Aktualizacja u źródła:
Informacje o modelu
- Źródło
- Printables
- Kategoria
- Other House Equipment
- Licencja
- Creative Commons — Attribution — Share Alike
The intention creating this modular system was to close the gap below the shutter when guiding the hose of the portable split air conditioner out of the window in order to limit the air exchange through the open window. The assembled system is to be installed in the guide rails of the shutter which give it stability (thickness 15mm; for assembly leave one segment out until it is put in position and slide it then in).
The system was designed for Midea Porta Split but should be compatible with other systems unless the hose exceeds dimensions of 50x90mm.
The whole system consists of 5 or more parts depending on the size of your print bed and the width of your window.
You need:
1x END_SEGMENT_1
1x END_SEGMENT_2
1x POCKET_BRIDGE
at least 1x MIDDLE_SEGMENT_XXX_POCKET (where the hose is passed through)
at least 1x MIDDLE_SEGMENT (without pocket)
1x DUMMY_PLATE (has to be adjusted in slicer with desired holes)
The Segments are just slided into each other using tongue and groove - the shape of the tongue should allow for print tolerances and still allow good fit. There is a defined clearance between the parts of 0,2mm in the design.
The segments are combined to fit your window width (multiple combinations might be possible depending on the size of your print bed and whether you prefer less longer or more shorter segments) - you should keep some clearance ~5mm:
e.g. width 84mm:
1x MIDDLE_SEGMENT_250_POCKET
2x MIDDLE_SEGMENT_200
1x END_SEGMENT_1_065
1x END_SEGMENT_2_120
e.g. width 104mm (Variant 1):
1x MIDDLE_SEGMENT_250_POCKET
3x MIDDLE_SEGMENT_200
1x END_SEGMENT_1_065
1x END_SEGMENT_2_120
e.g. width 104mm (Variant 2):
1x MIDDLE_SEGMENT_250_POCKET
6x MIDDLE_SEGMENT_100
1x END_SEGMENT_1_065
1x END_SEGMENT_2_120
Printing:
All parts are orientated (upwards standing) and can be loaded directly into the slicer. By default the system has a height of 200mm - if you want to have less height, simply cut of the lower end of the segments.
Layer height: 0,2mm (only required for pocket and pocket bridge - can be increased for other parts)
Material: at least PETG or any UV and weather resistant material (there will be no big load on the parts)
Supports: no
Infill: 5% with Adaptive cubic (but can be adjusted to your preference)
Depending on your bed adhesion you can add small cylinders (Ø10, 0,2mm height) to the corners/ends to enhance adhesion
2 Perimeters
3 Bottom layers
4 Top layers
Hose pass-thrugh (pocket):
The pocket has an additional groove which can hold a specific adapter to prevent even more exchange or can be used as it is. In order for the hose not to slip out there is the POCKET_BRIDGE which will close the pocket and keep the hose in position.
For the specific adapter you can use the DUMMY_PLATE and add specific holes to is in your slicer. In the end, just cut it into two parts to be able to mount.
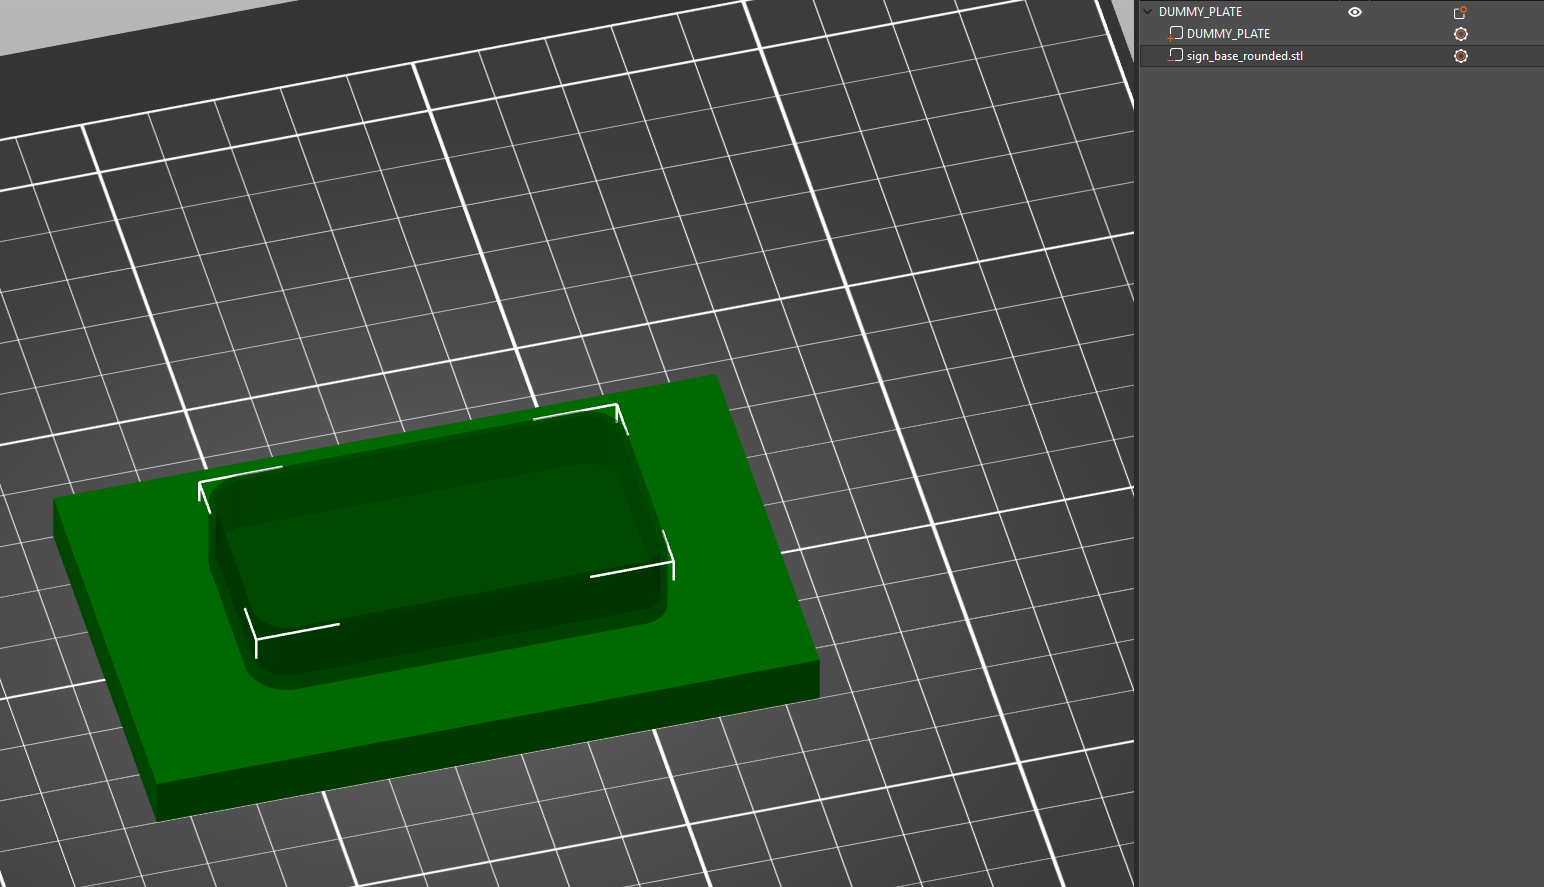
Load DUMMY_PLATE to slicer and add negative volume with the desired shape
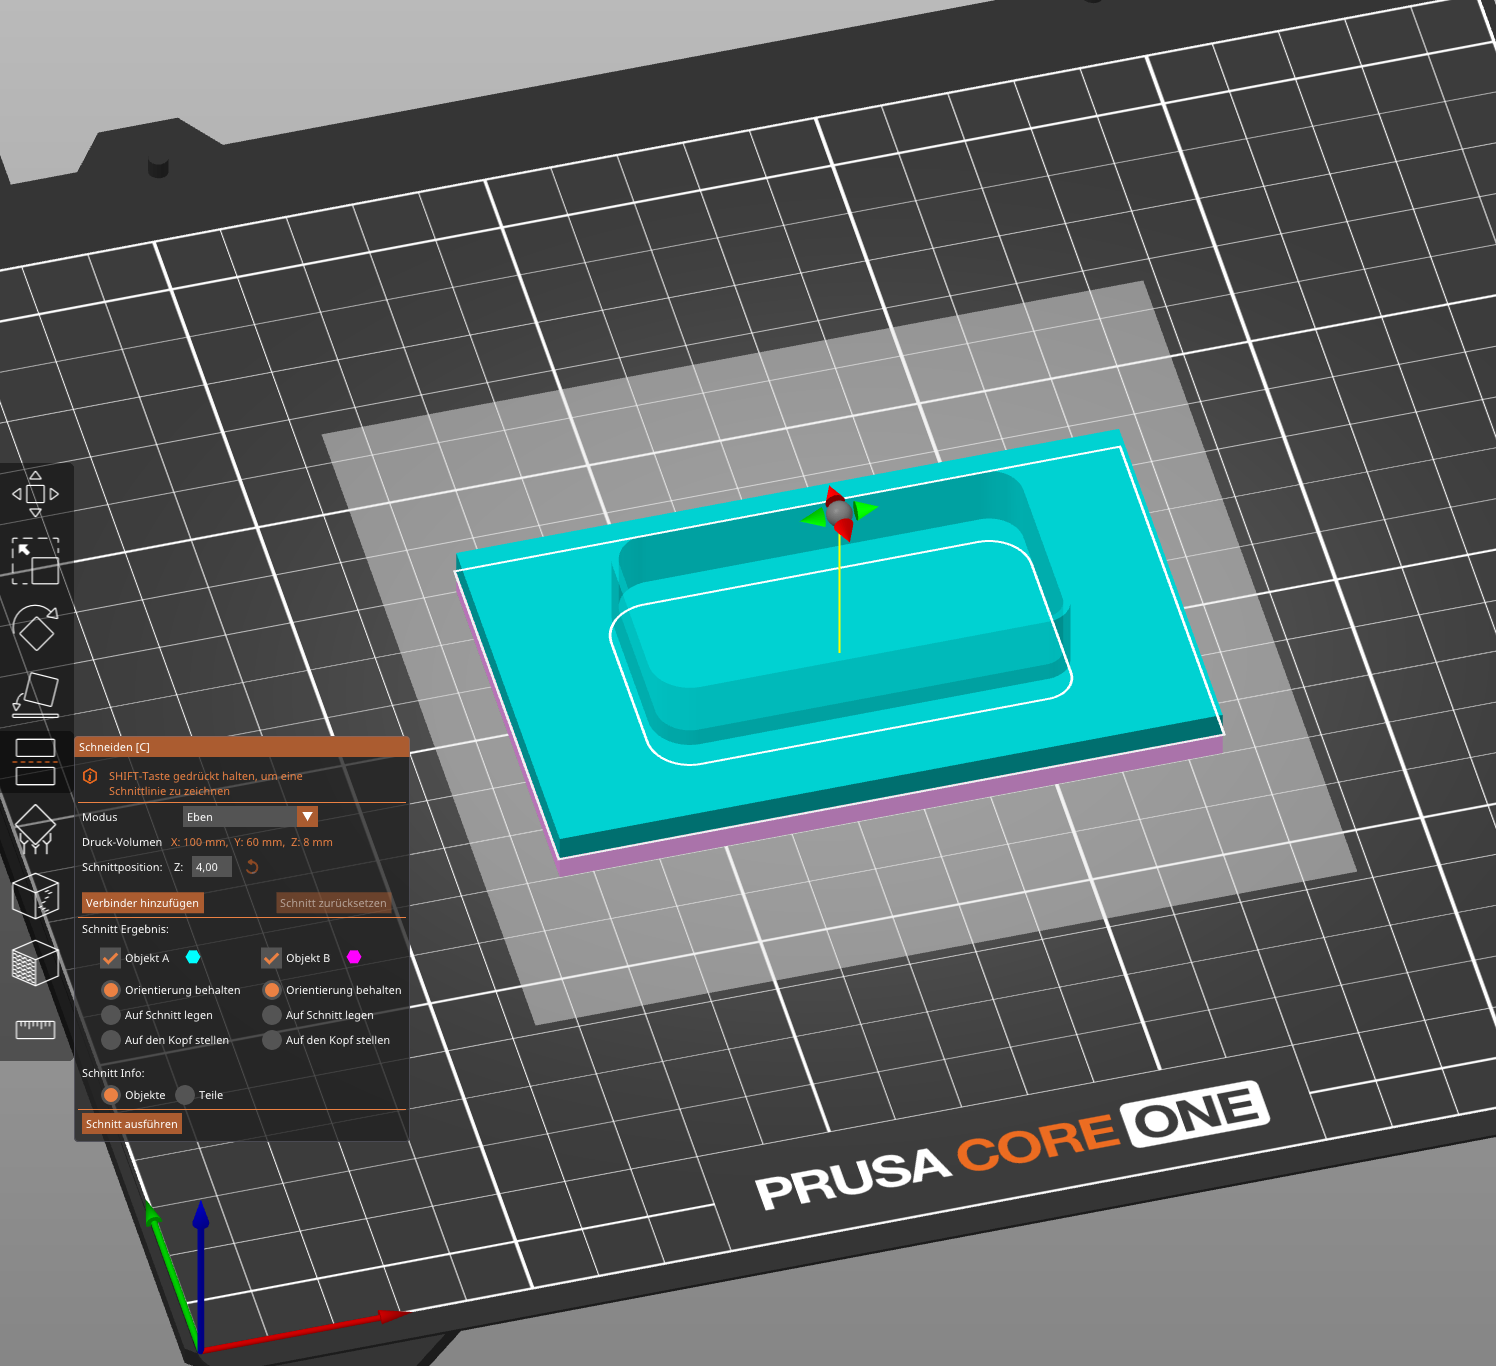
Use the split command (Thickness is 8mm so set height to 4mm)
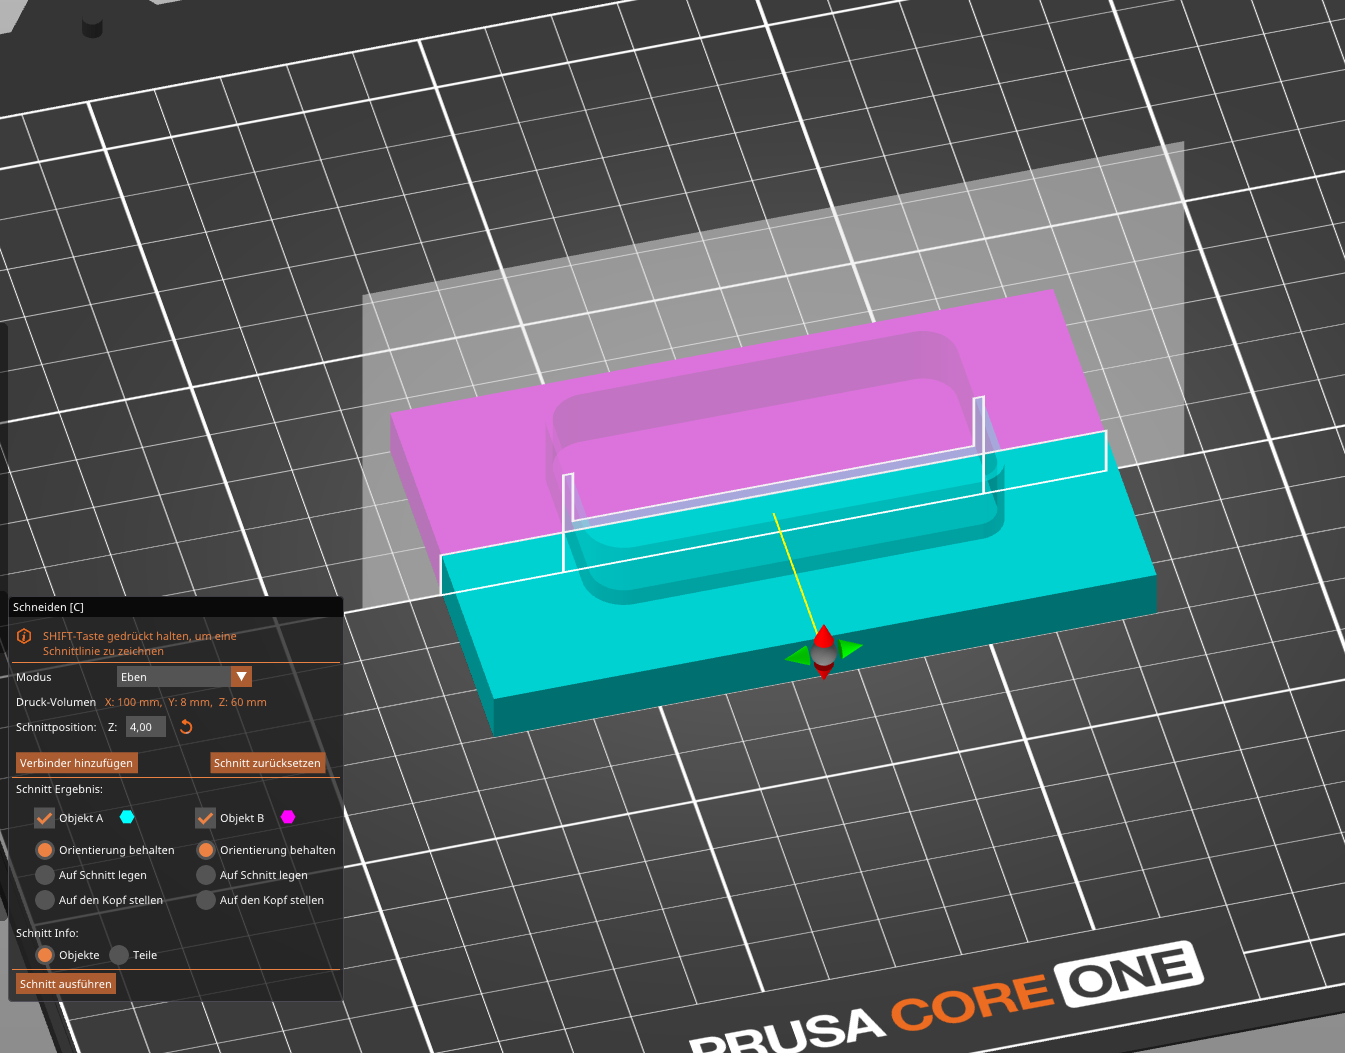
Rotate split plane with the controls to get segments which have open contours to place the hose
Execute the cut to get multiple parts and arrange them afterwards
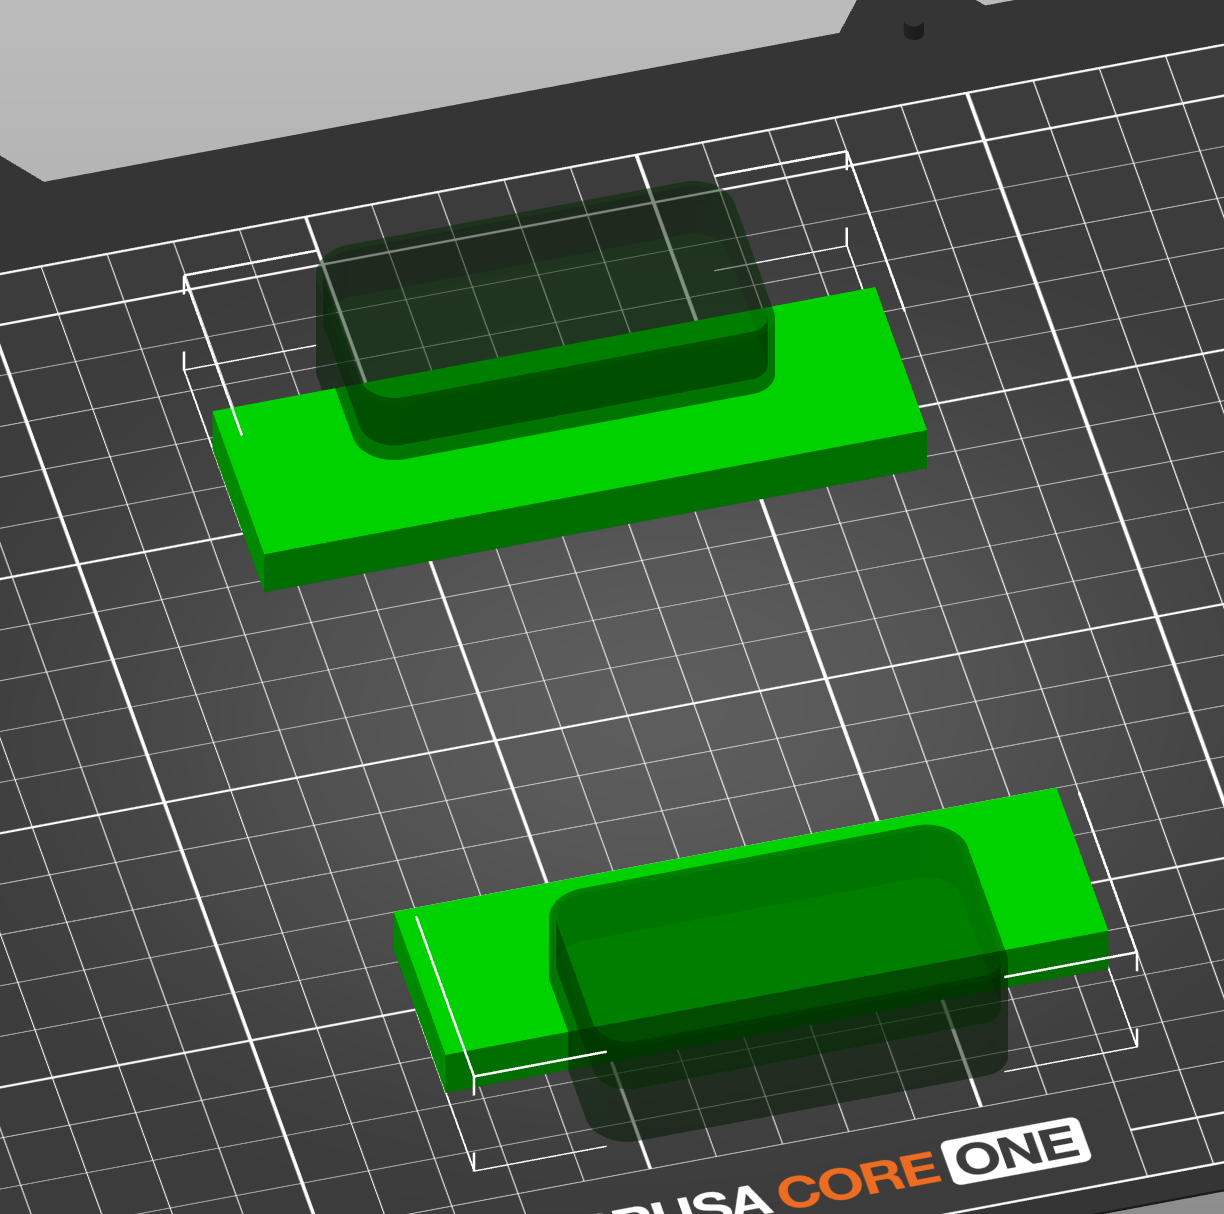
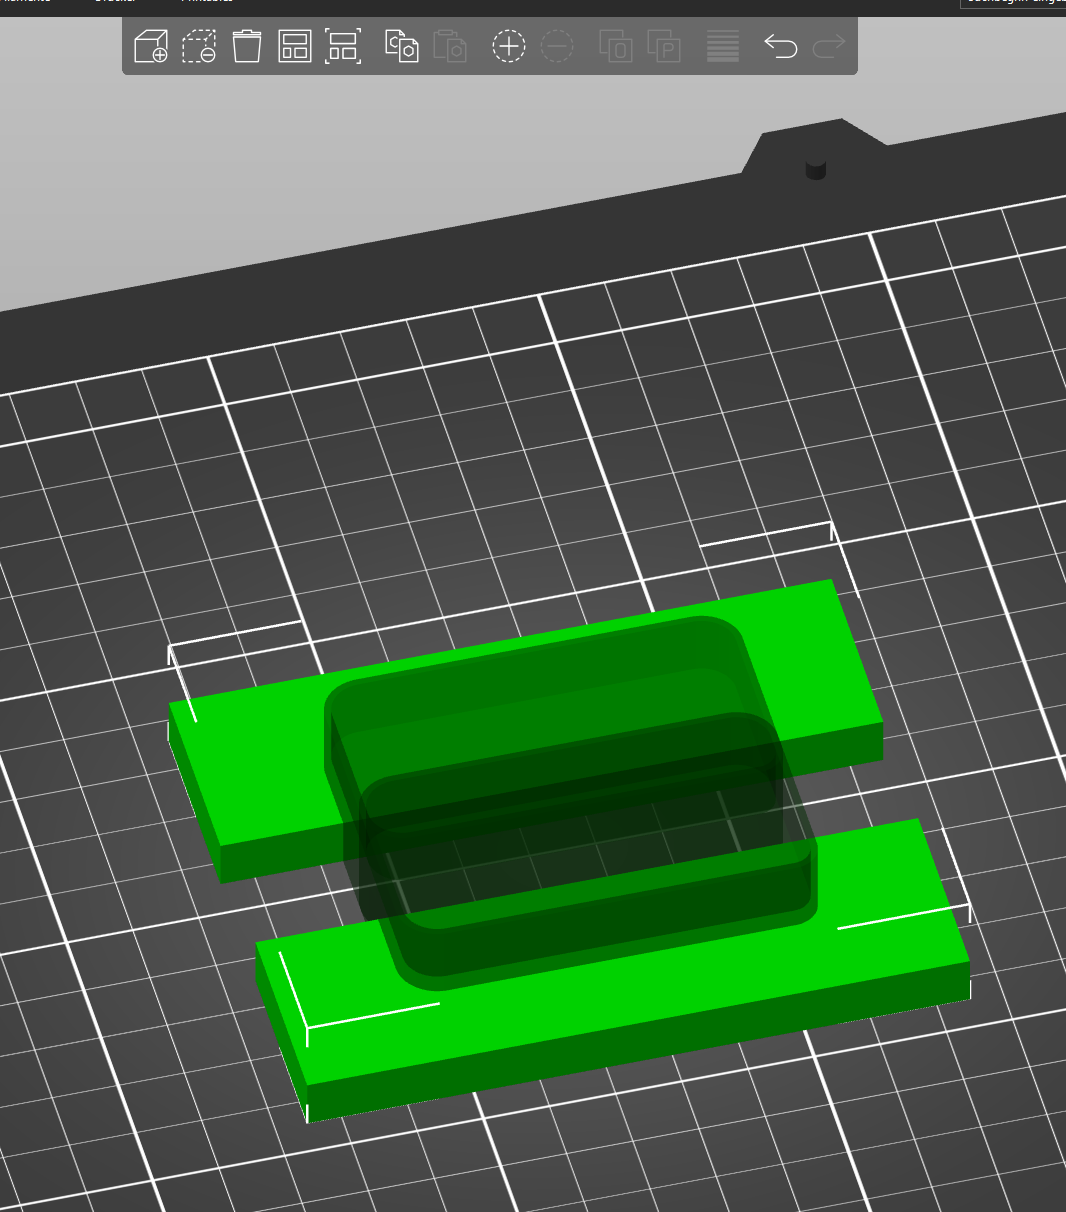
The segments can then be slid into the pocket to close the gaps between the hose and the pocket.
For additional sealing you can put some window sealing stripes on top and bottom (prepare cut to be able to remove bridge and slide the system apart for disassembly)