
ExoGuitar - Shoulders - Single Cut
Obliczymy ostateczną cenę na podstawie wybranego pliku. Sprawdzisz ją i zaakceptujesz przed płatnością.
Zapisane na tym urządzeniu.

3D printed guitar part — full catalog, build planner, and assembly guides at https://exoguitar.com
- Ocena
- 0 / 5
- Polubienia
- 0
- Pobrania
- 5
- Wydruki
- 0
- Wyświetlenia
- 20
- Oceny
- 0
Aktualizacja u źródła:
Informacje o modelu
- Źródło
- Printables
- Kategoria
- Music
- Licencja
- Creative Commons — Attribution — Noncommercial — Share Alike
Part of the ExoGuitar project — full catalog, build planner, and assembly guides at https://exoguitar.com
Plan Your Build & Get Hardware
ExoGuitar can be confusing! Head over to our build planner to plan your entire build - it'll walk you through every available part and handle compatibility along the way, and it covers all ExoGuitar parts. It's also the best way to get hardware, since it lets you buy everything for a full build in one go, not just this part.
You can find this specific part, ExoGuitar - Shoulders - Single Cut, on our site.
Step 1: Install Carbon Fiber Rod (Optional)
For more stiffness, cut a 3x6 carbon fiber bar to 1 piece of 50mm.
Find the rectangular hole on the bottom of the shoulder.
Remove all the support material from this hole. The fit is tight.
Put some CA glue in that hole.
Hit the 3x6 carbon fiber bar into the hole with a small hammer until it is fully in the shoulder. Step 2: Tap 2020
Tap the end of the 2020 with an M6 tap.
Do the same for the other 2020. Step 3: Mount Shoulder to 2020
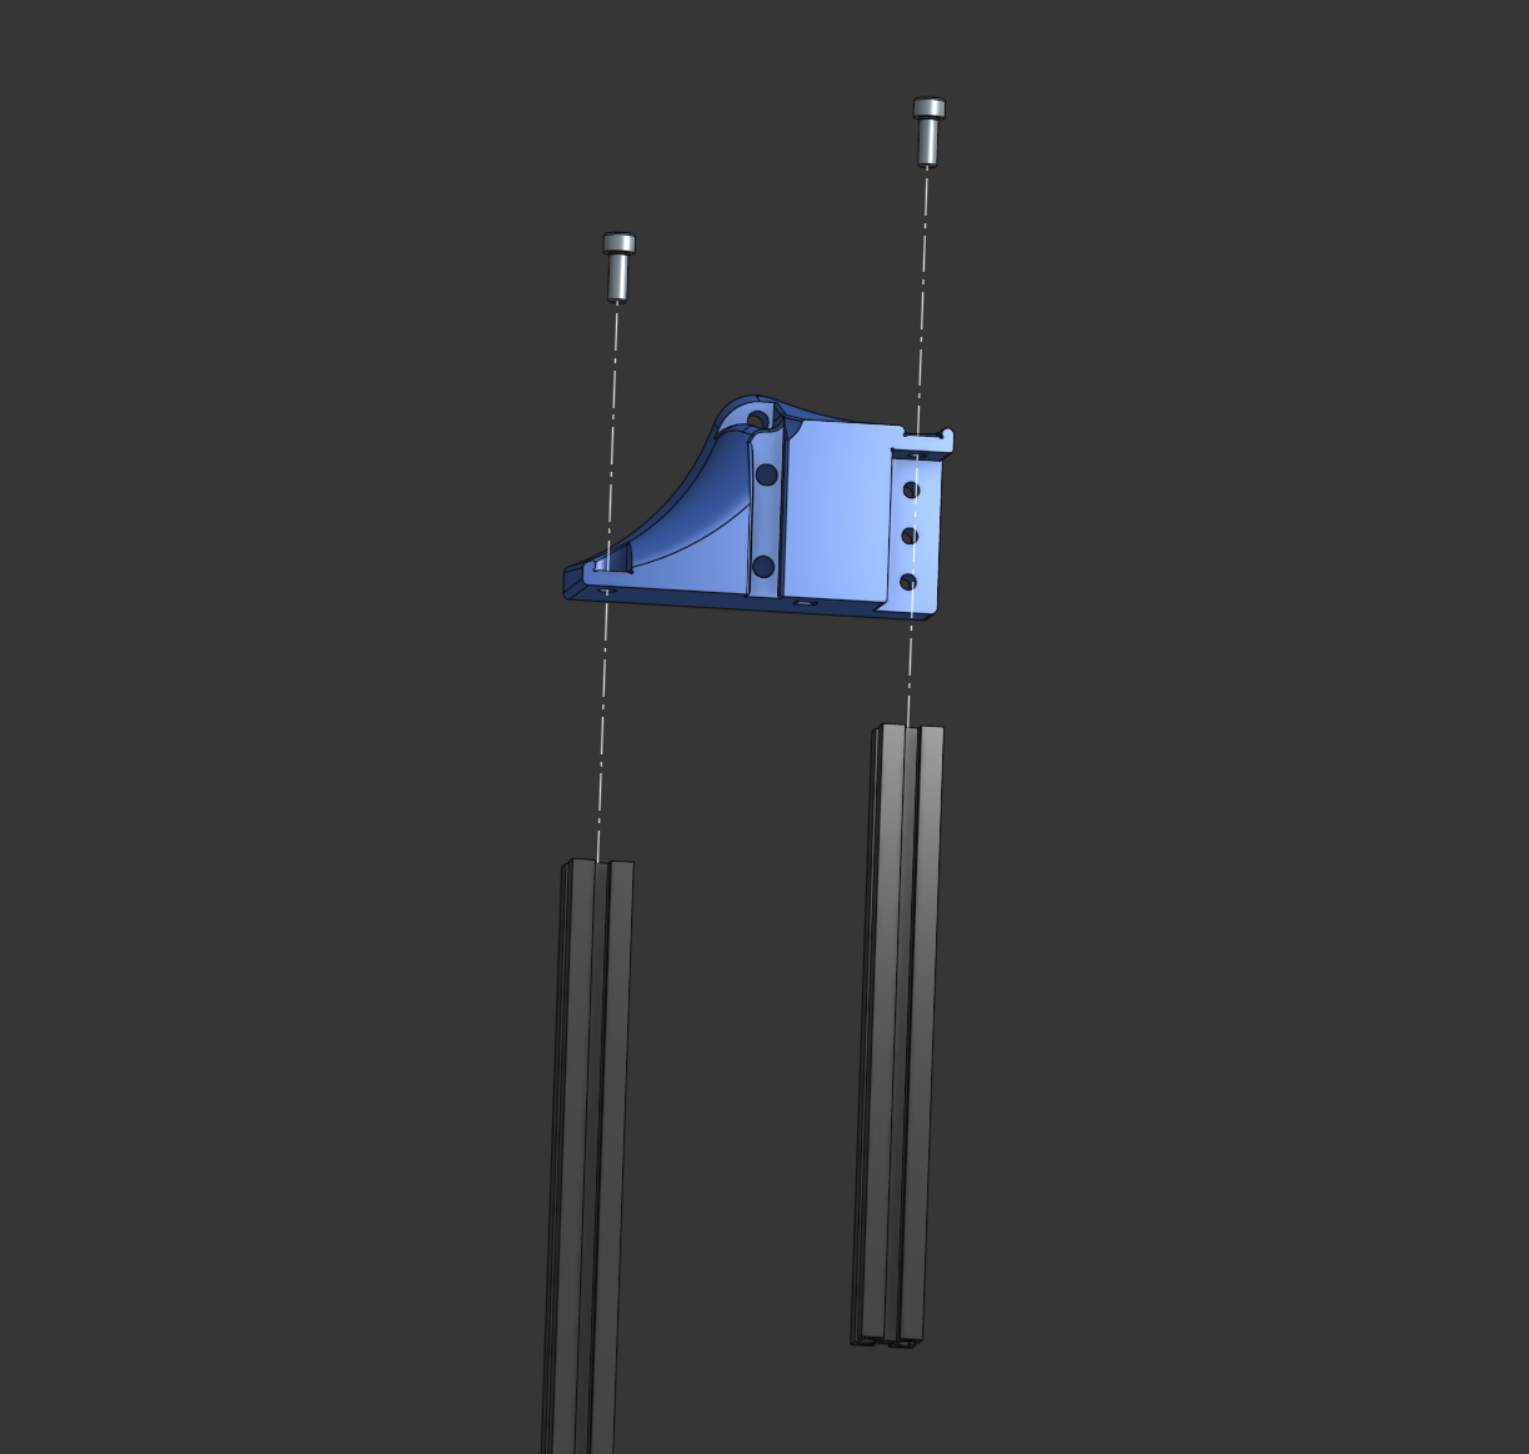
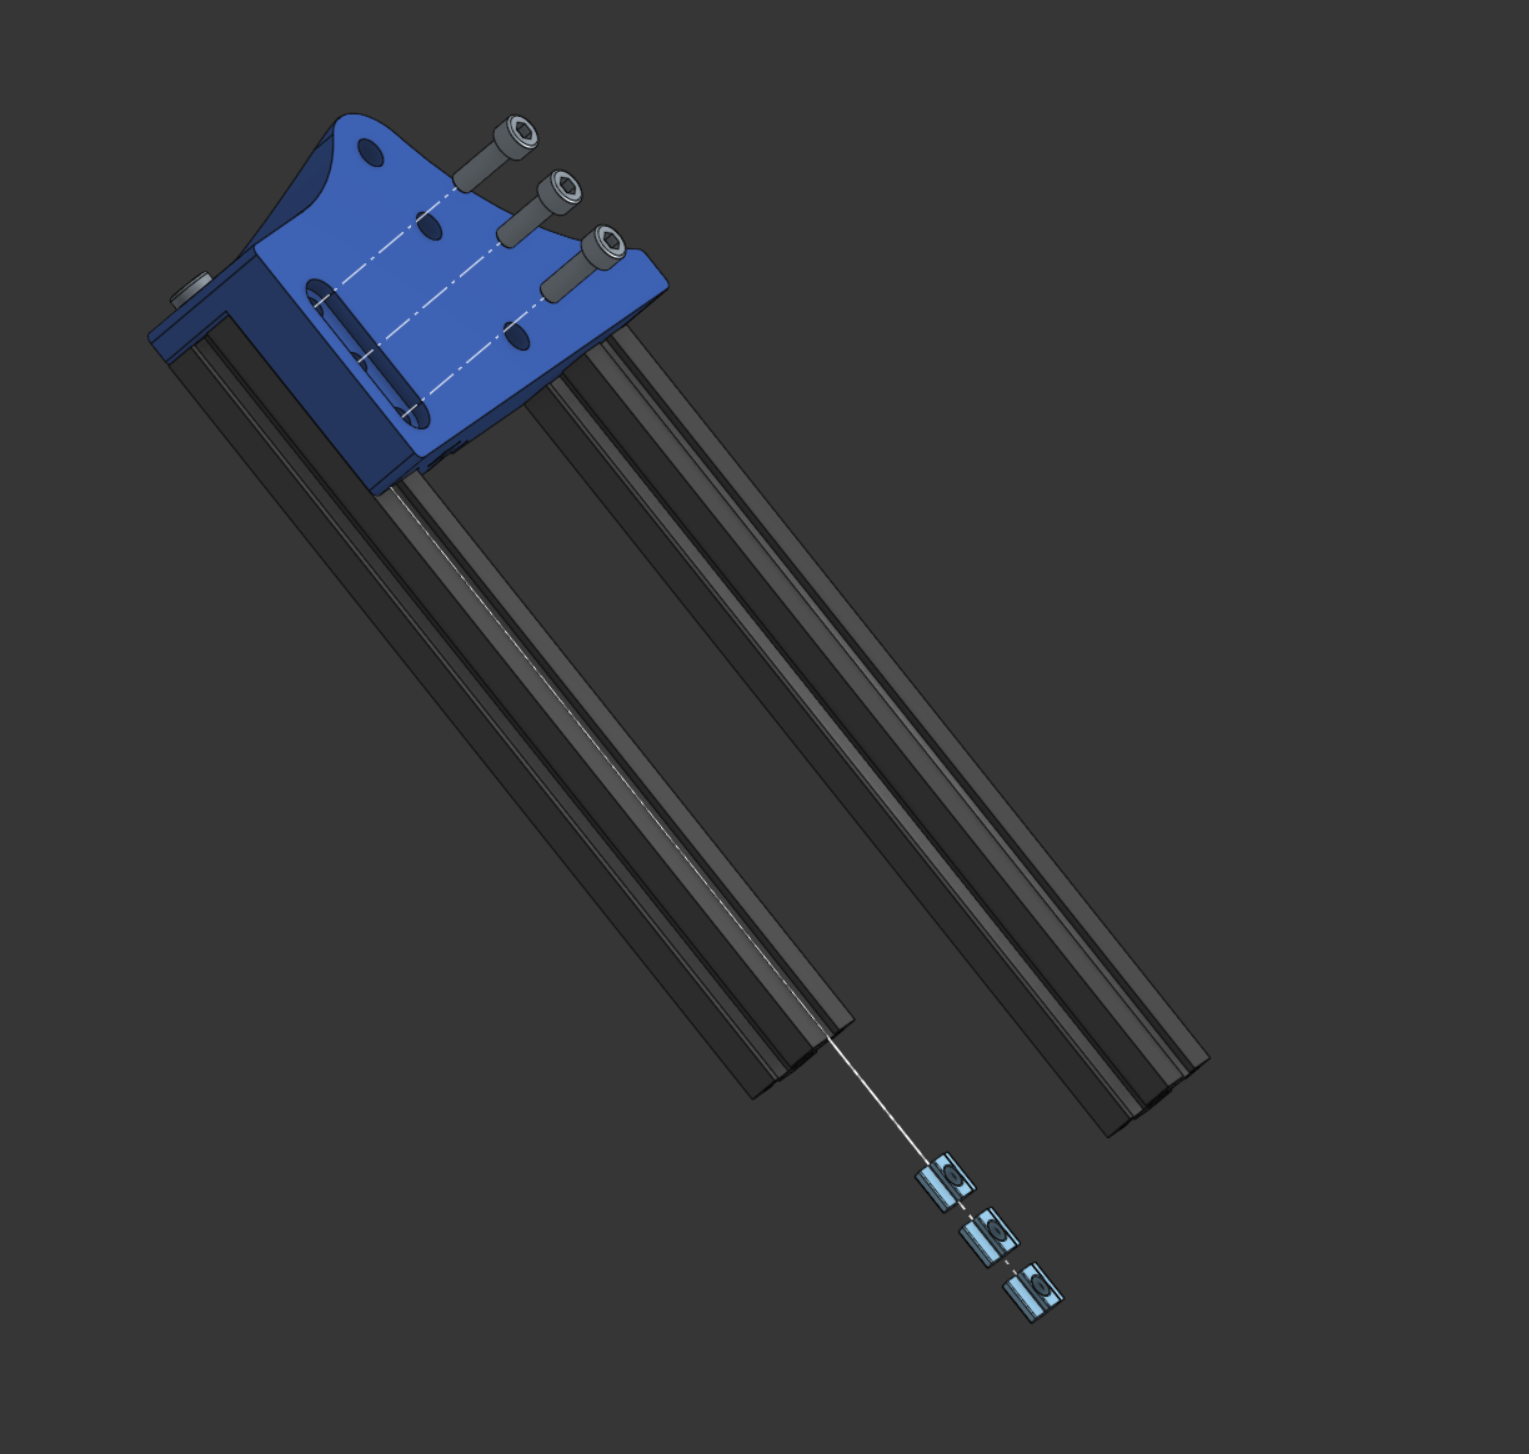
Attach the shoulder to the top of the two 2020s with 2 M6x20 screws.
Attach the front of the shoulder to the 2020 with 3 M5 slide-in nuts and 3 M5x16 SHCS. Step 4: Press In Neck Pipes
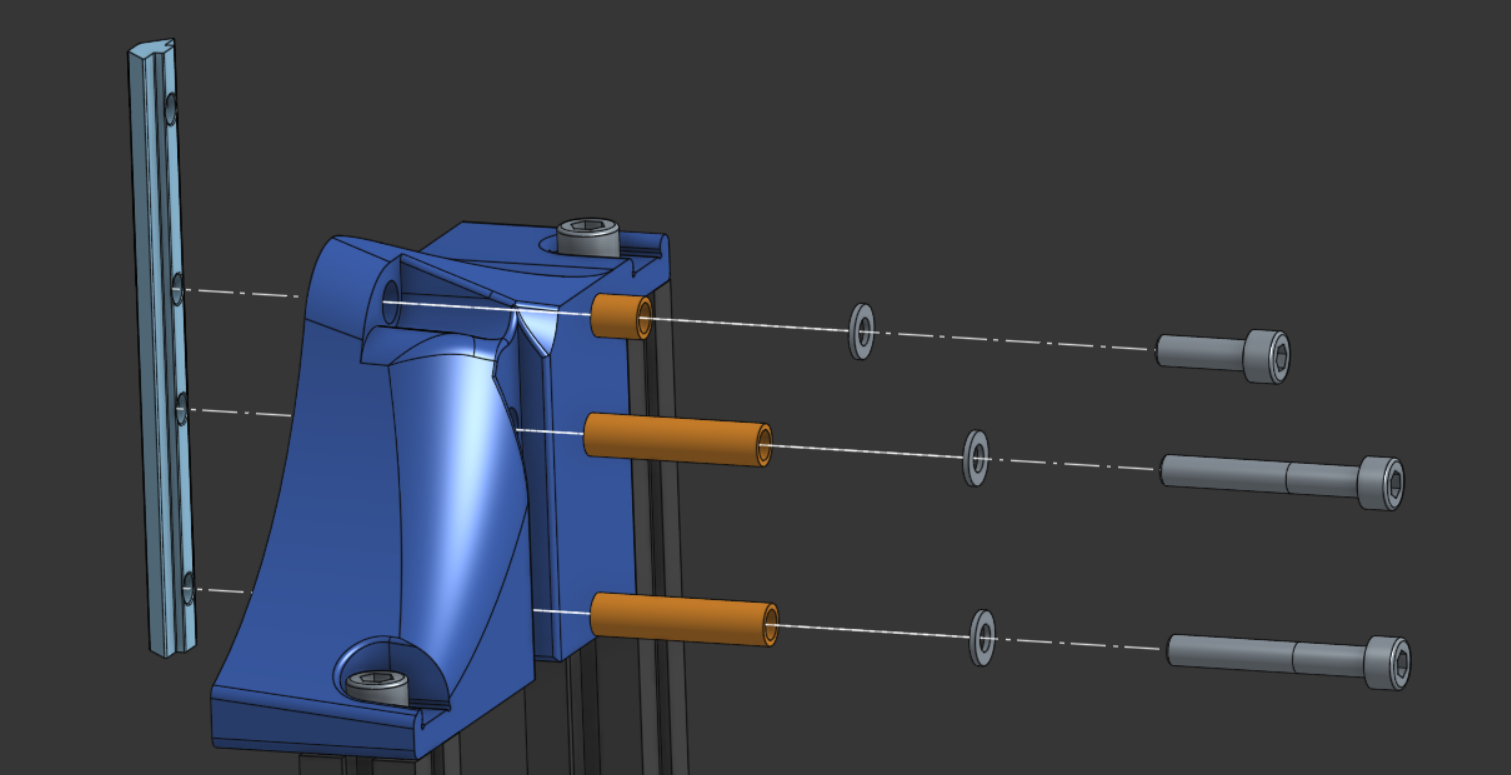
Find the neck screw holes in the face of the shoulder.
Remove all the support material from those holes. The fit is tight.
Use an arbor press, or a small hammer and a punch. Push 2 brass pipes (7mm x 30mm) into the neck screw holes until they are fully in.
Keep each pipe square to its hole when you start it. If the pipe is not square, it can catch and damage the print.
Push a 5x7x8mm sleeve bearing into the other neck screw hole with the same procedure. Step 5: Mount Neck
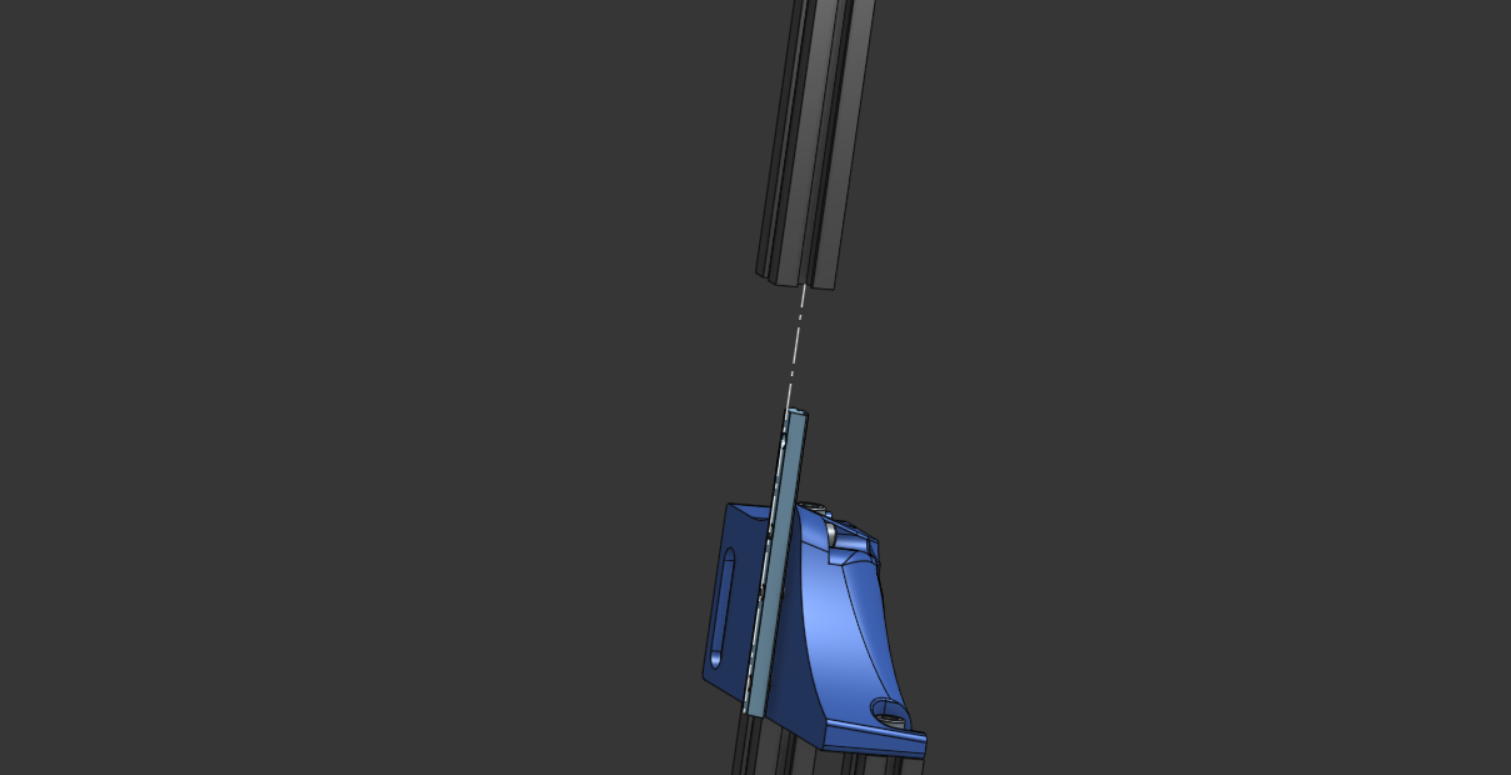
Put the neck against the shoulder. Connect the two with one 2020 straight line connector. The connector goes in the slot across the joint.
Attach the connector with 2 M5x35 SHCS and 1 M5x16 SHCS. Put an M5 washer below the head of each screw. That is 3 M5 washers in total.
Tighten each screw a small quantity at a time. Start with the middle screw and continue outward. Then the neck stays aligned with the shoulder when the connector pulls down.
Hardware
DIY Kit
You can order a DIY kit for your entire build from our build planner, the estimate for this part's kit is $19.87 plus shipping.
Self Source
If you want to order the parts yourself, here's a list. Estimated cost: $87.31.