
Capacitive CYD Case with Battery and Speaker
Obliczymy ostateczną cenę na podstawie wybranego pliku. Sprawdzisz ją i zaakceptujesz przed płatnością.
Zapisane na tym urządzeniu.

Case for a Cheap Yellow Display with space for a battery and a speaker. Single centered USB-C port. Made for SquachWatch
- Ocena
- 0 / 5
- Polubienia
- 3
- Pobrania
- 9
- Wydruki
- 0
- Wyświetlenia
- 61
- Oceny
- 0
Aktualizacja u źródła:
Informacje o modelu
- Źródło
- Printables
- Kategoria
- Other Gadgets
- Licencja
- Creative Commons — Attribution — Noncommercial
Double check the location of your USB-C port. This is intended for centered USB-C ports with buttons on either side of it. Built for an 1100mah MakerFocus battery.
I used this board, specifically: ESP32-S3 CYD Display, 2.8" 240x320 IPS LCD Touchscreen from MeLife. (*affiliate link) The capacitive screen is waaaay nicer to use than the resistive ones while still being super bright and fairly power efficient. This one is being sold as a device for an AI assistant, so it includes a large speaker as well. I used the MakerFocus 1100mAh battery from Amazon.
FEATURES
This was designed with the intention of being a highly portable case for the CYD running SquachWatch -- https://squachwatch.com/. Basically a spy detector with alerts from cameras, Ring, Flock, Axon, deauthers, Airtags, etc. The firmware is by TalkingSasquach on YouTube. Here is a link to the release video on his channel. This board can be flashed directly through his web flasher on this site or on ESPterminator.com.
BOOT and RST are both accessible through buttons on the back of the case. Cutouts are for the speaker and LED.
PRINT SETTINGS
I printed in PETG but PLA is totally fine. I just used my default profile.
PETG at 250 nozzle and 70 bed, 0.4mm nozzle
0.2mm layer height (I actually think I used Adaptive, but either way)
3 walls
15% Adaptive Cubic Infill
NO SUPPORTS
HARDWARE
This was designed around heat-set inserts, so I haven't tried it without them, however my past cases didn't use them so it's completely possible it'll fit with enough bite to hold without them.
4x - M3x12mm Screws
4x - M3 Heat-Set Inserts
INSTALLATION
Attach the speaker (optional) and battery to their respective JST connectors.
1a. - I used a tiny bit of foam mounting tape on either side of the speaker to hold it in place and to prevent vibration.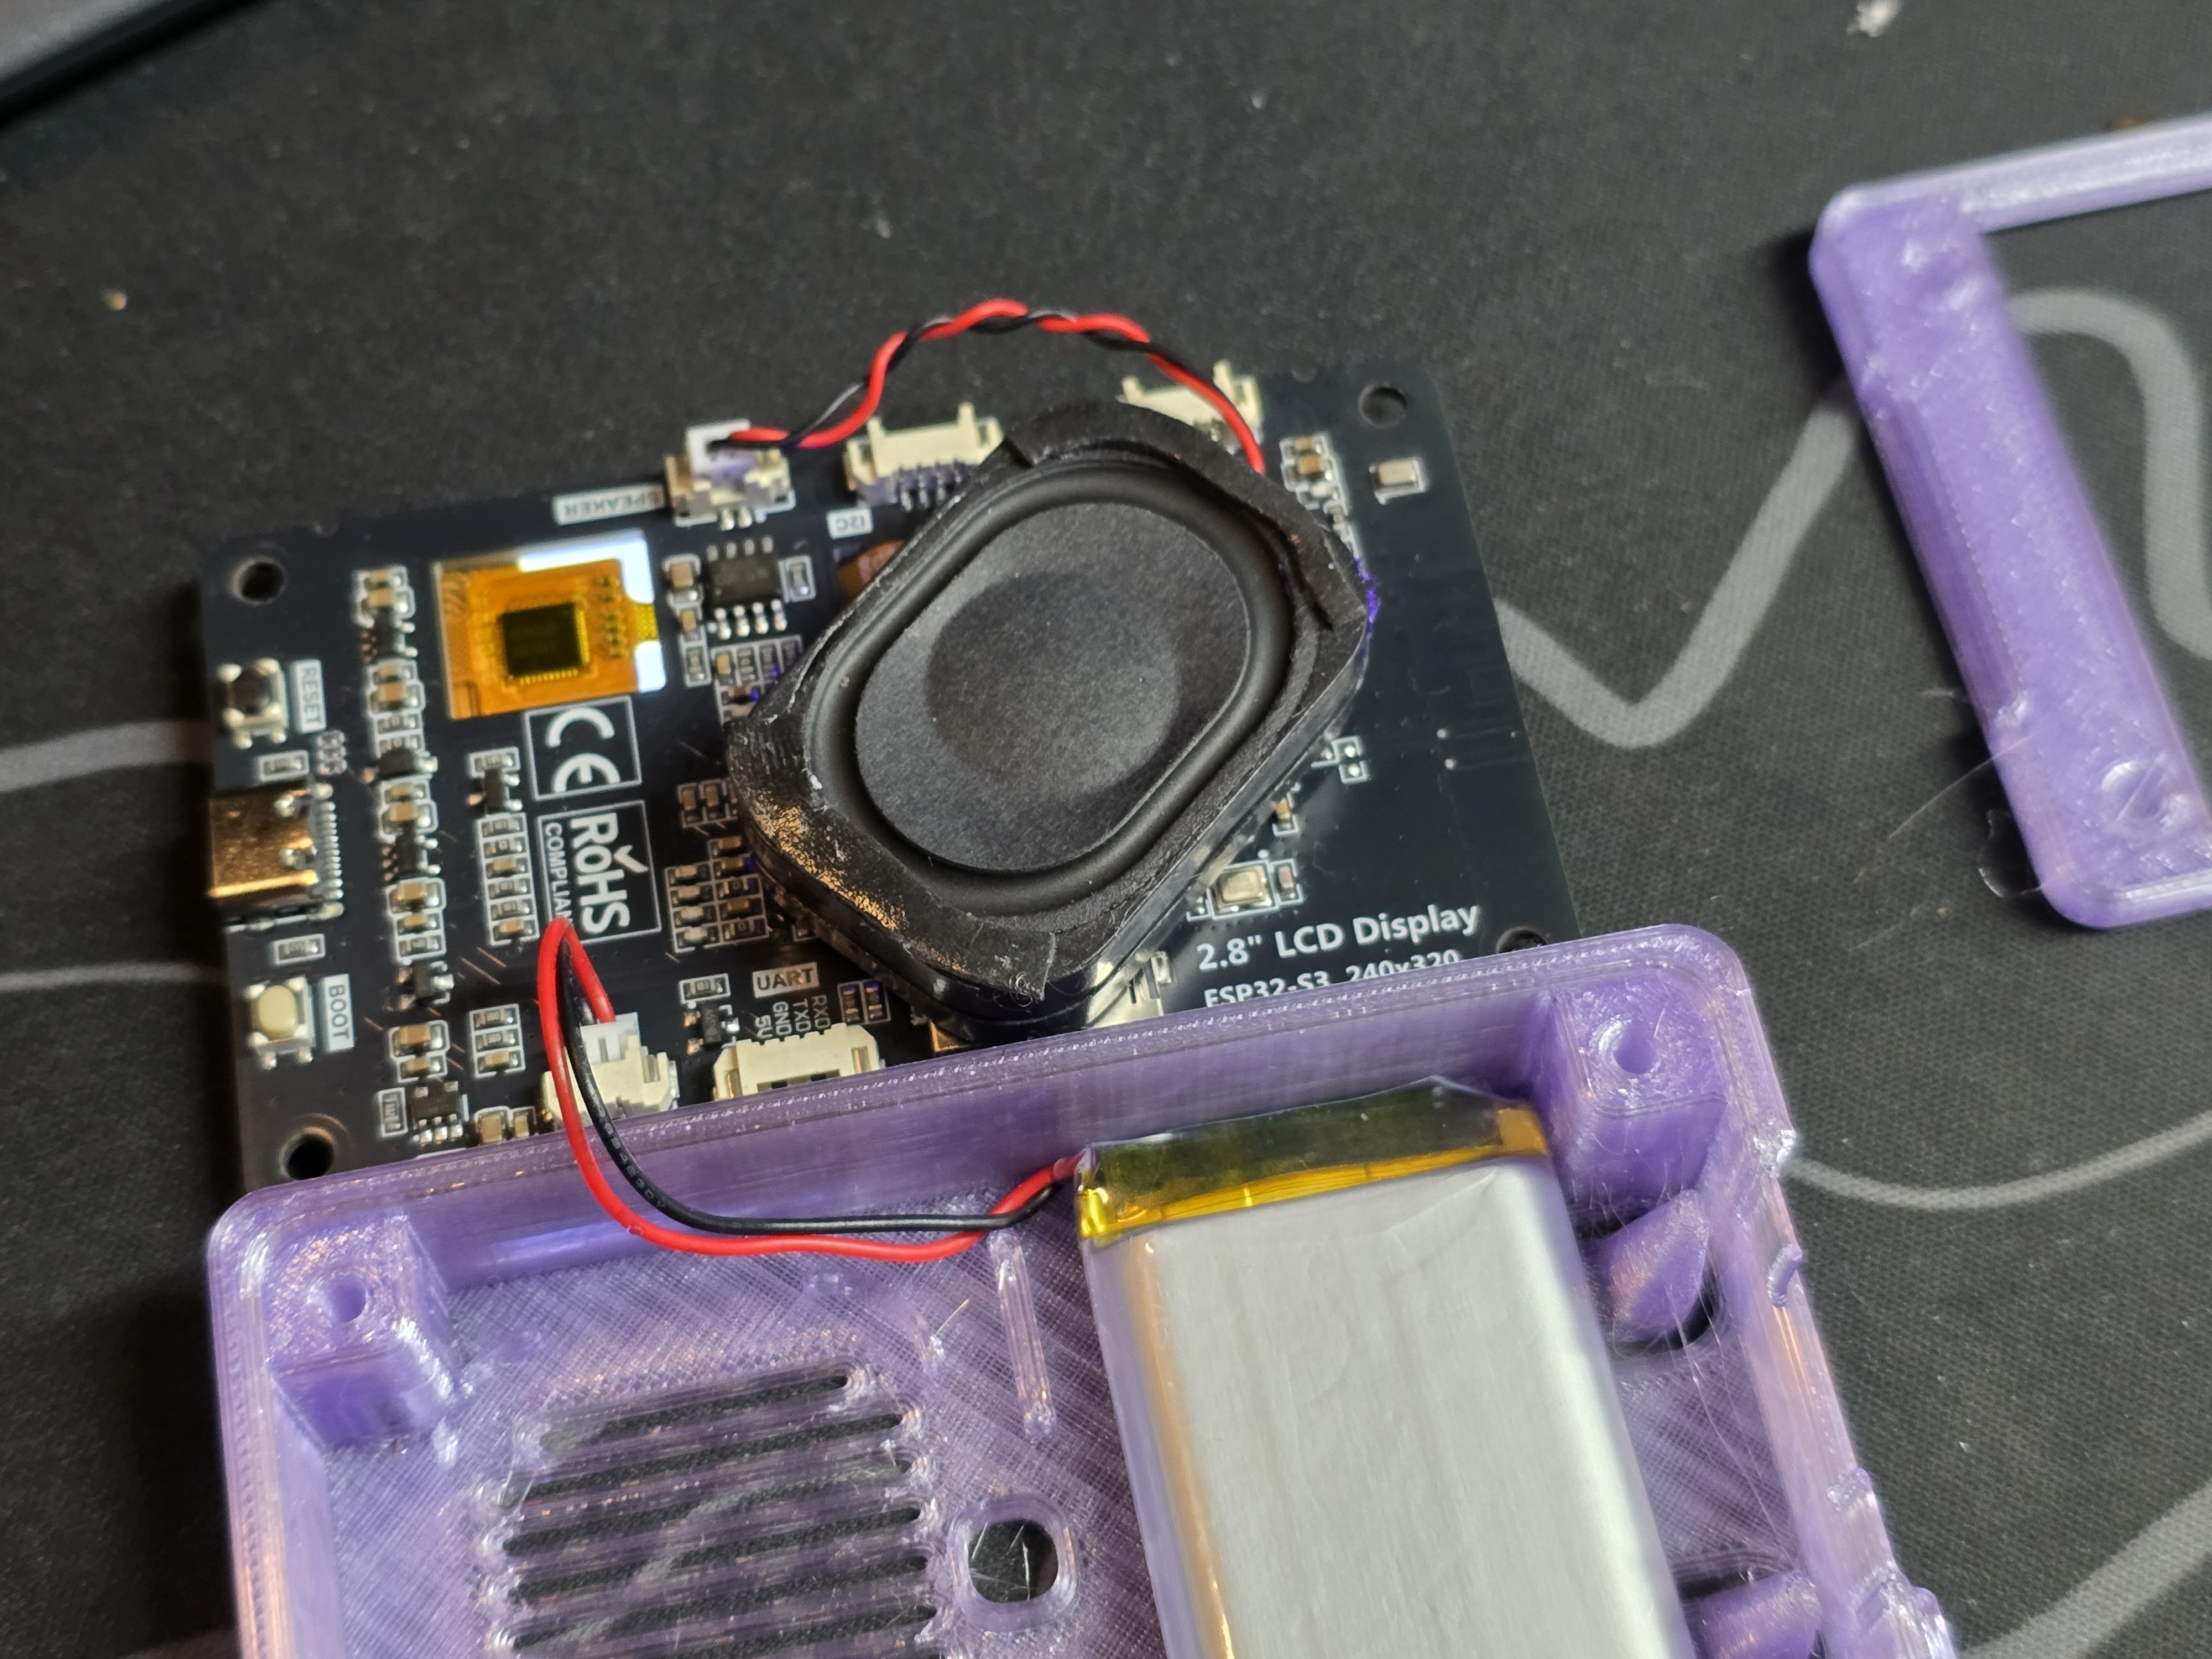
Gently press the battery and speaker into their respective locations.

Align the board over the battery, speaker, and case. It should sit on the screw posts and not rock at all. If it wobbles, make sure your battery is pushed all the way in. It's snug so be gentle with the wires.

Insert the 4 heat-set inserts into the lid using a soldering iron. Be careful to not overheat them while inserting them as there's only 2mm from the base of the hole to the top of the case, so make sure not to melt all the way through! It's easy, just be aware.
Insert the four screws. Some force will be needed the first time to drive them in since tolerances are tight. Your milage will vary depending on your filament and screws.
Thanks! Be safe, have fun, pet a cat. I love you!
Affiliate links support my designs.