
CamGrip - Modular Phone Grip with Battery & Shutter
Obliczymy ostateczną cenę na podstawie wybranego pliku. Sprawdzisz ją i zaakceptujesz przed płatnością.
Zapisane na tym urządzeniu.

Modular phone camera grip with battery compartment and bluetooth shutter remote holder. Based on SnapGrip.
- Ocena
- 4,5 / 5
- Polubienia
- 113
- Pobrania
- 227
- Wydruki
- 3
- Wyświetlenia
- 3677
- Oceny
- 2
Aktualizacja u źródła:
Informacje o modelu
- Źródło
- Printables
- Kategoria
- Photo & Video
- Licencja
- Creative Commons — Attribution — Noncommercial — Share Alike
A modular phone camera grip based on SnapGrip. Features a portable battery compartment and a mount for a bluetooth shutter remote. Compatible with MagSafe, PopSocket, QuadLock, and more.
💖 Attribution
This project uses modified versions of the following designs that are licensed under the CC BY 4.0 license.
🔩 Components
Base
 | Base | Supports recommended but not required. |
Phone Mounts
MagGrip can be mounted to your phone in several ways:
 | MagSafe Sticker | Requires a MagSafe Magnet sticker. |
 | PopSocket | PopSocket mount by @Adammelancon. Supports recommended. |
 | QuadLock | QuadLock mount by @Vinzcenzo. Supports recommended. |
 | Blank | Useful for remixing or DIYing. |
Caps
The CamGrip requires a total of 2 caps. One of which must be mirrored.
 | Finger Grip | |
 | Charge Hole | |
 | Camera Shutter | Designed to fit a generic bluetooth camera shutter. Supports recommended. |
 | Blank | Useful for remixing or DIYing. |
Other Parts
You'll also need some additional components:
 | 4 * M3 Screws/Bolts | Required. Can be 8mm-12mm in length. |
 | 4 * M3 Nuts | Required. |
 | Tube-Style Power Bank | Optional. I had a heap of these sitting around that I had received for free from various conferences. |
 | Bluetooth Camera Shutter | Optional. Found on Amazon for cheap. |
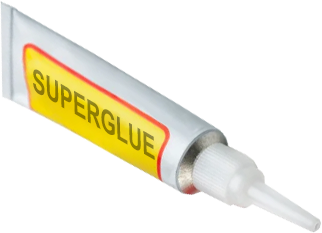 | Superglue |
🪛 Assembly Instructions
- 3D-Print Base component.
- 3D-Print 2 Cap components.
- 3D-Print a Mount component.
- Insert Power Bank into the Base component.
- Attach the 2 Caps to the Base component using 4 M3 Screws and 4 M3 Nuts.
- Attach the Mount to the Base component.
- If you're using the Camera Shutter component, slide it into the corresponding Cap.
- Attach your phone and you're done!