
Bosch 12V battery connector
Obliczymy ostateczną cenę na podstawie wybranego pliku. Sprawdzisz ją i zaakceptujesz przed płatnością.
Zapisane na tym urządzeniu.
This connector connects to a 12V Bosch(Pro) battery pack so it can be used as a portable power source for other things.
- Ocena
- 5 / 5
- Polubienia
- 50
- Pobrania
- 260
- Wydruki
- 1
- Wyświetlenia
- 2647
- Oceny
- 1
Aktualizacja u źródła:
Informacje o modelu
- Źródło
- Printables
- Kategoria
- Electronics
- Licencja
- Creative Commons — Attribution
This connector connects to a 12V bosch(Pro) battery pack or compatible packs from third parties so it can be used as a portable power source for other things. Made to use as a portable power source for a ts100 soldering iron.
Printing parameters:
Printing orientation = stl orientation
- Layer height: 0.3mm
- 0.4mm nozzle
- 3 perimiters
- 25% infill
- PLA
- Supports are required for the lid and the body.
For the body you only need supports for the section with the cut-outs for the spade connectors the rest will bridge ok and some drooping won’t affect the fit of the other components.
Parts list:
- 4X M3X8mm screws
- 1X 5.5X2.1mm barrel jack
- 1X switch
- 1X 5mm LED
- 1X 1KΩ resistor
- 2X spade connectors (blade: 6.35x0.8mm or similar)
- wire
Assembly instructions:
The plastic part of the spade connectors needs to be cut flush with the inner metal part. This can easily be done with scissors.
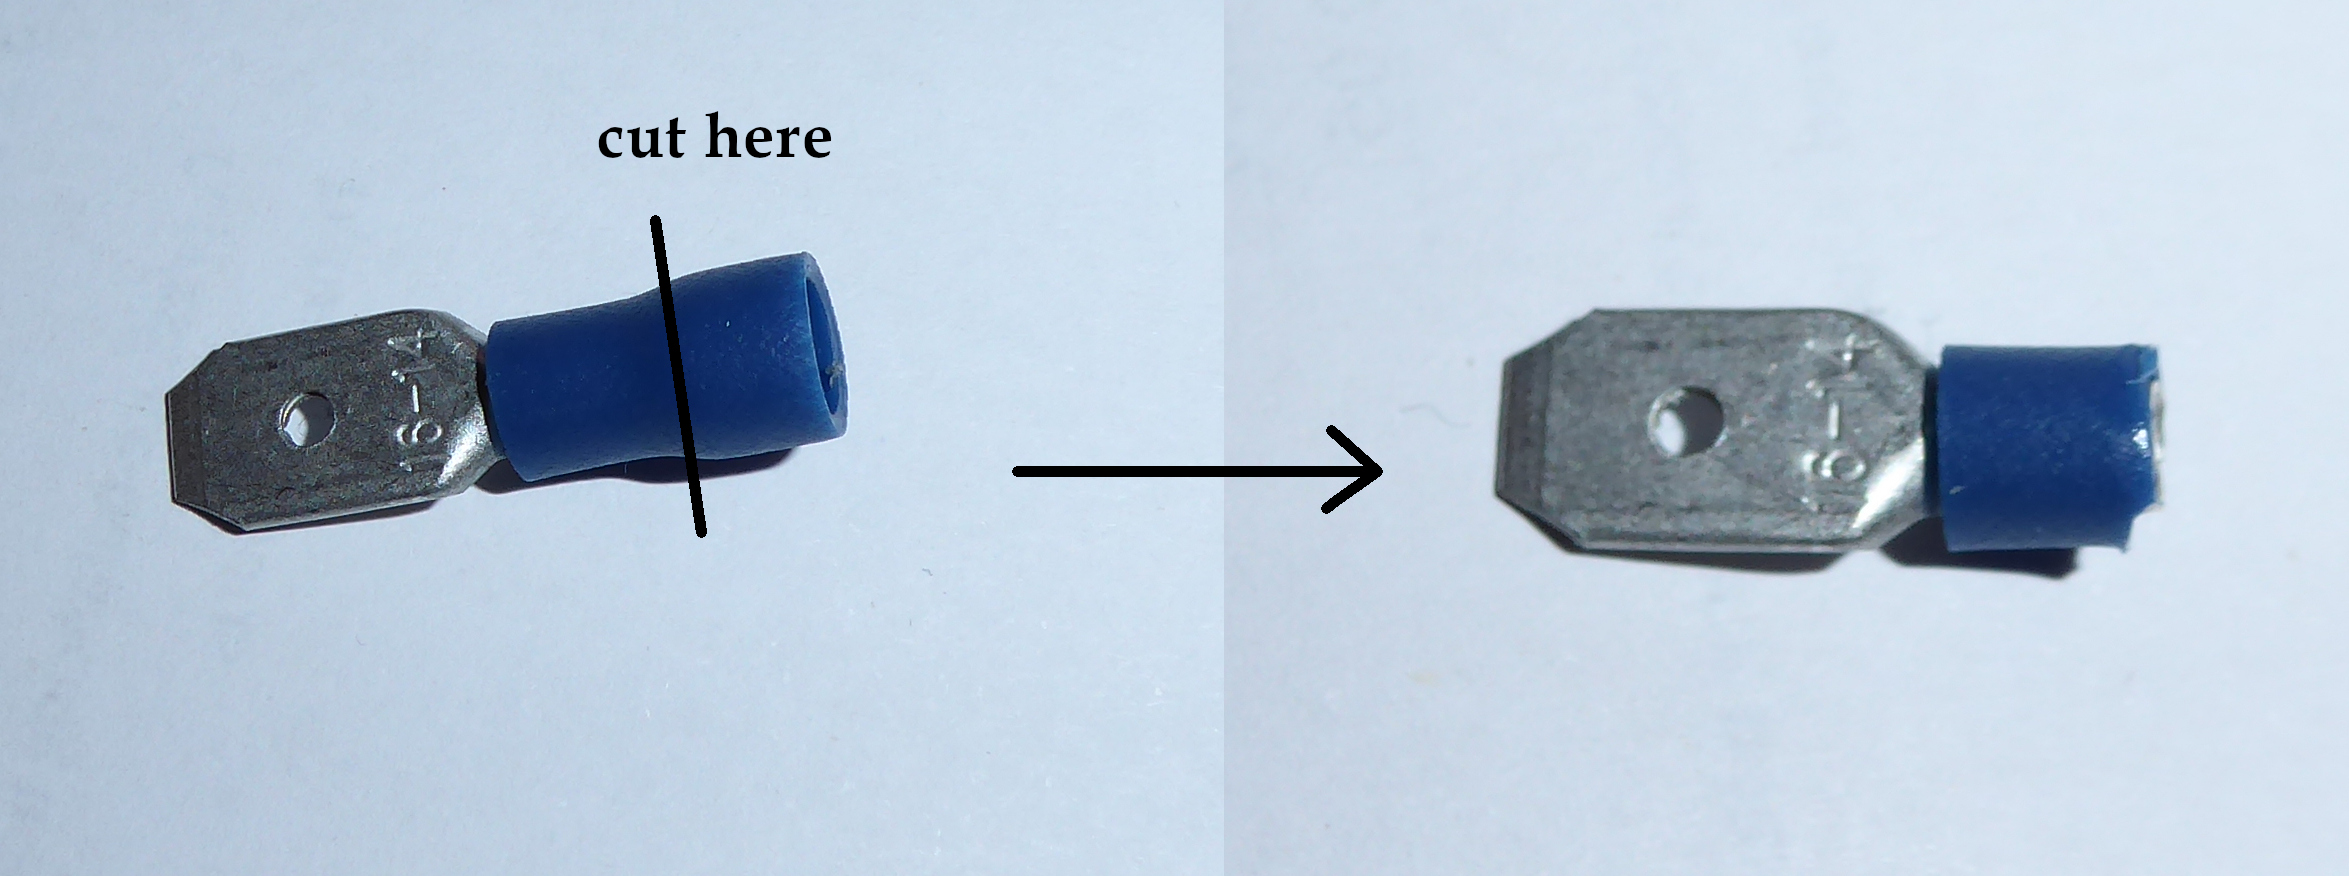
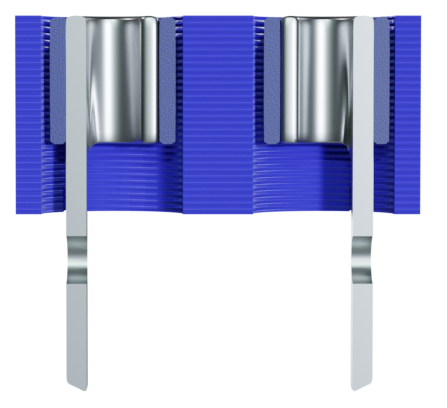
Crimp some wires on the connectors and insert them in the ConnectorBlock from the bottom. This is side with a slot intersecting with the hole. The flat part of the spade connectors is offset to one side make sure these are opposite each other in the ConnectorBlock as shown. Don’t glue them in yet.
After crimping the wire it might not fit in the ConnectorBlock if this happens use some pliers to compress it a little to make it fit, make sure to check the connection is still secure after doing this.
There is enough space inside to fit the wiring but there is not much extra space so plan ahead when wiring everything up.

The switch is impossible to reach once installed so solder the wires to that outside of the enclosure and feed them trough the hole. It’s possible to reach the barrel jack terminals once installed but easier before placing it inside its hole. The led can easily be soldered to the barrel jack terminals once both are installed.
After wiring everything up you should glue the ConnectorBlock to the inside of the enclosure with some super glue do this with the spade connectors in place because you won’t be able to get them in afterwards. You can glue the connectors in place as well but it should not be needed.
Before closing everything you should also check there are no bare wires touching inside because of the limited space inside this can happen.