
5.25" drive bay fan fixture for three 40mm fans with hex mesh cover
Obliczymy ostateczną cenę na podstawie wybranego pliku. Sprawdzisz ją i zaakceptujesz przed płatnością.
Zapisane na tym urządzeniu.
Attach three 40mm fans in the 5.25" drive bay of your computer. Designed for the Silverstone GD09, but easy to remix
- Ocena
- 0 / 5
- Polubienia
- 16
- Pobrania
- 176
- Wydruki
- 0
- Wyświetlenia
- 1510
- Oceny
- 0
Aktualizacja u źródła:
Informacje o modelu
- Źródło
- Printables
- Kategoria
- Electronics
- Licencja
- Creative Commons — Public Domain
I needed more airflow in my computer, and I was not using the 5.25" drive bay.
This was designed to fit in the drive bay of the Silverstone GD09 computer case, however it's not too difficult to remix, or adapt to your own taste.
FreeCAD model files are available.
Note: Assembly requires screws (came with the fans) and Cyano-Acrylate glue.
How to adjust the Hex Mesh to taste
Open the FreeCAD design files named “5.25 drive bay cover hex mesh.FCStd”.
On the left-hand side of the UI, you should see the tree-view (see image below)

Double click on the “Dimensions” spreadsheet. This is where the parameters can be tweaked.
To better see what you're doing, in the menu, click on Windows > Tile
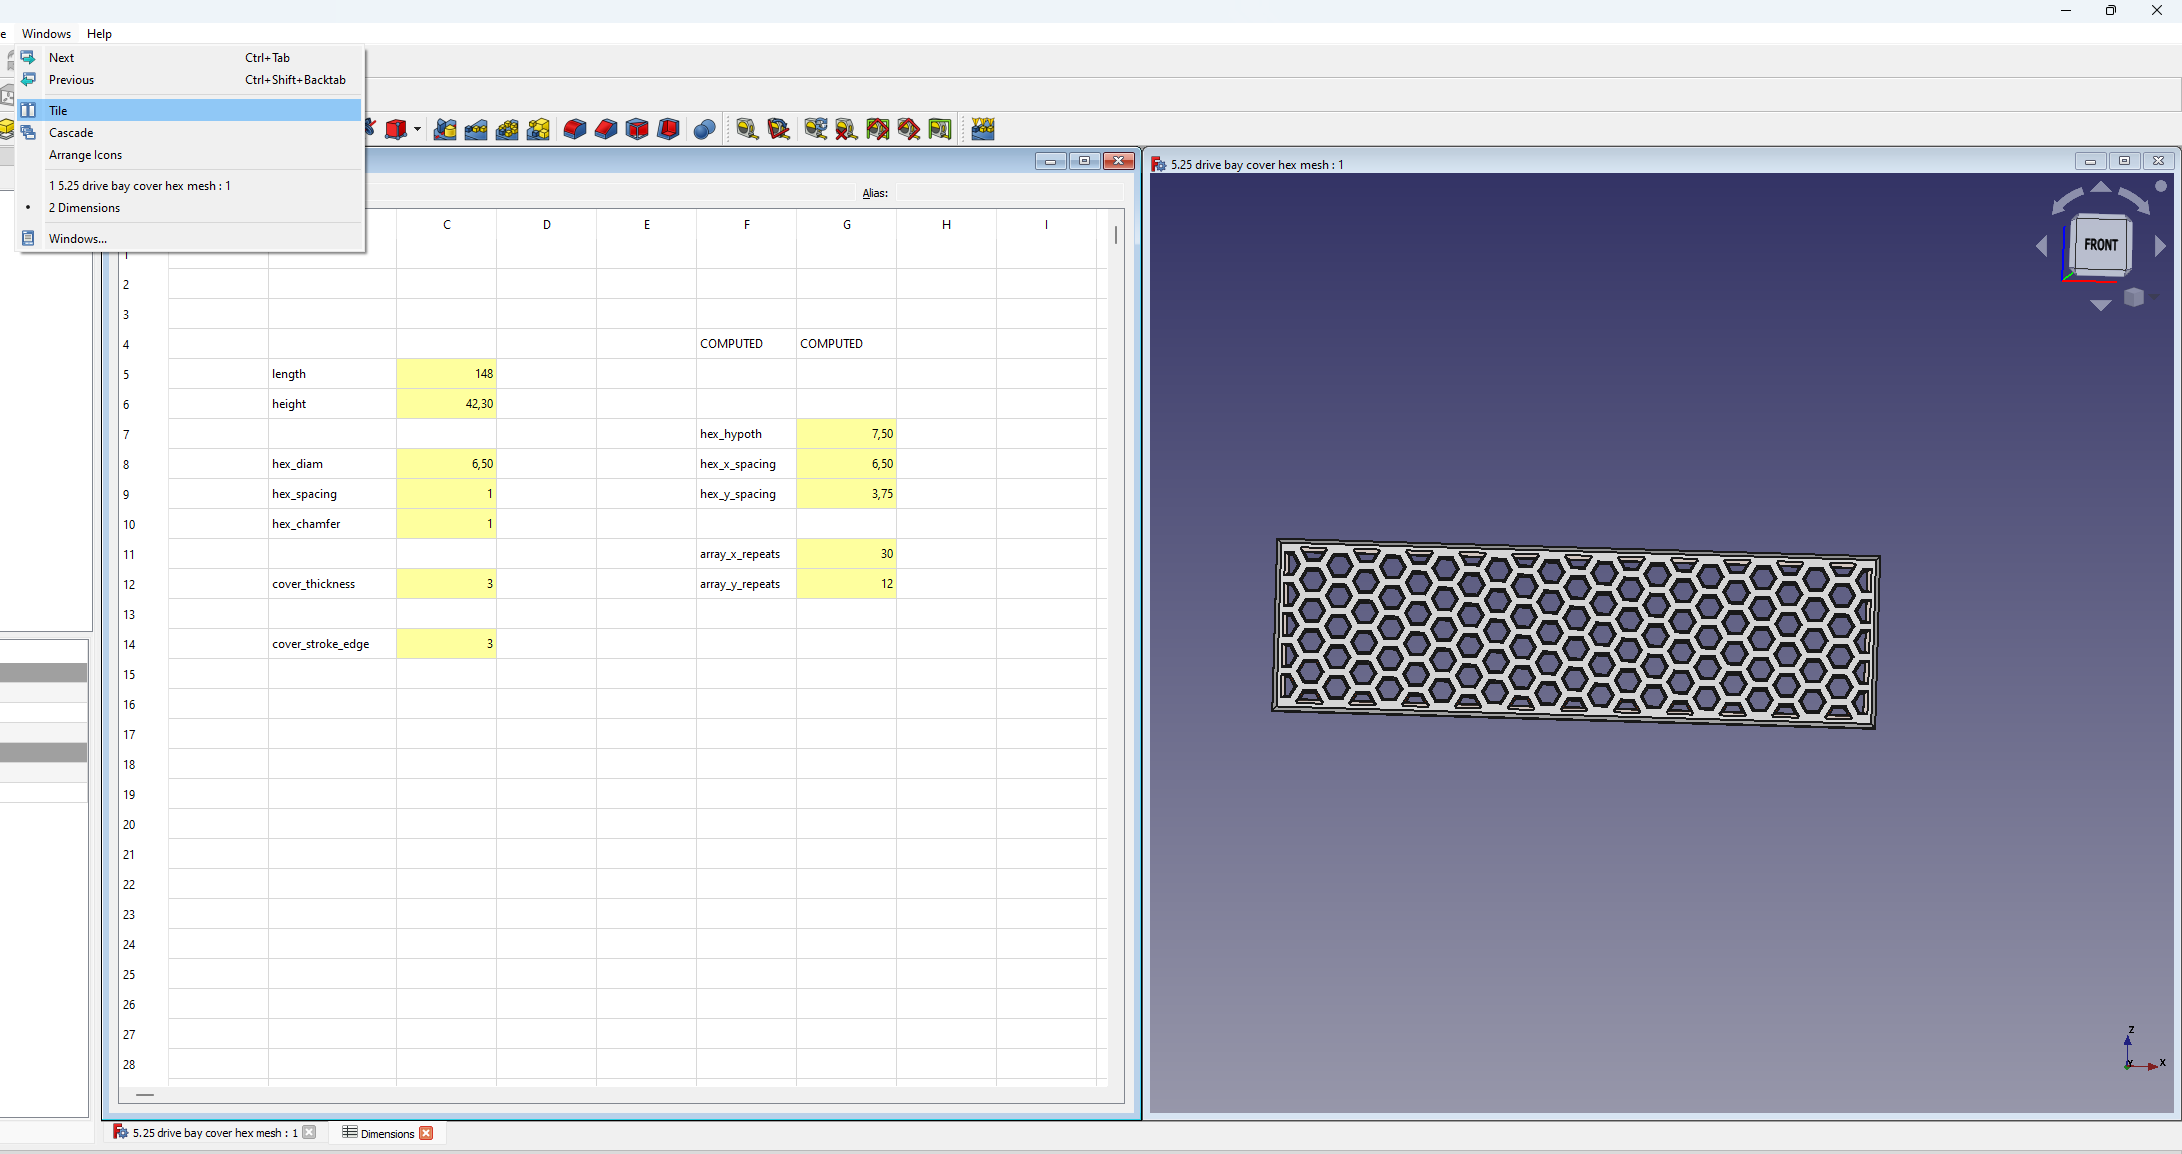
The only parameters which should be tweaked are
- hex_diam Diameter of the circumscribed circle of the hexagons
- hex_spacing space between the hexagons
- hex_chamfer the chamfer amount on the front side. (Not sure how stable the model is if changed, I always stuck with 1mm)
- cover_thickness Thickness of the mesh cover. 3mm by default
- cover_stroke_edge The outer edge of the mesh cover must be a solid. This parameter defines how thick the solid edge is, from the outside in.
In retrospect, I might have wanted to add a different variable for the vertical/horizontal cover stroke edge.
WARNING: Any change on any of these parameters will trigger a full recompute. It WILL take a lot of time to recompute - it took about a full minute on my machine.
The other FreeCAD design file (5.25 bay_cover_fan.FCStd) I used for designing the rest of the parts. I exported the mesh I was happy with and designed around it. This means this model is much faster to recompute, almost instantaneous.
Assembly
- Fans are screwed to the bracket, and their cables are managed through the slots. Be careful to orient the fans so the cable only runs between two fans, as space below and above the fan will be tight. Having a cable running down, then going at an angle may damage the cable or interfere during installation
- Use CA glue to attach the left and right plates to the front cover.
- Glue the other side of the plates to the slots in the bracket.
- Bolt the entire assembly to the case
Admittedly, CA glue is not the best assembly method, I just wanted something easy to print, with as much flat parts as possible.