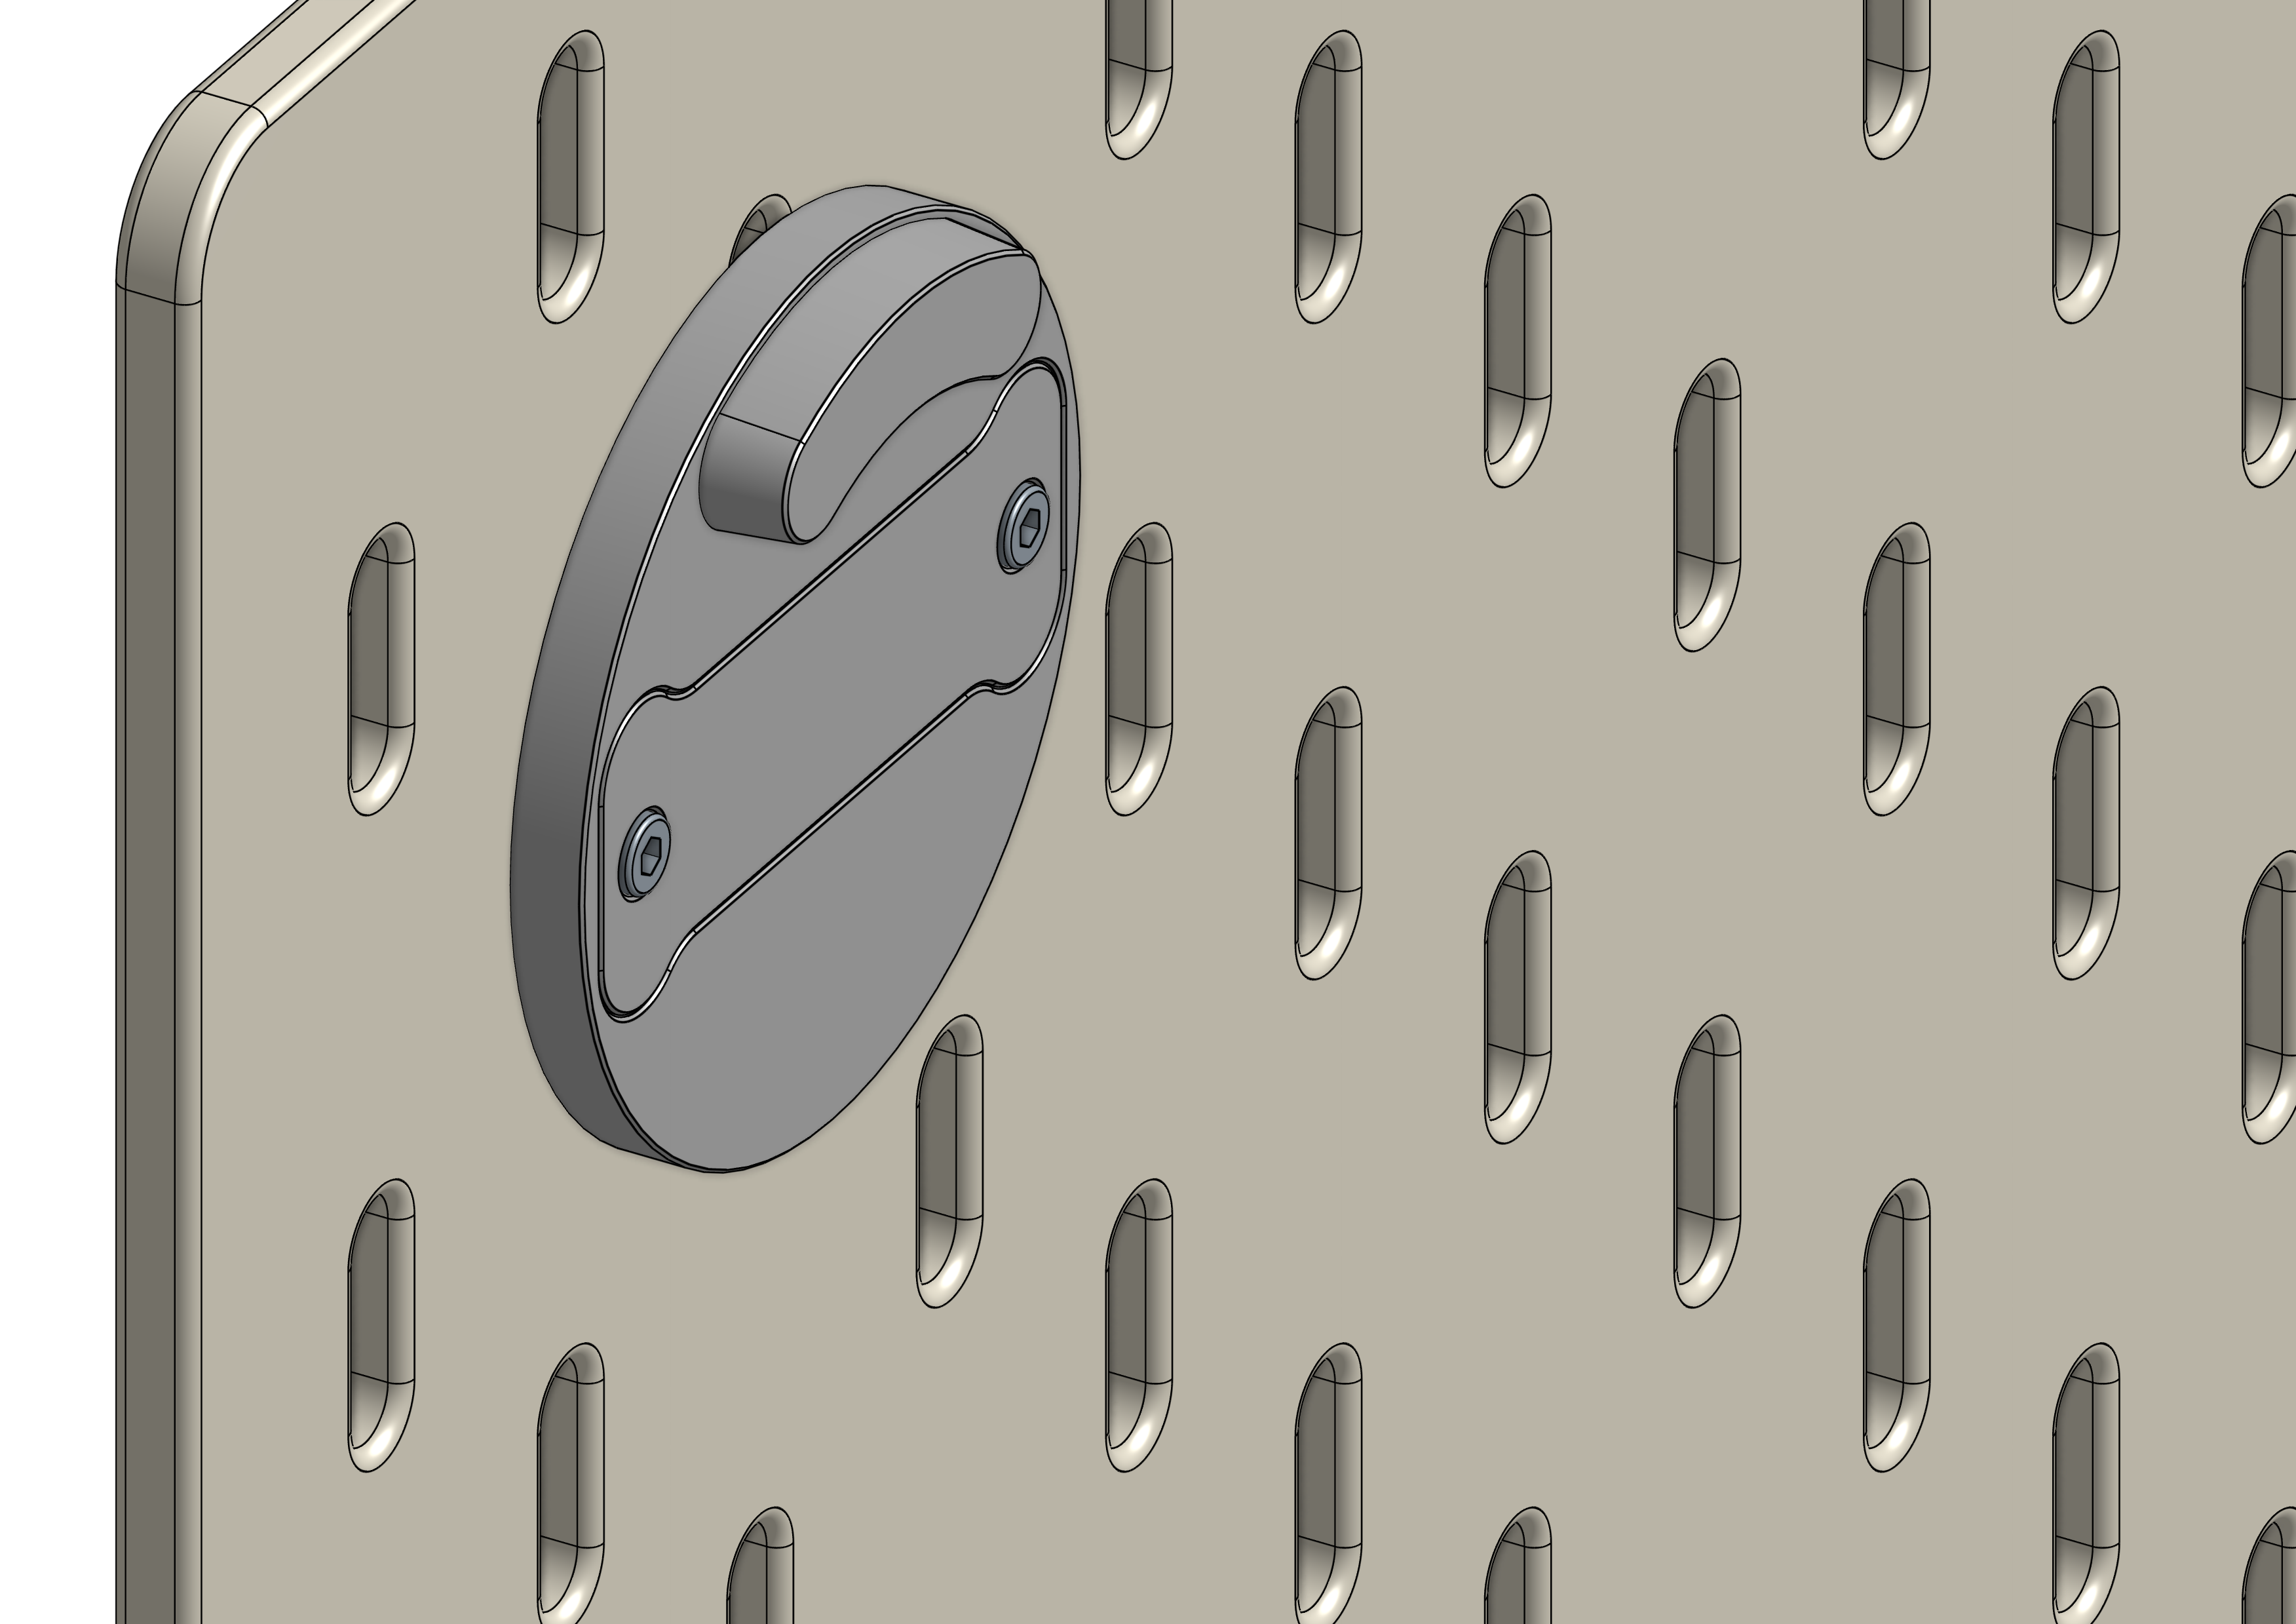
Skadis Mount for Xiaomi Temperature and Humidity Monitor
Obliczymy ostateczną cenę na podstawie wybranego pliku. Sprawdzisz ją i zaakceptujesz przed płatnością.
Zapisane na tym urządzeniu.

A mount to attach a Xiaomi Mi Temperature and Humidity Monitor to an IKEA SKÅDIS pegboard
- Ocena
- 0 / 5
- Polubienia
- 22
- Pobrania
- 56
- Wydruki
- 0
- Wyświetlenia
- 875
- Oceny
- 0
Aktualizacja u źródła:
Informacje o modelu
- Źródło
- Printables
- Kategoria
- Other Gadgets
- Licencja
- Creative Commons — Attribution — Share Alike
This is mount to attach a Xiaomi Mi Temperature and Humidity monitor (version 1) to an Ikea Skadis pegboard. It uses Skadis T-Nuts for secure and easy installation.
 | Read more about the Skadis T-Nuts Mounting System and check out the Skadis T-Nuts Collection for more Skadis accessories that use T-Nuts. |
BOM
| Qty | Description | Sourcing |
|---|---|---|
| 2 | M2.5 DIN934 Hex Nut | Aliexpress |
| 2 | M2.5x12 (or longer) Socket Head Cap Screw | Aliexpress |
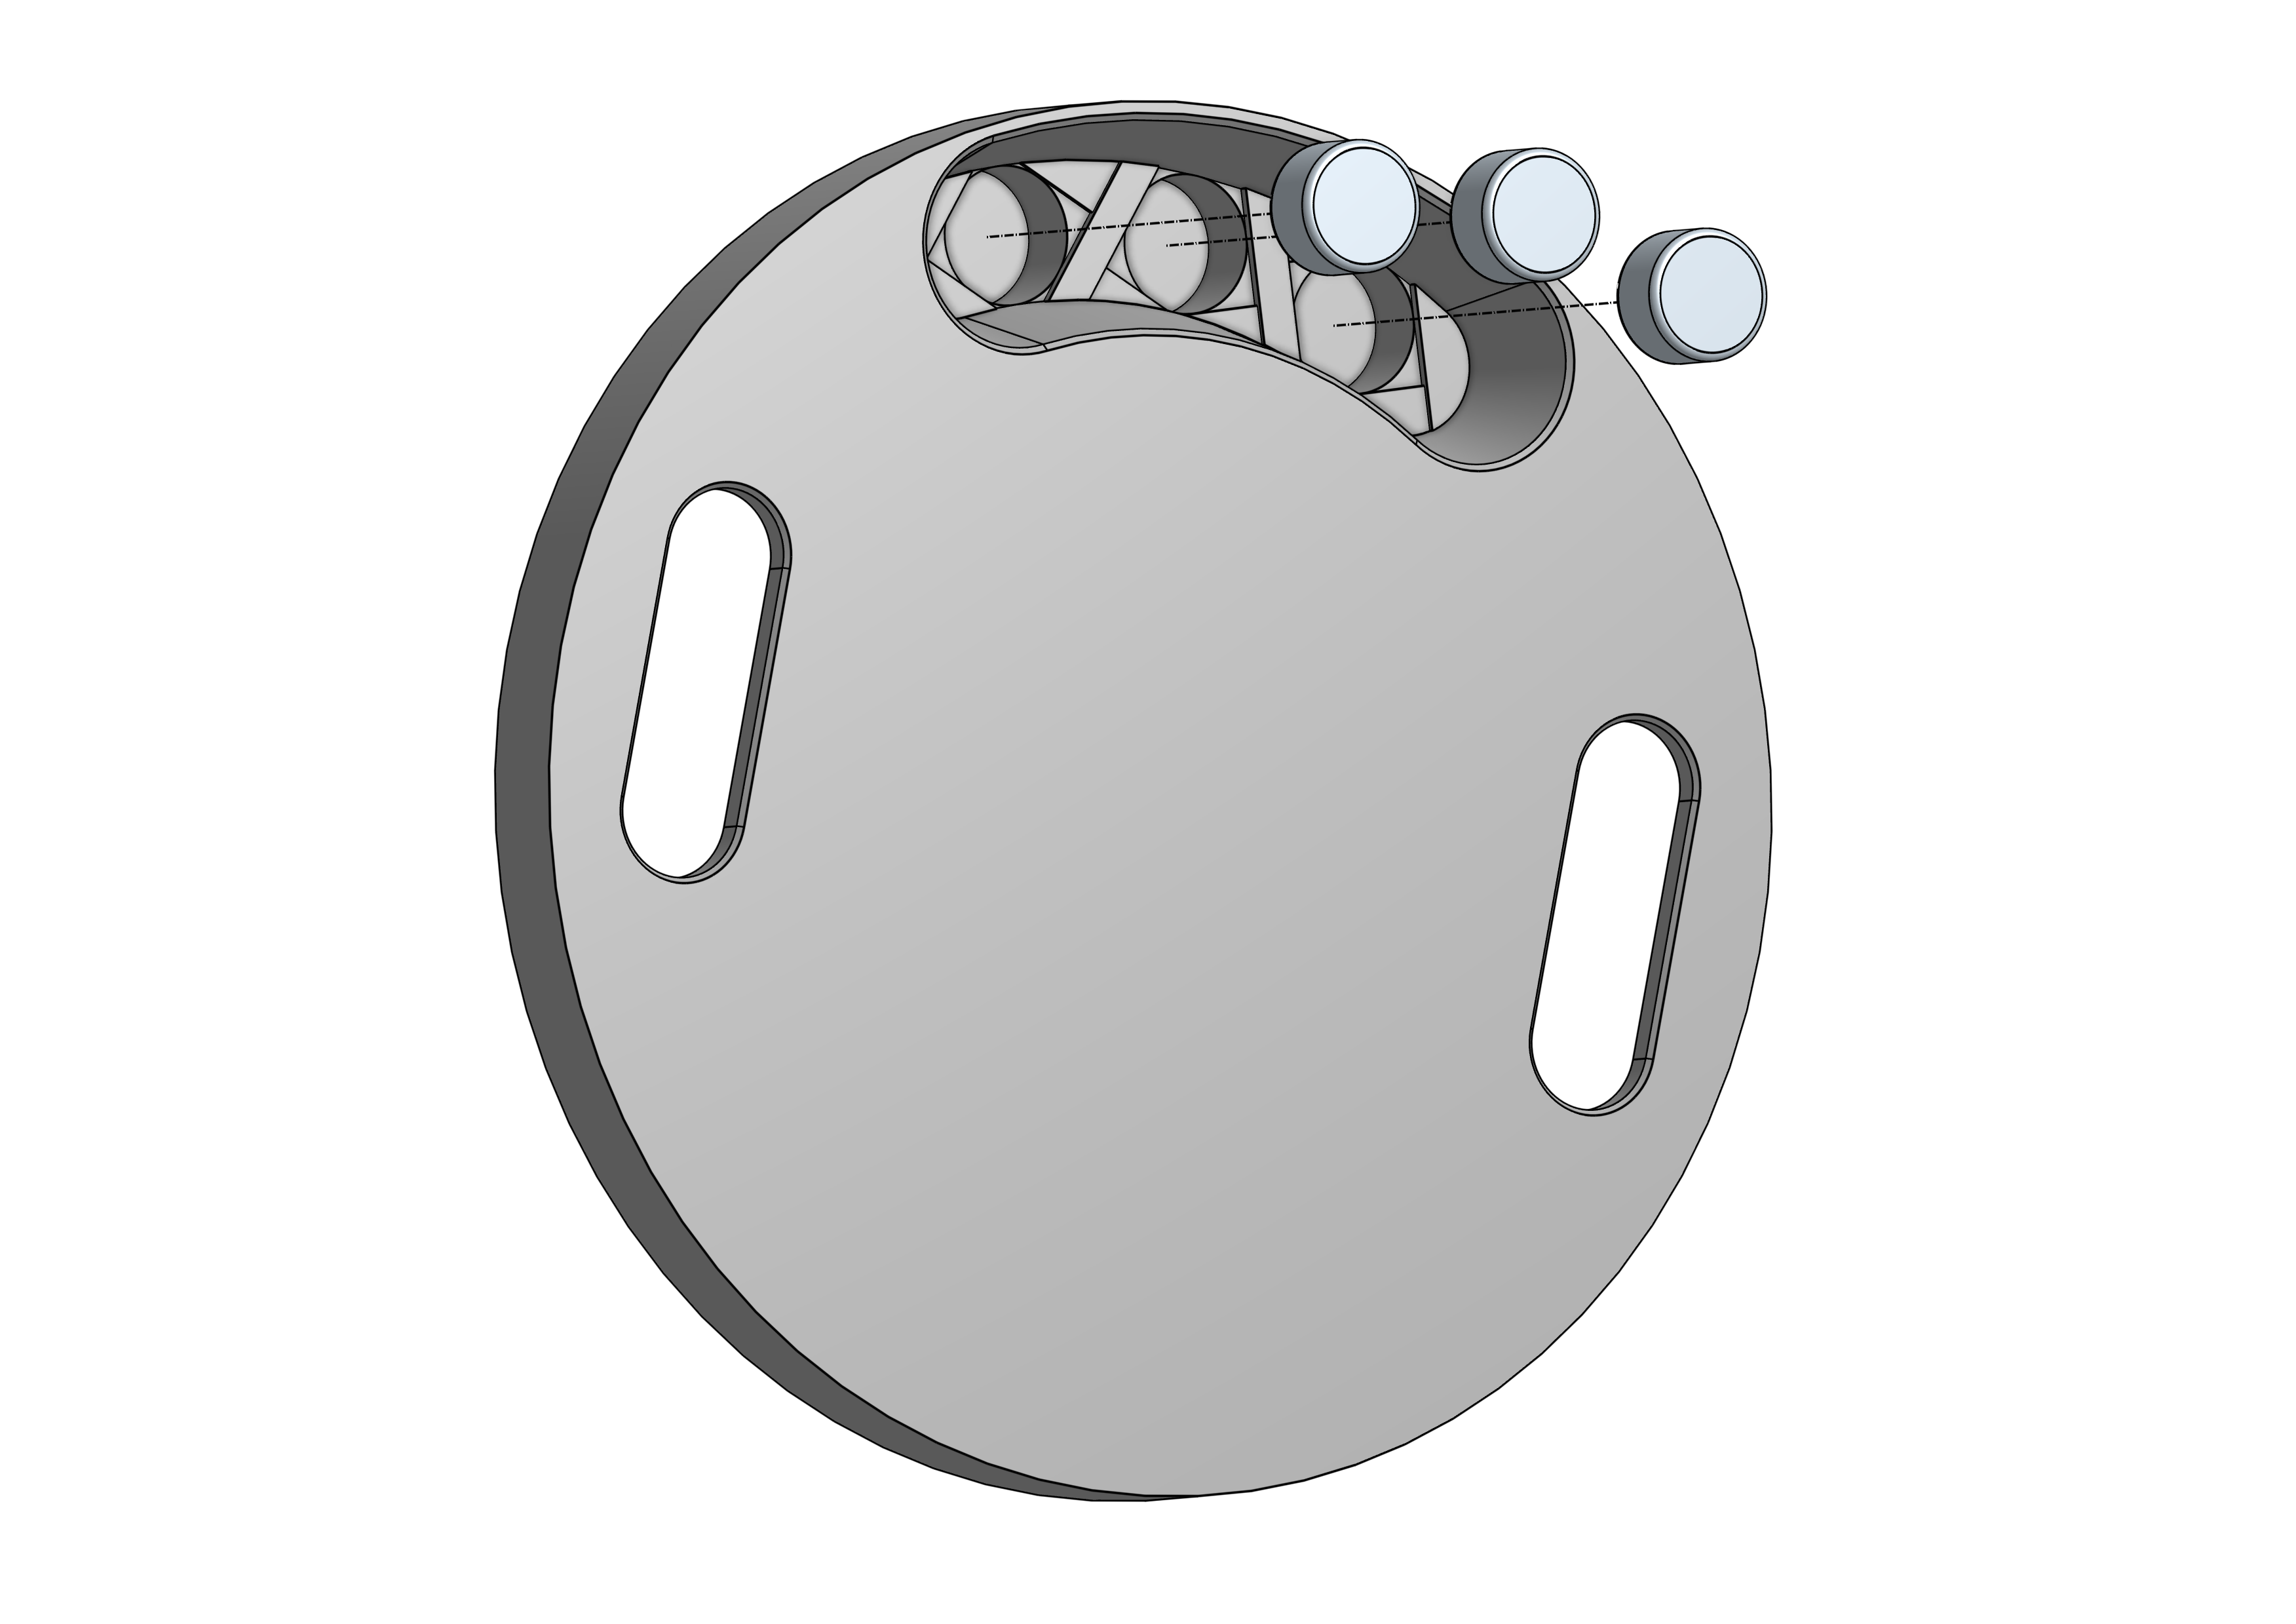
| 2-3** | Neodymium disc magnets with 5 or 6mm diameter and 2-4mm thickness | Supermagnete (CH), Supermagnete (DE) |
| Superglue |
** The 6mm version uses two magnets. The 5mm version uses 3 magnets.
Printed Parts
| Qty | Part |
|---|---|
| 1 | Mi TH Mount 5mm.stl or Mi TH Mount 6mm.stl |
| 1 | Mi TH Dog Bone.stl |
| 2 | Skadis T-Nut M2.5.stl |
5mm VS 6mm Version
The 6mm version has very thin walls. If you have 6mm magnets lying around use the 6mm version. If you're going to purchase magnets use the 5mm version and purchase three 5x3mm disc magnets.
Printing
Print the parts in the original orientation. All STL files are pre-rotated for printing. Check out the Skadis T-Nuts page for T-Nut print settings.
Print Settings
- Material: PLA, PETG, etc
- Layer height: 0.2mm
- Extrusion width: 0.4mm
- Perimeters: 3
- Infill: 15% or more
- Support material: No
Assembly and Installation
Step 1 - T-Nuts
Prepare the T-Nuts. Push an M2.5 hex nut into the bottom of both T-Nuts. You may have to use some pliers or other tool to push them in.

Step 2 - Dog Bone
Stick the M2.5 screws through the Dog Bone and screw the T-Nuts on. Leave a gap of about 2mm between the T-Nuts and the Dog Bone.

Step 3 - Magnets
Insert the magnets into the back of the base and secure them with superglue. I'd recommend inserting and gluing each magnet separately and wait a few seconds for the glue to harden so the magnets don't snap together.
Step 4 - Assembly
Align the T-Nuts with the alignment pegs and tick the Dog Bone assembly through the Mount. You can optionally superglue the Dog Bone to the Mount. Pay attention not go get any glue on to the screws or T-Nuts.

Step 5 - Installation
Align the T-Nuts with the alignment pegs on the Dog Bone. Push the whole assembly through the holes on the pegboard. Tighten the M2.5 screws but do not over-tighten. As you tighten, the T-Nuts will lock in the horizontal orientation and then clamp the assembly against the board.

Success!
You can now attach the the device.
To remove the mount again, loosen each screw by half a turn and pull the whole assembly off the board.