1 / 4
Tiny Llama x86 case
Zamów wydruk tego modelu
Obliczymy ostateczną cenę na podstawie wybranego pliku. Sprawdzisz ją i zaakceptujesz przed płatnością.
Zapisane na tym urządzeniu.

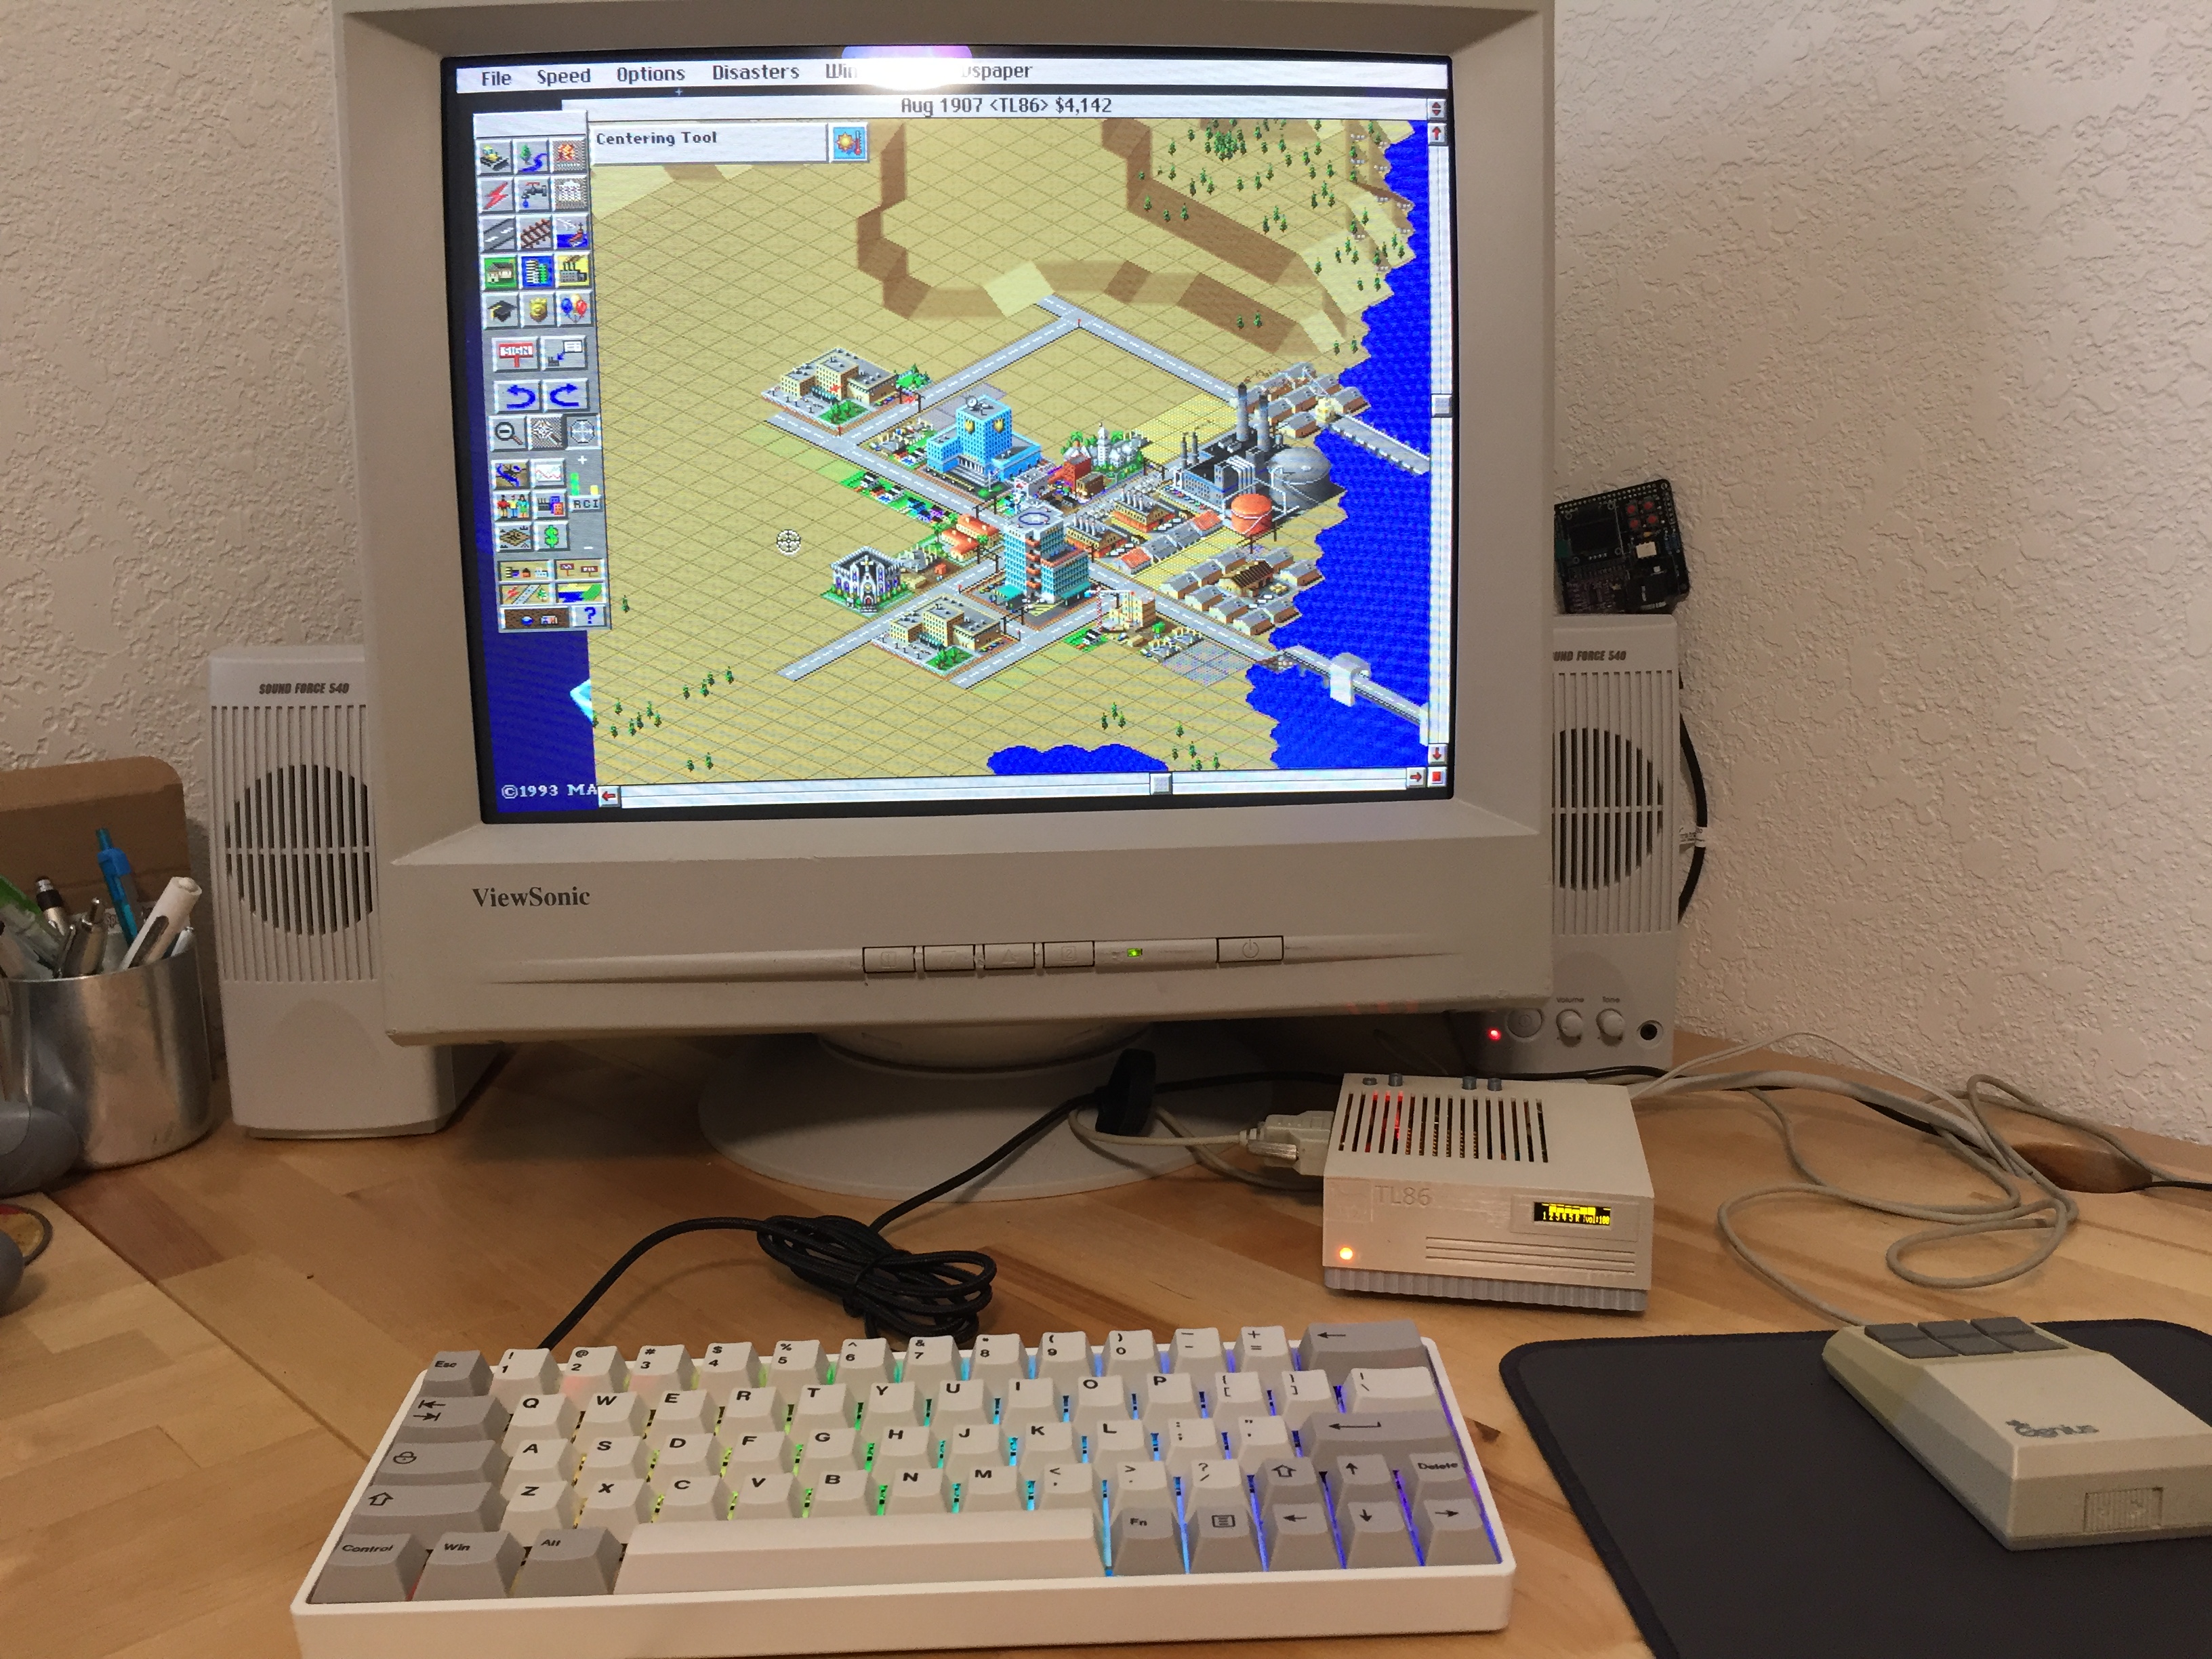
Tiny Llama x86 case. Created in TinkerCAD. Links and information below.
- Ocena
- 0 / 5
- Polubienia
- 8
- Pobrania
- 28
- Wydruki
- 0
- Wyświetlenia
- 796
- Oceny
- 0
Aktualizacja u źródła:
Informacje o modelu
- Źródło
- Printables
- Kategoria
- Computers
- Licencja
- Creative Commons — Attribution — Share Alike
TinyLlama single board x86 PC case.
I created an case and buttons for version 1.1 of the Tiny Llama Vortex86EX SOM single board DOS computer in TinkerCAD.
Revised 01/26/2023: Enlarged vga port opening in base. Widened space for 1.1 PCB board by 5.mm on each side.
- Link to GITHUB of the project: https://github.com/eivindbohler/tinyllama
- Link to Vogons thread on the project: https://www.vogons.org/viewtopic.php?f=25&t=84880
- 128x32 OLED Display Bezel used in the case top design (scaled to 103%) created and shared by Optix74 on ThingVerse https://www.thingiverse.com/thing:4768895
- Hardware needed:
(2) M3 x 6mm screws (secure rear of base to top)
(2) M3 threaded brass heat inserts (for case top)
(4) M3 x 16mm screws (secure system board to base)
(4) M3 nuts (fits bottom of case base)
(2) Hex Standoff 4#-40 (secure vga header to base)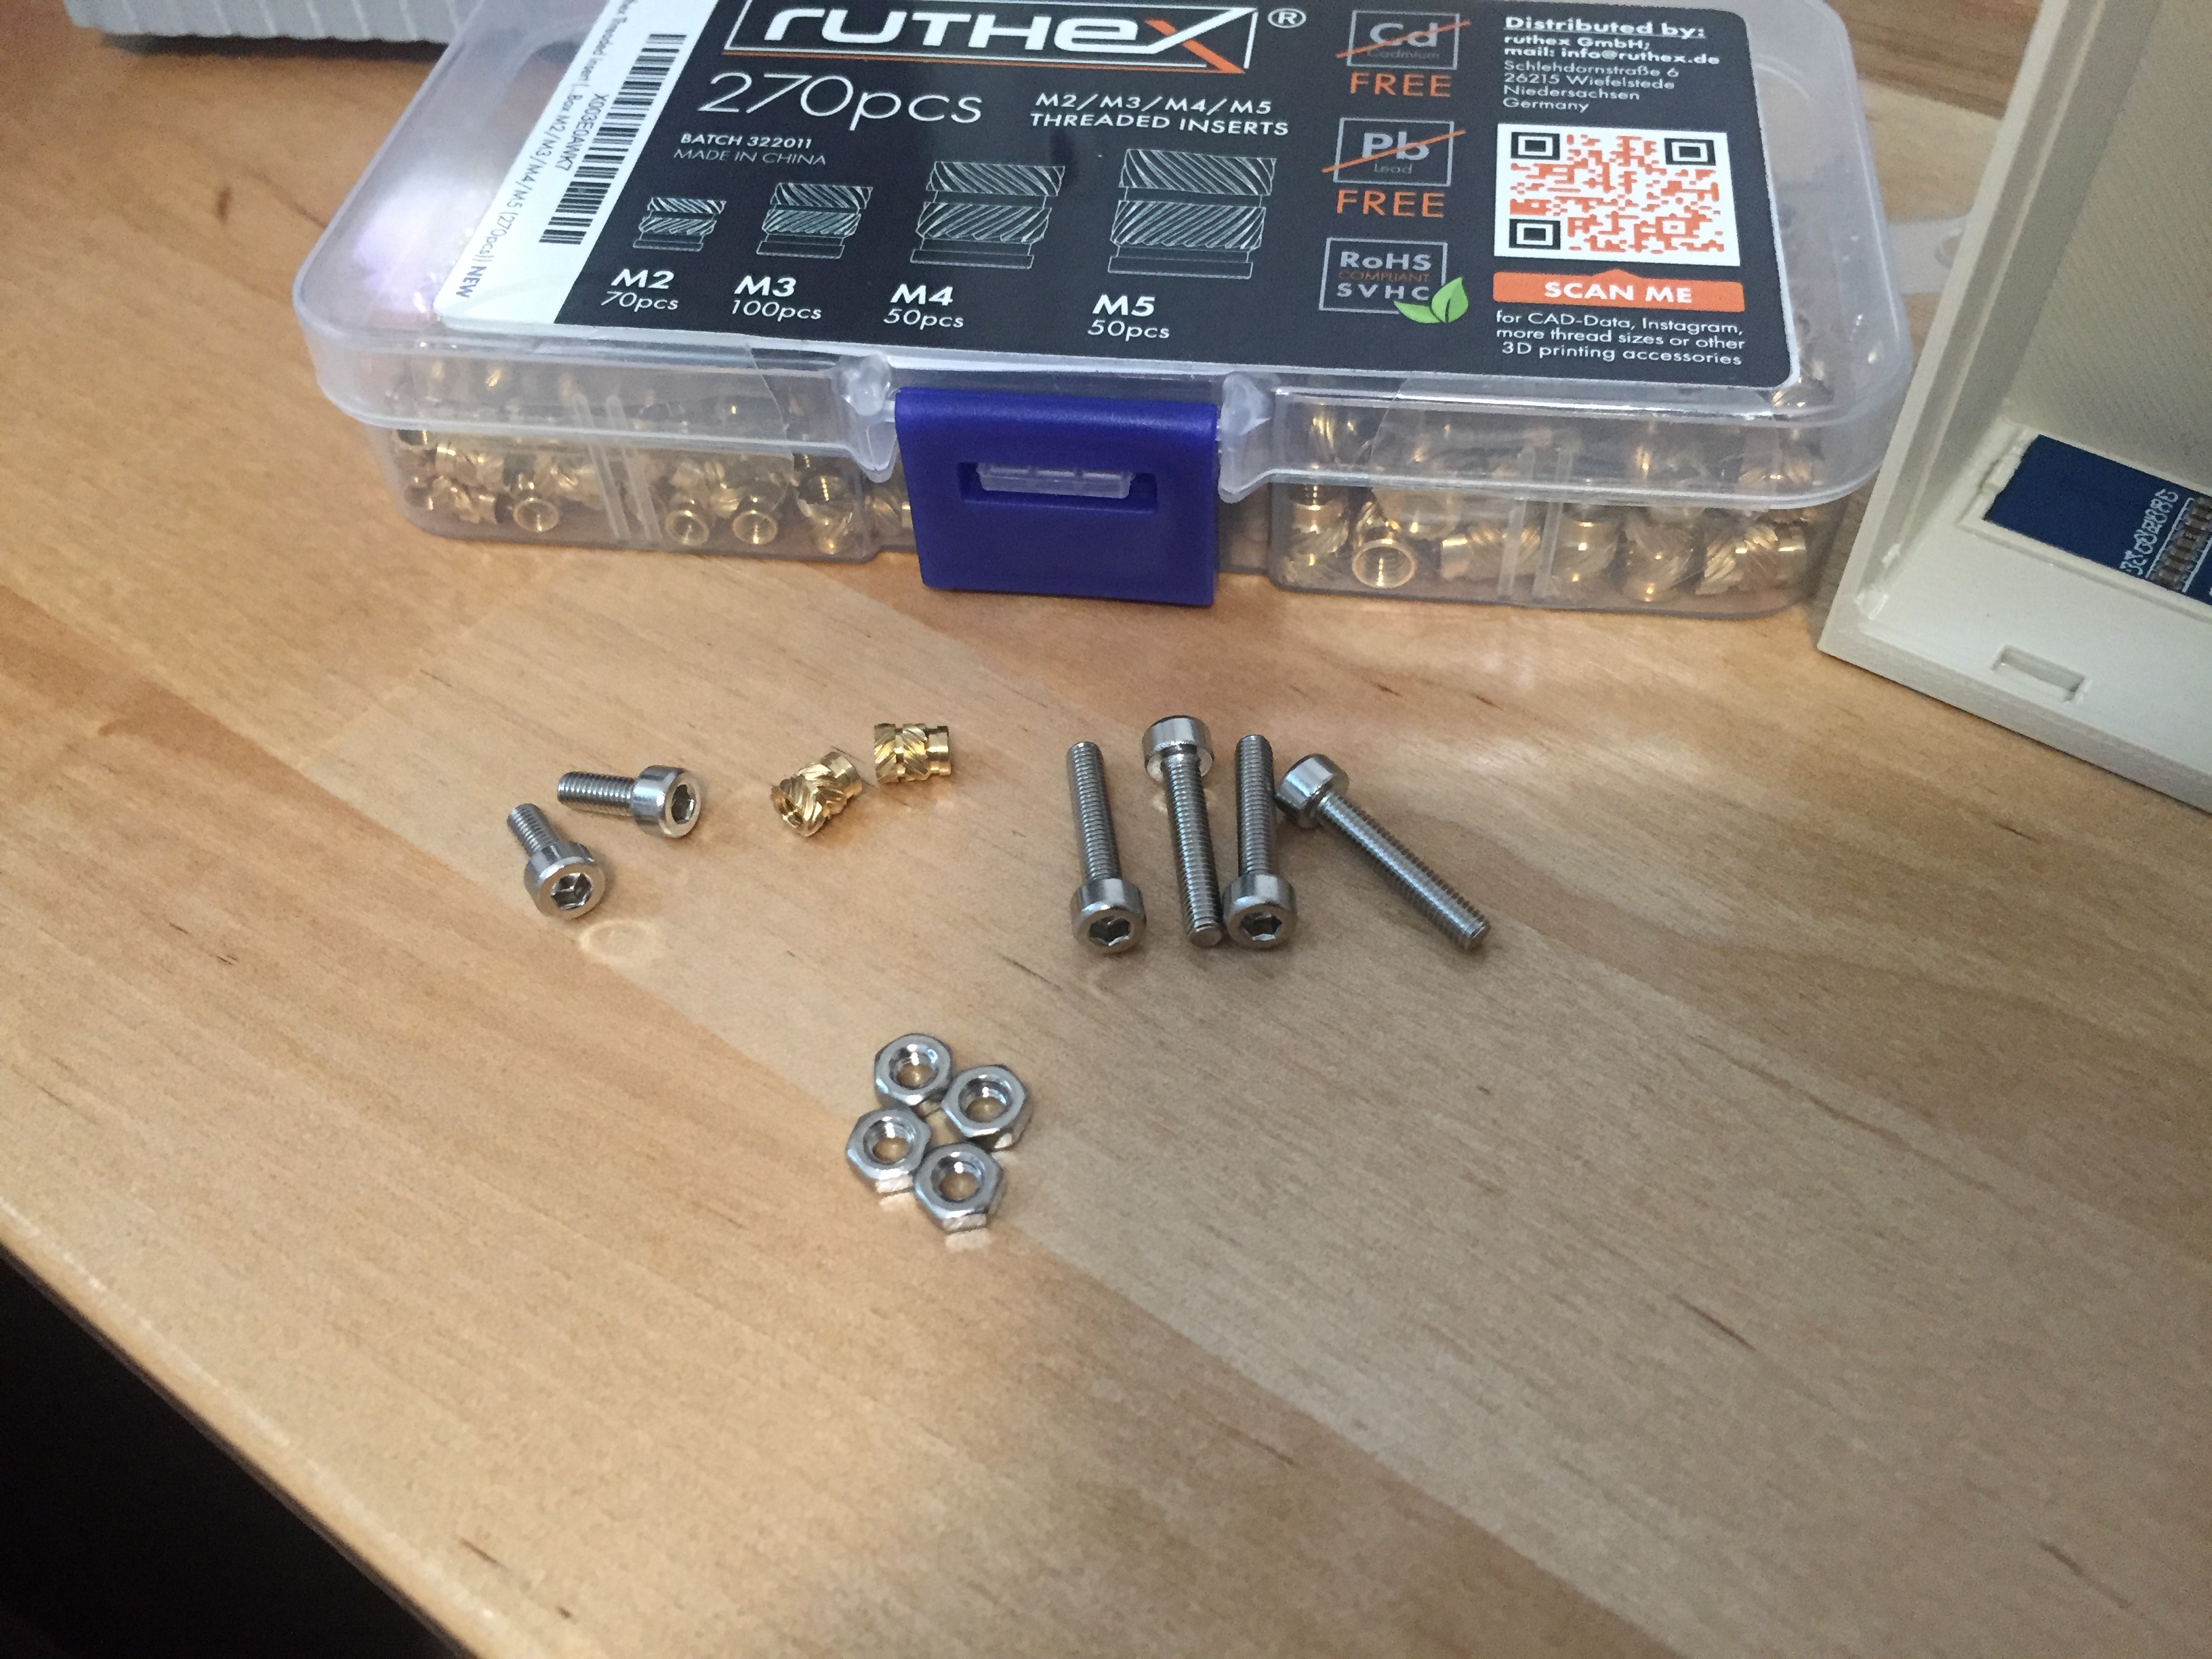
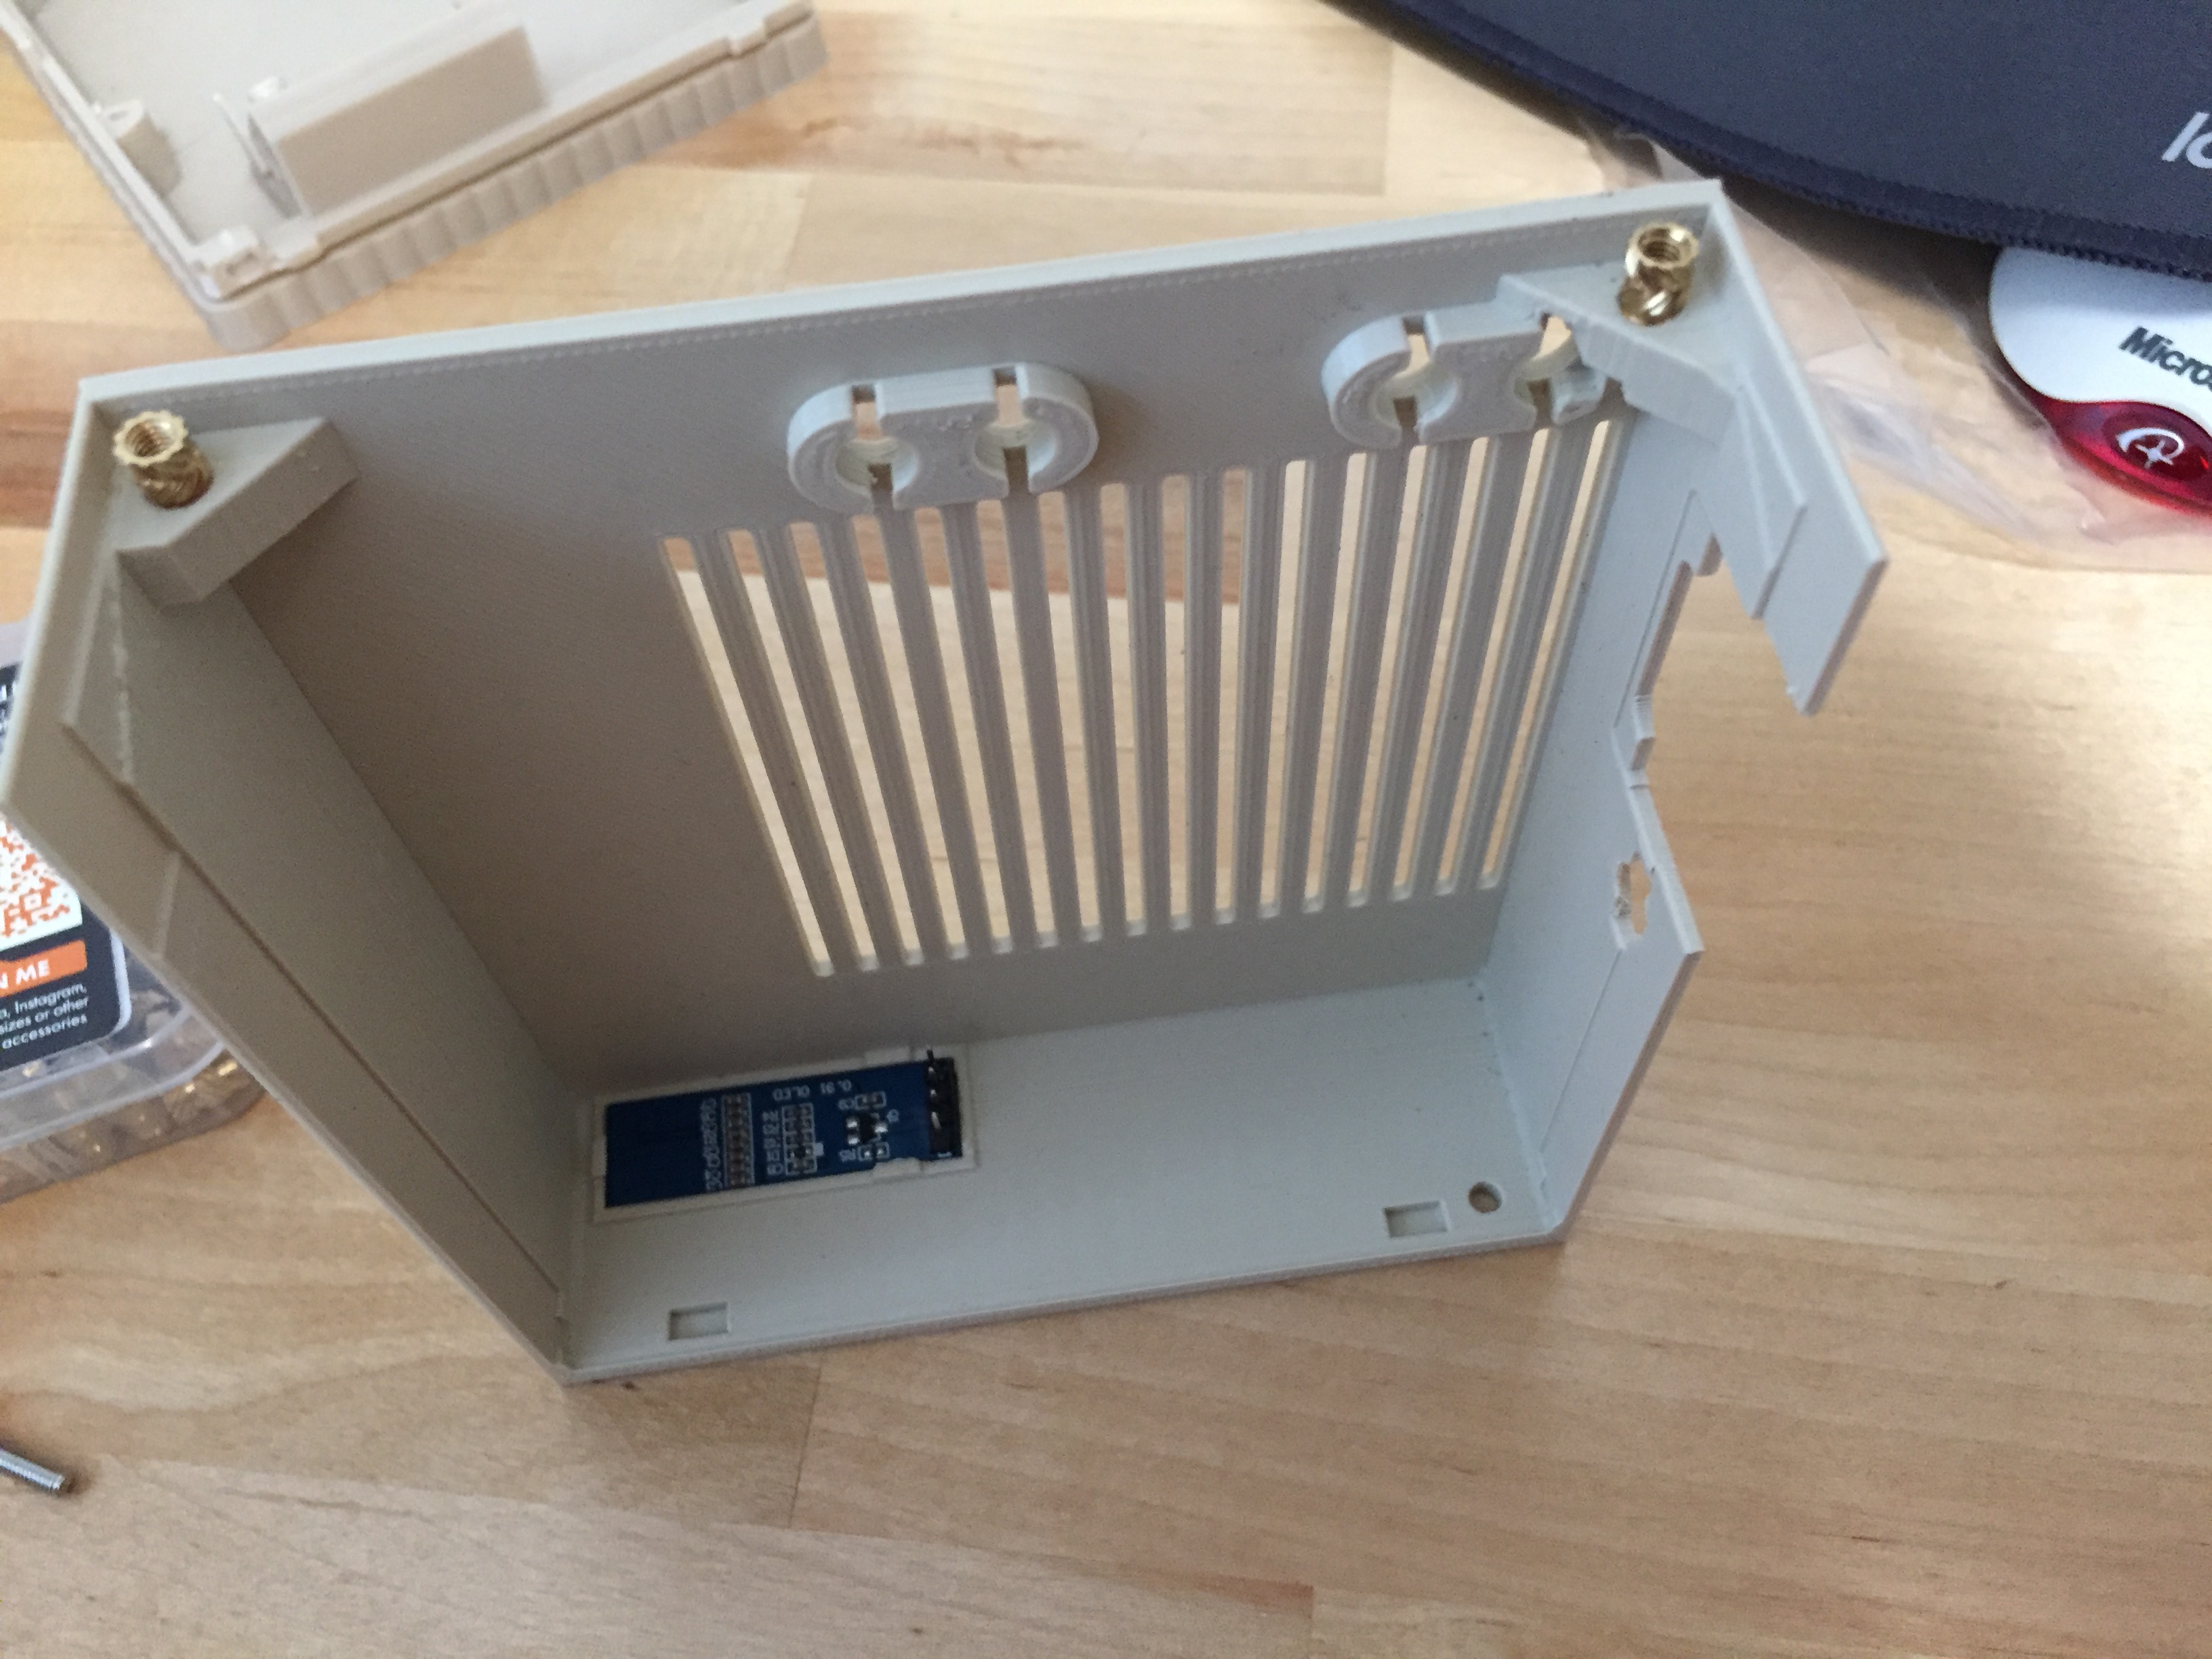
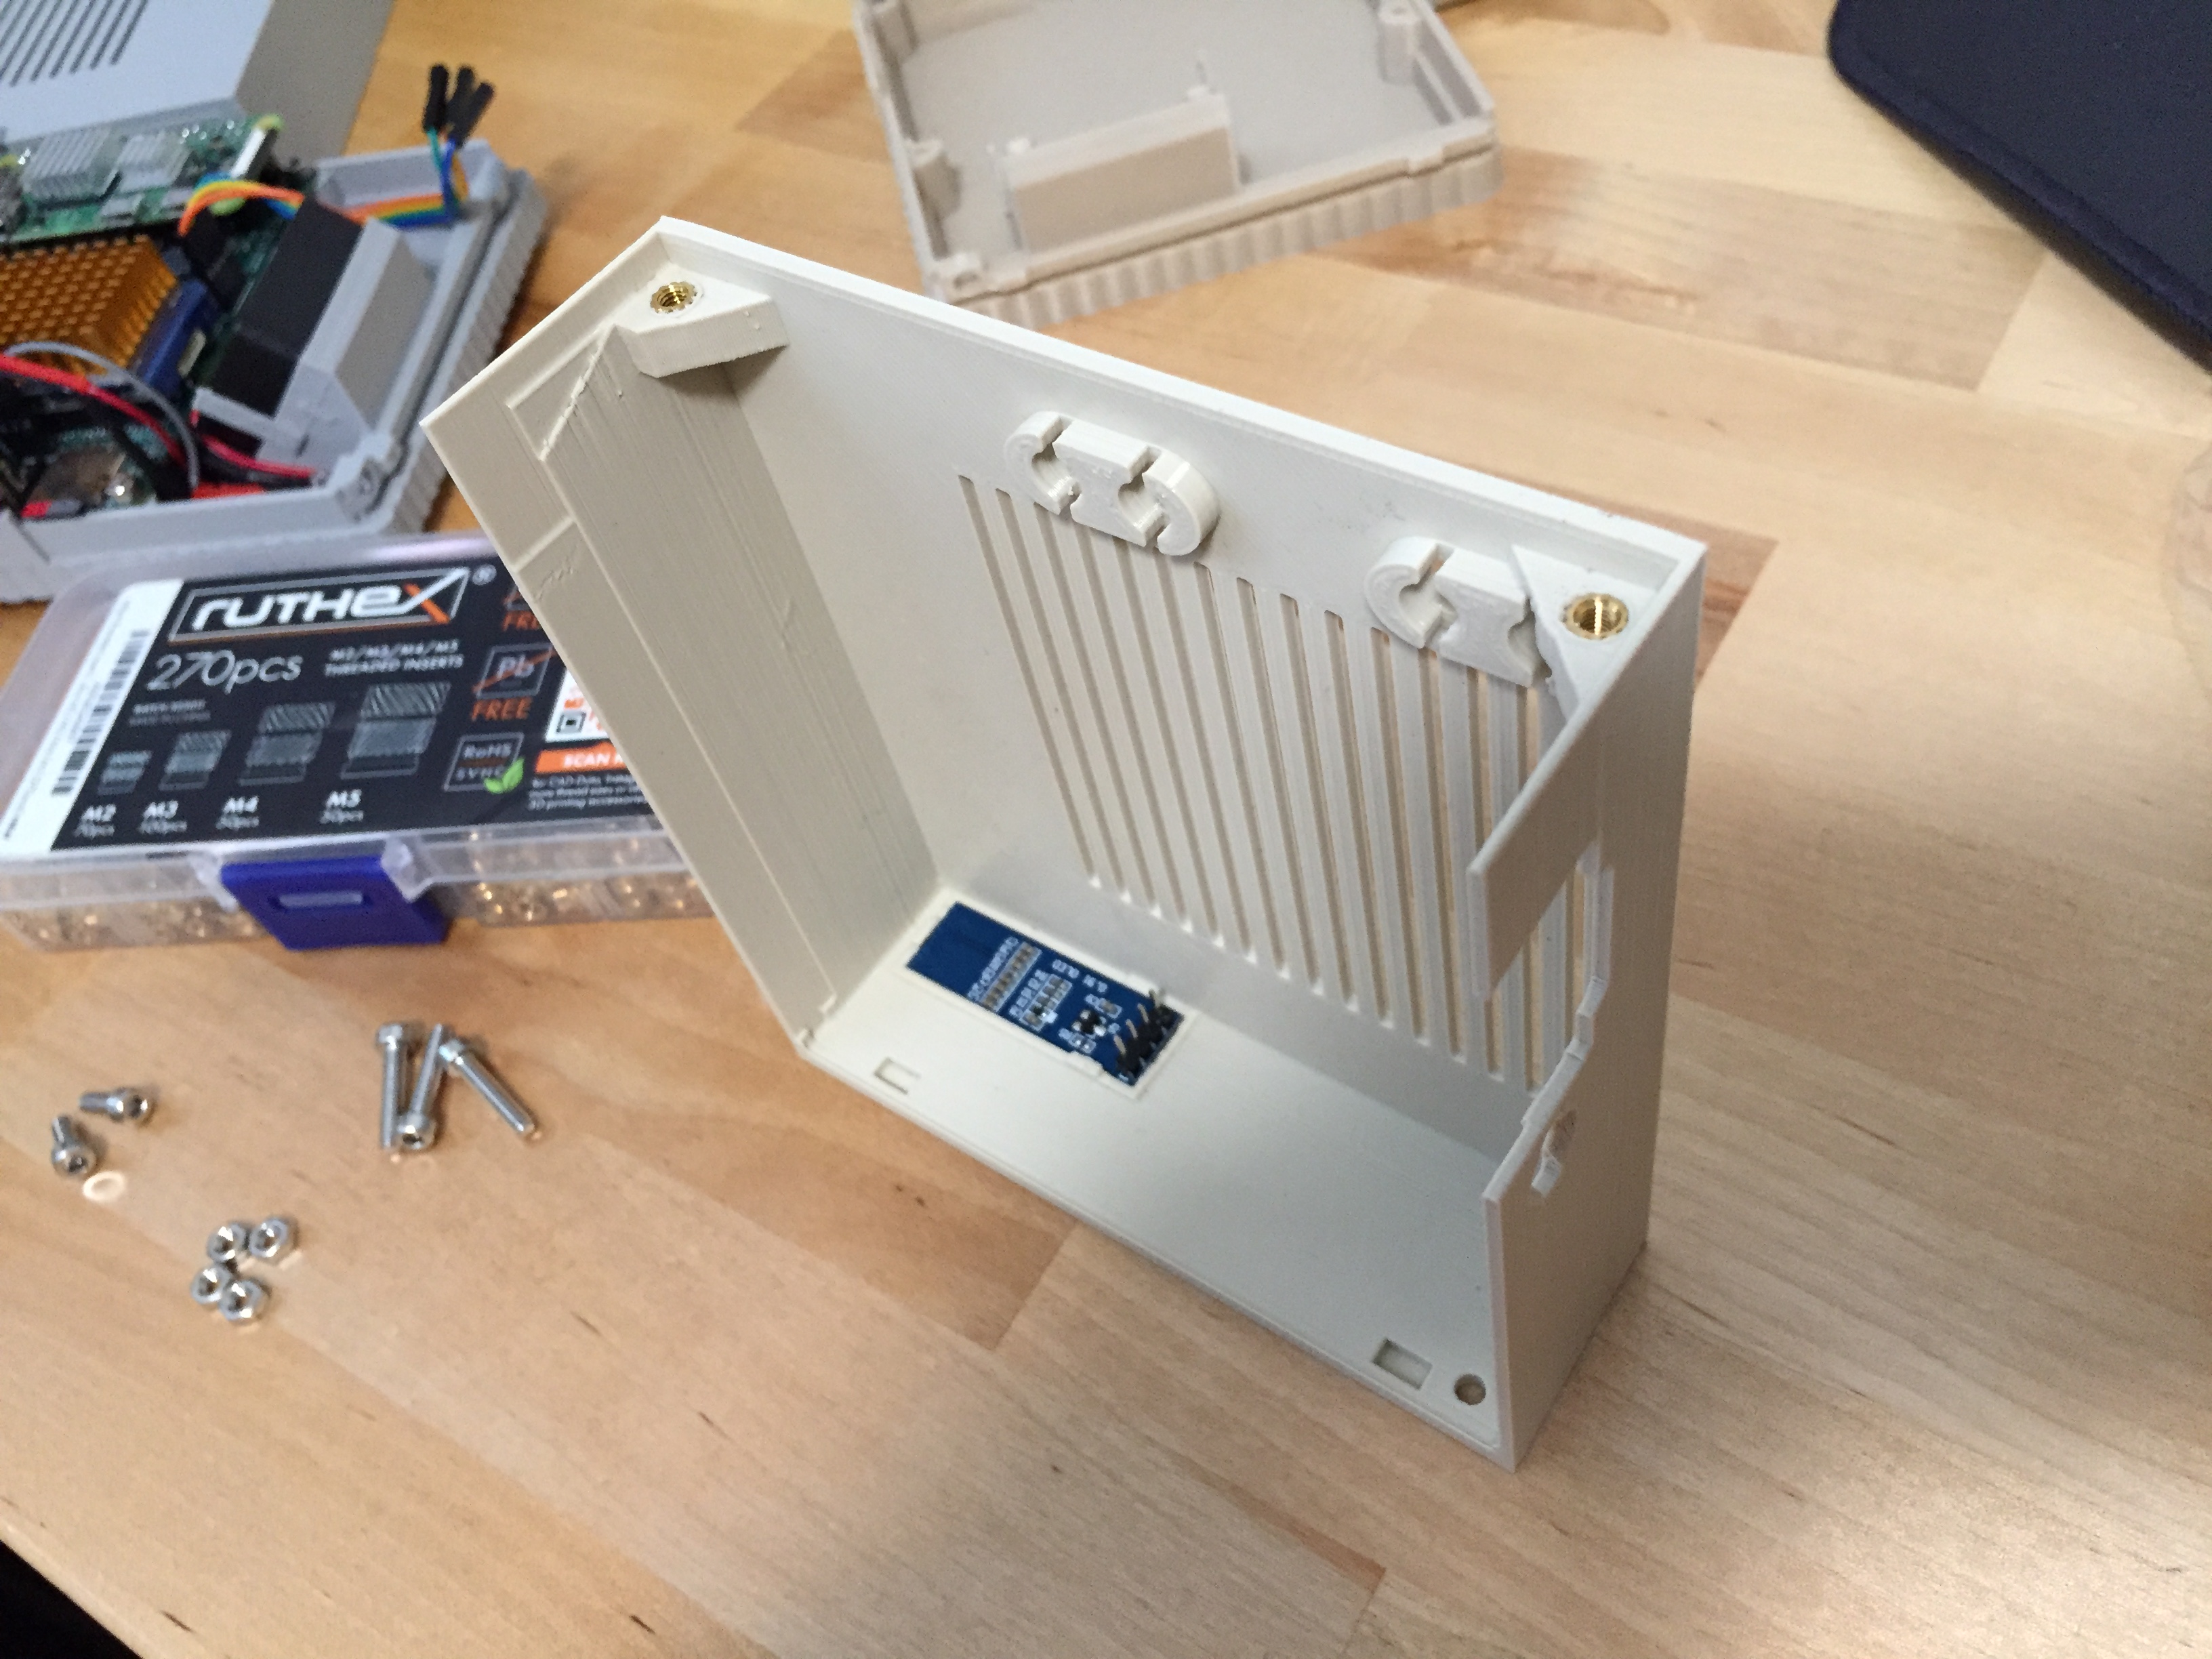
- When installing VGA connector in base. Be sure to insulate the top of it with kapton tape to prevent any shorts of the metal housing. Also cut any pins on the board flush that are located above the vga connector to be safe.
- Printing:
Used .4mm nozzle and 20% infill.
Printed with “Printed Solid Jessie 500 PLA” https://www.printedsolid.com/products/jessie-pla-1-75mm-x-1kg-beige-500
If using the above filament, use high extrusion temperature (~230c) or you will have poor layer adhesion.
Buttons print upright. Case base prints normally, only supports were for USB , vga and memory card slot. Print top case upside down. Use a brim if you have bed adhesion issues. Recommend using support blockers on the round holes. - Additional parts you may want to add. 5mm LED for power indication. A 3mm could also work with some glue to hold it in place. Fits the case base and shows through front of top cover. Use appropriate resistor (75ohm for example) to limit power to led from 3v source.
40x10MM 5v or 12v cooling fan (nice if you overclock). Fan fits the base very snugly without any fasteners needed(uses screw head recess of fan body to hold in place). A set of four rubber feet. This will elevate the base to allow airflow for the fan intake.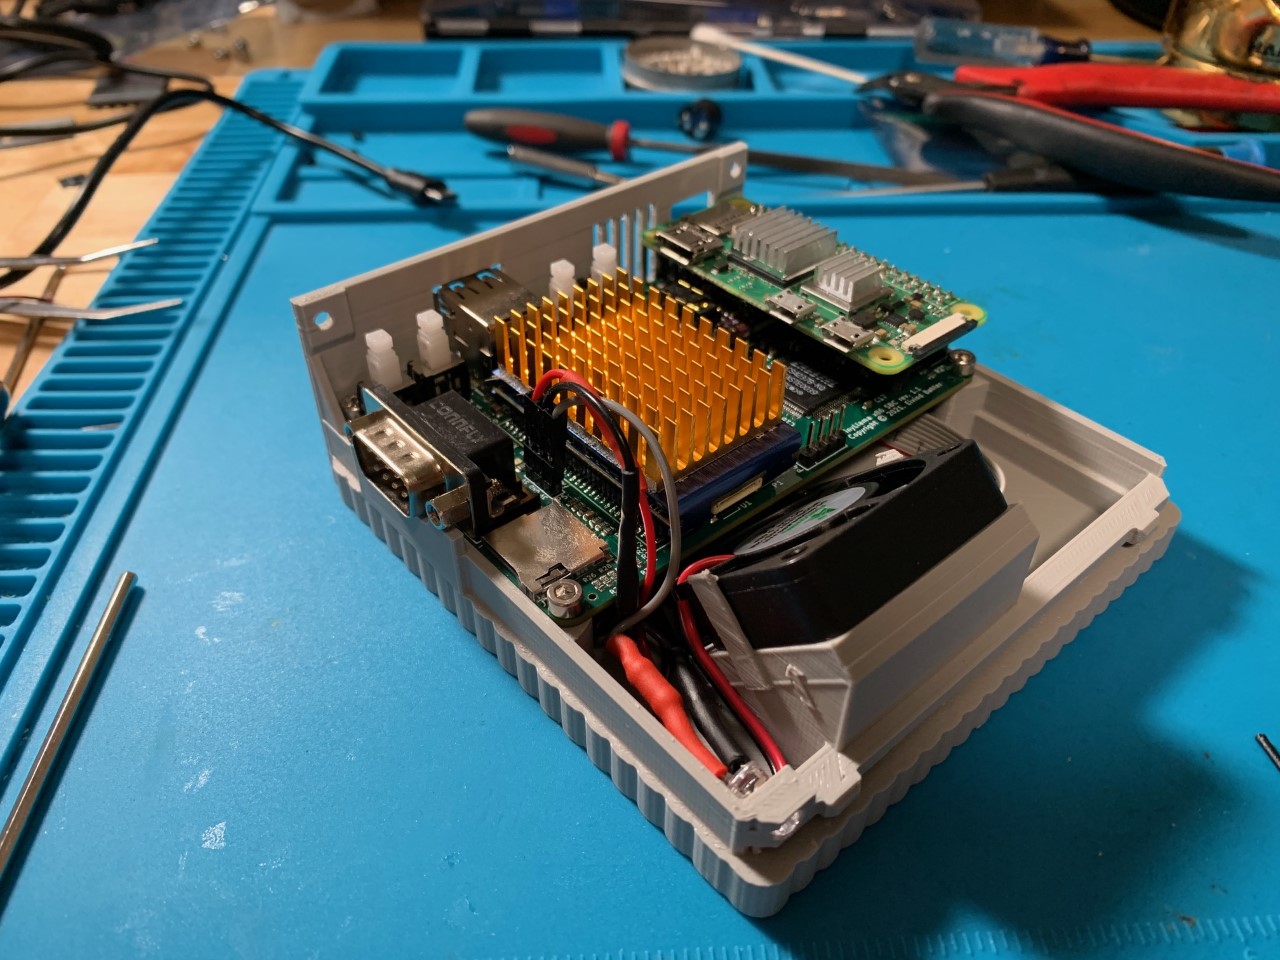
- Feel free to modify or customize this design on TinkerCAD here:
Buttons https://www.tinkercad.com/things/ih1Of0sWMSZ
Case top https://www.tinkercad.com/things/d0FCe8YYv4M
Case base: https://www.tinkercad.com/things/4x1AM5zuciA - Enjoy!