
RatRig V-Minion Z-Endstop Klicky EVA3
Obliczymy ostateczną cenę na podstawie wybranego pliku. Sprawdzisz ją i zaakceptujesz przed płatnością.
Zapisane na tym urządzeniu.

mechanical z-endstop for v-minion
- Ocena
- 0 / 5
- Polubienia
- 26
- Pobrania
- 56
- Wydruki
- 0
- Wyświetlenia
- 1511
- Oceny
- 0
Aktualizacja u źródła:
Informacje o modelu
- Źródło
- Printables
- Kategoria
- Other Printer Parts & Upgrades
- Licencja
- Creative Commons — Attribution — Noncommercial
Hi,
I've designed Klicky Z-Endstop for RatRig V-Minion with EVA3.
Because of it's construction is really hard to get ‘space’ for that solution.
But after few ‘little’ modifications You will be able to do it!
First steps:
- Move X engine ‘holder’ far to left to get more space. It will require loosening the belt of X axis. You need extra ~-5 to 6mm in X axis. Make sure to set in klipper position_min to -X value (X - in mm new negative value)
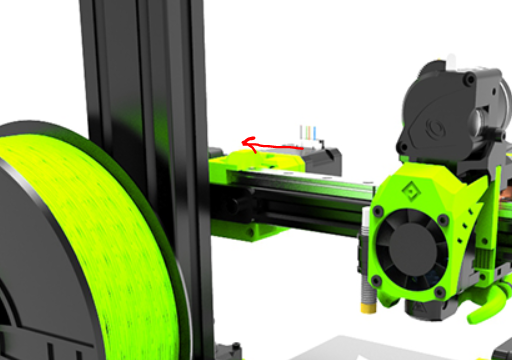
- You will probably need to cut corner of front panel of EVA3, like in the picture below. W/O that carriage will hit X-plate - and You will be not able to move carriage closer to Z extrusion. 45 angle cut. OR print new front panel modified by me.
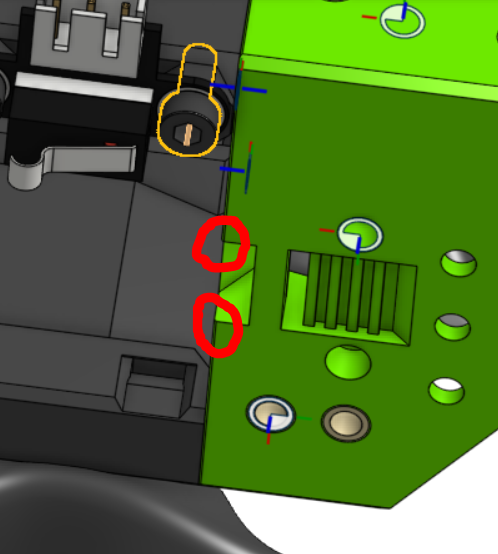
Now You should be able to move the nozzle out of bed.
Klicky Z-Endstop switch BOM:
- 1x Body Fab1.STL - ABS is highly recommended
- 1x D2F-5L switch - remove metal lever (https://www.tme.eu/pl/details/d2f-5l/mikroprzelaczniki-snap-action/omron-ocb/d2f5l/)
- 1x fi 5mm, 22mm long, metal pin (You can cut old 5mm drill)
- 1x 5x8x10mm bushing (https://www.sklep.neronpila.pl/Tuleja-tulejka-z-brazu-5x8x10-AMES-p48252)
- 2x M2x10mm self taping screws
- 2x M3x12mm screws
- 2x T-Nut M3/3030
- 1x 3-Pin JST 2.54 socket
- thin wire

Assembling:
- Solder 2 wires - 1 to NC, 1 to C
- Bend switch pins at 45 angle. To avoid short circuit - switch is really close to the printers frame.
- Insert switch to in place and tighten the M2 screws.
- Insert JST socket in place and solder 2 wires to it.
- Push bushing in place
- insert metal pin in place.
- insert M3 screws + t-nuts and pre tighten it on extrusion
That's it.
You will probably have to move z-endstop on extrusion to find perfect spot.
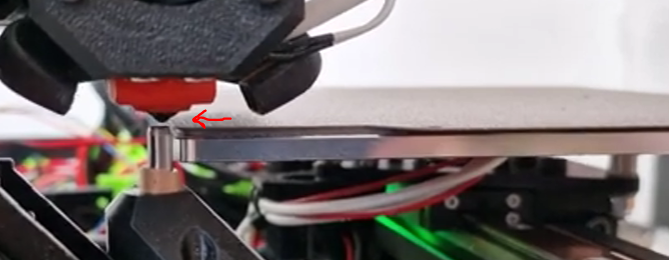
My pin is in ~0.5mm distance from heatbed.
now make proper adjustmets in klipper and perform first z-homming. Make sure that You nozzle is always clean. Calibrate z-offset.
this is how it works:
Enjoy
If You want, buy me a coffee :)
ko-fi.com/marcinmiszewski