
The Modular Lantern Frame, Lid, Pole and Foundation - Low Poly Design
Obliczymy ostateczną cenę na podstawie wybranego pliku. Sprawdzisz ją i zaakceptujesz przed płatnością.
Zapisane na tym urządzeniu.

This is the low poly design of the modular lantern. The frame, pole and foundation.
- Ocena
- 5 / 5
- Polubienia
- 144
- Pobrania
- 491
- Wydruki
- 3
- Wyświetlenia
- 2589
- Oceny
- 3
Aktualizacja u źródła:
Informacje o modelu
- Źródło
- Printables
- Kategoria
- Home Decor
- Licencja
- Creative Commons — Attribution — Share Alike
This is the low poly design of the modular lantern LR2268. It builds the project’s base and contains the frame, lid, pole and foundation. Use these with one of the side panel prints to create a small candlelight or a complete lamp with a post and foundation.
On this page, you will find all files you need for the print and detailed instructions on how to print them. After printing the frame, you must print one side panel design to complete the lantern.
Preface
The idea of this design is to create a lantern with interchangeable parts. You can start by printing a small candlelight and extending it later into a lamp with a lid and stand. Also, you can print new side panel designs and replace them as you like.
All parts of the LR2268 share the same connecting geometries and are compatible. If I publish alternative designs for the modular lantern, you can easily mix these with the ones you have already printed.
Requirements
The modular lantern can be printed on almost every 3D printer using PETG or PLA.
- You need a 3D printer like a Prusa MINI, Prusa i3 MK3S+ or similar.
- For the side panels, you need transparent PETG or PLA filament.
- You need an opaque PETG or PLA filament you like for the frame.
You will find all details, how to print the design and which model files you need on this page.
Where to Start?
Select a Side Panel Design
Start by selecting a side panel design you like and print these panels. Usually, the side pieces are more complicated to print than the frame. Look in the “Side Panel Designs” section for a list of side panels available for print.
Print the Minimal Version of the Frame
If you have your side panels printed, the best is to continue printing a minimal version of the lantern for candles.

It is an easy and quick print with only a few required parts.

For the minimal print, you need the following model files:
LR2268-1X-…- the side panels you already printedLR2268-21- the lower frameLR2268-22- the flat baseLR2268-23- the upper frame- 4 ×
LR2268-31- the sidebars for the frame
There are several prepared PrusaSlicer projects that you can use as a good base for printing and also learn in which orientation the individual parts are printed. Detailed instructions and tables will be found in the “How to Print the Frame” section.
Assemble the Lantern
After you have printed all parts, you have to assemble them. There is no glue required as the individual elements easily click in place.
You will find detailed assembly instructions in the “Assembly” section.
How to Print the Frame
The Sides
As each side design has its variants and peculiarities, check out the description on its page for detailed printing instructions. Also, you will find an example PrusaSlicer project there.
The Minimal Frame for a Candlelight
Compared to the sides, printing the frame is straightforward. It is a one-colour print unless you print the individual elements in different colours. Have a look at the following image for the correct orientation of the models:

There is a prepared PrusaSlicer project LR2268 Minimal Frame Print.3mf with all settings made. If you like to slice the models from scratch, have a look at the table below:
| Nozzle Size: | 0.4mm recommended It should print well with 0.6mm |
| Layer Height: | Optimised for 0.2mm |
| Filament Materials: | PETG recommended PLA works |
| Perimeters: | Three perimeters |
| Prusa Slicer Profile: | “0.20mm Quality” |
You need the following model files for this print:
LR2268-1X-…- the side panels you already printedLR2268-21- the lower frameLR2268-22- the flat baseLR2268-23- the upper frame- 4 ×
LR2268-31- the sidebars for the frame
The Frame and Stand
For the frame, lid and stand, you need two printing sessions. It is a one-colour print unless you print the individual elements in different colours. Have a look at the following image for the correct orientation of the models:


There are two prepared PrusaSlicer projects LR2268 Stand Print 1/2.3mf with all settings made. If you like to slice the models from scratch, have a look at the table below:
| Nozzle Size: | 0.4mm recommended It should print well with 0.6mm |
| Layer Height: | Optimised for 0.2mm |
| Filament Materials: | PETG recommended PLA works |
| Perimeters: | Three perimeters |
| Prusa Slicer Profile: | “0.20mm Quality” |
You need the following model files for this print:
LR2268-1X-…- the side panels you already printedLR2268-21- the lower frameLR2268-22B-B- the stand adapterLR2268-23B- the lid- 4 ×
LR2268-31- the sidebars for the frame LR2268-41- the short poleLR2268-42- the long poleLR2268-44- the platformLR2268-45B- the footLR2268-46- decoration elementLR2268-47- decoration element
Print one of the covers if you plan to add an LED light with cables through the foot part. Add them to the first print session:
LR2268-48A- foot coverLR2268-48B- foot cover
Assembly
Important: This lantern is designed with a tight fit, so prepare all printed parts properly. Remove strings and blobs from the parts and use fine sanding paper to remove any spikes sticking out on the interlocking elements.
Please start with the base frame and put it on a flat surface before you. Add three sides to the base frame as shown, and make sure the small lip at the bottom of each side is locked in the frame’s groove. Next, insert the last side. It helps slightly bend the side panel to properly slide the hook into the frame's groove.

Next, slide the sidebars into place. First, check the pieces' angles, which only match the frame one way around. There are two lines inside these pieces; these have to point downwards.
The sidebars will slide into place with little force. If the piece gets stuck, remove it and check for any blobs or strings on them or the side panels. If it looks fine and the bar still gets stuck, use fine sandpaper to remove material from the side panels until it fits.

Now slide the bottom between the sides until it touches the lower frame (not locking it into place yet). This only works if all four sides are correctly inserted. Re-check the sides’ position if you have trouble putting the bottom down to the frame.
Put the frame on a solid and flat surface and press the bottom part down until it locks into place. This requires some force to keep it secure and prevent accidents with burning candles. Best to press the part down with a piece of wood with approximately the dimensions of the bottom part. If you do it by hand, press it down at the four corners, not the middle.
The last step is pressing the top frame on top of all four sides. Done!

The Lantern with Stand
Be gentle when assembling the lantern and the stand. As this design is a piece of art, it is not designed as robust as mechanical parts. Especially the blades with the locking notches are thin and fragile.
Step 1
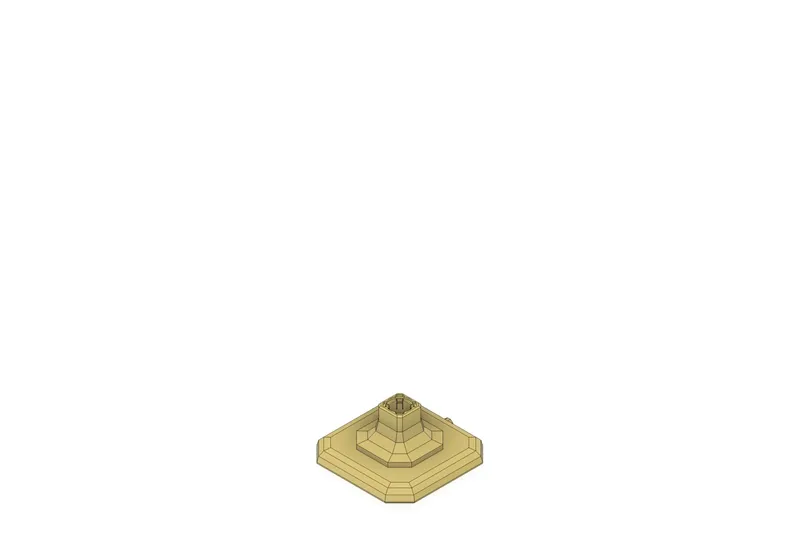
Place part LR2268-45B on a flat surface.
Step 2

Insert part LR2268-42 into the foot. Push it down until it locks completely into place. If you have trouble inserting the part, check for imperfections from the print and remove them.
While I carefully designed this stand for a great fit and did many test prints on my Original Prusa i3 MK3S+, prints on your machine may not be as precise as I expected. In these cases, use sandpaper to remove excess material until the parts fit perfectly or reprint the parts with adjustments.
Step 3
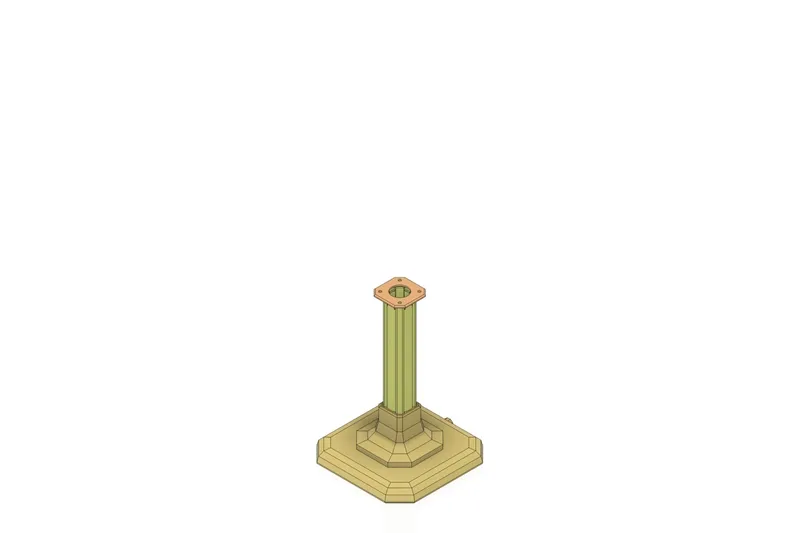
Put part LR2268-47 on top of the stem. This part is loose until the top stem is inserted. You see four alignment holes on top. Insert two short and straight, 6mm long pieces of 1.75mm filament into two holes.
Step 4
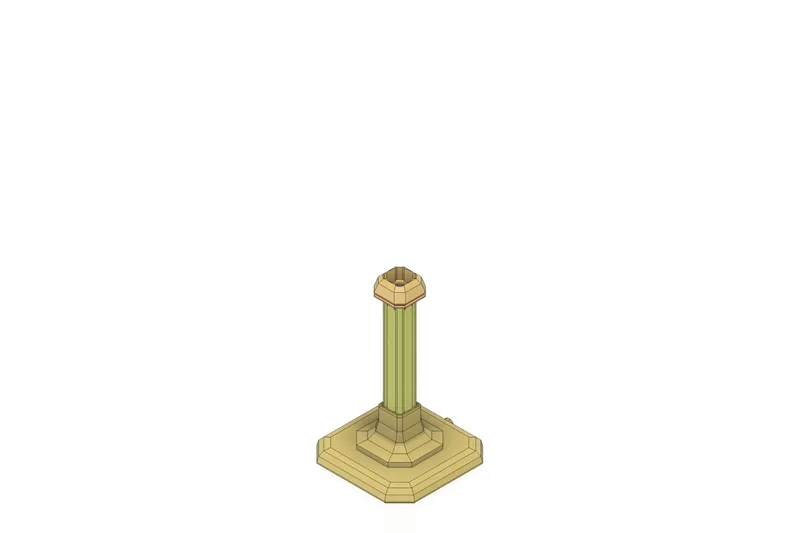
Press part LR2268-46 onto LR2268-47. The two filament pieces should connect the two parts. Yet, they are still loose.
Step 5
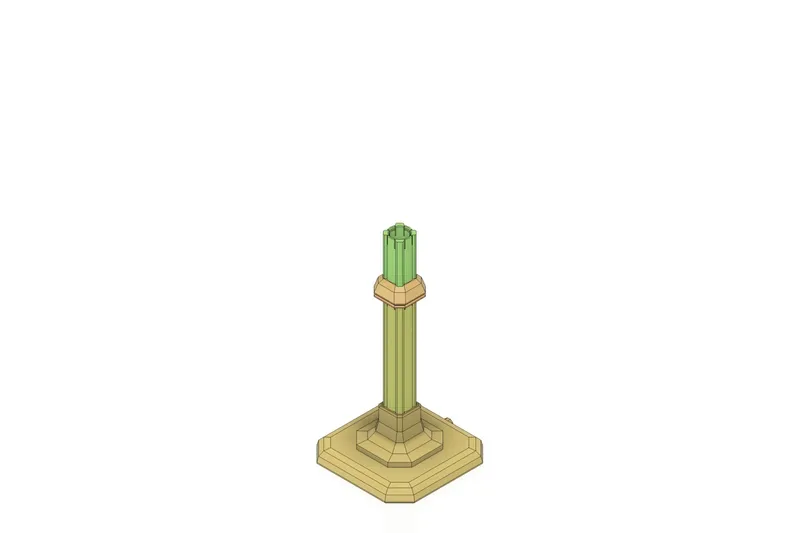
Carefully insert part LR2268-41 into part LR2268-42. Press the parts down until you feel them click into place.
Step 6
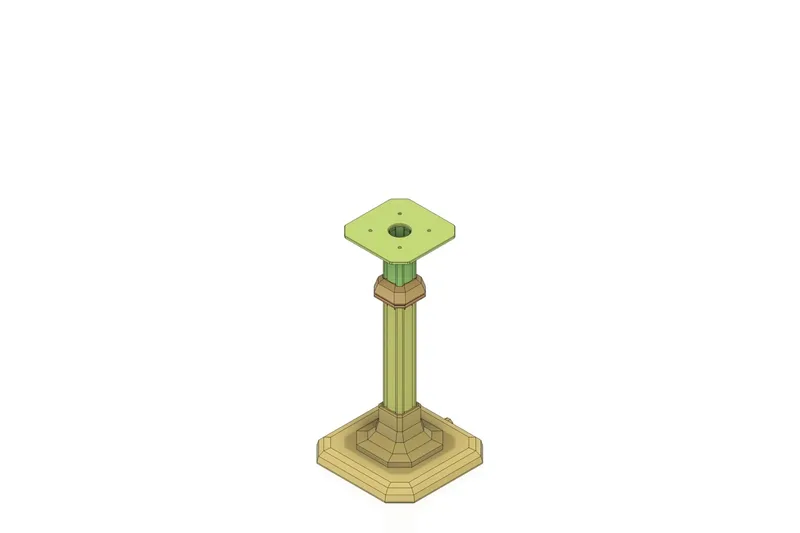
Put the plate LR2268-44 on top of the stem. It is still loose and will get fastened with the lantern adapter. Insert two short and straight 1.75mm filament pieces into two alignment holes.
Step 7
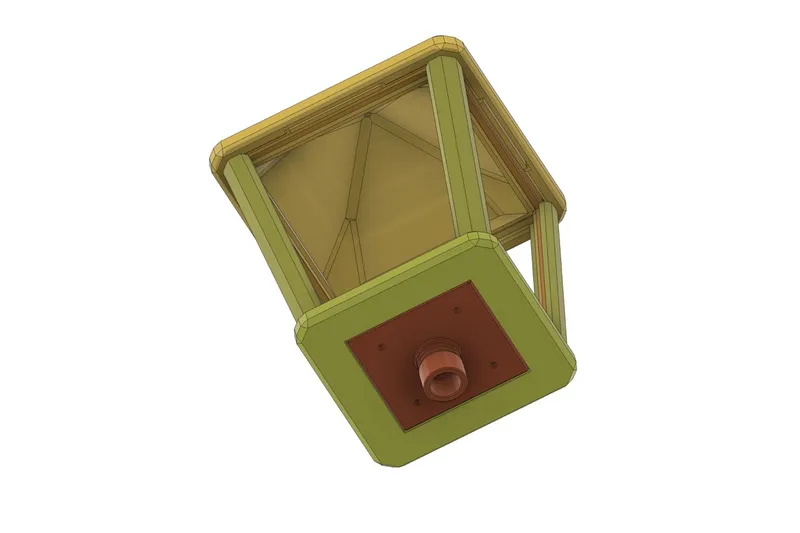
Now, prepare the lantern. Remove part LR2268-22, the bottom with the candle cutout and replace it with the stand adapter LR2268-22-B.
This can be a bit difficult, as you need some force to press the bottom part into place. The best is to put the lantern on the edge of a table or desk. Then make sure the part gets jammed, as there is little play. Please press on the corners of the part until it clicks into place.
Step 8
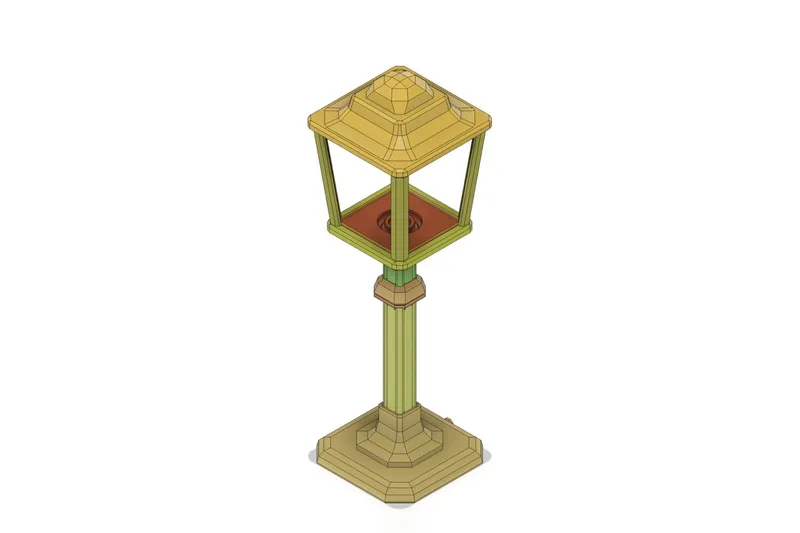
Finally, insert the adapter into the stand and press it down until it securely locks into place. Do not press the lantern down; remove the top and press directly on the adapter.
Side Panel Designs
There are the following side panel designs available for the lantern.
Anton Firsik's Forest Theme


Download the side panels for Anton Firsik's forest theme here.
Kristina's Bird and Flower Theme


Download the side panels for Kristina's Bird and Flower-Themed design here.
Valentine Theme


Download the valentine themed side panels here.
Plain and Empty Panels

You will find the following files in the file section with plain and empty panels:
LR2268-11-empty.3mfLR2268-11-plain.3mf
How to Integrate an LED Light in the Lantern
If you like to add an LED light to your lantern, have a look at the following blog post:
You find various diffusor models in the file section on this page. I recommend the diffusor model LR2268-64 (1+2) printed with a transparent PETG for the best results. I also added an example print for this diffusor.
Explore More from Meti·kumi
Interested in my designs? Browse through my collection of 3D models:
👉 https://metikumi.com/3d-models/
Stay connected on social media for the latest updates and work-in-progress insights:
Conclusion
I hope this lantern makes a beautiful decoration in your home. If you like it, please rate it and upload photos of the colour combinations you used to print it.
Happy Printing!